DIY Fireplace Makeovers Guaranteed To Impress

A fireplace makeover may be the perfect project to tackle for your next DIY, especially if your brick or stone fireplace and mantle are outdated or in need of repair.
See Post: Frank| Fireplace Makeover
There are a ton of ways to update your fireplace whether you just want to add a fresh coat of paint or cover an entire wall of existing brick or stone with a new finish. Get inspired to give your fireplace a new look so you can cozy up with friends and family on a cool night.
See Post: Jennifer | Painted Brick Fireplace
Brick Fireplace Makeover
If your brick fireplace is dark and gloomy, a fresh coat of white paint may be just what the doctor ordered. There are several ways to paint the brick around your fireplace to achieve a light and modern look. Use chalk or lime paint to cover the existing red brick with a light wash, cover the whole thing with a thick opaque coat of white paint or just paint the wood around to fireplace to lighten the look without painting the actual brick.
See Post: Craftsman Finishes | Fireplace Makeover Going White
Supplies for painting a brick fireplace
- Sponge
- Rag
- Cleaning solution for brick or masonry
- Chalk or lime paint
- Paintbrush or roller
Instructions for painting a brick fireplace
- Clean the brick with a solution that is made to clean brick or masonry. You need to remove old grease and soot in order for the paint to adhere properly.
- For a light wash just dip your brush and gently smooth it over the bricks and grout. If you apply too much paint, lightly wipe a rag over the area.
- If you want an opaque look, use a brush or roller and simply paint over the brick like you would a wall. You will likely need two coats. Let the paint dry for a day in between coats.
See Post: Angela Hodges Lloyd | Remodeled Fireplace Makeover
Chalk paint is commonly used for painting brick but lime paint can also be used and will provide a soft, transparent finish. When applying lime paint you want to spritz water on the area first for best absorption. Then unlike traditional paint, you begin painting in random strokes.
With traditional chalk paint, you want to paint carefully and avoid heavy brush strokes. Lime paint absorbs into the brick and using random strokes will give it a mottled look.
See Post: Sherry | Fireplace Wall Makeover
Paint Around the Brick Fireplace
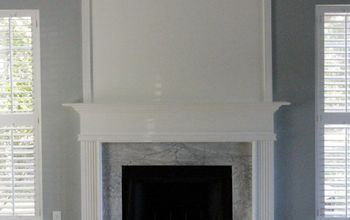
If you want to makeover a brick fireplace without painting the brick but still making the space lighter you can add some extra trim and paint the surrounding areas white like Sherry did with her DIY fireplace makeover. Use extra trim leftover from other home improvement projects and attach it to the wall around the fireplace. Then, paint it the color of your choice for a fresh look.
See Post: Caitlyn | Fireplace Makeover! Learn how to Tile
Tile DIY Fireplace Makeover
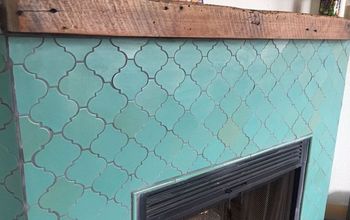
White paint, not your thing? There are many interesting ways to give your fireplace a new look, like this Moroccan-inspired tile fireplace Caitlyn made over.
Supplies for tiled fireplace
- Tile
- Grout
- Tile adhesive
- Tile saw
- Spacers
- Sponge
- Trowel
Directions for tiled fireplace
- Make sure to scrape any concrete and existing mortar off the floor before attaching the tile. You need a smooth surface to work on. The concrete foundation can be thin, so be careful not to hammer down into it.
- Make sure your fireplace area is completely cleared of debris. If you're using a patterned tile lay it out and see how you want the final pattern to look.
- Spread your mortar or tile adhesive on the surface. Start by spreading a thin layer covering the area and then go back with your notched trowel and drag the ridged edge across the mortar so you see rows of lines. This will help the tile stick.
- If you need to cut tiles you will have to use a tile saw.
- After the mortar or adhesive has set it's time to grout. Follow the instructions listed on your bag of grout. Mix the grout and apply using a trowel, let it sit for 20 minutes and wipe off with a large damp sponge. Have a bucket of hot clean water handy to rinse out the sponge. Make sure not to take too much grout out of your edges. Try to just remove the grout on the tile.
- If there is haze on the tiles gently buff it out with a soft terry cloth towel after the grout has set.
- Grout will become very hard in 24 hours.
Floor to Ceiling Brick DIY Fireplace Makeovers
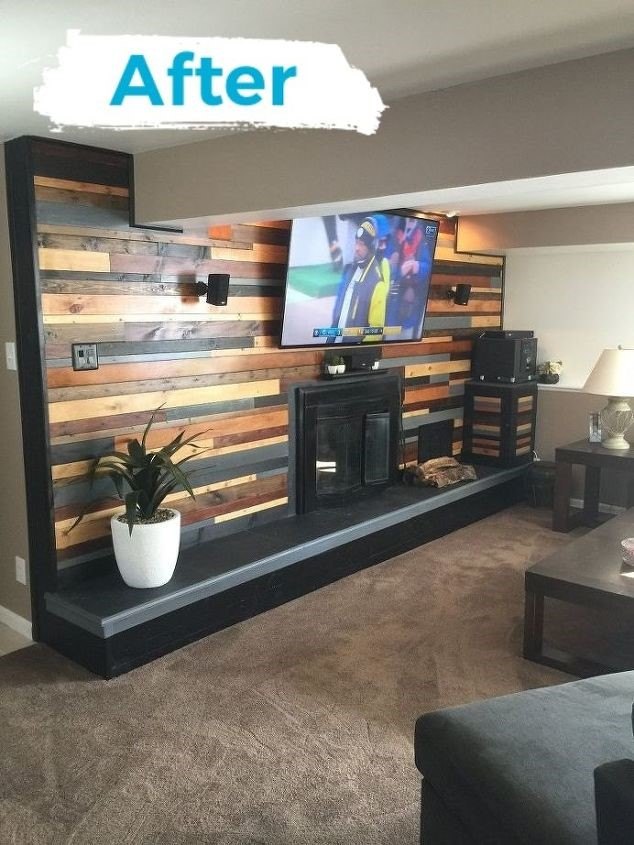
Make a statement with a wood plank fireplace makeover. Frank added wood paneling to the entire wall of his brick fireplace for an incredible rustic look. Here’s how you can try this yourself:
Supplies for Wood Plank Wall
- Wood planks cut to various sizes
- Concrete nails
- Wood Stain in at least 6 colors
- Clear poly varnish
- Chop saw
Instructions for Wood Plank Wall
- Attach wood strips vertically along the length of the brick wall every 2 feet using concrete screws or nails. You can hammer them into the mortar joints or drill into the brick with a masonry bit and screws.
- Paint strips black in case of any gaps in the wood that will cover them and run electric cords at this point if necessary before you attach the planks on top.
- Stain the wood in the different colors and let dry completely.
- Use a chop saw to cut the stained wood random sizes between 2 and 8 feet.
- Attach the planks to the walls with screws from the bottom working up.
- Apply a coat of clear poly varnish to give the wall a bit of shine.
See Post: Birdz of a Feather | Corner Fireplace Makeover
Cover the brick or stone with drywall and a new finish
Another way to cover an old unsightly brick fireplace is by covering the brick with new drywall and applying Venetian plaster like Birdz of a Feather did for an elegant look.
Supplies for Venetian plaster fireplace makeover
● Cement board
● Cement screws
● Cement tape
● Cement
● Venetian plaster
Instructions for Venetian plaster fireplace makeover
- You need to cover the brick with a cement board in order to provide a smooth surface for the Venetian plaster. Attach cement board to the brick wall with cement screws and mortar.
- Tape up the seams in the cement board with mesh and use more mortar on top of the tape to smooth it down.
- Skim coat over the whole area with plaster and a plaster squeegee.
- Apply several coats of the Venetian plaster, letting it dry between coats.
- Sand down to a smooth and lustrous finish.
See Post: Smart Interiors | Fireplace Makeover Frumpy to Fantastic
Stacked Stone Fireplace Makeover
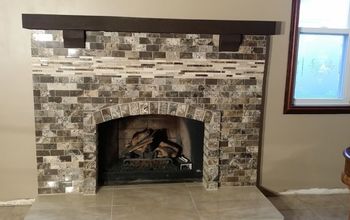
Stacked stone is a trendy material for interior or exterior use. XXX covered their dated stone fireplace with stone veneer for a dramatic makeover. To try this application yourself add cement backer board on top of the old hearth and wall like in the Venetian plaster makeover above and then use the following instructions:
- Start by ensuring the substrate is suitable to receive the stone veneer. Interior wall substrates should be cementitious such as cement backer board, brick, or block. Drywall is not a suitable substrate to install stone veneer on. The substrate should be level, plumb, and free of any dirt, debris, or contaminants.
- Mix thin-set according to the manufacturer's recommendation and only mix up enough that you'll use in about 15-20 minutes to keep it workable.
- Chalk or draw a level line up off the floor since many floors aren't level starting point and use that as a starting point, making sure to trim or shim up the first row to level.
- Apply thin-set directly to the wall, spread, and notch using a 1/2" square notch, and lightly spread thin-set over the back of each panel to assure full coverage.
- Set and twist each panel onto the wall to ensure a good bond with the thin-set. Work one course at a time making sure to stagger where vertical seams fall from one course to the next, and check your level every few panels to ensure the installation stays tight. Use tile spacers as necessary to keep rows level over slightly uneven substrates.
- Keep a sponge and bucket of water handy to clean off any thin-set that finds its way onto the face of the stone before it dries.
- Sealing is not necessary for interior wall applications but can be used to enhance the finish of the stone. Only use water-based penetrating sealers and test all sealers on a sample piece of stone to confirm the effect.
See Post: Love and Renovations | Shiplap Fireplace Makeover
Shiplap Fireplace Makeover
Shiplap has been trending in the home improvement industry for a few years now thanks to Joanna Gaines and her Fixer Upper style. A fireplace is a great place to use this versatile material. Check out how Love and Renovations covered the wall above their fireplace with pieces of shiplap painted black. Simply cut the pieces of wood the same length as the wall and nail them into place. Then, paint with two coats of dark paint for a sophisticated look.
See Post: Diva of DIY | Build a Mantel of Out of an Old Barn Beam
Build a Mantel Out of ah Old Barn Beam
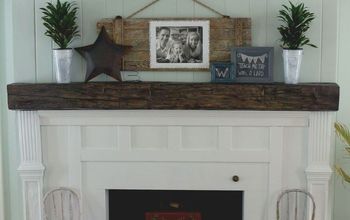
Okay, so maybe your fireplace could just use a new mantle instead of a major overhaul or maybe you completed one of the projects above and want a special mantle for your new fireplace? Try this idea from the Diva of DIY to create a rustic mantle out of an old barn beam
Supplies for Barn Wood Mantle
- An old beam from a barn
- Reciprocating saw
- Lag bolts
- Dark wood stain
- 2x4 piece of wood
- Power washer
- Sharpie
Instructions for Barn Wood Mantle
- Choose your piece of the beam to use for your mantle and have it cut to the right size
- Power wash the wood beam
- To hang the beam you will need to hollow it out. Mark the area that needs to be hollowed out with a sharpie marker and then, using a combination of tools such as a reciprocating saw hollow out the log.
- Attach a 2x4 above the fireplace with lag bolts
- Place the mantle onto the 2x4 and attach with more lag bolts.
- Stain the mantle with a dark wax stain.
See Post: Jenny @ Refresh Living | Birch Log Fireplace Screen
Supplies for birch log fireplace screen
● Plywood
● Foam board
● Birch logs
● Chop saw
● Nail gun
Instructions for birch log fireplace screen
- Use your chop saw to cut the birch logs to varying widths, between 1/2" and 1 1/2"
- Cut a piece of plywood down to fit in the opening, paint it gray, and use foamboard adhesive to attach it to a 1/2" thick piece of styrofoam.
- Arrange the birch rounds onto the foam and when you are happy with the placement, nail them into place.
- Place your screen in front of the fireplace.
See Post: Jessica @ Decor Adventures | Old House Modern Fireplace Makeover
Are you ready to finally update your old outdated fireplace with a fresh new look? As you can see there are many different ways to take your fireplace from “meh” to “marvelous”. Which idea will you try? Let us know in the comments.
Written for the Hometalk community by: Adrienne Carrie Hubbard










Frequently asked questions
Have a question about this project?