


Great Room Renovation Reveal
Ok, so who's ready for a room makeover reveal? Like, a biiiig room makeover reveal! Because that's what you're in for today. I've been working up to this post for a looong time, and although there are other changes that will probably be made to this room, I think it's finally to a point where I can put my perfectionist tendencies aside and share the end product. Given this is the main room of the house, and it actually doubles as two rooms, I guess I can understand why it's taken me so long to write this, and why this post is going to be so long. If you're still here by the end of this post, God bless you!
Since I already know this is going to be lengthy, let's just jump right in with some Before pictures.
Since I already know this is going to be lengthy, let's just jump right in with some Before pictures.
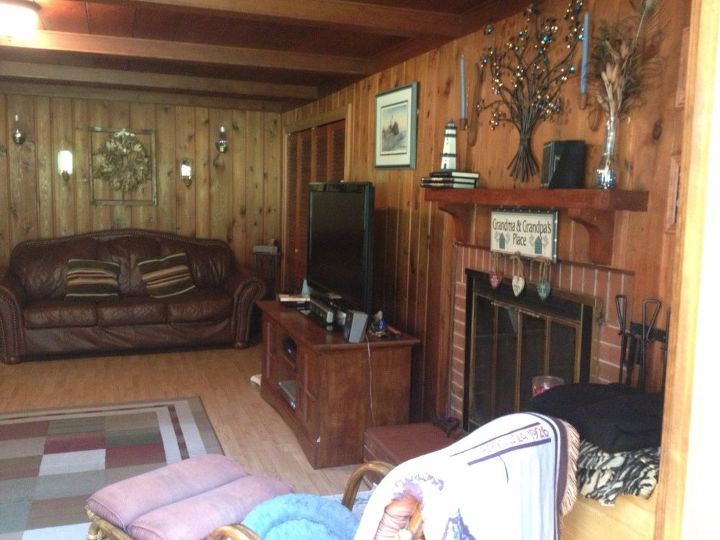
So, as you can see, we were working with a lot of dark paneled wood. For those of you who lived through the '70's, please tell me, what was going through your heads when you thought lining your walls and ceilings with dark and dingy paneling was a good idea?! I'm sure in 20 years my kids will be asking me the same question, but about Ikat wallpaper or something that then will seem equally as offensive. But I guess this constant evolution of trends is what keeps interior decorators in business!
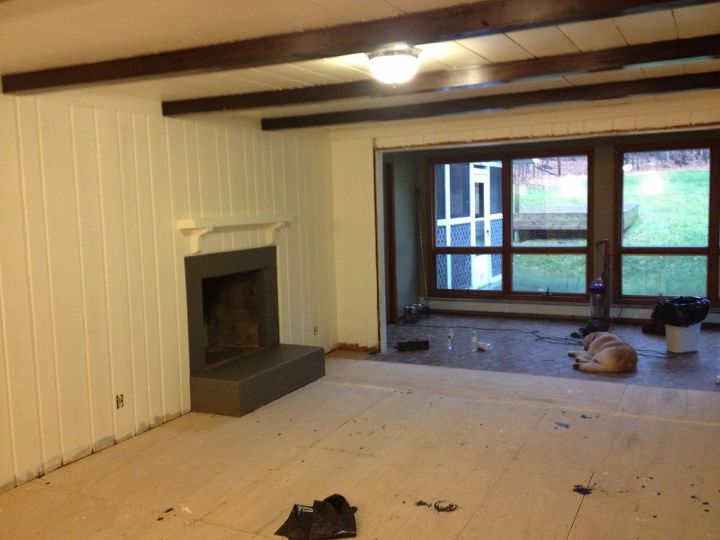
Better, but at the end of the day, it was still a bit dark and dingy. The low ceilings felt like they were coming down on you, and given the entire wall of windows and skylights, the room didn't feel as if it had great natural light pouring in. However, before we jump to the next step, I would be remiss if I didn't mention how long it actually took to get to this point. For those of you who have painted paneling before, you know what I'm talking about. We're talking priming, painting, using a brush to get into the cracks. It's not fun and it's not fast. And to go through all that work, only to change your mind a couple months later was salt in the wound.
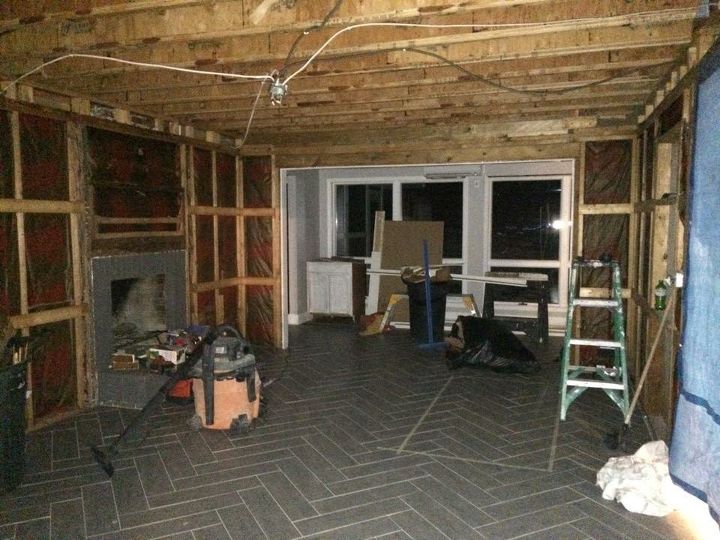
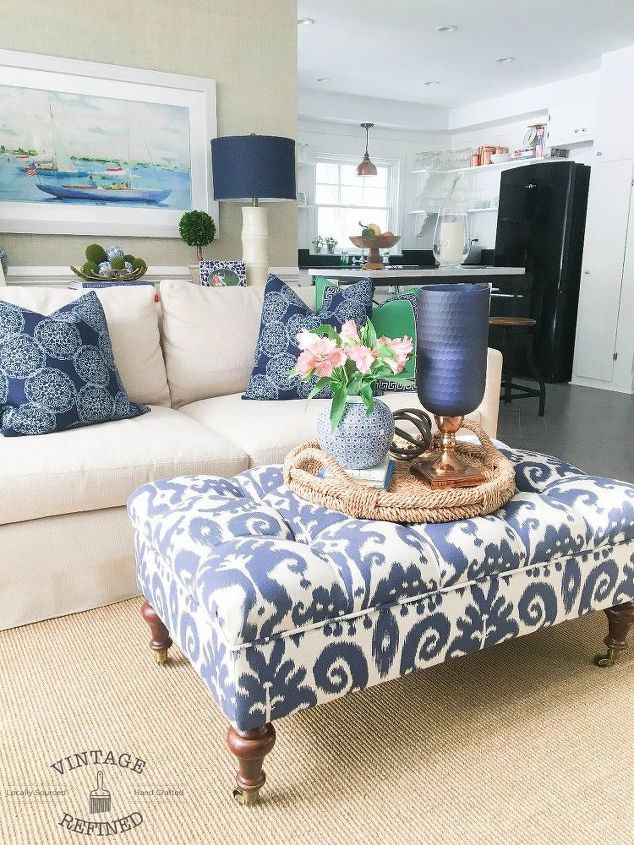
By this point, we had installed new flooring and decided there were just too many challenges that we were facing by having to work around the paneling. We finally surrendered and gave the go ahead to rip up the walls and ceiling. This decision gave us much more flexibility regarding light fixture placement, room layout, decor decisions and also allowed so much more natural light into the room.
All right, you ready to talk about all the details? Let's do it! We'll start from the bottom up.
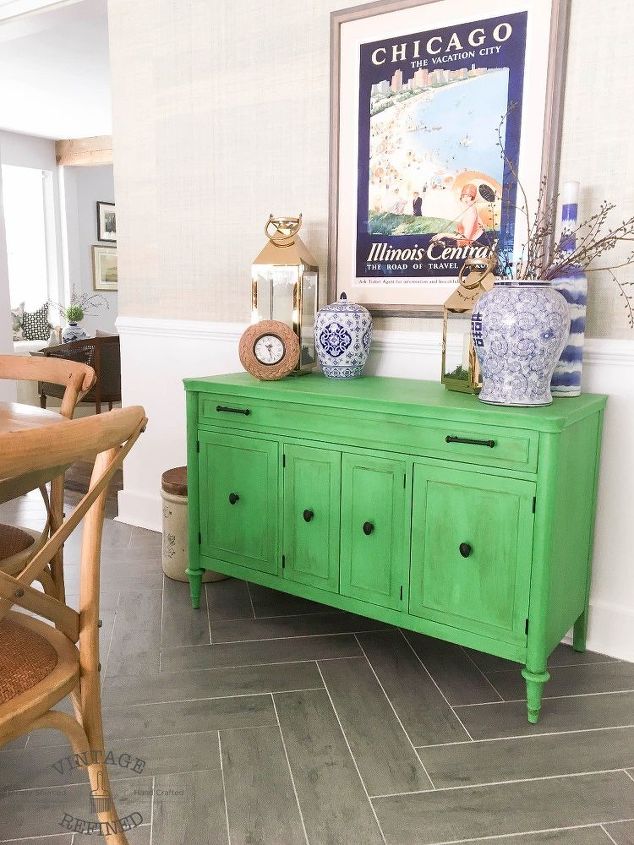
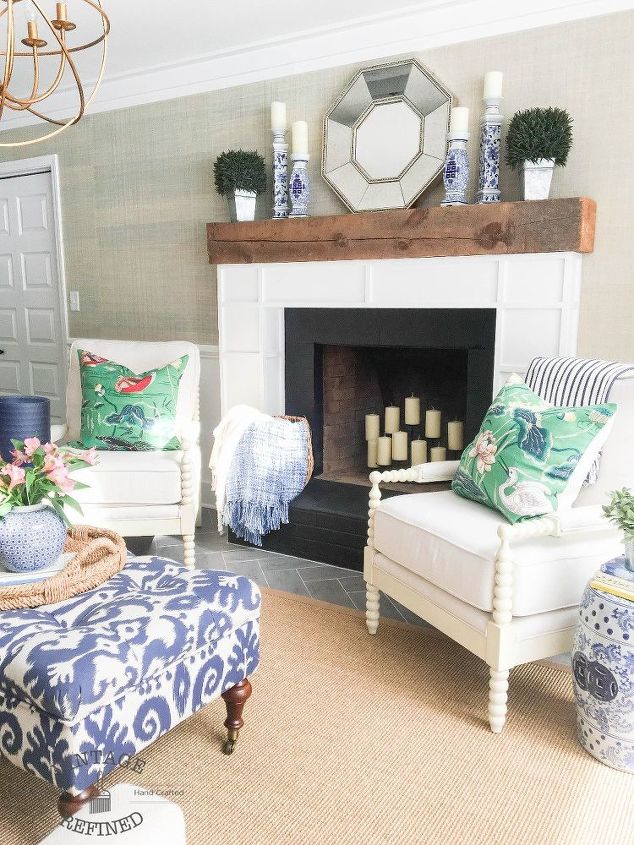
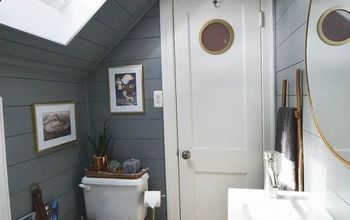
Onto the walls. Well, obviously, they are no longer paneled, but rather dry walled. Or more specifically, wallpapered. I definitely went through (actually am still going through) a major wallpaper phase. I. CAN'T. GET. ENOUGH. In general, the smaller the room, the bolder the print. Bathrooms and hallways are fair game to loud and ostentatious prints, but when it comes to larger rooms where you spend more time, I try to tone it back a bit.
For more details and pictures, check out the full post at http://www.vintagerefined.com/blog/2016/12/28/great-room-renovation-reveal

Want more details about this and other DIY projects? Check out my blog post!
Comments
Join the conversation
2 of 18 comments
-
Your living room looks gorgeous! But I would love to see a picture of your kitchen, I have open shelving in my kitchen but I think it needs something and I can't figure it out. So I was wondering if you could give me some ideas, because you have great taste!
-
Yummy! Absolutely gorgeous!


Frequently asked questions
Have a question about this project?
Did you have to sand the paneling?
Absolutely gorgeous 😍😍😍😍😍
Where did you get your blue and white ottoman? Your work is beautiful! Love the room!