


Everything You Need to Stencil Your Tile Floors For Less

To our Cutting Edge Stencils fans, welcome back! We have the biggest blog post of the year for you to bookmark or save on your computer! We will show you EVERYTHING you need to stencil your tile floors for LESS using tile stencils. This step-by-step tutorial has every detail on floor preparation, stenciling technique, and top coat instructions to create the perfect tile floor. This will make all of your stencil projects so much easier and by the end of this post, you’ll be able to change your job title to “Stencil Professional.” First take a look at the complete “How-To” video tutorial and then follow along through each step with the written instructions.
[PLEASE GO TO OUR BLOG FOR THE ENTIRE TUTORIAL AND TO ENTER OUR GIVEAWAY]
https://www.cuttingedgestencils.com/blog/everything-you-need-to-stencil-your-tile-floors-for-less.html
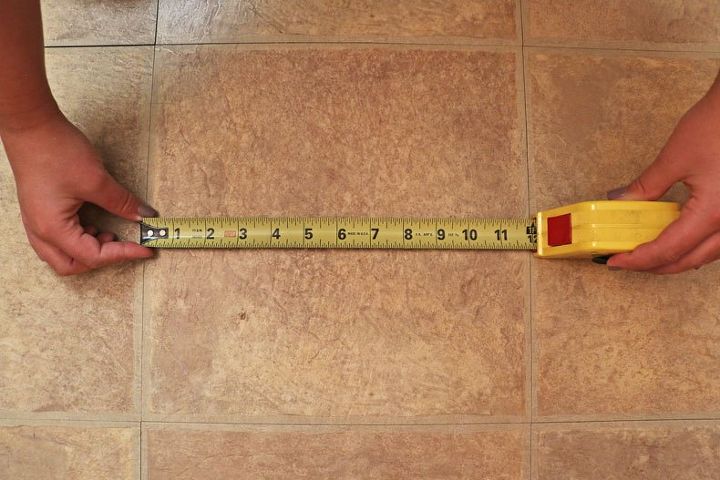
Before ordering your , you must measure your tile! The correct way to measure your tile is from tile edge to tile edge. You can use a ruler or measuring tape! Make sure you do NOT include the grout lines. For this specific floor project, we want to ignore the grout lines. We decided this style will look best with this linoleum floor because the space between the ties is too thin. The size you measure will be the size you order!
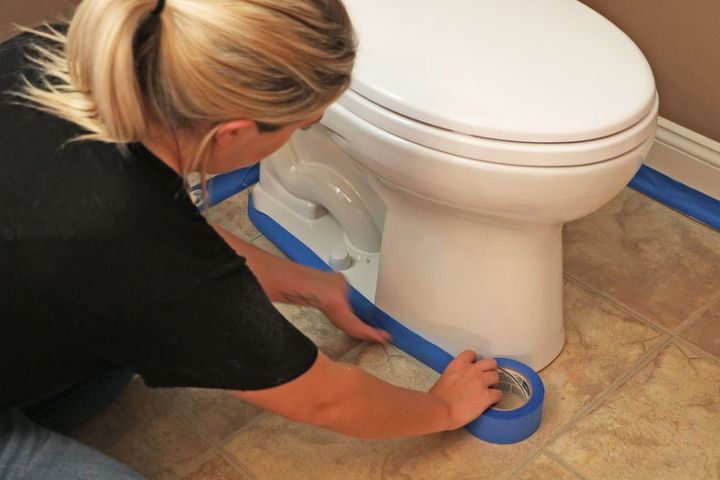
Before you start painting, sand your tiles down using 220 grit sand paper. This gives your floor extra adhesion! Then, rid your floors of any dust or dirt that may be left there. We recommend using TSP, a heavy-duty floor cleaner, when cleaning your floors before you stencil. Tape the perimeter of your bathroom floor and toilet to avoid getting paint in unwanted areas.
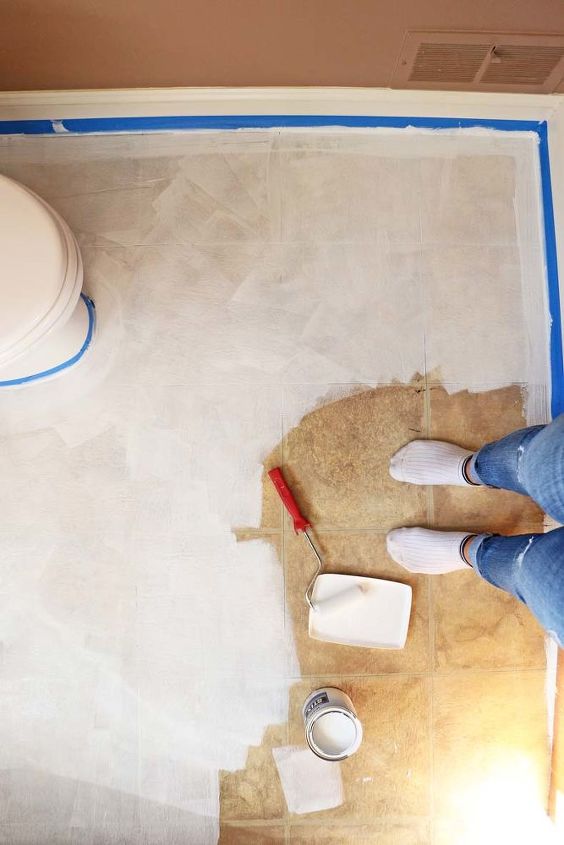
After taping the baseboard, it is time to prime your floor! We recommend using STIX primer because we found it provides the best adhesion! We are going to go in with a dense foam roller to cover the whole floor. You will want to apply about 2-3 coats of primer before the base coat. We sand and prime the floor before stenciling because we want to make sure the paint sticks to the tiles!
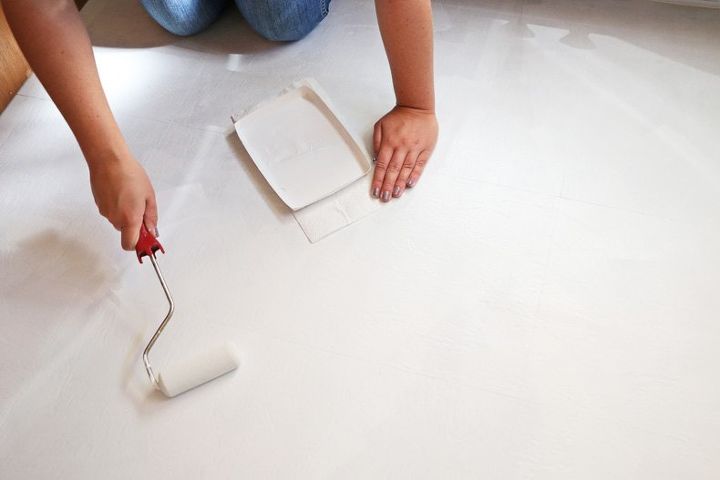
Once the primer is dry, we are going to paint our floor with the base coat color. [Pro Tip: You can save yourself a step and money by getting your primer tinted to the desired floor color at your local paint store!]
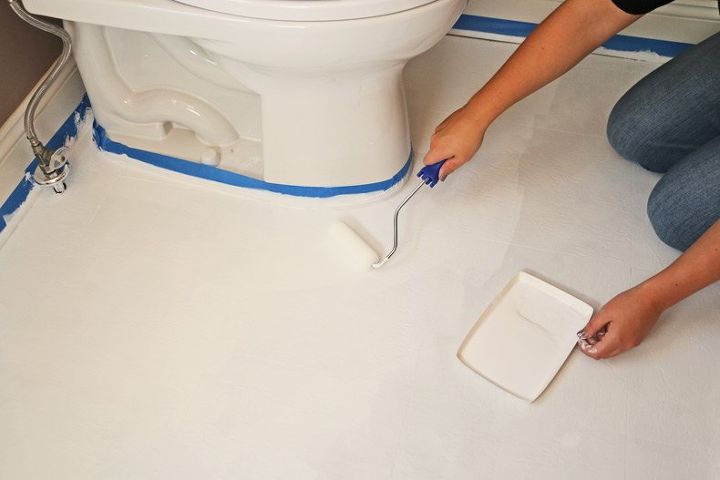
Otherwise, grab your paint color and apply 2-3 coats of your base color. Any interior matte or flat finished paint will work great!
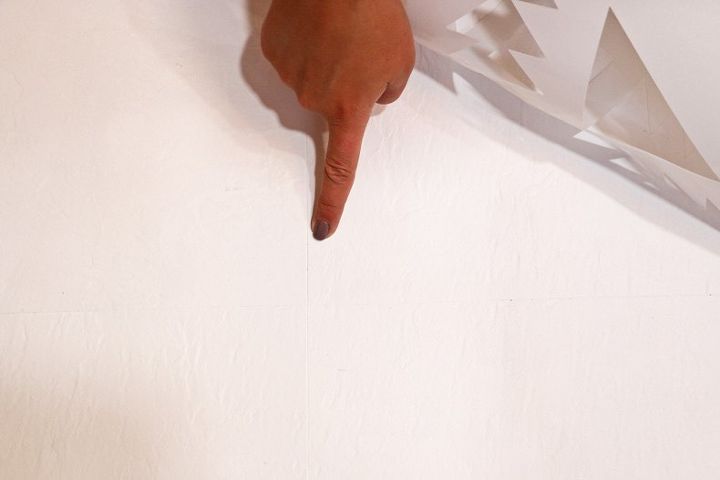
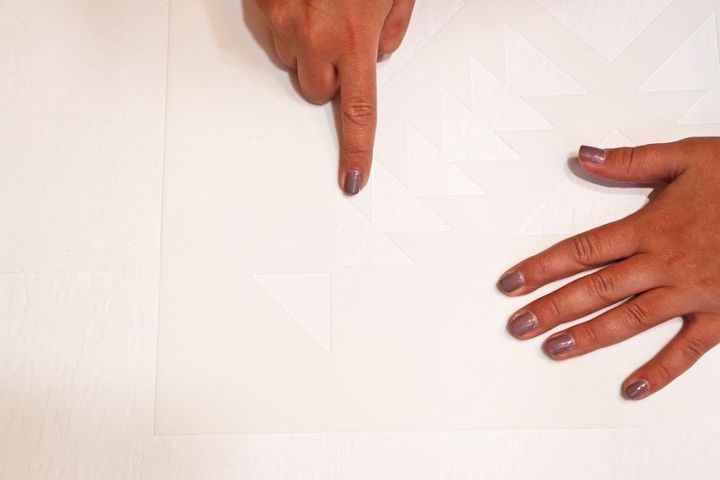
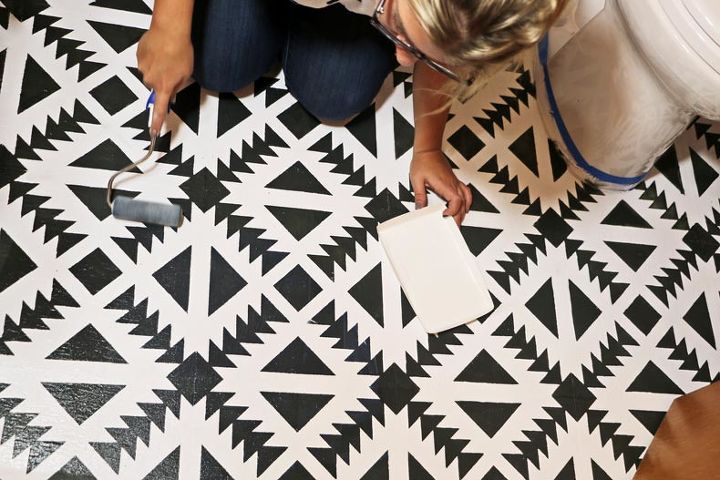
For this specific floor project, we want to ignore the grout lines. We decided this style will look best with this linoleum floor because the space between the tiles is too thin. We are placing the stencil directly on the tile where the edges meet. Because we are not stenciling the grout lines, we covered the repeating registration marks with blue painters tape.
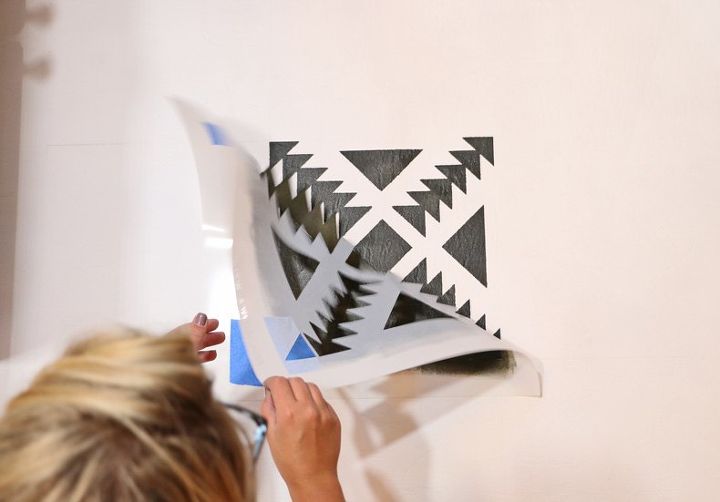
Another key factor when stenciling the perfect tile floor is all about how you load your dense foam roller. Evenly load the paint onto your roller and offload excess paint onto a paper towel. Then with light pressure, apply paint onto the stencil! If there is too much paint on your dense foam roller and you press down too hard, you will get some bleed! To accomplish a complete stencil you will need two coats of paint!
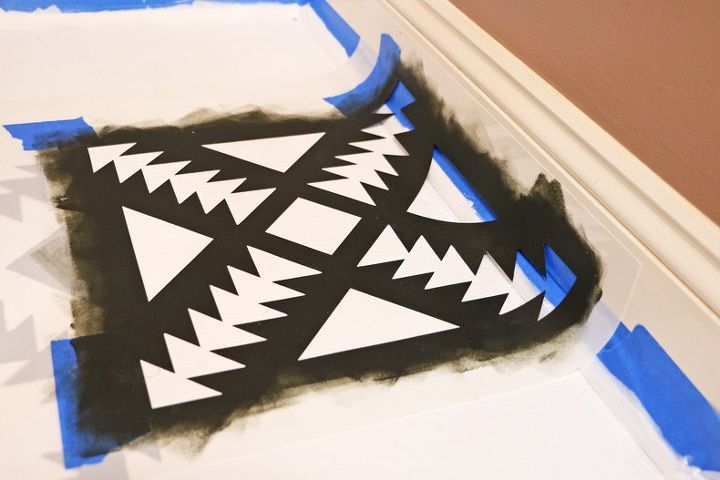
Our Tile Stencils are super flexible and can bend to fit tricky corners. Just roll your paint as close as you can to the edge, and then go back with your professional stencil brush and pounce where the floor meets the wall. Push down the stencil when pouncing in that area for crisp lines!
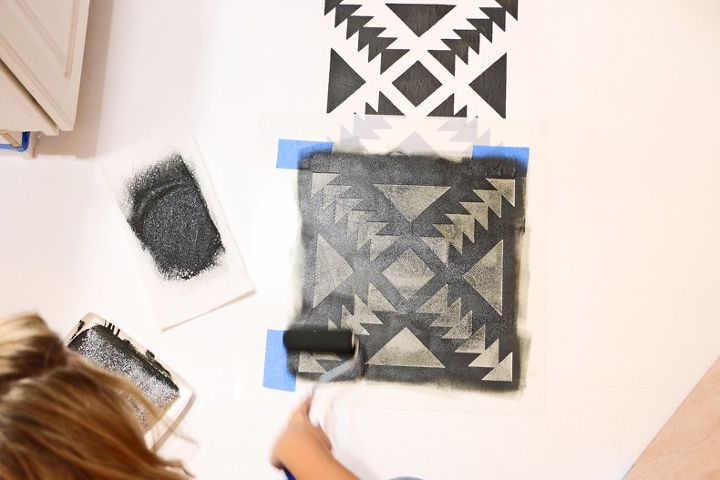
So far, so good!! Since we did not stencil the registration marks, we will align the stencil right next to the other so the corners touch. Now repeat this process on each full tile.
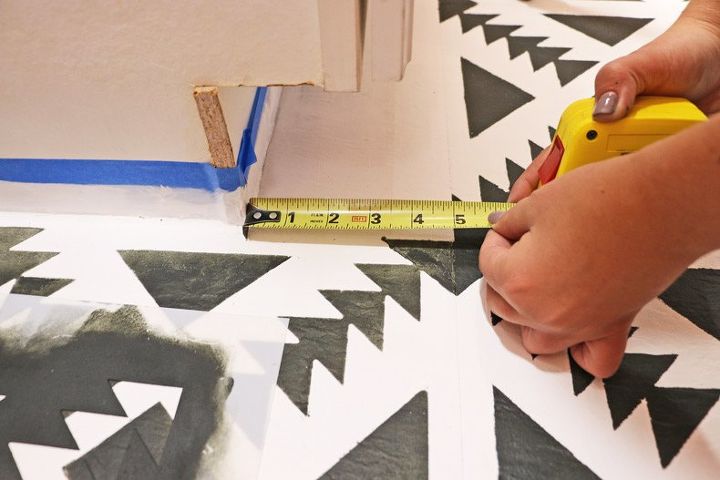
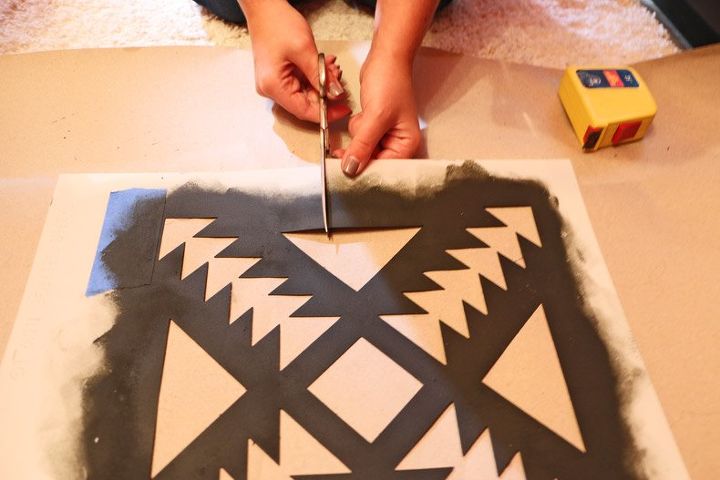
For those extra hard to reach places, this is where buying a second stencil comes in handy! Measure your partial tile and cut your stencil accordingly. Then place your stencil down and fill in those tiles. Don’t be afraid to freehand any leftover space the stencil can’t reach. To fix any bleed or smudges, our Liner Brush is perfect for touchups.
Once you have finished stenciling and the floor is completely dry, it is time to seal it with a water-based polyurethane. It’s important to use water-based because it is non-toxic, it has a rapid dry time, and it does NOT yellow over time. We recommend 2-3 coats of this! Please allow 2 hours of dry time between each coat and then you must wait a full 24 hours before you can start using your floors completely!
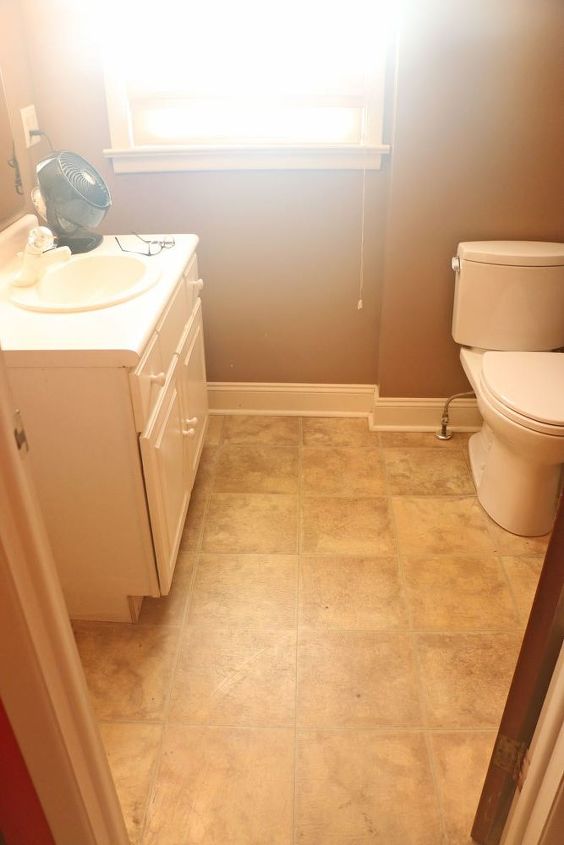
BEFORE!!

AFTER!! What do you think?
Has this project inspired you to transform your home with a designer touch?
Resources for this project:
See all materials


Comments
Join the conversation
-
Truly beautiful! Thanx for sharing!
-
this looks fantastic. I love projects like this. Less cost than new floor and when I do these kind of projects it helps my stress level.


Frequently asked questions
Have a question about this project?
You didn't mention in the instructions when you used the spray adhesive.
Fantastic Job, Looks Great!!!!!
More labor involved with this project than getting replacing the linoleum with different flooring-----probably less of a mess, too. Will this hold up for years of traffic?
Why do people think it is cute to photograph their feet ?