Making a Pantry! How to Stencil Tile Over Concrete and Seal With Epoxy

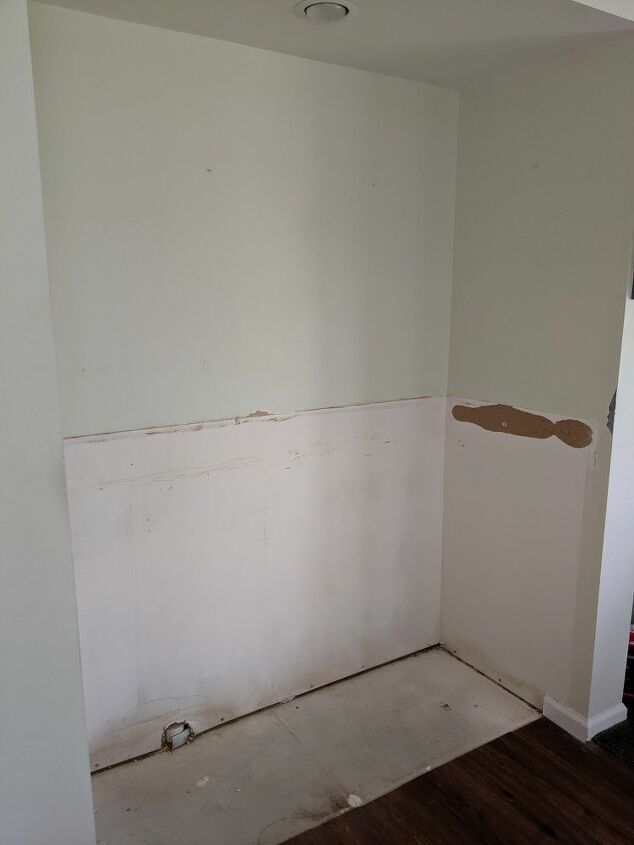
Our home was built in the late 1980's. Bars were still somewhat popular then, which I'm guessing is what this little area of wasted space in our eat in kitchen was supposed to be used for. Silly me forgot to take a before photo, but there were just a couple of cabinets in this space. It turned out to be a "catch-all" counter for us and it drove me crazy! While we do have a ton of cabinets in the kitchen, it still felt like we needed more storage space. So, we decided to turn the catch-all "bar" into a pantry!
Keep reading to see how we turned a wasted space into a much needed pantry!
We ripped out the cabinets and countertop, and we were left with the concrete slab. Its a smaller space, and I really wanted tiles with a lovely design. It wouldn't have been much to buy the small amount of tiles that we needed, but I couldn't find a design that I loved. But I did find a stencil that I loved! So we decided to stencil the concrete!
I first scrubbed the concrete with a product called Sugar Soap made by Frenchic. It's a non toxic cleaner that lifts up all the caked on dirt and grime. I then sealed the concrete so that it wouldn't flake while we were painting. I added a thick layer of polycrylic and allowed it to dry for 48 hours.
Then I painted the floor in Frenchic's Grey Pebble.
Once the base coat has dried, you can map out the tiles. The attached flooring was crooked, and the back wall was off a little too. So we couldn't go by that to get a straight line. So we penciled in straight guidelines. Then got started!
The most important thing to remember when stenciling is, less is more! Grab your paint (we used Frenchic's "Loof"), a good stenciling brush and lots of paper towels! Blot off most of the paint that's on the brush. The more paint on the brush, the more likely you'll get bleed through. When stenciling, always dab, don't brush the paint on. Up and down motions of dabbing will help minimize bleed through as well. You may need to do more than one coat for full coverage. Continue on until the entire area has been stenciled. Another tip, wash the stencil periodically so the paint buildup doesn't fill in small details.
Now that the floor is stenciled and dry, we added the mouldings. We matched the same moulding that is throughout the rest of the house for the inside closet, and we used a small plastic piece that is used to separate tiles from room to room for the floor. It has a small flap that fits under the laminate flooring and hides the uneven cuts. Adding the moldings also give us a sealed off space to pour the epoxy.
Now, it's to prepare for the epoxy pour. You'll need a large container to mix it in. There is an epoxy/resin calculator online that allows you to put in the dimensions of the space you need to cover and it will tell you how much epoxy you will need to mix up. Just Google epoxy calculator. We needed 44 ounces total for this 60"x21" space. Mix up the 2 part epoxy, it's always equal parts of each. Stir really well to be sure it's thoroughly mixed!
Then pour through the middle of the area.
Once the container is empty, go over the entire space with a spreader (we used a large plastic putty knife). Get the layer as even as possible, making sure you get the edges as well.
One you've spread the epoxy evenly, go over the entire floor with a heat gun. This will get rid of any bubbles that formed throughout the mixing/pouring stage.
Now allow to cure for 48-72 hours before walking on/placing anything on the floor.
That's it! That's how you stencil a floor with a super durable epoxy top coat! The epoxy looks like a sheet of glass 😍
We also added sliding doors and a great shelving system to complete the pantry. If you have any questions on the process, don't hesitate to ask 😉
Enjoyed the project?
Comments
Join the conversation
-
 Diana Deiley
on Aug 04, 2019
Oh, I am soooo jealous of your new pantry. It looks fabulous. I might add supports to the centers of each wire shelf for added strength. The floor looks great. Thanks for sharing your project. Keep up the good work.
-
 Deer Run Revamps
on Aug 04, 2019
Oh yes! Hubby just did a few days ago 😉
-
-
-


















Frequently asked questions
Have a question about this project?
Is the epoxy floor slippery? I am thinking of doing this for a bathroom floor.