


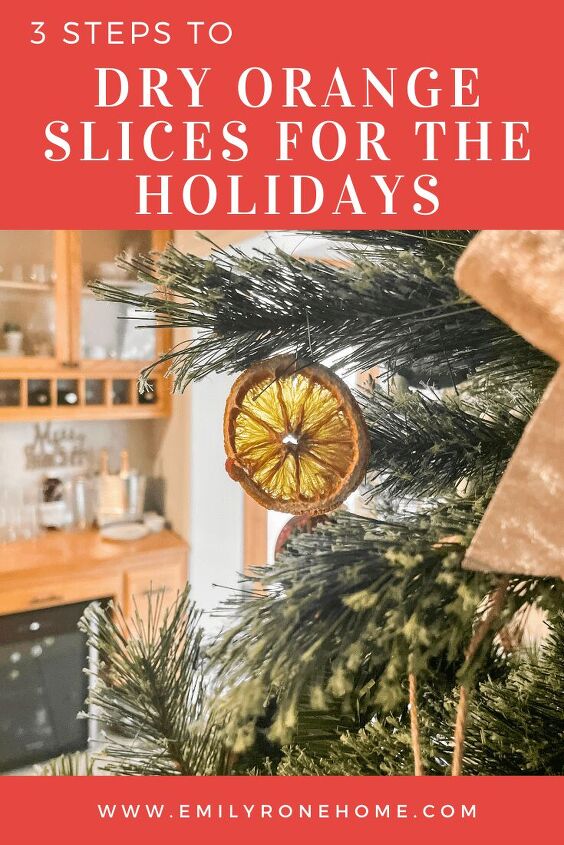
How To Dry Oranges for Christmas

A step-by-step tutorial to teach you how to dry oranges for Christmas! Use your new inexpensive & sustainable Christmas decor on trees, wreaths, and garland.
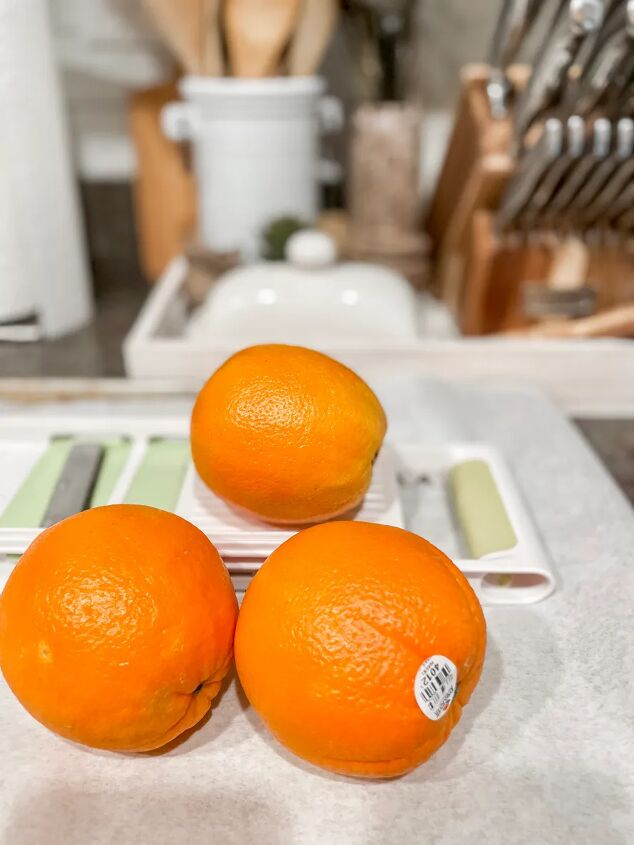
This holiday DIY is so charming, fun, easy, and inexpensive. Dried oranges also feel nostalgic to me, and I love to find ways to bring natural and organic elements inside to my decor. Heres what you’ll need:
For a full project tutorial and supply list- go to EmilyRoneHome.com!
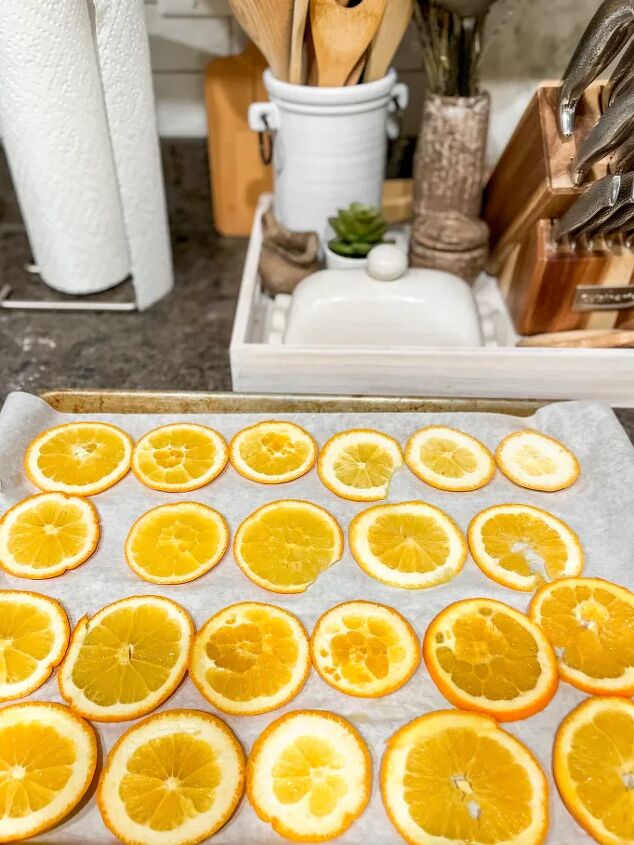
STEP 1: Slice Oranges
To dry oranges for Christmas decor, it’s best to use the thinnest slices of citrus you can manage (approximately 1/4″ thick).The thicker your slices are, the longer they’ll take to dry.
Great knife skills are not something I’ve been blessed with, so I decided to use my mandolin slicer to ensure both consistently and skinny slices.
The first slice was mainly just the “butt” of the orange, so I discarded it. I was then able to run the orange through the mandolin 2-4 more times and get nearly perfect rounds.
However, once I neared the middle, the orange was either not firm enough or the mandolin slicer was not sharp enough. My slices would stop halfway through and tear into a big mess. I decided to flip the orange over to the other end, toss the “butt” piece then get another good 2-4 more slices before ending up back in the middle.
I was able to use a sharp knife and cut another slice or two from what was left in the middle of the orange. Note, this process is messy! I had a pool of fresh squeezed OJ on the counter when everything was said and done. I wish I would have thought to find a way to salvage the juice.
I was able to get 22 good slices with all edges intact from 3 large oranges.
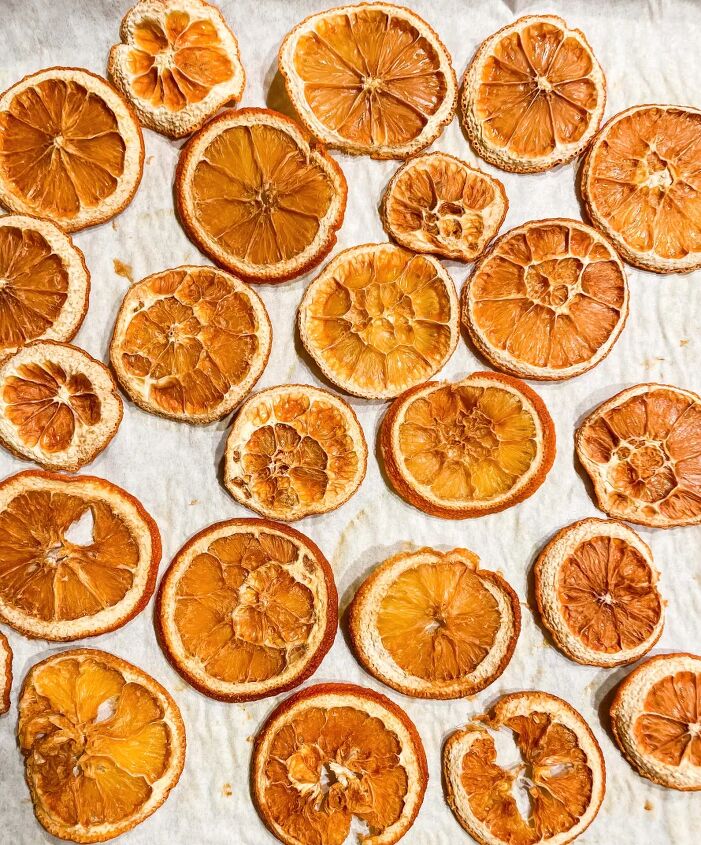
STEP 2: Bake Oranges
To prepare for baking, preheat your oven to 175-200 degrees F. You want the temp low to dehydrate the slices slowly and decrease the chances of burning them.
Line your baking sheet with parchment paper, and spread the orange slices out evenly. Bake on the lower rack for about 6 hours. I set my timer every 30 mins to flip the slices and rotate the baking sheet once every hour. These recommendations are definitely conservative, and result in a more hands-on process.
When I make them again next year, I will see if I can get away with setting the oven at 200 degrees to cut down on baking time, and rotating every 45 min to 1 hour. Other tutorials said it should take 4+ hours, but mine definitely took an entire 6 hours before they were completely dried out. You want them completely dry with absolutely no moisture left so they don’t rot.
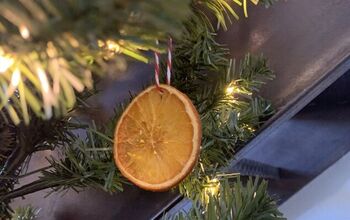
STEP 3: Decorate
Once your oranges have cooled, it’s time to use them to decorate your home. Since I only had one pan of good slices, I strictly used mine as Christmas tree ornaments. If I had more, I would have added some to my tablescape for my holiday wine tasting party, and made garland as well.
I haven’t decided how I plan to store mine yet, but I’ve seen people use either Gesso or Mod-Podge to help preserve their slices of citrus and use them for years to come!

I love the affordability of this holiday DIY, as well as the organic feel the dried orange slices bring to my decor this year.
Although the overall baking time is rather lengthy, the actual hands on time is much less. This leaves time for more holiday projects! I’ve been busy with a few other DIY’s this year, including:
- DIY Christmas cards
- DIY Vintage Mercury Glass Ornaments
- DIY Christmas Swag Wreath
- Hosting a holiday wine party
- DIY Marbled Ornaments
Thanks for following along! Remember to share, pin and tag me if you figure out how to dry oranges for Christmas. I’d love to see how yours turns out!

Tags: christmas, DIY, holiday, organic
DIY Christmas Decorations
Comments
Join the conversation
-
It's been a while since I have done this.
The directions I read at the time suggested dipping the slices in lemon 🍋 juice before baking to help keep their color longer and increase the length of time that they look good.
-
Love this idea, wonder if you can do apples with cinnamon?


Frequently asked questions
Have a question about this project?