


Destined for Fabulousness! (is That Even a Word?)

4 Materials
Ok , I have to admit , this is one of my favorite makeovers. I needed a vanity (yes, needed, regardless of what my hubby says...) and had 're-imagined an old sewing desk' into one (project coming soon). Along with that , I needed a chair to use with my fab new vanity.. enter the re-store find. Bought it for 20 bucks , which at the time I thought was actually a bit much for it, however it had good solid bones and a cool little feature in it .. a hide away nook under the seat : ) I had to have it. Once I laid eyes on it , none of the other chairs would do.
I took it home and completely took it apart for the redo.
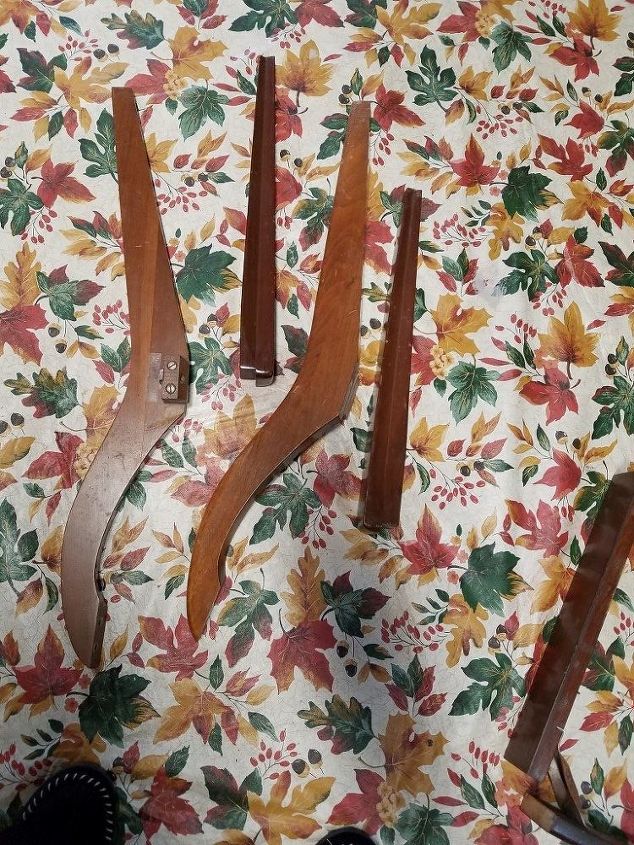
The legs.... I refinished the back legs with a richer , darker stain (mahogany stain), and painted the front legs with two colors: taupe homemade chalk paint and Algonquin fusion mineral paint (used in the creases).
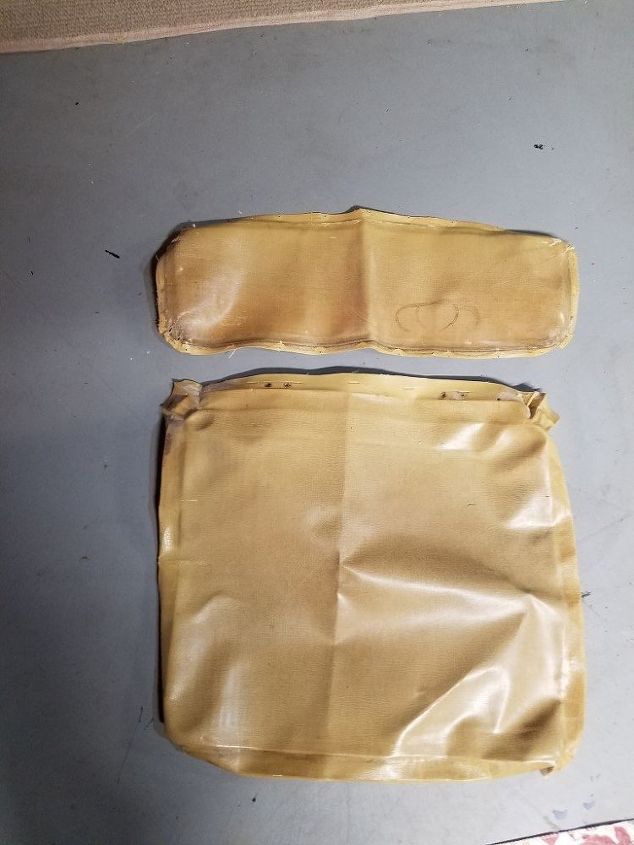
The original , mustard colored , fake leather like covering that was on it (and had seen better days a really long time ago).

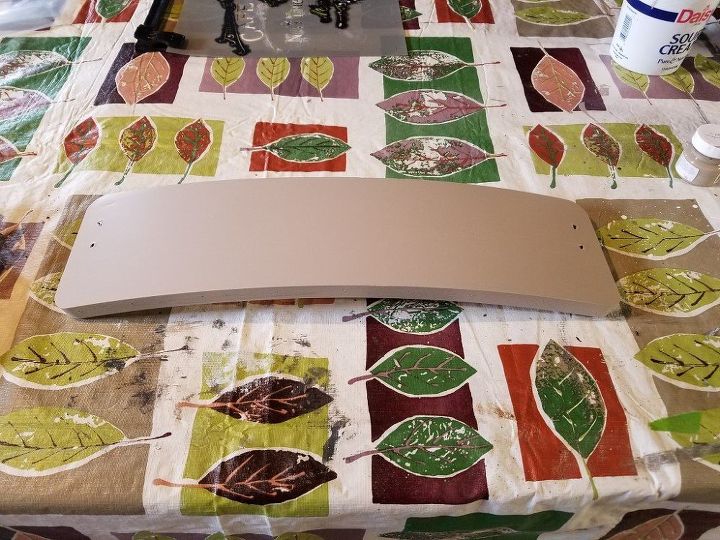
The seat frame which I cleaned, scuffed and painted with the taupe chalk paint.
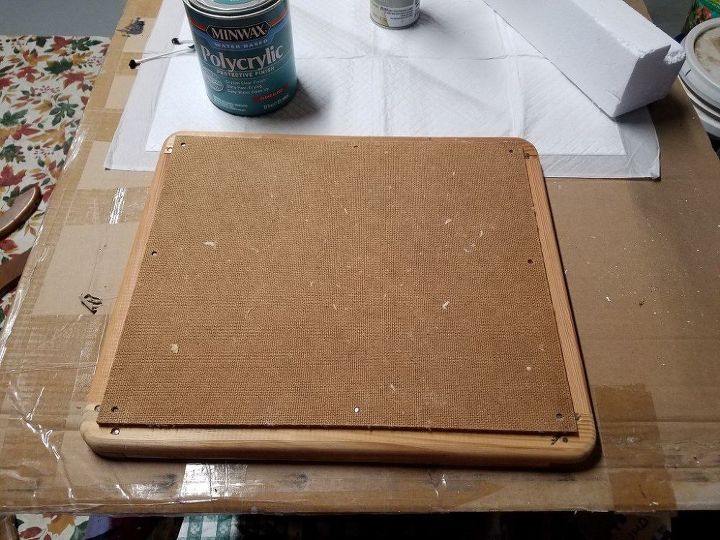
The base of the seat (bottom of the hidden compartment). This was decoupage. I had some material on hand that I modge podged on the bottom.
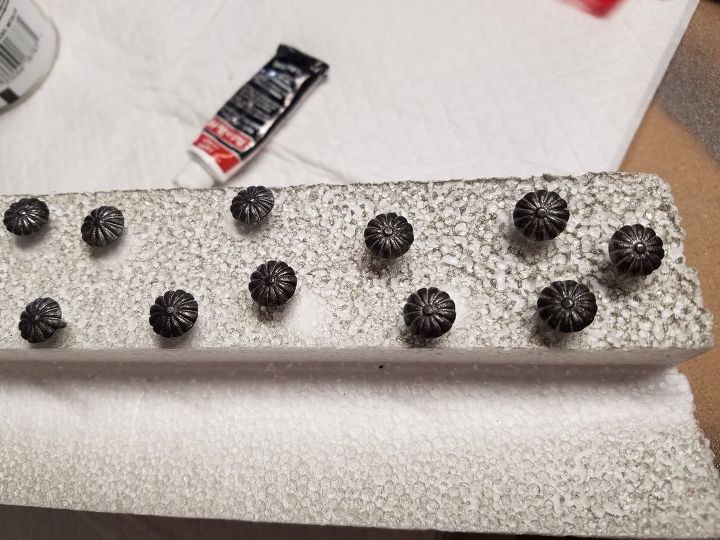
These are the brads that go around the seat back. I was able to pull them and re-use them. I painted them black and then rubbed pewter rub n buff on top of that. (I had purchased handles for the vanity that were black with a hammered pewter overlay and wanted them to match)
This is the seat back painted with homemade chalk paint. It was latex that I had because I had used it to paint one of my rooms and I really liked the taupe coloring for this project. Now it's ready for stenciling and fabric back on.
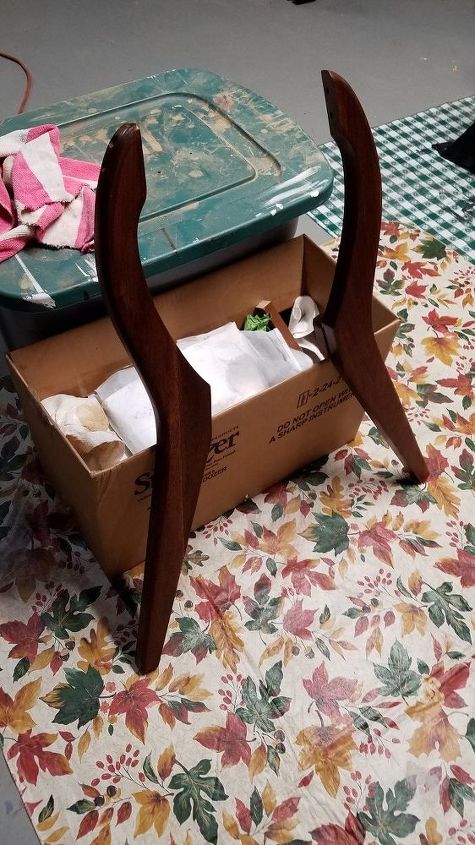
Here are the back legs all refinished.
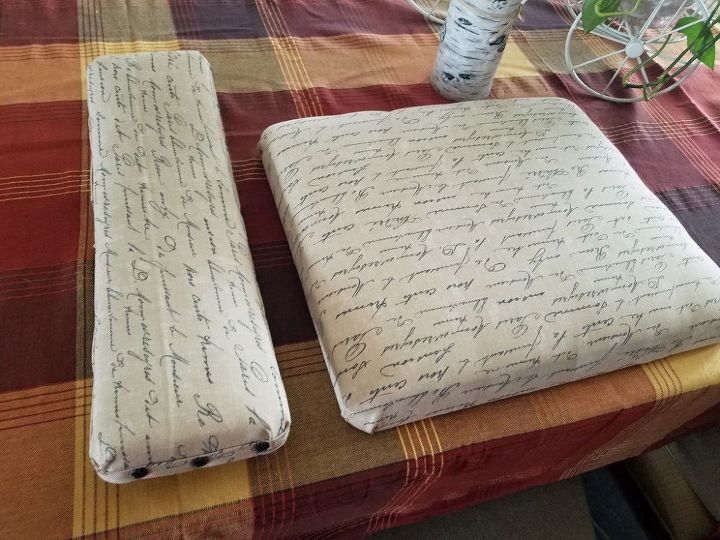
And here is the seat back and seat cushion all done with new fabric and the brads put back in : ) I love this material , it has a really nice weight to it and was easy to work with. I was able to use the old cushioning as it was in beautiful shape and used the original material as a pattern. The seat material was cut then stretched and stapled. The top was also stapled in a few places , then the band (made from the same material) was added and the brads repositioned.
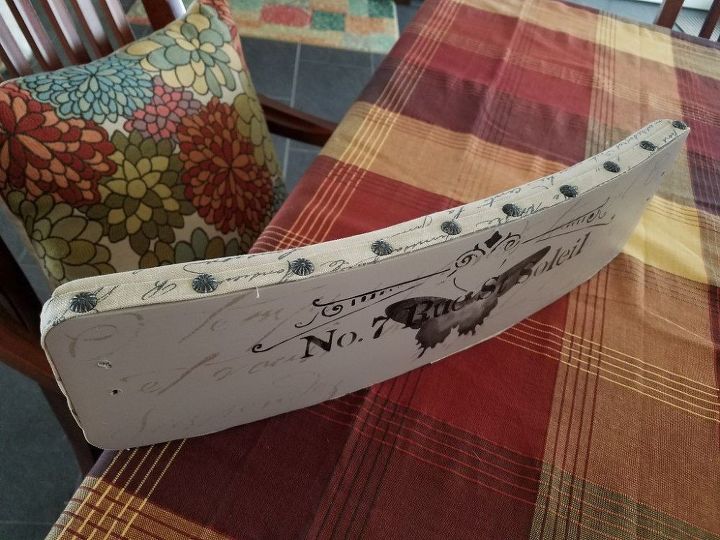
and here is the back of the seat showing the stenciling.
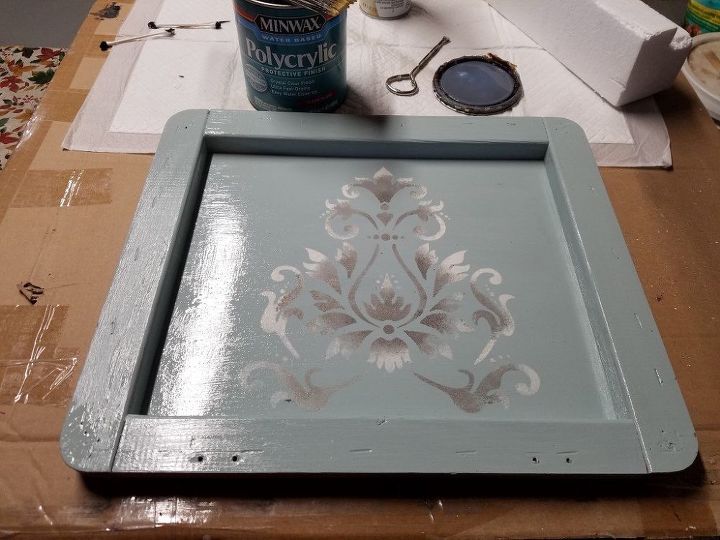
This is what is under the seat top ......... Stencil is done with Fusion Metalics in brushed Steel and Fusion Champlain.
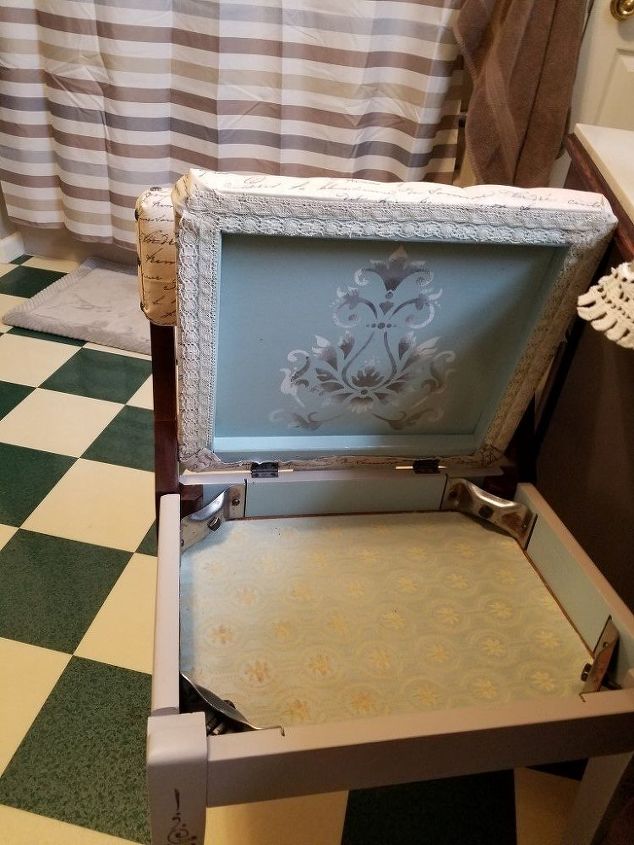
Here you can see the top finished off with a bit of lace, the bottom with the sides painted the same color as the top and the material that was modge podged on the bottom. Not sure what I'm going to keep in here.. but I'll think of something!
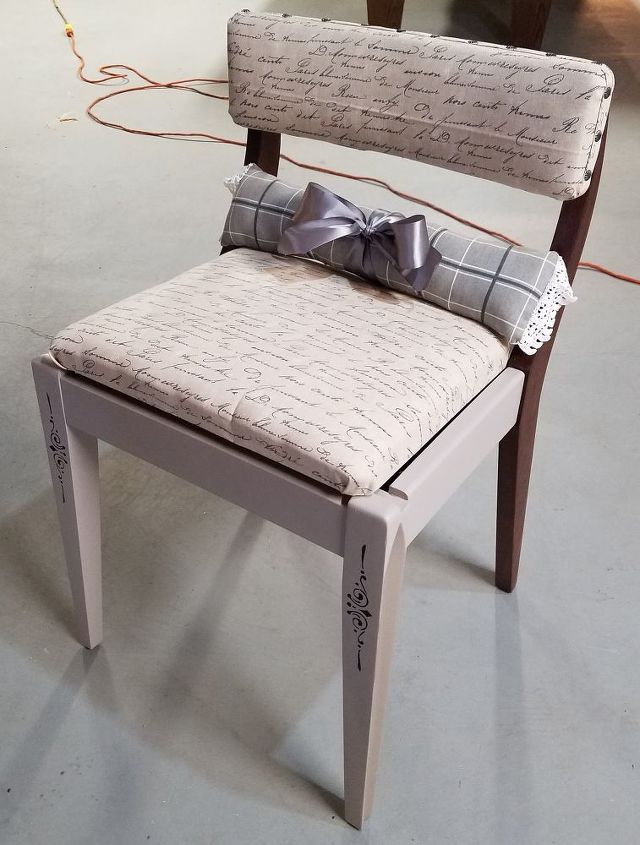
AND here it is! The chalk paint was finished off with Minwax Finishing Paste (since I was not distressing this piece, this product gives it a really nice finish). I also made a little pillow to go with it (did I happen to mention that I am 'pillow obsessed'?)
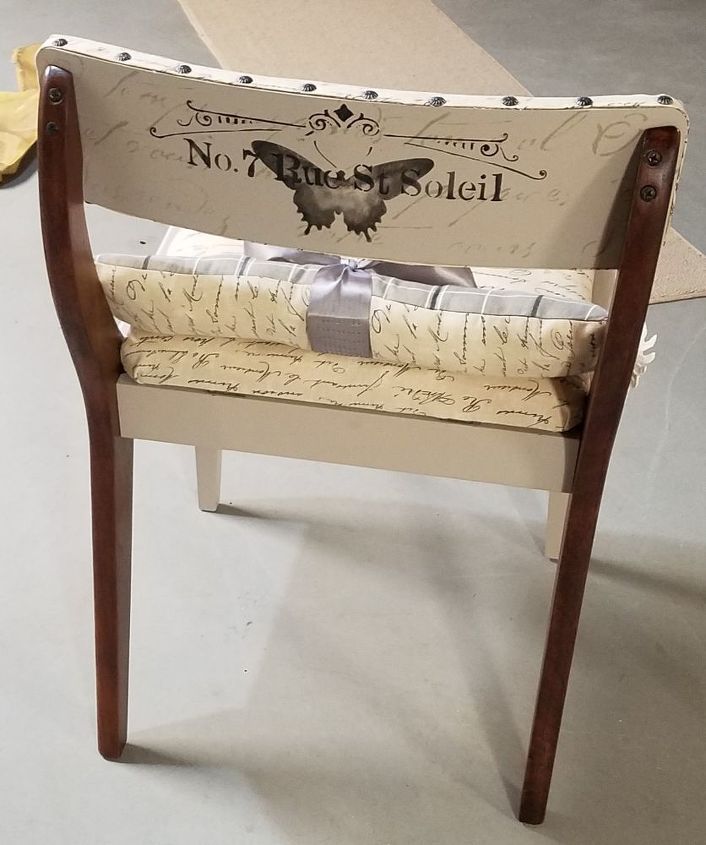
The back side..
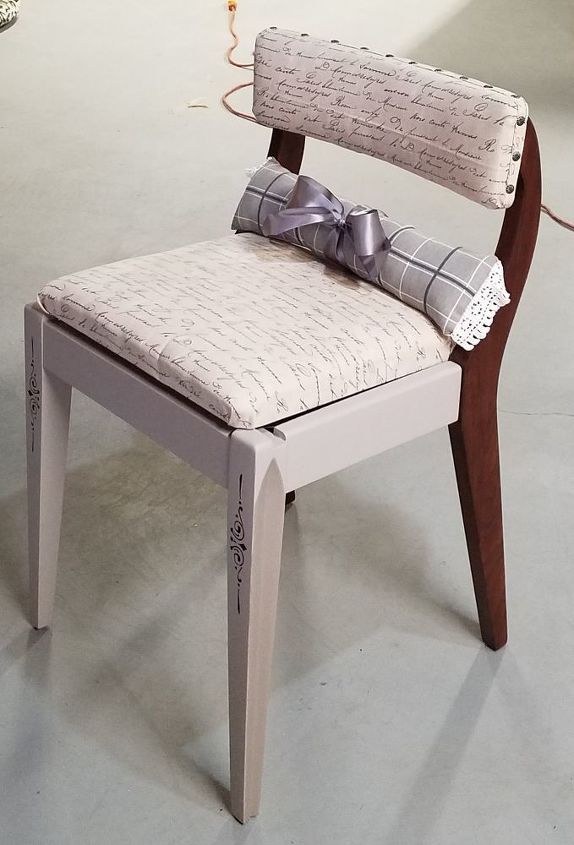
And one more showing the darker inlay on the front legs. I gotta tell you , I love this chair. : )
Comments
Join the conversation
2 of 11 comments
-
I love this chair too;)! It's gorgeous and looks like you paid serious money for it at a high end store!
-
Wow thank you Cindy Jo : )


Frequently asked questions
Have a question about this project?