


My Farmhouse Table

9 Materials
$1000
1 Week
Advanced
I was commissioned to build a farmhouse table from scratch. The customer sent me a photo and said "I want this table" I said, "just like that?" They said "yeah" So I went to at it...
{
"id": "3873934",
"alt": "Check out the video",
"title": "Check out the video",
"video_link": "https://www.youtube.com/embed/TIrGEjUfwnM",
"youtube_video_id": "TIrGEjUfwnM"
}
{
"width": 634,
"height": 357,
"showRelated": true
}
Check out the video for inspiration and my rock n roll track! Yes I also do a bit of music. I hope you enjoy it.
Farmhouse Table
This is the Farmhouse Table at the finished stage...but let's show you a bit of how it was put together...
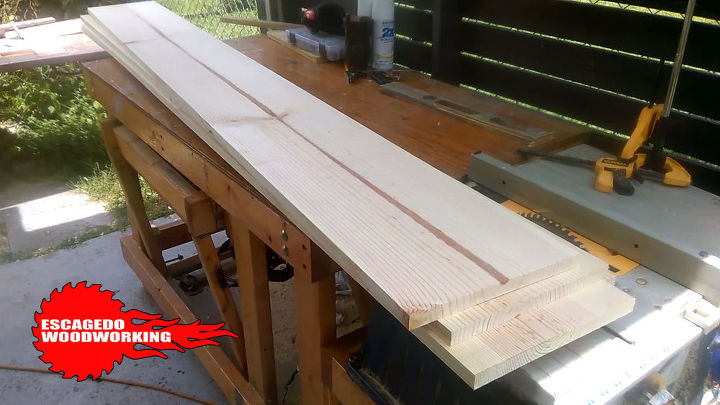
pine boards
I bought some pine boards at the local home center. I'm working on the top first...so we have to get these boards ripped down to side. We'll be joining 4 boards to make the top..but again...they need to be cut down a little..so, let's do that...
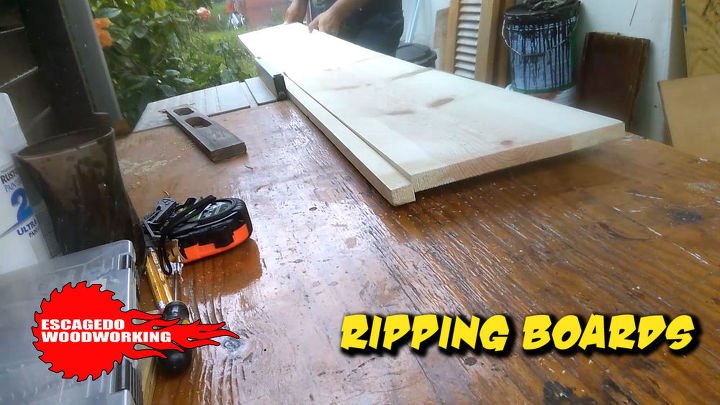
ripping boards down to size
So I shaved off a bit of each board using the table saw. This table is going to be massive...let's move on to see how I connect each board together...
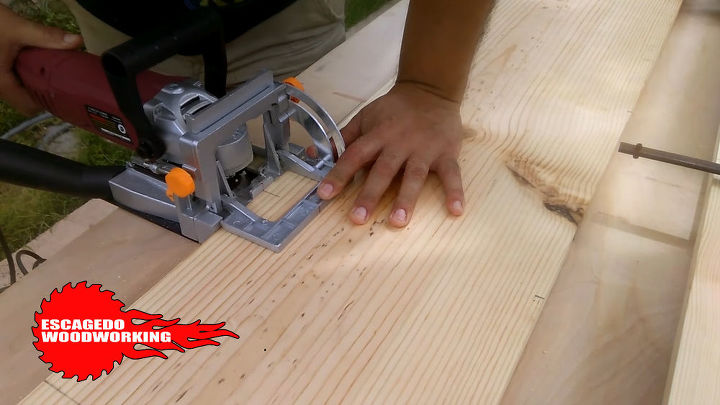
biscuit joiner
This is a biscuit joiner. It makes half oval type cuts into wood. This is a great way to join boards to make table tops and all sorts of projects! Let me show you what the biscuits look like...
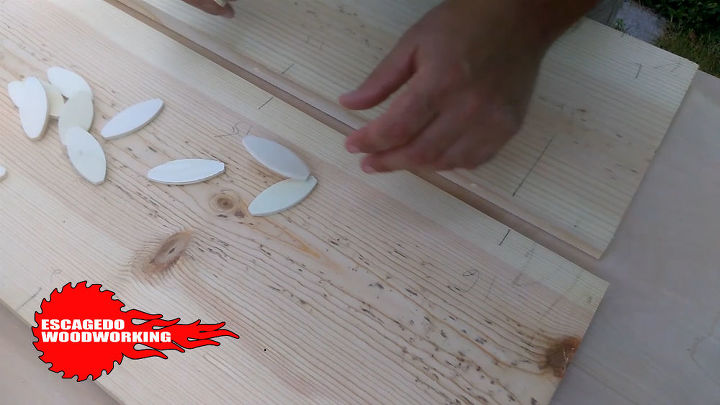
biscuits
So these are the biscuits. You add glue to the grooves the joiner made and then you pop the biscuits in. They suck up the glue and expand..then, the two boards become one. Let me show you the clamp up...so you have an idea of how it comes together.

clamp up and let glue dry
I clamped the 4 boards together with glue and biscuits. Now it's just a matter of letting it dry. Once the glue dries, these 4 boards become one. It's really an awesome process! Let's move on...
2x4 sides
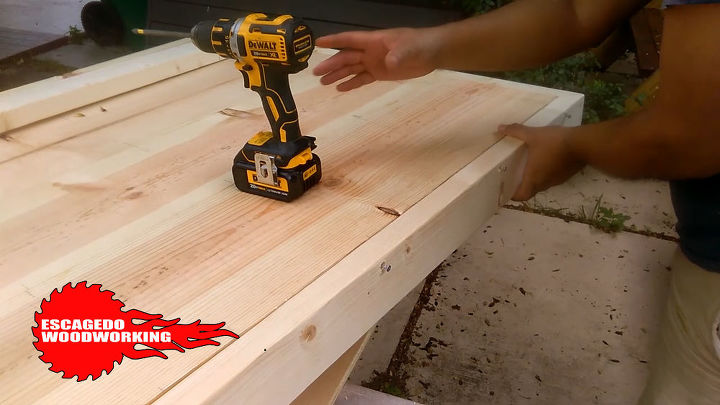
I cut 2x4 boards to skirt the edges of the top...now we're cooking!! Oh, I also used screws to attach the sides of the table top. What I did was, I countersunk the screws...That way I can cover the holes...but let me show you how...
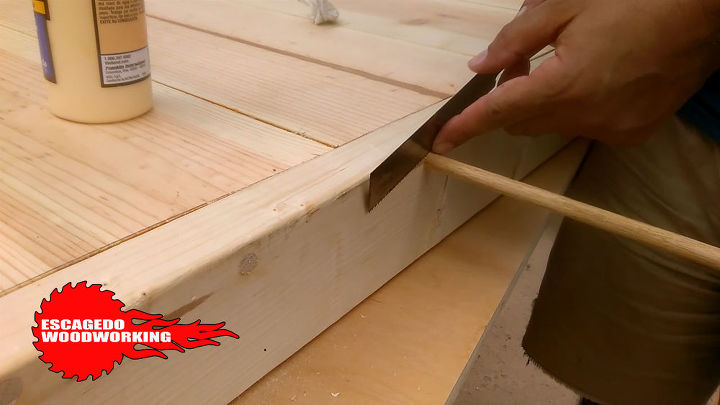
Dowels to cover up screw holes
So I plugged the countersunk screw holes with dowels. Once the piece is sanded stained and sealed, you won't even know they're there. Oh btw.. the customer wants this table "extra distressed" Wait til you see the craziness of how I accomplished that...
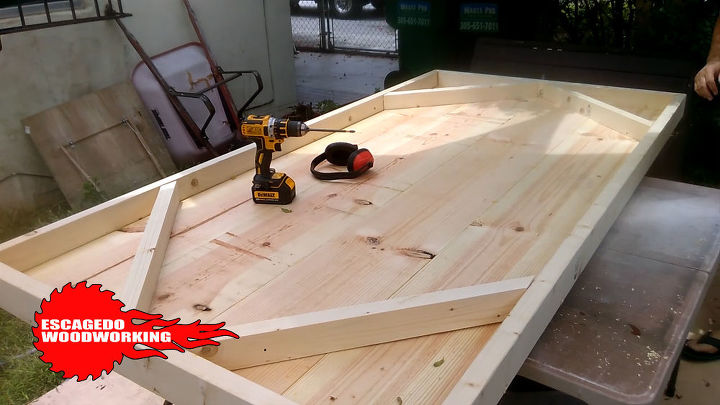
Table top Bracing
I also cut down some 2x4 boards for extra stability on the underside of the table. Now we need a base for this farmhouse piece! Let move on...
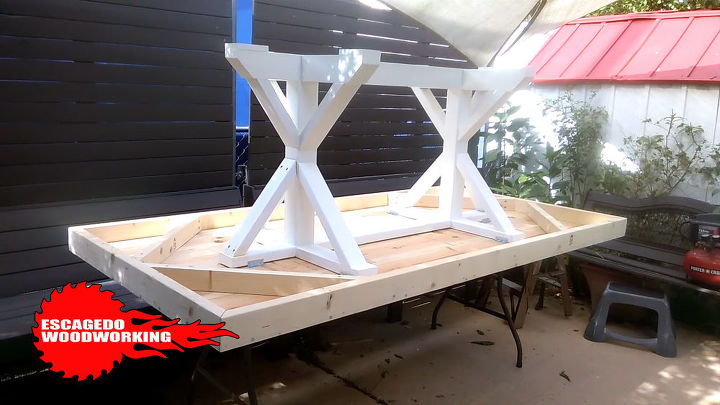
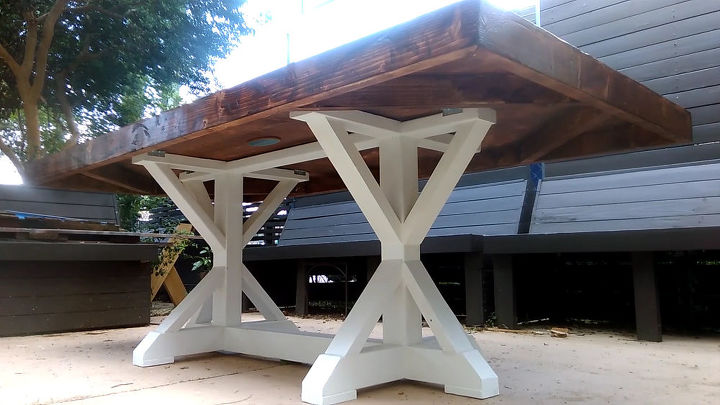
Table base and legs
Here is the table's base and legs. It's all made from 2x4s and 1x4s. Then painted white. Let's flip this right side up and distress the top...
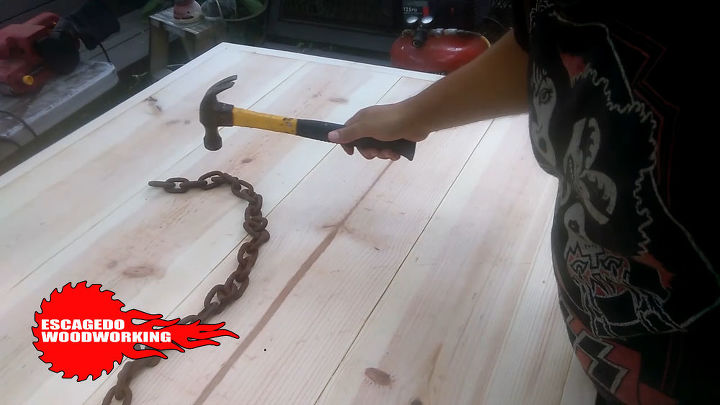
Distressing the table top
I used a lot of different tools to distress the top. I used chains, a hammer, and a grinder...I even torched the wood. Oh, I also used an awl to poke worm holes into the top. We're trying to give this new wood, a very old and rich vibe!
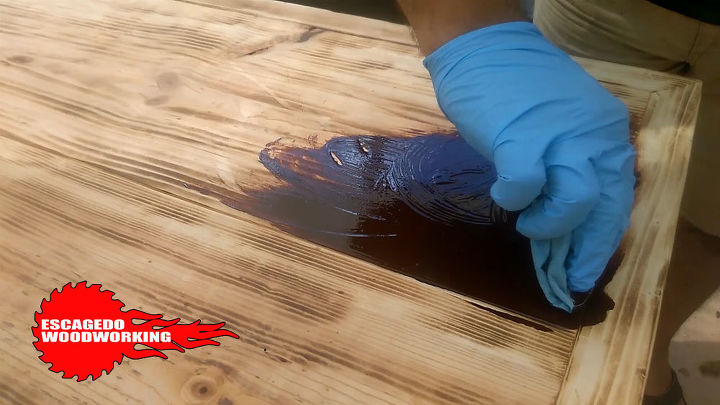
Staining the pine top with gel stain
So to finish up I stained and sealed the table. I used a gel stain and outdoor poly for the clear coat. The nicks and dings created by the distressing process come alive at this point. It was a very fun project and it has a whole lot of personality. I hope you enjoyed this! Again check out the video for inspiration. Let's show you the finished piece...
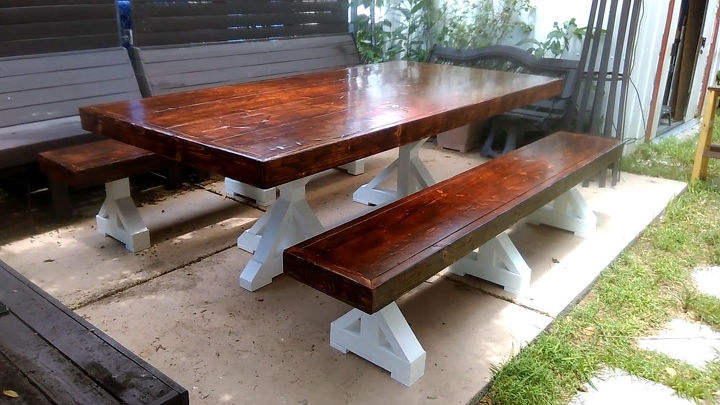
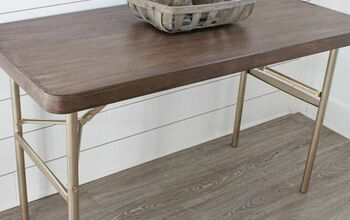
Farmhouse table project
There it is! The farmhouse table. Catch you next time...
Comments
Join the conversation
2 of 62 comments
-
Thank you for the love Michelle!!!
-
This is perfectly stunning!!! I would absolutely love to know exactly how the base/support was designed. I'm currently working on something for a lovely couple, and it is exactly what I've been needing to make their project work exactly how they want, while still being stable enough move the piece without it toppling.


Frequently asked questions
Have a question about this project?
Do you always use biscuits or have you used dowels -in the same way - curious as I don't want to invest in a biscuit drill.. but can straight drill for dowels...I am a BEGINNER and can't afford all the bells and whistles just yet!
Wow that's a lovely table. That's awesome. What color stain did you use?
Another well done project! On a side note, I would love to see your privacy patio decorated with plants and lights and cushions and ready for a bit of a party. Have you done anything like that to it yet?