


Ice Decor

As I'm sure I've mentioned in previous posts, we love to have friends over and entertain; granted, it's rare lately because of everyone's busy schedule, we still love to have an occasional gathering nonetheless. Even for a last minute dinner party, I love to use what I have to spruce up the table and make it look nice. I came across two really cool ideas for doing just that and I had to try them myself. Though they unfortunately won't last forever, they were fun and easy to create either way.
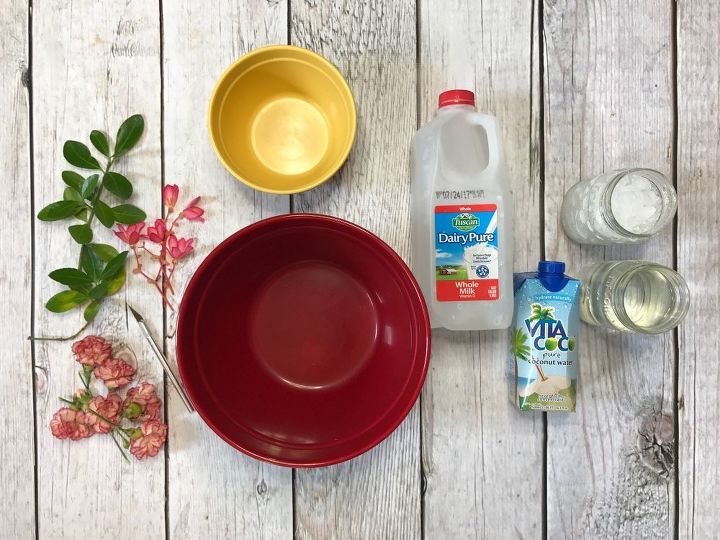
SUPPLIES:
- 2 bowls of different sizes
- 2 cartons of different sizes (I used a half gallon milk jug and a 1 pint coconut water carton.)
- crushed ice
- water
- small flowers or petals, leaves
- X-Acto knife or box cutter
Not pictured:
- scissors
- rocks
ICE LANTERN
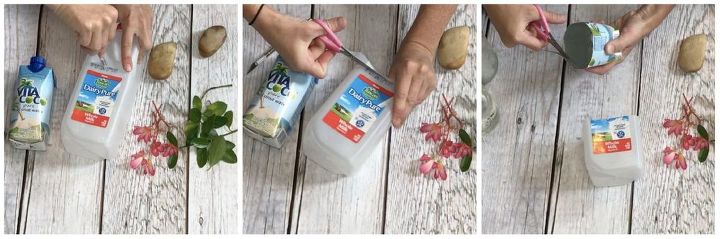
STEP 1: Cut carton/containers
For the ice lantern, I used an X-Acto knife to start a hole in a milk jug, then used scissors to cut the top off. I did the same for a coconut water carton.
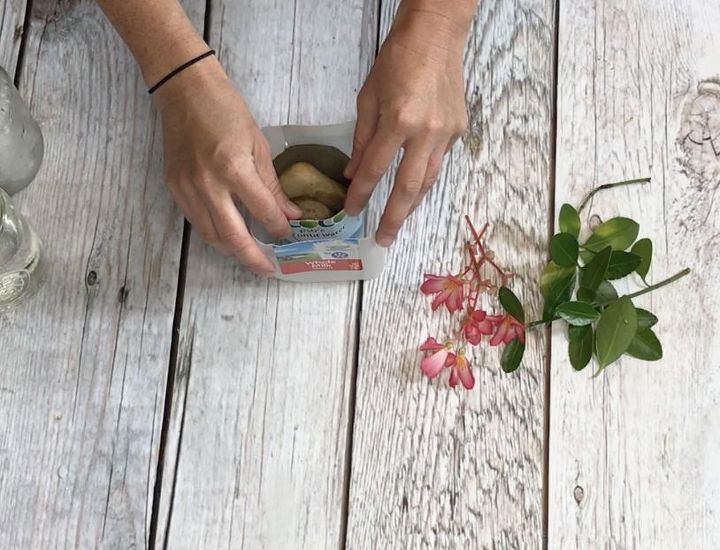
STEP 2: Create space for lantern
Next, I placed the coconut water carton (smaller container) inside the milk jug (larger container) and added a few stones/rocks inside the coconut water carton in order to hold the carton down once I poured the water in.
*Note: Hindsight, I would have used containers that were more square on the bottom like heavy cream or orange juice cartons and I wouldn't have put as much weight in the containers. You need to have just enough weight so that the inner container still floats a little in order for water to freeze under it, but enough weight so that the inner container stays centered inside the outer container.
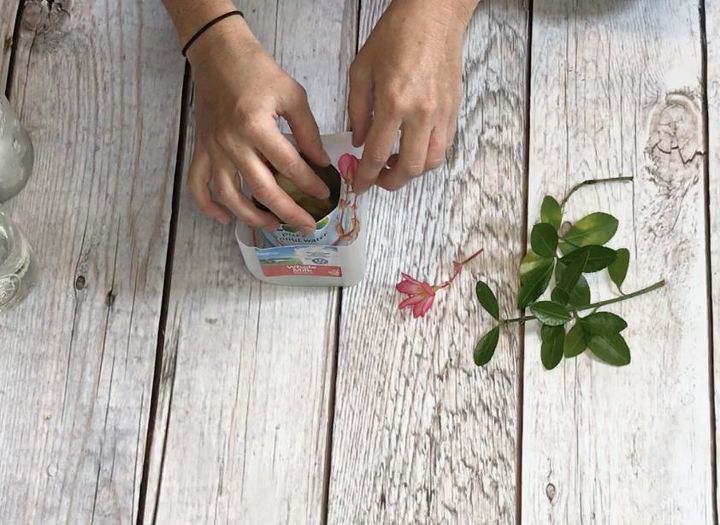
Once the inner container was centered, I placed small flowers and leaves in the space between the inner and outer containers.
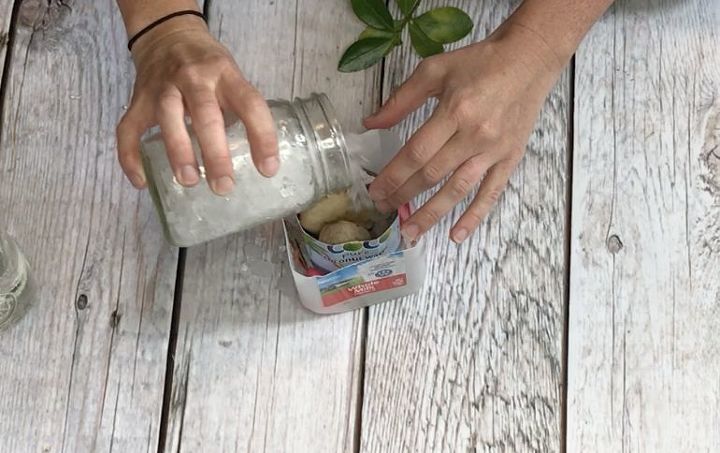
Then, I poured crushed ice on the flowers and leaves in order to weigh them down so that they wouldn't float up once I poured water over them.
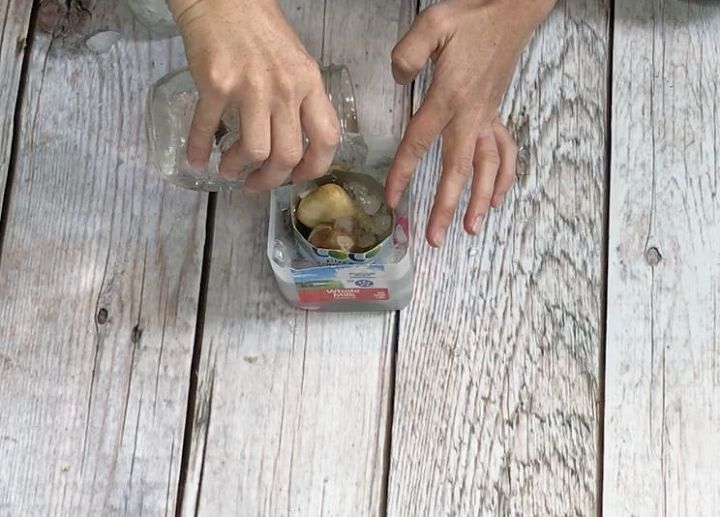
Lastly, I poured cold water in the space between the inner and outer containers and placed the prepped lantern in the freezer overnight.
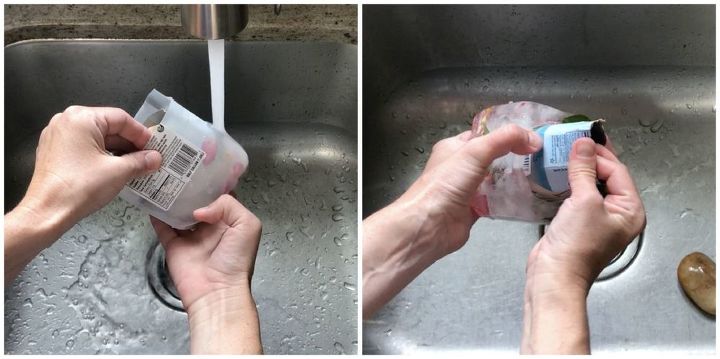
STEP 3: Remove ice lantern
The next day, I removed the prepped ice lantern from the freezer and carefully ran cold water on the outside of the milk jug. Immediately, I could see that the ice lantern was separating from the jug; I also carefully let a little cold water run inside the inner carton. I worked the sides of the inner carton off the walls of the ice lantern until I could pull the inner carton completely out.
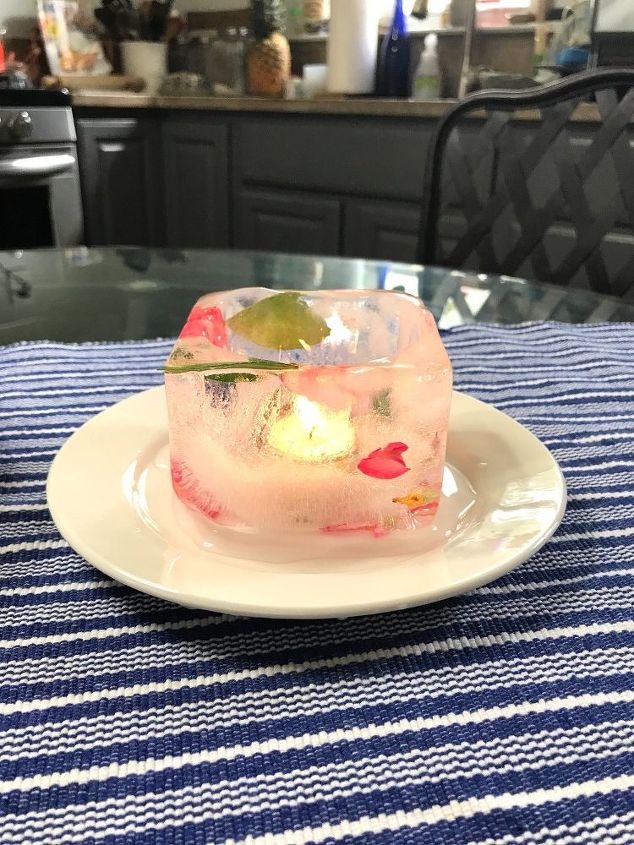
I love how this little ice lantern came out! I had a glass tea light holder that I placed inside the lantern as well as a tea light so I didn't spend any money at all on this unique (albeit temporary) piece of decor. If I were to do this project again I would definitely look into how I could make the lantern last longer...maybe put it back in the freezer after removing it from the mold? Or place it in a deep freezer for a while? If anyone has tips, I'm all ears!
ICE BOWL
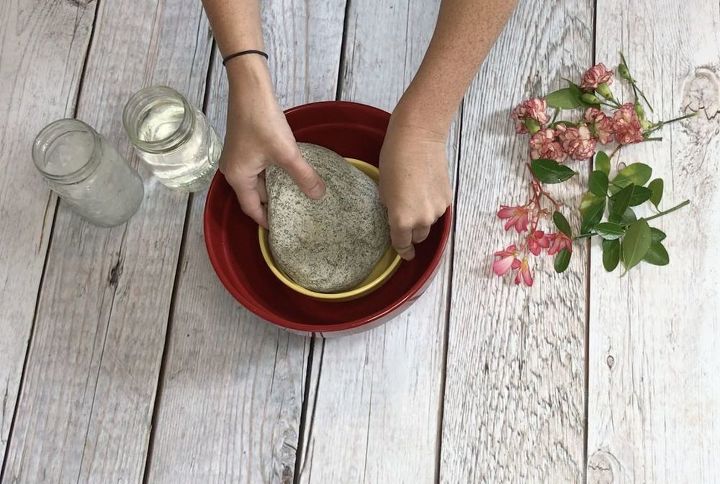
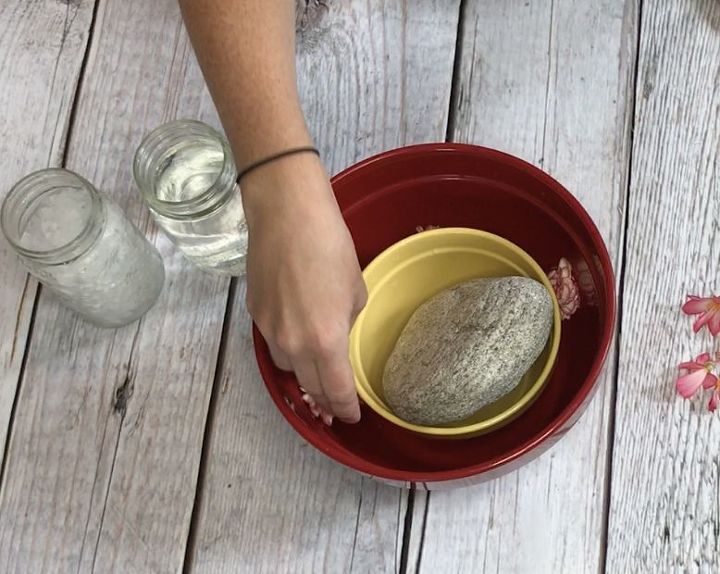
STEP 1: Create mold
To create an ice bowl, I first created a mold much how I did for the ice lantern. I placed a small bowl inside a large bowl and added a big rock inside the small bowl in order to hold the carton down once I poured the water in.
*Note: Again, hindsight, I would have put less weight in the small bowl because once the water froze there was so much weight in the small bowl that ice didn't form the bottom of the ice bowl after it was removed from the mold.
STEP 2: Fill mold
Just like I did for the ice lantern, I made sure that the small bowl was centered in the large bowl and filled the space with flowers and leaves.
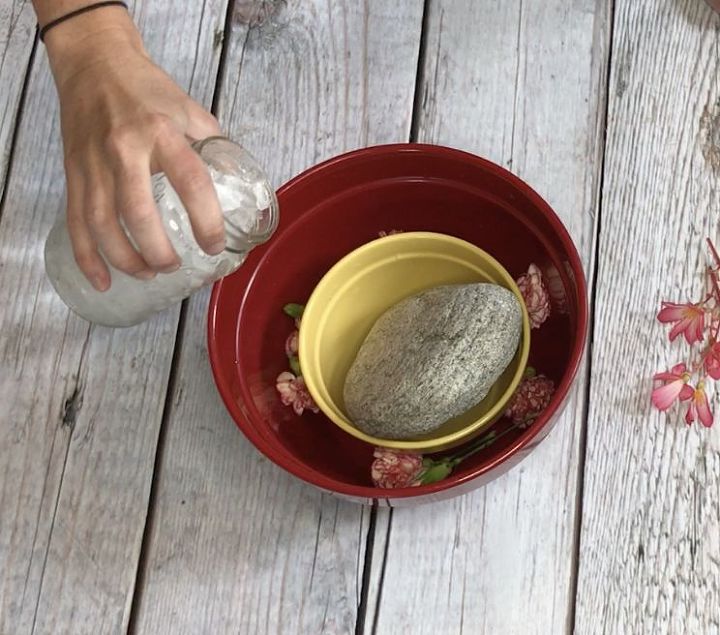
Then, I poured crusted ice on the flowers and leaves in order to weigh them down.
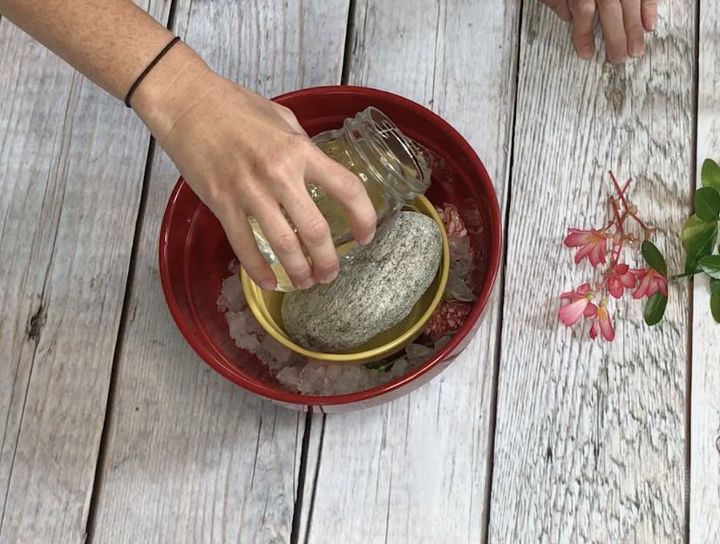
And lastly, I poured cold water in the space between the small and large bowl, and placed the entire mold into the freezer overnight.
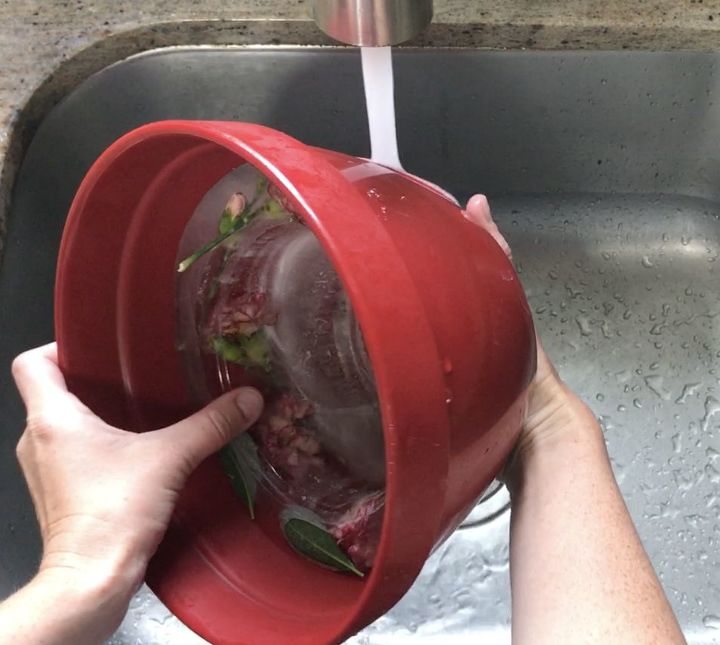
STEP 3: Remove ice bowl from mold
The next day, I removed the mold from the freezer and ran it under cold running water. Just like with the ice lantern, I could see the ice bowl separating from the inside of the bowl; after running cold water on the outside of the mold, I gave it a light tap on the inside of my sink which released the ice bowl.
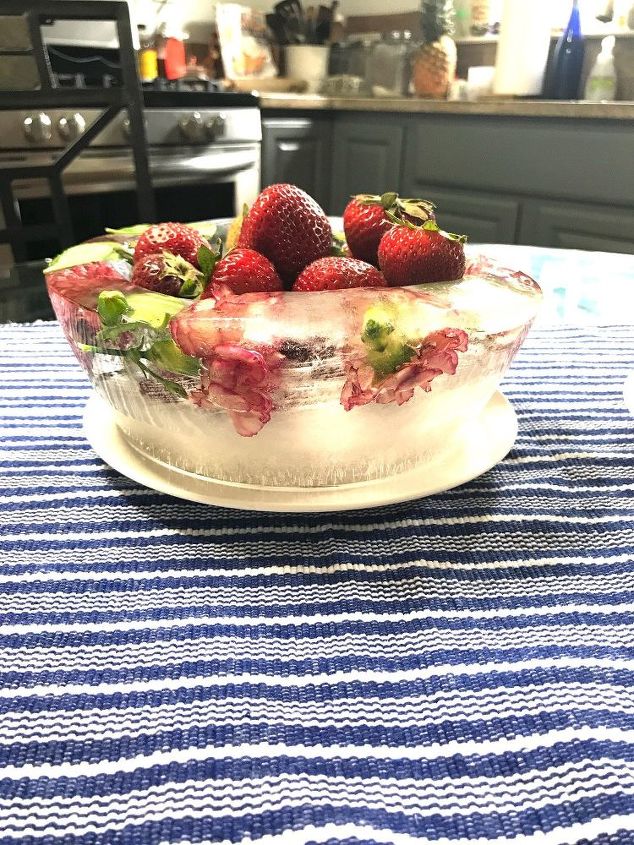
How cool is this?! Even though the bottom wasn't solid because of the weight I had put inside the inner bowl of the mold, I simply placed the ice bowl on a salad plate and filled it with fresh strawberries. This bowl definitely could be a conversation starter at your next gathering!
Resources for this project:
See all materials


Comments
Join the conversation
-
Ice bowl is beautiful. Perfect for cold food serving.
Making additional serving bowls if you don't have enough or party theme display.
-
I love this idea. I can see using the same idea for creating a lovely floating Ice bowl in a punch bowl by using flowers that are food safe. Raised without pesticides of any kind and edible flowers a few common ones & their Flavor: Arugula flowers - spicy or peppery, Basil Flowers - Lemony or minty, Bee Balm-Citrus, Carnations - Sweet, Chamomile - Faintly Apple-like, Chrysanthemum - Tangy, Clover- Sweet, Bachelor's Button - Clove Like, Dandelion-Sweet when young, bitter when mature, Daylilies - Light & Sweet, Dianthus - Spicy, Honeysuckle - Sweet, Johnny Jump-ups - Wintergreen-like flavor, Lilac - Citrus, Mallow Flowers - Sweet,
Nasturtiums - Sweet & Spicy, Pansy, mildly sweet, Roses-Sweet.Violets - Sweet. This is a partial list found online


Frequently asked questions
Have a question about this project?
Love this and so pretty with the flowers and leaves. But, when it starts to melt then what? I think the bowl could be placed in a larger container with ice on a table to catch the water but not sure about the lantern. On a hot summer day maybe who cares?
What about using ice cubes to weigh down the inner bowl? Or perhaps a paper or plastic drinking container with water it, or even an empty food can or bowl with water added? The water amount could be easily adjusted so as to acquire the desired flotation depth of the inner bowl.
Really pretty. Use flameless candles?