


Boring Wardrobe Mirror Makeover With a Soda Can, Tacks & Fence Wood?!

by
Jacque
7 Materials
4 Hours
Easy
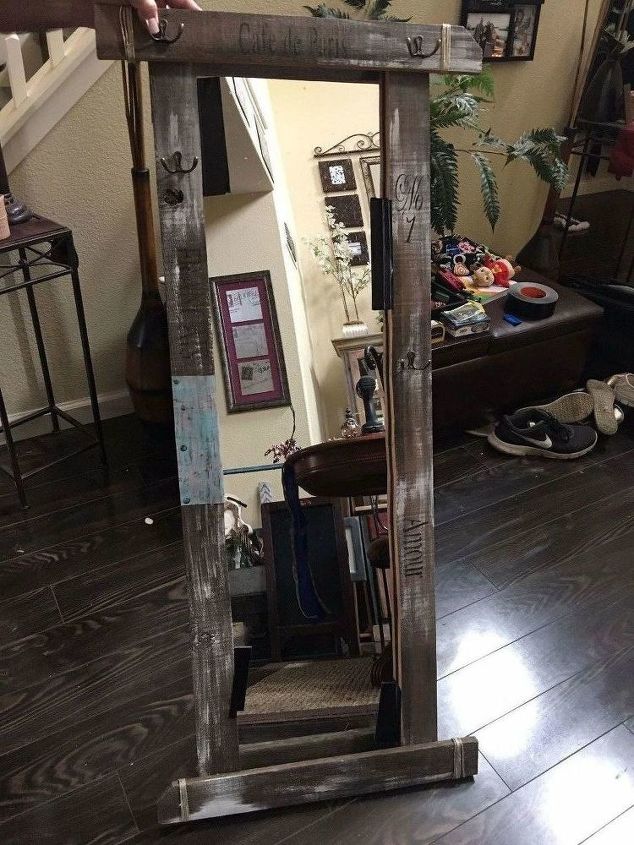
I think everyone I know has one of these plain wardrobe mirrors in their home. I've seen lots of cute mirror makeover's on Hometalk and thought I'd spruce up mine. Anything would look better than how it does now!
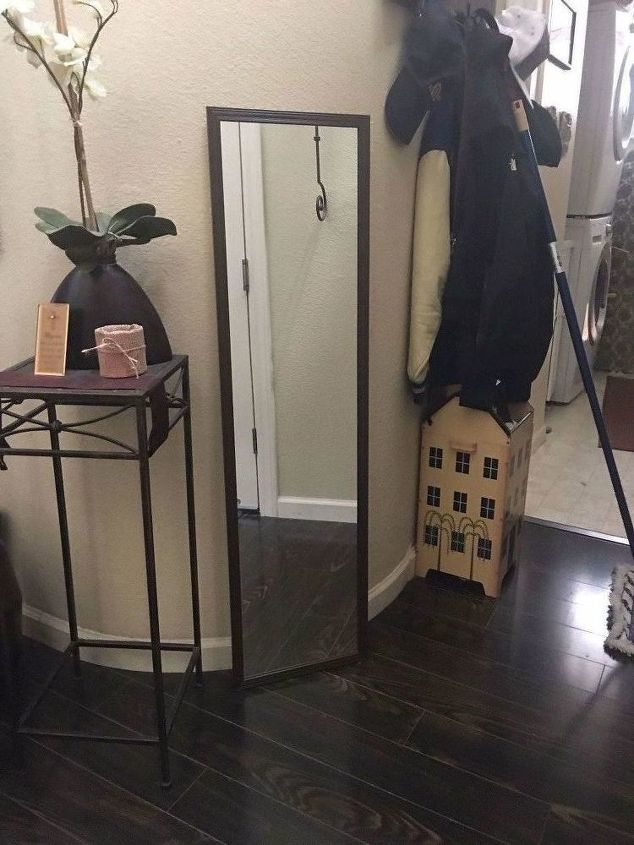
BEFORE: Boring entryway mirror.
I like the idea of having a large mirror in my entryway...I will have to settle for this. I know I can make this plastic frame look much better...but how?
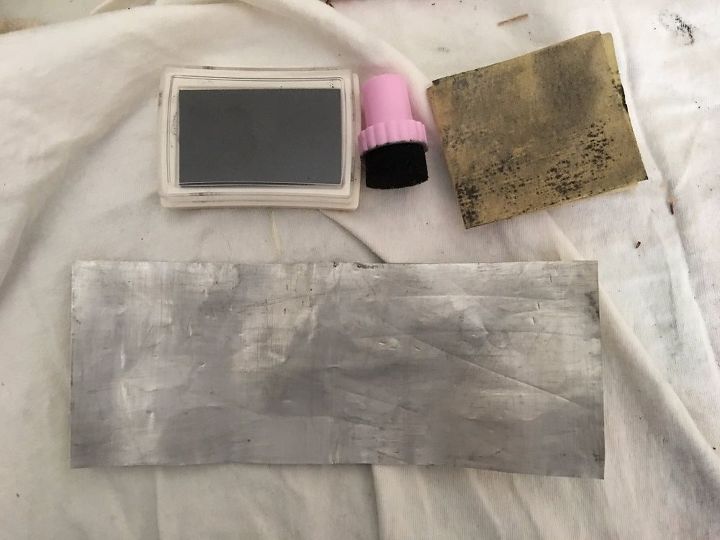
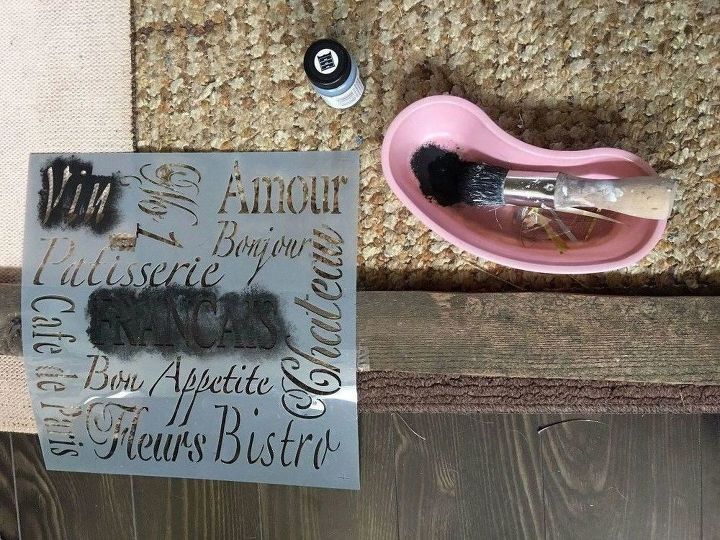
Soda Can Aluminum piece
First, I wanted to add some embellishments (to the front of the mirror after the wood has been cut and applied). I cut top & bottom off of a regular soda can and then cut it down the middle in order to have one flat piece of 3x6 aluminum.
I used sandpaper to scratch up the surface so the ink would sink into the grooves to make it look weathered and old.
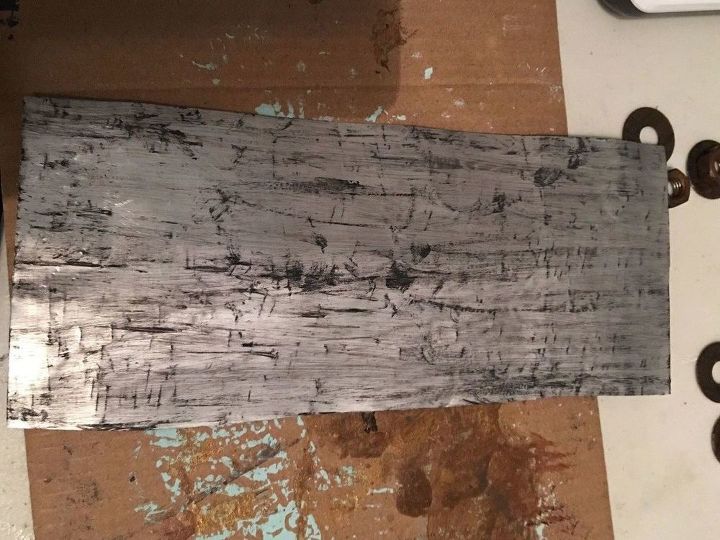
Weather it down with sand paper and ink
I added a small amount of black paint because the ink just made it look less shiny. I painted the heads of three gold tone thumb tacks black to match it. I put this to the side and began to cut the piece of wood fence into 4 sections.
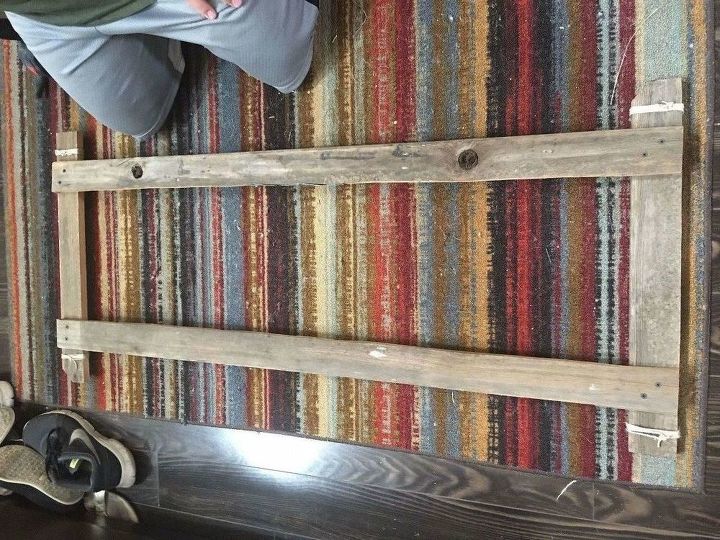
Lay it out to measure correctly
All you need is ONE piece of 6ft fence wood. I cut it the length of the mirror (4ft), then split the wood in two. I had about 2 feet left for the top/bottom.
They are attached to each other from the front with two screws sunk diagonally from the back (so that they don't show from the front). You'll need 8 screws, 2 per corner, about 2" long.
I used burlap string and wrapped it around each corner about 5x just for decoration and embellishment. It adds to the rustic look.
Add a few stencil stamps to wood
I added a few stenciled words to the wood and lightly brushed white chalk paint on each piece to give it a more weathered look. I love how all of the simple embellishments came together to make it one pretty piece of decorative furniture!
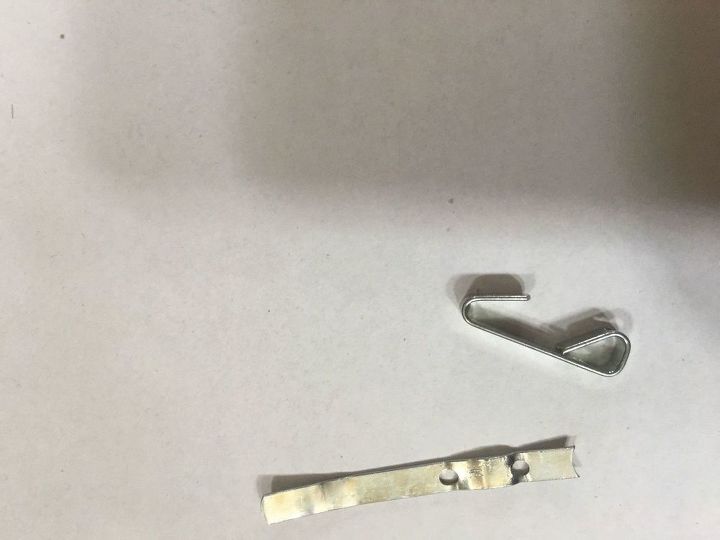
Hmm Now, how do we attach my new wood frame to the mirror without drilling thru the plastic frame and cracking it? I had my husband do the thinking on that one! He came up with a brilliant hack! We flattened out the hooks we use to hang/mount pictures on the wall. We used two per corner and found screws to fit into the small holes.
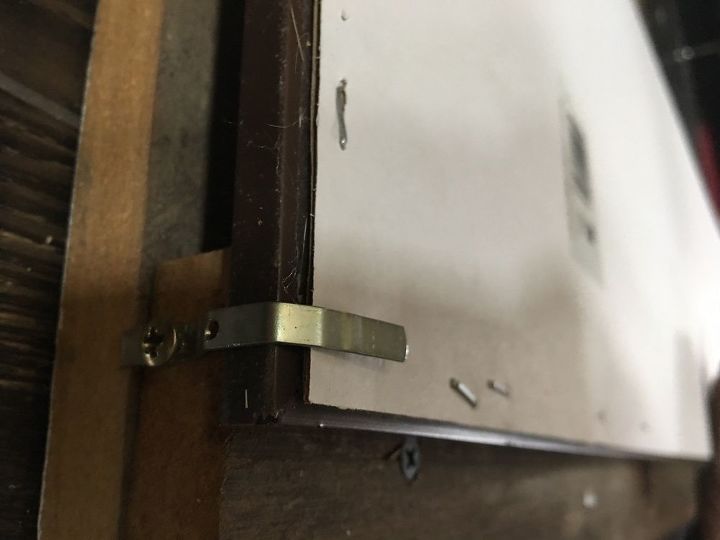
The first one is attached to one side/corner with a screw and you can bend it down using pliers if needed. They are soft metal and are easy to manipulate.
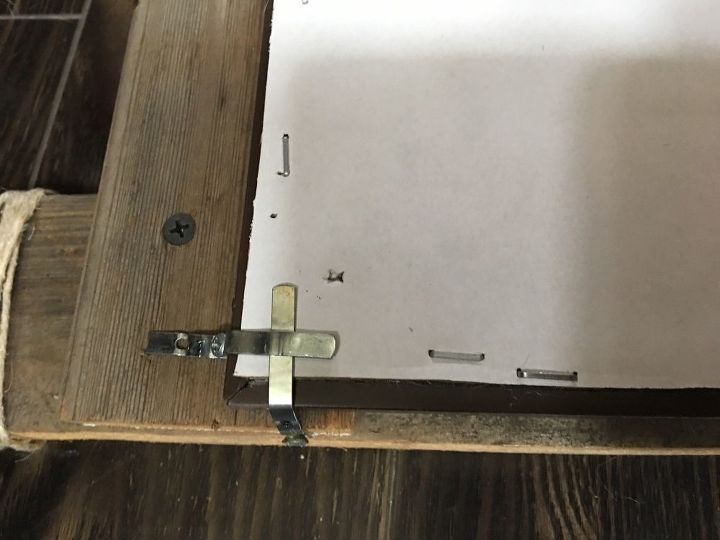
This is how each corner looks. Each pair of hooks holds its corner down tight with the screws in place. This mirror is stuck now...it doesn't budge! You could even use nails if you didn't have screws....depending on the weight of the mirror. This mirror weighs 7-10lbs if that.
I love the way it looks now!
I added the aluminum piece with 3 painted thumbtacks (I used a patina wax on the aluminum piece to give it a bluish hue patina). I also added a few hooks to hang up hats and umbrellas.
I had all of the supplies on hand so this cost me nothing to do! Wild huh?
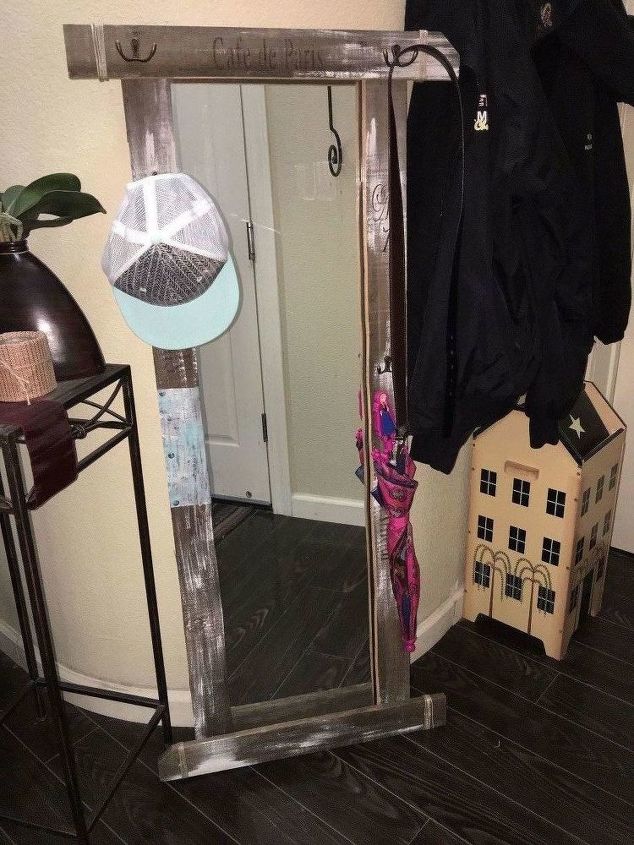
AFTER: Hooks help keep clutter off floor
Here is my new mirror already put to good use! I wouldn't hang coats on it unless I had it tethered to the wall, which I strongly suggest if you have little ones. You don't want this crashing down on anyone.
It is so much more sturdier than before and I love my new rustic looking mirror.
Thanks for looking! Hope this helps to inspire you! I'd LOVE to hear how your makeovers go!
Comments
Join the conversation
2 of 7 comments
-
That is really a cute idea! I'm going to try it myself. And like you said. Those mirrors are usually petty flimsy so the frame will really help sturdy it up. Thanks for the share!
-
Very cute, crafty idea! Thanks for sharing!


Frequently asked questions
Have a question about this project?