


Boring Buffet Beautified!

2 Materials
$35
5 Days
Easy
I used to live in a 670 square foot loft in Oregon. When you live in one big room, your furniture pieces must be carefully selected and they must serve many purposes. I scored big at a great upscale furniture consignment shop in the general area where I lived and one of the pieces I purchased, a very large, oak Thomasville dresser, was the perfect size for behind my sofa (and in front of my bed) to serve as both clothing storage and credenza. Since then, I've moved to Georgia in a 3 bedroom condo (I know, right?!), but this piece now serves as a buffet in my dining area. I've been here 4 years and finally got up the nerve (and energy) to update it and take it from the 1980's into the new millennium!
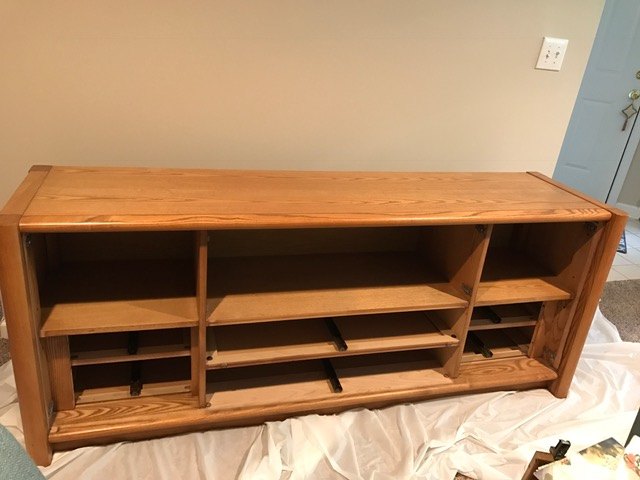
Step 1: This is the buffet waiting for its facelift. All doors and drawers were removed as well as hardware. (My 3-1/2 year old granddaughter helped me empty it. It was hilarious!) It's really not a bad color and when my kitchen cabinets were still the old oak color, it had some flow (this is an open concept floor plan, so you can see the kitchen plainly with only a high countertop separating the two rooms). But I had my cabinets refaced in a lovely, soft yellow and this was the last vestige of oak left, so it had to go. By the way, I was doing this inside the house because this dresser weighs a ton! I had to figure out a way to lift it up off the carpeted floor so I could paint all the way down as the bottom is flush with the floor. I picked up three scrap pieces of lumber which were in the trash (yes, I did get permission) for free and placing the first piece close to the end, lifted the dresser (it is ridiculously heavy) and kicked the wood under it. Then I did the other side. Yeah, just call me "Wonder Woman."
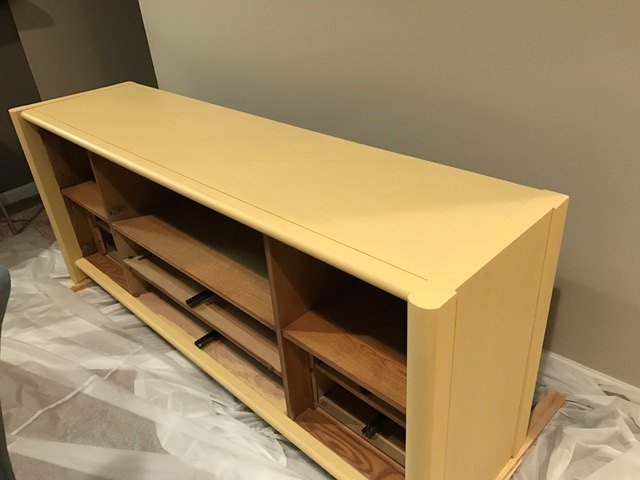
I used a Rustoleum Furniture Transformation kit for this (see my post on how I did my laundry room cupboards--also oak) and all the necessary items are included. The deglosser solution is used with a scrubbing pad (included in the kit) on all areas which will be painted. Wipe it off with a clean, damp rag, then wipe it with another clean, damp rag. I wiped it again with a dry rag to remove any moisture left behind. You have to wait one hour for the piece to be dry before applying the bond coat (the color). A word about the color: The available color selections did not meet what I needed. A wonderful paint mixer at Home Depot took the one I had already had mixed (because it just was not right) and grabbed another from a kit and mixed it til it was the color I wanted (using a paint chip) without charging me. Score one for HD! I applied the recommended two coats, following the instructions very carefully, which say to wait 2-3 hours between coats.
You're seeing the glaze coat here. This coat is the trickiest part, in my opinion, as you don't want to make it too dark, especially on a light color. You can really make the finished product look cheap and like a total DIY (and not in a good way) project. I kept wiping the glaze off with the included cheesecloth til I got it exactly as I wanted it (this picture shows it halfway through the wiping off part). You have time to do this as the glaze does not dry quickly. You can literally wipe it all off, let it dry for a bit, and reapply, if you need to do that. Or you can wipe it all off, keeping it in crevices only. You can kind of play with it a bit in this step. I also added some "distress" in places where I thought it might actually get banged up a little by wiping slightly harder and getting down to the original oak. Don't go crazy with this, though (see my cheap comment above). Also, you can eliminate this step if you don't want the look. I chose not to use the glaze on my laundry room cupboards because, in that small room with one overhead light, I didn't want them darkened. I loved the Seaside color in its truest form and am really glad I chose not to glaze them.
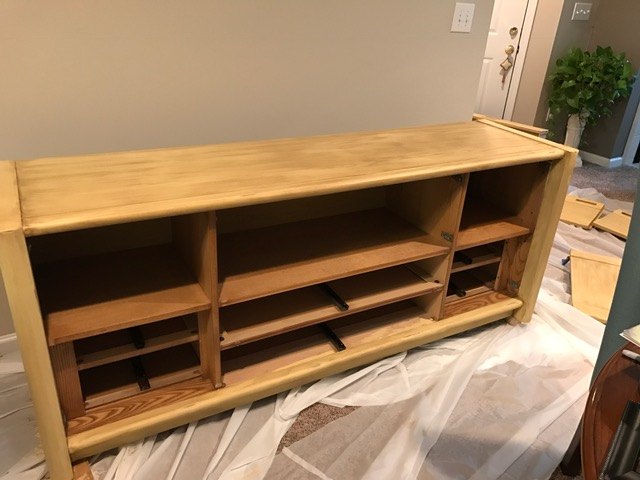
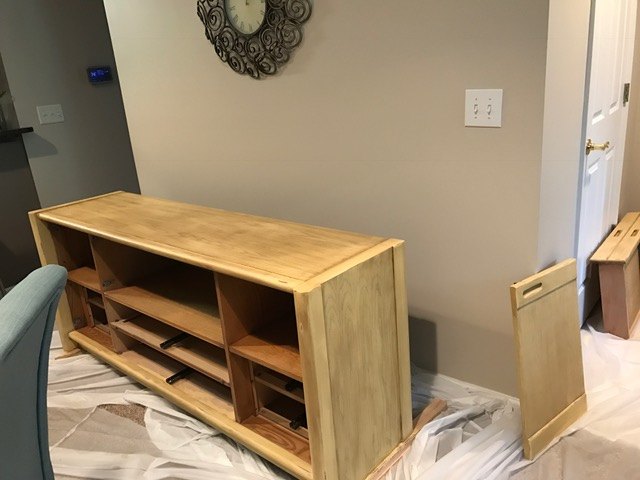
You have to wait 8 hours before applying the protective top coat. Patience is not my strong suit, folks, but even I knew enough to follow the directions. As you can see, I elected not to paint the inside because, as you will see, it is not even seen once the drawers and doors are back in place. What I will eventually do is find a really cool wallpaper that matches my decor and apply it to the inside on the exposed areas, like the small drawer fronts and the larger open areas. But seriously, if that never gets done, I'll be okay with it. Brush on the topcoat in the direction of the grain and don't keep going over the places you've already applied it or it gets built up and kind of yucky looking. The topcoat seems to be self-leveling so that, as it dries, it becomes smooth and no brush strokes are seen.
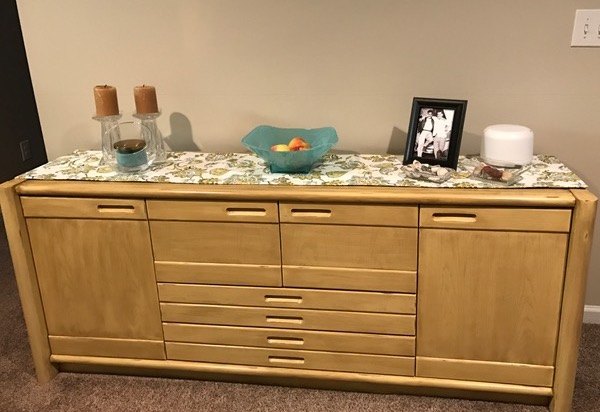
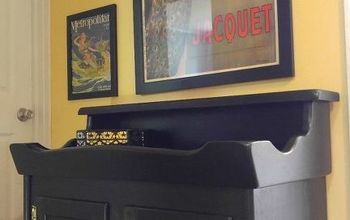
And here's the finished piece! Here's a funny story: I sent my sister in Oregon, who was with me when I purchased this, a picture of the finished piece. She asked me if I was going to paint it. Bahahaha...it's difficult to tell that this piece is not oak any longer. But in real life, trust me, you can tell. My side tables, small credenza, and round, tufted "coffee table" are gray-washed. I didn't want another gray washed piece because, well, that's just monotonous. But I wanted to pull the yellow in from my kitchen and from the design in my chairs in the livingroom to tie everything together.
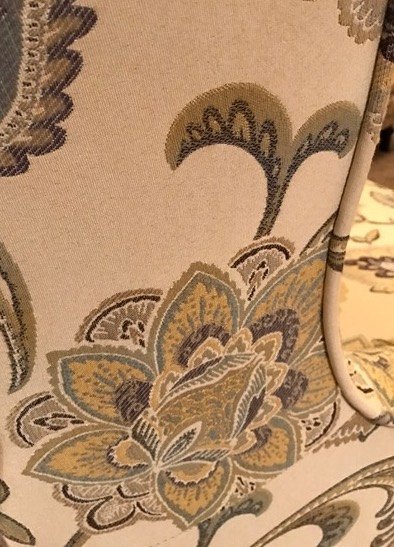
This is the design in my wingback chairs in my livingroom which are about 5-1/2 feet from this buffet (it's a condo, remember, not the Taj Mahal). As you can, hopefully, see, the yellows are a great match since I used the glaze to soften the bright saturated color.
These kinds of projects are inexpensive at only $35 for one kit, but pretty time consuming. Depending on the size of your project piece, you need to allow an appropriate amount of time so you don't rush the process and I cannot emphasize enough that you MUST read and follow the directions (or at least look it up on YouTube and watch someone doing it). The end results are totally worth the patience it takes!
Comments
Join the conversation
4 of 6 comments
-
your sister is a funny kinda girl ! All that beautiful work..and she wants to know if you are going to paint it? Hahahaahahhahah !!!! Sounds like MY sister !!
-
no offense meant ! I just thought it was funny ! My sister is forever saying.."Well why did you do that?"...the fact is? I'm an artist !! Filled to the brim with creativity ! Half the time I don't know myself !! But those are the BEST projects ! The surprises !


Frequently asked questions
Have a question about this project?