


From BLAH to YAH! Raised Stencil Project

Single dressers are my favorite project pieces. Their size lends them to many options for your home. Entryways, bathroom, or bedroom these smaller pieces with drawers offer a lot of function for very little space.
Also, they're quicker to do than a huge armoire or triple dresser. HA! 
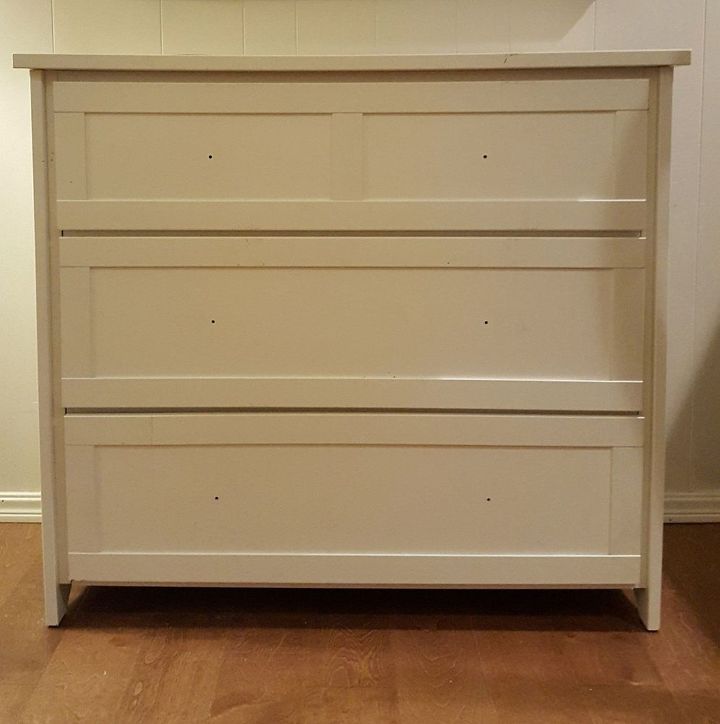
A friend of mine was moving and offered this little chest if I'd move it. You bet! I brought it home and repaired a drawer guide, and lightly sanded and cleaned it, preparing for painting.
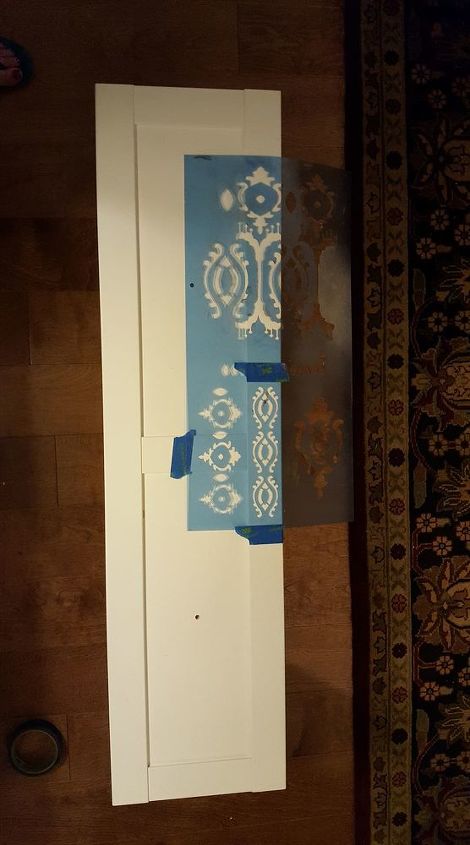
I had this great little stencil with several different coordinating patterns I thought would be fun to use for the chest. Using an old credit card, I spread wall mud over the stencil and created a pattern. Allowed it to dry then lightly sanded the raised stencil, and removed all the dust.
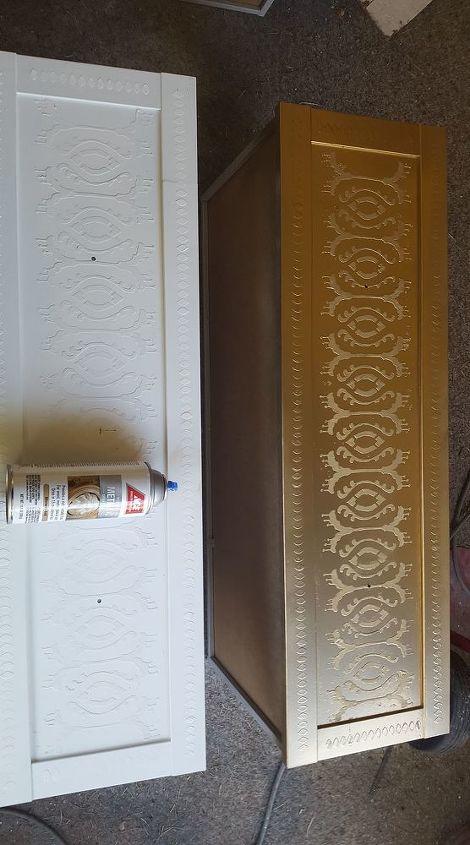
I covered the whole drawer front with gold spray paint and a top coat of polyurethane.
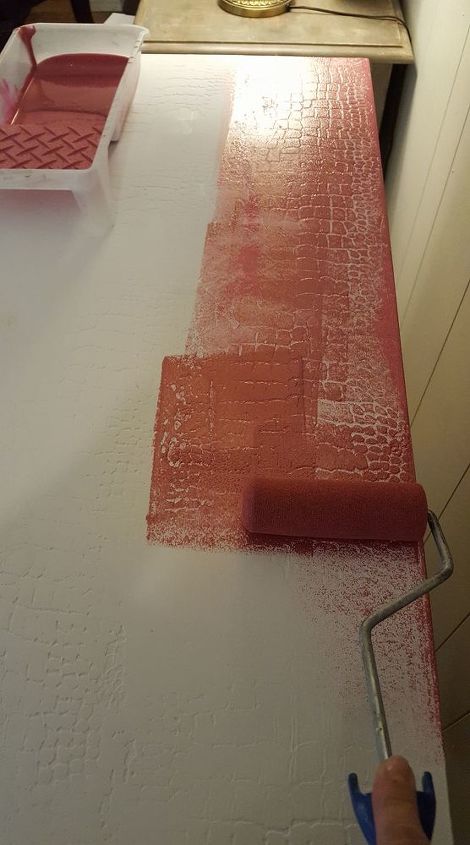
Applied a thin coat of wall mud to body of the dresser. Rolled over it with a stencil roller with croc design and allowed it to dry before lightly sanding. Painted the body and over the gold on the drawer fronts. Using a wet chore boy sponge, I carefully wet sanded over the stencil to reveal the gold pattern.Brown glaze over the entire piece before finishing with a top coat of gloss poly.
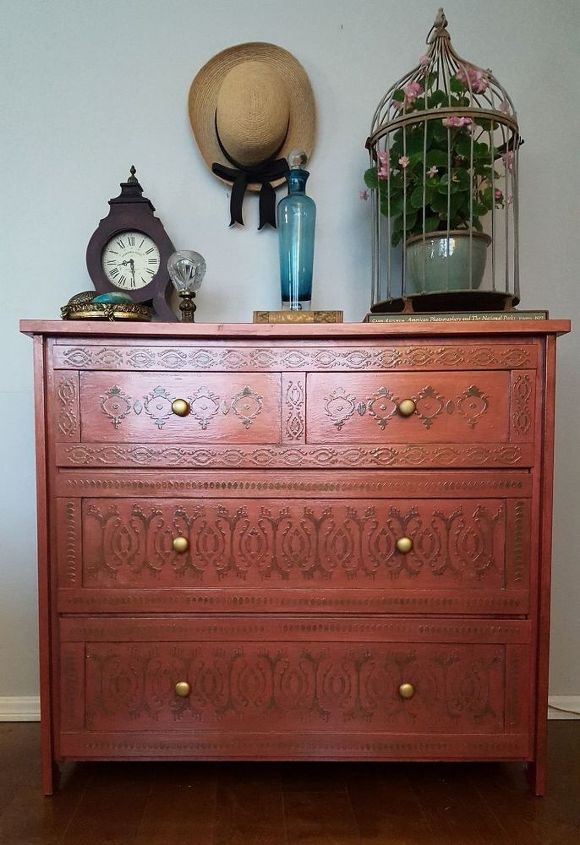
A long way from the plain white chest, this new finish will brighten a room.
Resources for this project:
See all materials


Comments
Join the conversation
-
This is definitely a one of a kind masterpiece! Thanks for sharing this technique!
-
This is stunning and so much better than so many post of people covering furniture with flat paint. You added depth and detail to a very plain piece. WELL DONE


Frequently asked questions
Have a question about this project?
This piece turned out beautiful. I wish you had pictures of the sides. You said you used the crock roller and mud on the body, I assume you mean the sides?
Ran thru your directions (which I thought were just perfect with one exclusion-sorry there were so many questions that were obvious to me) the last part where you used a brown glaze before the final poly....what type of brown glaze did you use? Thinking not antiquing wax because the poly would not stick that well.
Like everyone else, I am truly inspired by your piece and am in the process of re-working an old Craig’s List number that was the perfect candidate for the project!
After much searching I found the stencil based on your previous mention that it might be found at Stencil Ease. It is and was in the Oak Lane Studio collection. It is called Ikat Wall Stencil.
I was able to imitate your general design (which is brilliant by the way). I had to modify my design layout based on a few size considerations and was oddly restricted by raised trim on the piece. But it’s coming along beautifully!
Having said that I had a few quick questions:
How long after painting that first coat of paint do you wait before you wait wet-distress the raised stencil? Do you wait until it’s completely dry first?
Do you put a coat of poly on BEFORE you add the brown glaze? I’ve seen it recommended on the manufacturer sites but if you just did the paint on/rub off on the newly dried paint without the poly, I’m wondering if you have to wait longer for the paint to cure before rolling on and rubbing off the glaze.
The manufacturers make a big deal about waiting 12 hours to add a final poly topcoat. How long did you wait before you did your final topcoat (ie: after the glaze)?
You have an amazing eye and great spatial relational sensibilities which are admired and imitated by others but are clearly a singular gift for you!
Michelle B.