


Awesome Wall Light Idea Using Cord Decor!!

11 Materials
$50
3 Days
Advanced
Here's an awesome way to add a wall light and use the cord as wall decoration.
I did a similar project on my ceiling you can check out here:
http://www.hometalk.com/diy/kitchen-dining/kitchen-lighting/cord-decor-lighting--19803036
**Please use extreme caution when working with electricity!
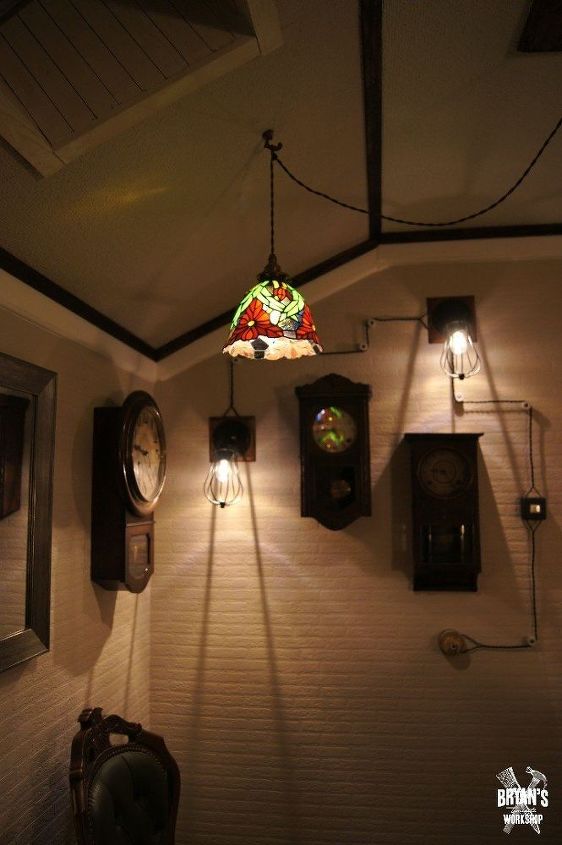
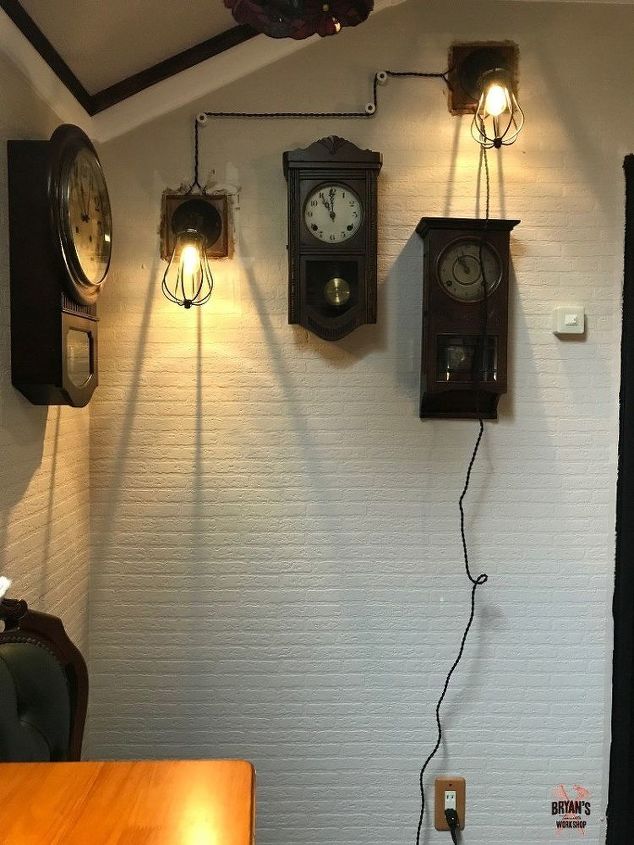
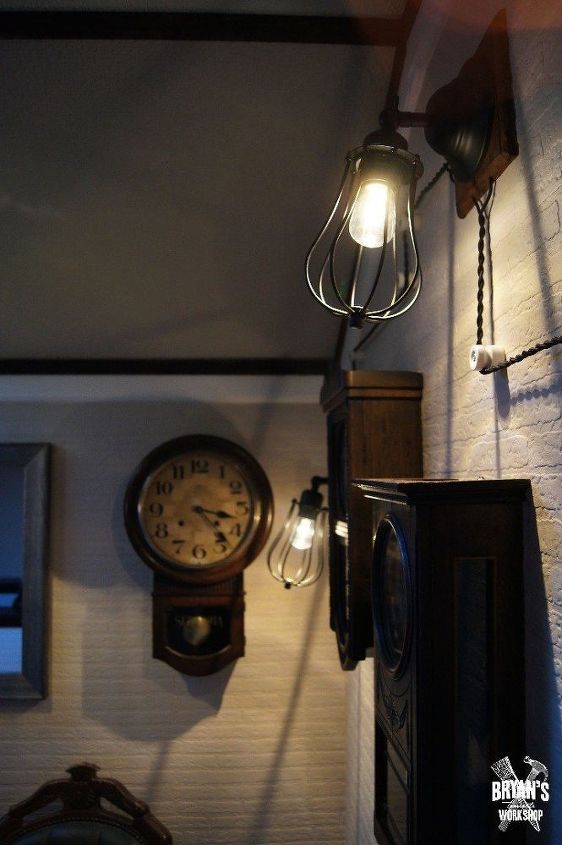
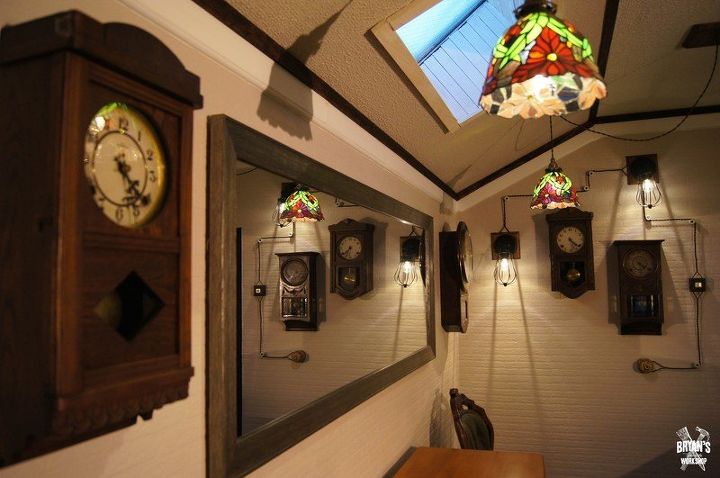
Here are the finished wall lights and cord decor.
We have two cats (Wednesday and Pugsley) that LOVE playing with EVERYTHING! To keep the cord safe and my cats alive; I fed the cord into the wall at a height they can't reach and have it coming out just above an outlet covered by a cool little box I found at the dollar store.
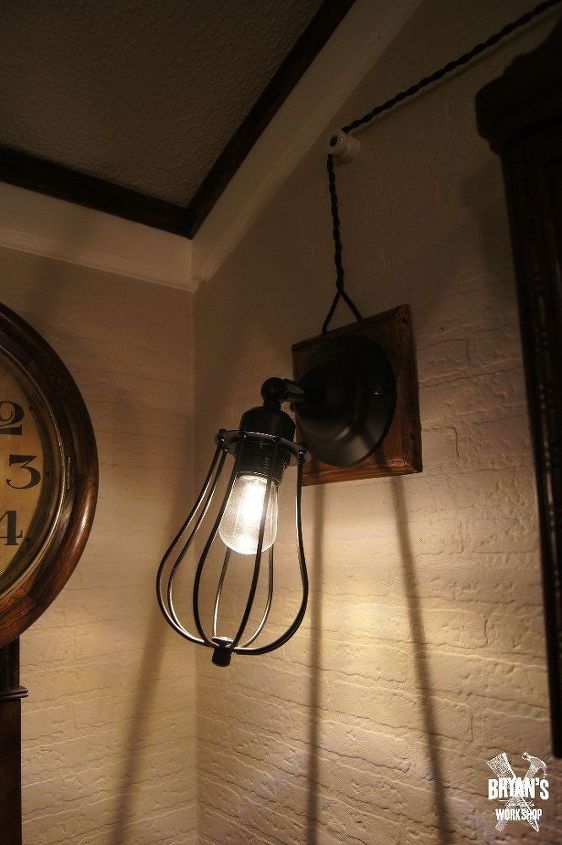
I found an awesome antique wire insulator (pictured above) I used as decoration to feed the cord into the wall. The insulator is only decoration and serves no other purpose.
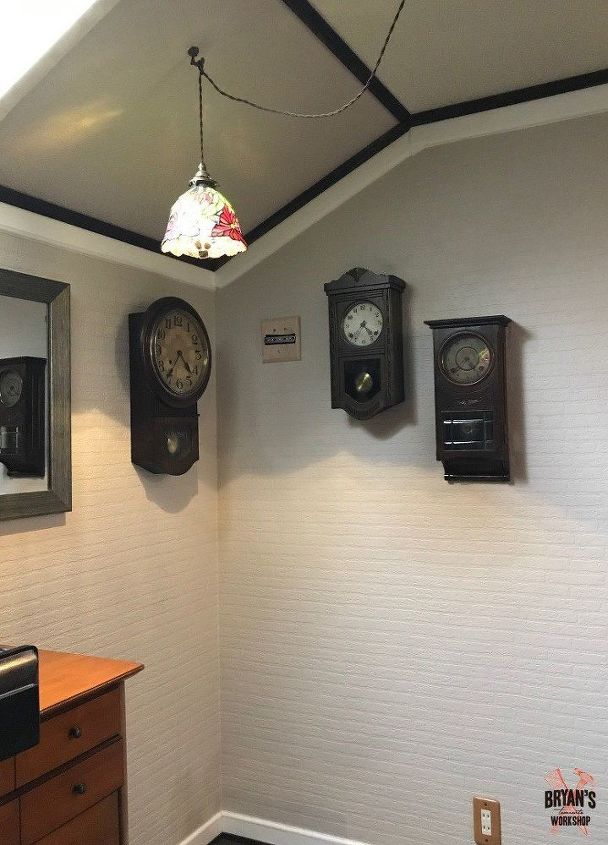
Here is the wall before.
My lovely wife Mariko and I collect antique clocks and this projects was our way of making our clock hall look even better.
First, I bought two light pendants. You can find these on Amazon, at a home center or lighting store.
You can even buy pendant lights already on a plug if you don't want to do any wiring. IKEA is an awesome place for lights like these.
I made two wood bases to secure my cage light pendants on. I have two and they are parallel wired together with a light switch.
*Again, use caution with electricity.
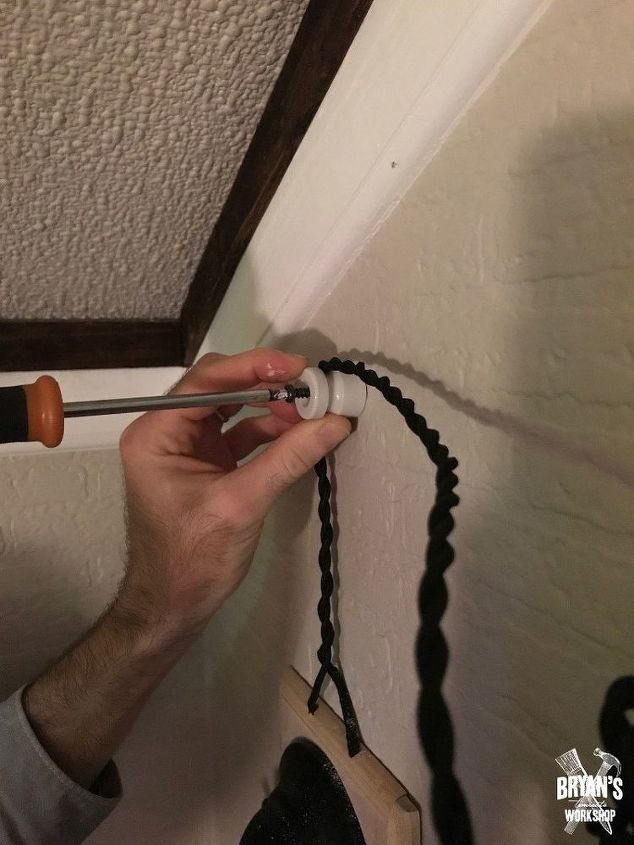
I used black twisted cord for this project. You can find it on Amazon and in a variety of colors. It's called vintage electrical wire too.
I used ceramic knobs to hold and secure my cord into place. I live in Japan and these are available at the local home center. You can find them in your area with a quick Google search or EBay check.
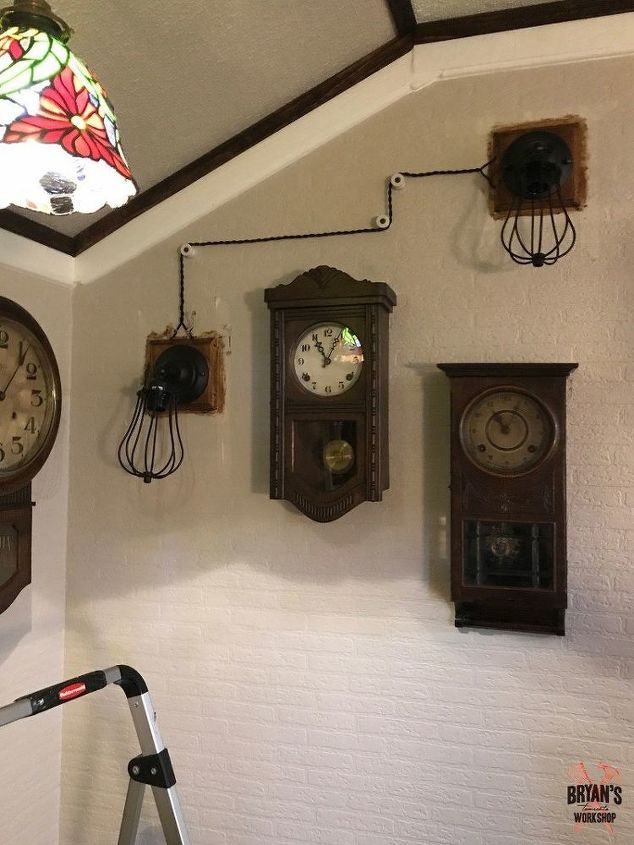
Progress!
I used Jacobean Briwax on the light bases.
Here are the lights without the switch.
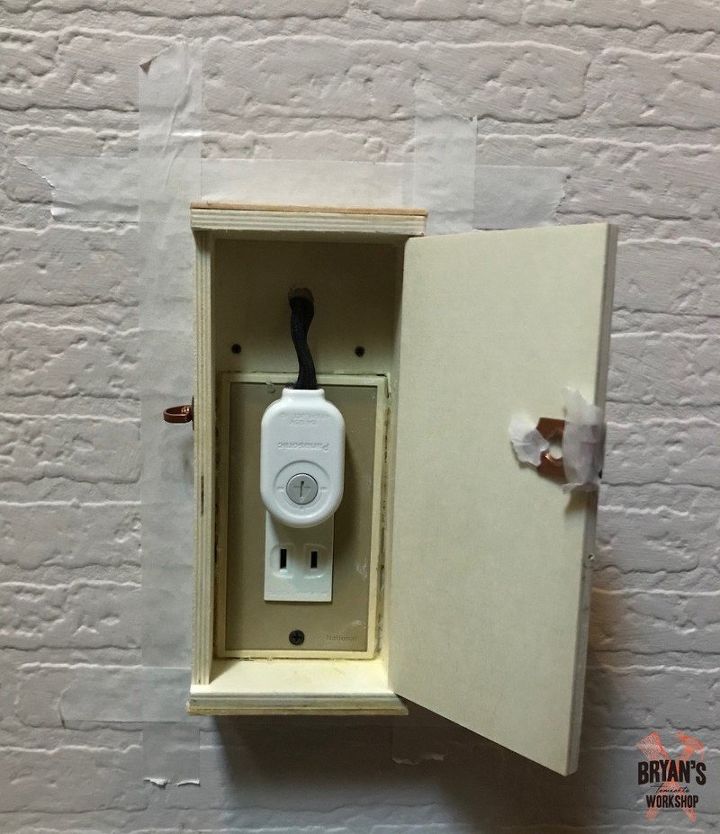
I found this wooden gift box at The Daiso and it fits perfectly over the outlet.
*Use caution making holes in your wall ESPECIALLY around outlets.
I turned off the electricity and took the outlet out with out disconnecting it. I fed the cord into the hole I made above (in the middle of the wall) and pulled it through a hole I made directly above the outlet cover.

I put a small door latch on the box and then painted and waxed it.
The finished lights! There is the antique ceramic insulator. The cord is going into the side of it.
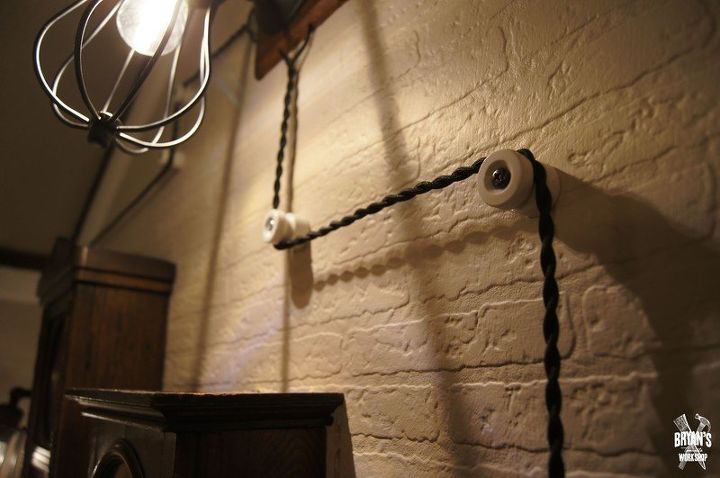
The cord and knobs!
These are nifty looking LED light bulbs.
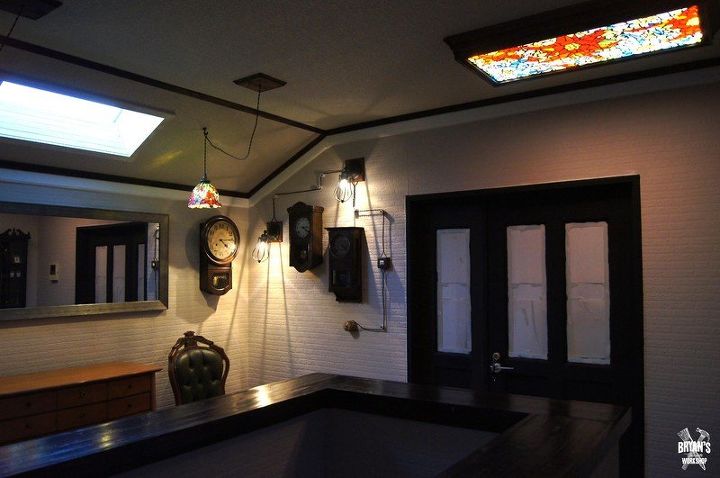
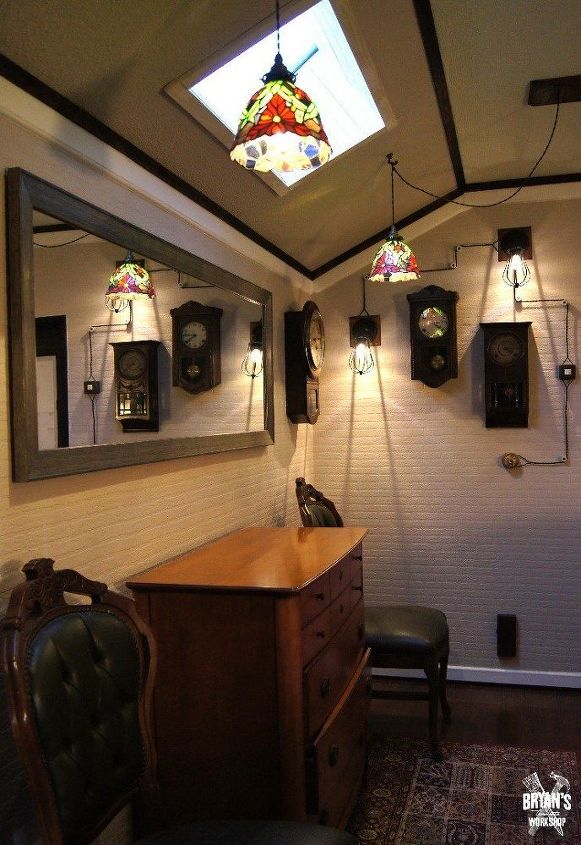
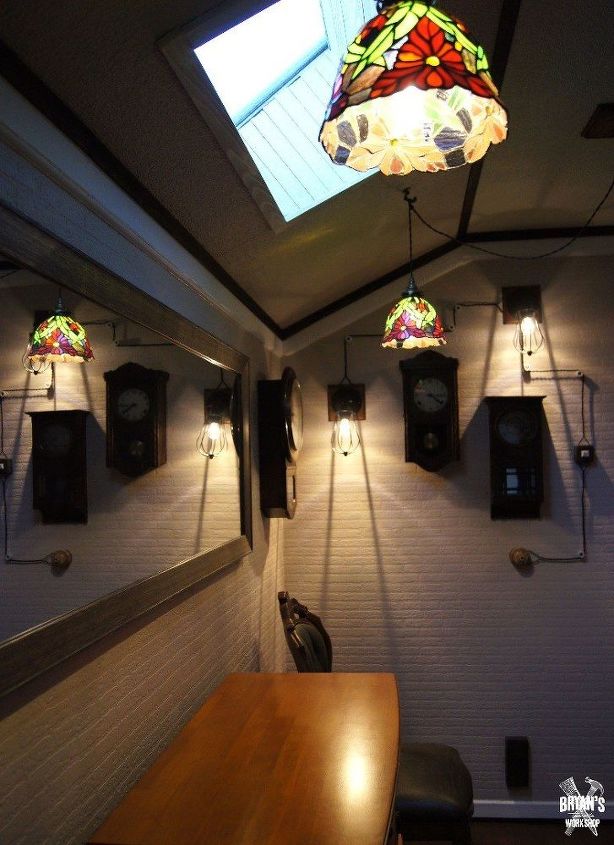
I also made that stained glass light on the ceiling. You can check it out here:
http://www.hometalk.com/diy/decorate/rooms/how-to-make-a-mosaic-glass-light-29126435
Those doors lead to the master bedroom. I'm in the middle of a large bedroom remodel, so the windows are covered with painters tape and paper. 

We will take that mirror off the wall to hang more of our clocks. 
Stop by Bryan's Workshop on Facebook for more DIY ideas. We're also on Instagram! 
Comments
Join the conversation
3 of 33 comments
-
WOW love it!
-
Very creative!!


Frequently asked questions
Have a question about this project?
Did you use what came with the pendant light to mount it to the ceiling? .
My husband and I have also collected antique clocks. Is that a schoolhouse or bank clock on the wall by the mirror?