


What You Need To Do Before Painting Exterior
If you love this project, grab your quick start DIY guide & subscribe to our blog!
If you’re thinking about painting your exterior, these things to do before you paint the exterior of your home is a must-read! Being prepared for a big DIY project like this is essential.
GATHER YOUR TOOLS.
If you’re wondering what the heck kind of supplies you need for painting your exterior, don’t worry. I have you covered with a whole post of 15 things you need when painting your exterior.
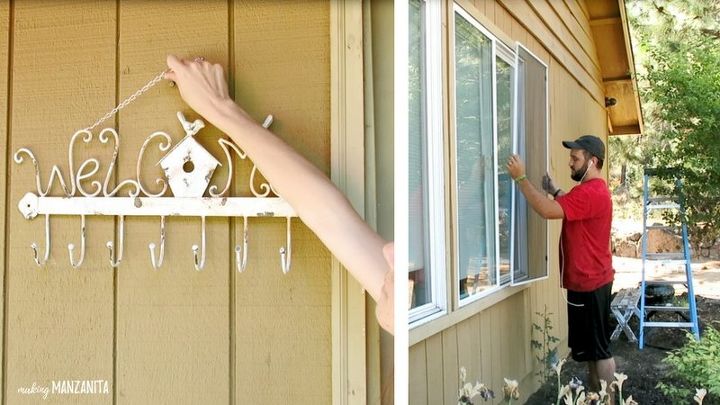
REMOVE ANYTHING ATTACHED TO YOUR EXTERIOR.
Window screens, shutters, exterior lights, welcome signs, address signs, those cute little planter boxes under your window….remove it all! You want to be sure that you paint behind all of these in case you (or someone that buys your house later) wants to remove these. It’s also great to be able to clean behind these things…which brings us to our next thing to do before you paint the exterior of your home.
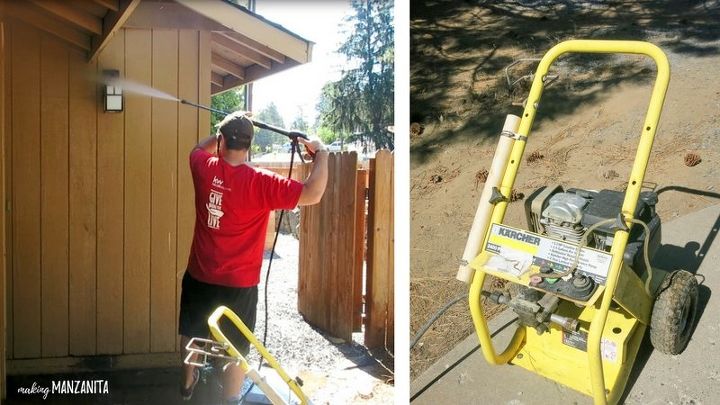
PRESSURE WASH THE ENTIRE HOUSE.
If you’re thinking….”I don’t have a pressure washer, can’t I just use my hose?”…well, you can. But, it’s not going to work that well. And getting a clean surface to paint on is very important for the paint adhesion. You can rent a pressure washer from Home Depot or ask around and see if you have any of your friends and family have one you could borrow for the weekend.
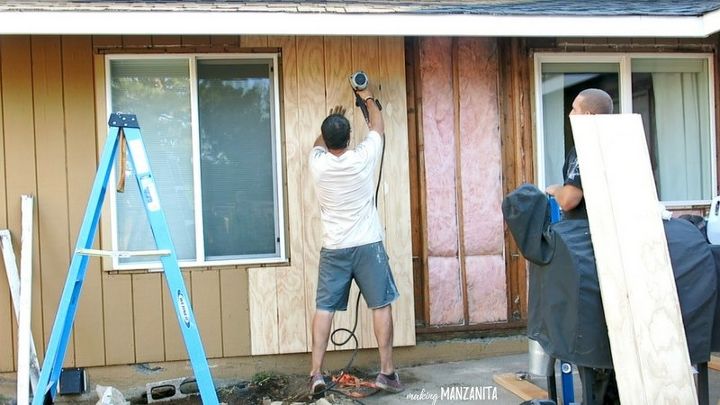
REPLACE ANY ROTTED SIDING OR FASCIA BOARDS.
If your home has been sitting and crying for some new paint for a while, chances are that you may have some warped siding or even rotted fascia boards. Take the extra time to replace all of that now, instead of just cover it up with paint. You’ll be happy when your paint job lasts A LOT longer on the fresh surfaces versus rotted wood that’s not going to last much longer.
As you can see from the photo above, we had a big chunk of siding that needed to be replaced on the backside of our house.
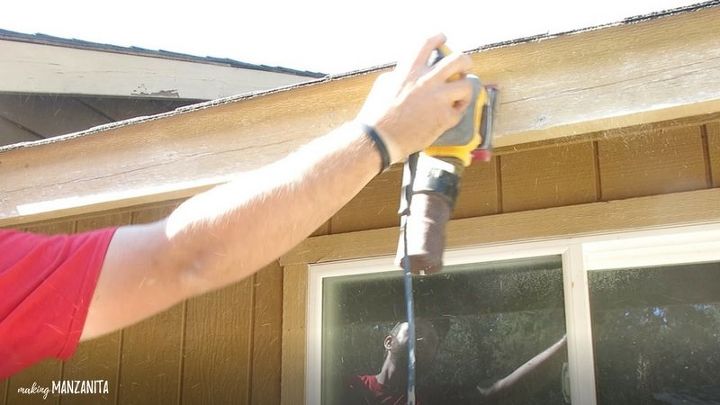
SAND OR SCRAPE CHIPPED PAINT SURFACES.
There may be areas of your exterior surface that has chipped paint. I know ours had plenty. Be sure to sand these down with a hand sander, so you are painting on a smooth surface. Alternatively, you could scrape this chipped paint as well.
Be sure to check out this full blog post (linked below) with 4 more things you need to do before painting your exterior!
Resources for this project:
See all materials


![Faking It [brick Paver Edition]](https://cdn-fastly.hometalk.com/media/2017/04/05/3806609/faking-it-brick-paver-edition-animals-appliance-repair-appliances.jpg?size=350x220)


Frequently asked questions
Have a question about this project?
Can you use your ideas about painting your house on vinyl siding?