


UpCycle a Vintage Door

by
Gary Hardman
10 Materials
$50
2 Days
Medium
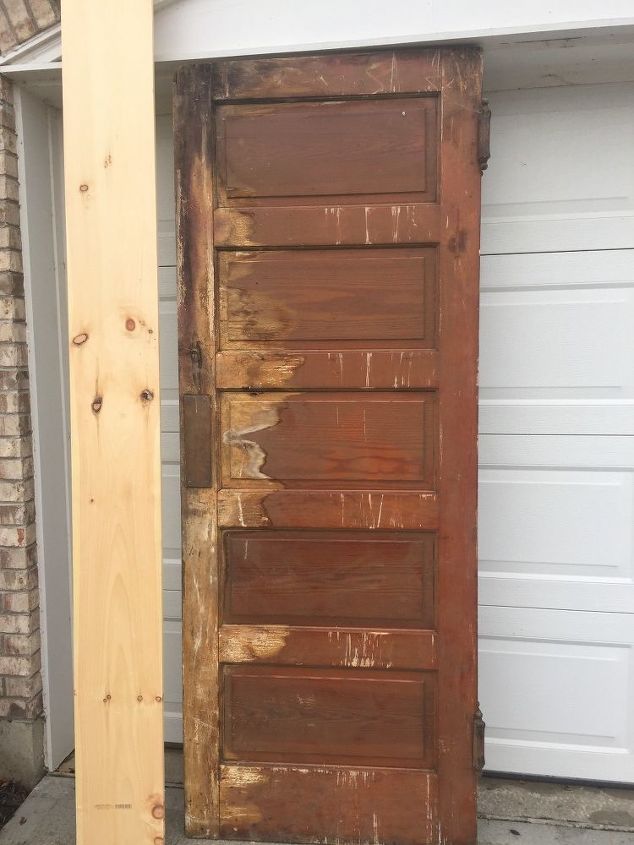
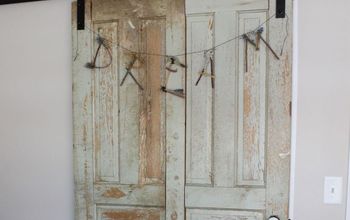
So it’s the last minutes of a sale. Two huge swinging doors. Price $100. I offer $20 for both and $5 for them to deliver. They accept. Priceless....and from this, beautiful Leaning Shelves.
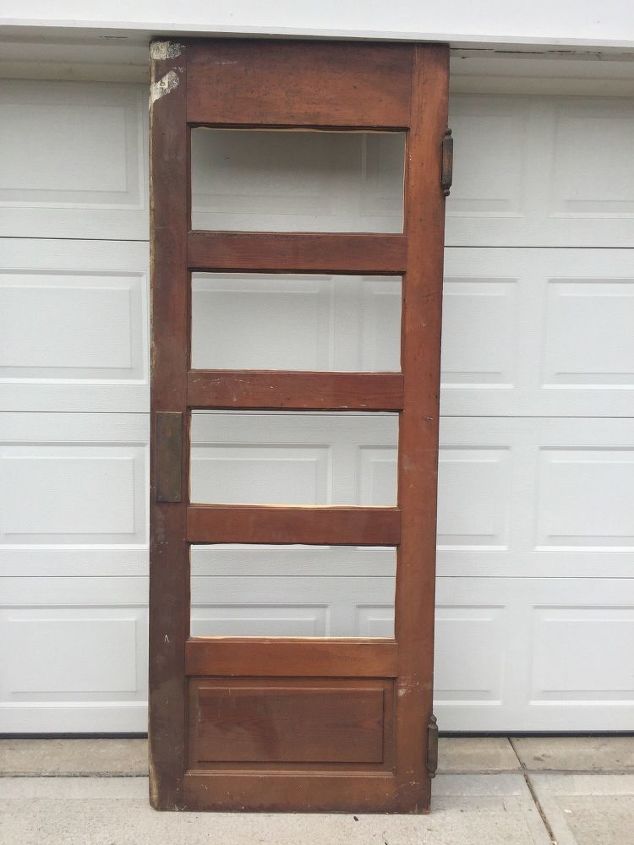
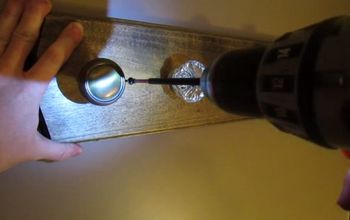
The first step is to cut out the top four rectangles of the door. I drilled holes in each corner to make it easier to make the cuts on each side.

The second step I cut out each section using a skill saw and sanded each cut smooth.
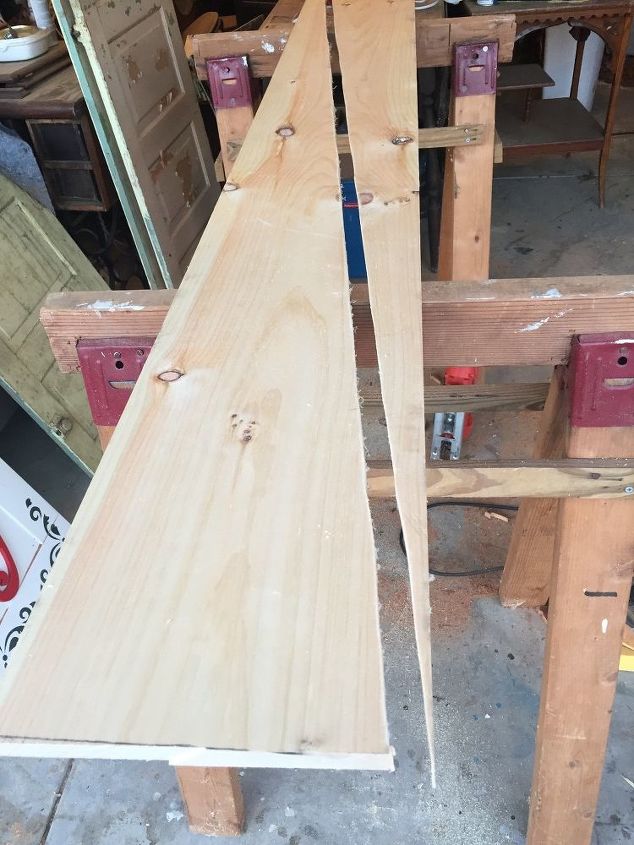
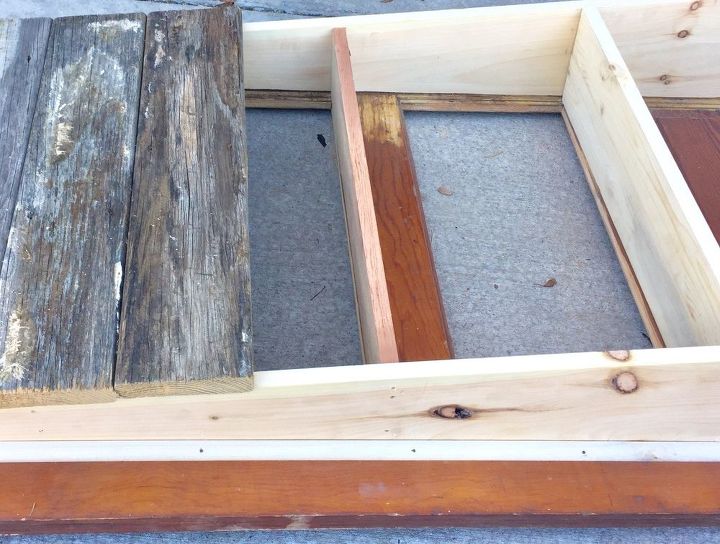
Step three. I cut a one by ten board the same height as the door. I made a diagonal mark from one corner of the board to the other to form the back triangular supports of the shelf. I cut it with a skill saw.
- Step four. I attached the cut sides of the supports to the back of the door lining the board up with the inside edge of the shelves. I used 2.5 inch Trim Head Screws. These screws are great because they sink tightly into the wood and cannot be seen. It leaves a small hole that can be easily filled with putty.
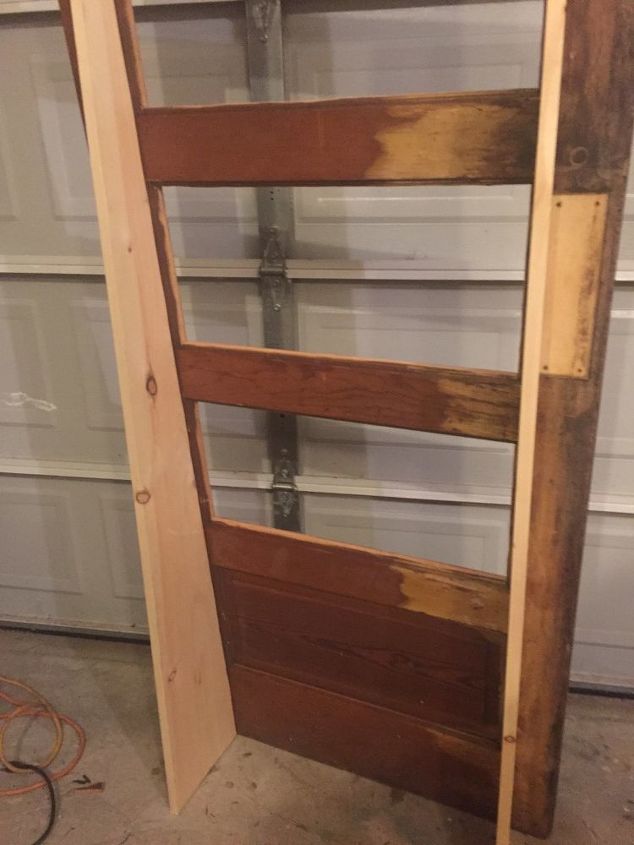
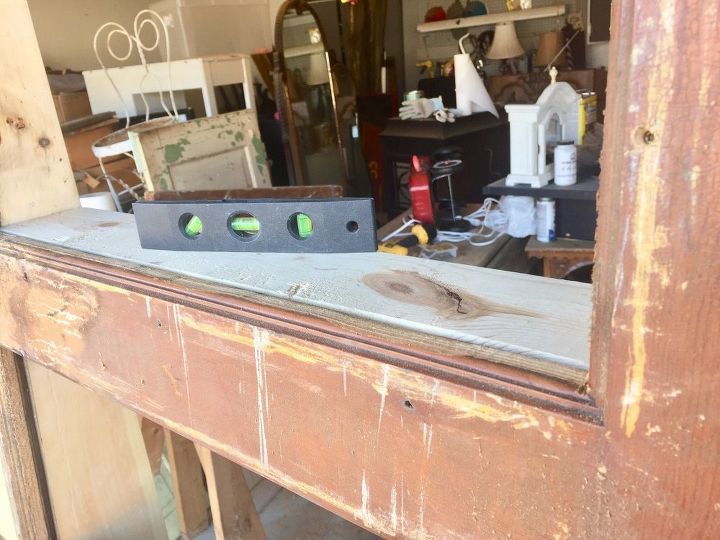
Step five. I measure the width and depth of each shelf and cut pieces to fit. Try to align it with the lip of the shelf and the back of the door. Level it with a level and attach it to the side supports. Repeat with the other three shelves.
Step six. I cut wood pieces ( 1x8” deck planking) the width of the back and applied it with 2.5 inch screws. I choose to apply the boards horizontally but you can also apply them vertically. I also added one inch quarter round trim along the back supports to give it a more finished look.
Step seven. I sanded the door to prepare it for paint. I filled the holes and imperfections on the door with Durham’s Water Putty. I then stained the inside of the shelves with Min-Wax Provencial Stain. I then painted the door and the back of the piece with Clark and Kensington “Gateway Arch“ paint which is a gray/brown color. I used a coat of Min-Wax Clear Finishing Wax as a sealer for the paint. I shined the brass push plate for the door and reattached it. I left the big clunky hinges on to give it an industrial look.
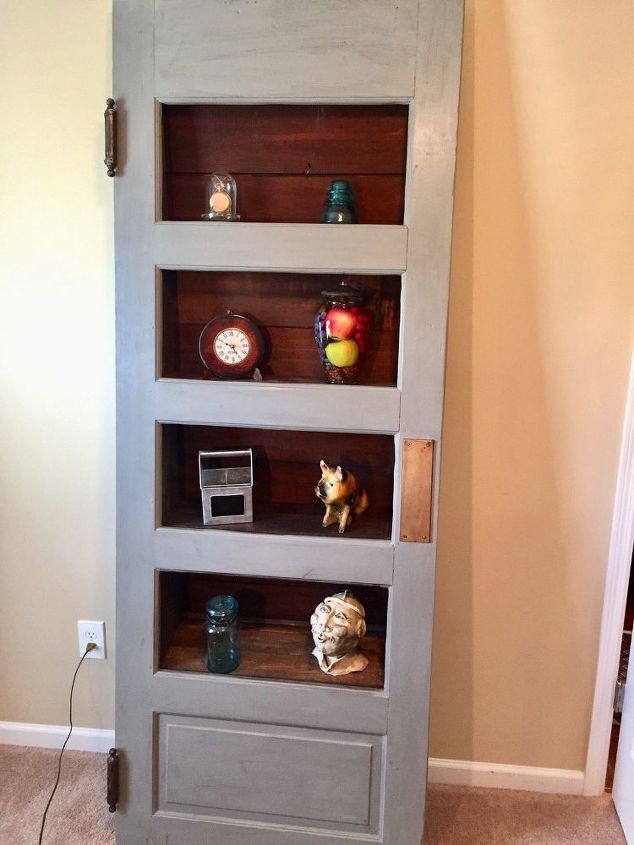

The finished project is a fun and functional piece that works in any room. For Hometalkers who want to build this, it is not as complex as you may think. I used basic hand and power tools and you don’t need to be a master carpenter. If you find this kind of door, snatch it up. I will be glad to answer your questions about this project.

Here is the finished brother to the first one.


Any price and availability information displayed on [relevant Amazon Site(s), as applicable] at the time of purchase will apply to the purchase of this product.
Hometalk may collect a small share of sales from the links on this page.More info
Comments
Join the conversation
4 of 103 comments
-
WOW!
-
Creative and oh so lovely


Frequently asked questions
Have a question about this project?
I live in the country on and a secluded lot and I Kino want to turn that into a hide a door like make shelves out of it you know just make it look like a shelf how can I do that with the
This was my lucky day, reading this post this morning.
i came across 2 very vintage doors that a local photographer used for backdrops. She said they came from A New Orleans plantation house, and probably 150+ years old. They’ve been in my garage- aggravating my husband with those old ratty doors!! Yes I have that kind of husband, little imagination and thinks the $100 I paid for them was ludicrous.
I have been wracking my brain how to use them. My house is decorated modern farmhouse- so you see my attraction. I first wanted to lean them somehow in the center of my dining room bay window, like as a sort of window covering. I researched every internet site for inspiration, then changed my mind. My house is small and these doors are BIG. Then, and I’m sure this has happened to all of you, I KNEW EXACTLY WHERE TO PUT THEM. We have an electric fireplace in a nice console, and a 60” TV sitting on it. It has always felt an unfinished and lonely area. I’ve had large wall units before, but that would have been too much for a really small family room. I need shelves desperately, and I visualized these doors on each side. There are several missing window panes, and that’s where the shelf idea came to mind. But I had no idea how to make this work... until I read your post. Voila!!! I want to preserve as much as I can of the natural distressing of their age, (you know, the ratty condition) and showcase the beautiful hardware- including 2 amazing crystal doorknobs. I can refinish the fireplace console to match the doors. (Sorry this long, but I’m super excited).
BUT What should I do with the area over the TV? The doors are 10’ High at least. Without looking like a wall unit, how can I meld this?
I wish I could post a picture of the doors, but they’re buried, covered of course, in my garage. I’ll show a picture of the fireplace and TV.
You all are so brilliant and creative, please, please give me your thoughts. Thanks
Hi Gary, could you possible explain step four in more detail (apologies I’m quite novice). Just wondering how exactly you attached the supports with the screws? Many thanks in advance :)