


Painting After Removing 3 Layers of Wallpaper

by
Fiddledd224
2 Materials
$70
8 Hours
Medium
We wanted to paint our bathroom but had severely damaged walls (gouges, dents and holes) after removing 3 layers of stubborn wall paper. We weren't sure painting was an option since the walls were so badly damaged.
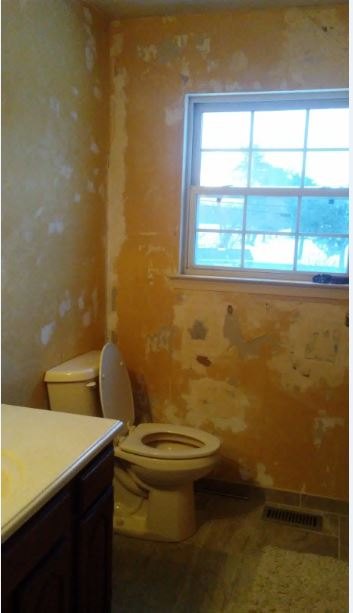
This is what our bathroom walls looked like after we started removing 3 stubborn layers of wallpaper. Some layers peeled right off, but the orange areas are the remains of the wallpaper backing that wouldn't budge. The gray areas are gouges from scraping and the white areas are holes that were spackled. What a HUGE mess! (I was seriously worried that painting this bathroom would be a waste of time and money).
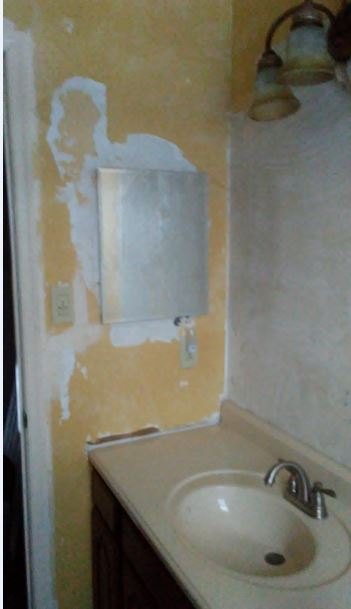
Here is another view of the damaged walls after the wallpaper was removed. Note how much of the wall paper backing is still remaining and how much spackling had to be done.
The first task was removing 3 layers of wallpaper and the stubborn backing.
Once the majority of the wallpaper was removed, we wiped the walls down with a mixture of hot water and liquid fabric softener - mixing one Cup of fabric softener to a gallon of hot water. We applied it with an old t-shirt and let it sit for 10 minutes---- the stubborn backing peeled right off!
Next, we spackled the holes using a spackle spreading tool and latex spackle, applied generously. We let the spackle dry well and then sanded as smoothly as possible using a sanding block or power sander. (Don't worry if the sanded areas aren't perfect- the textured paint will cover most imperfections!)
Next, we used the textured latex paint (containing sand) to hide any remaining damage to the drywall. The paint hid ALL of the imperfections and dried to a "high-end" finish. This paint turned a frog into a prince!
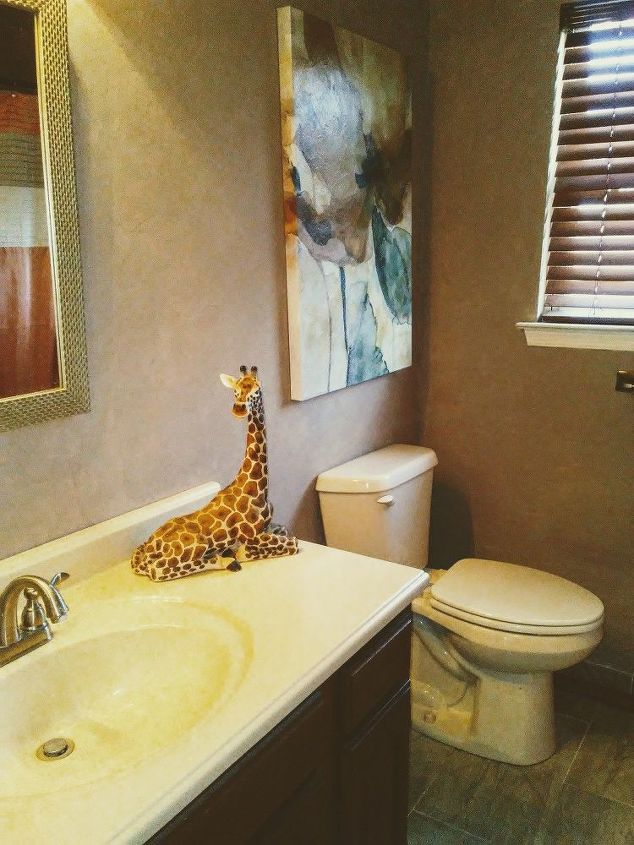
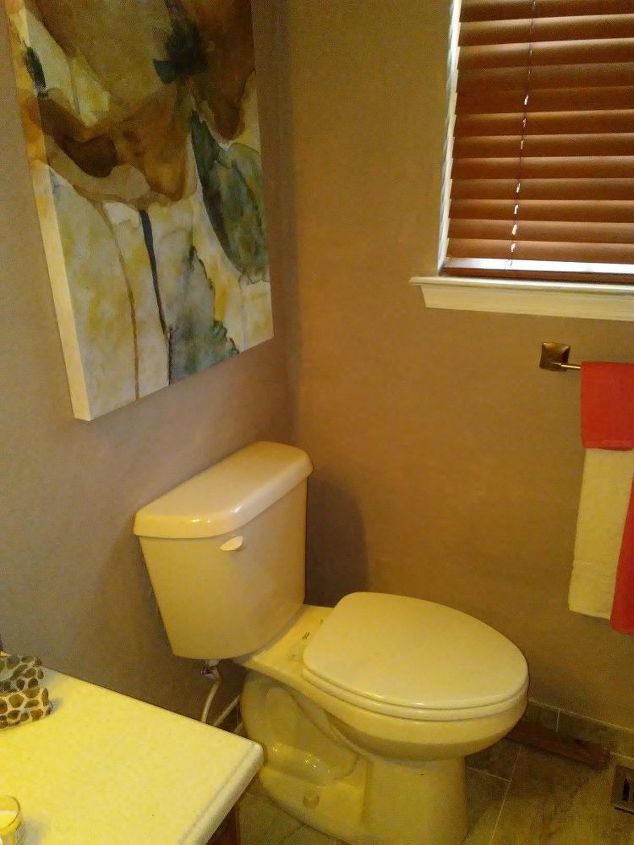
Here is the finished sink area. It looks like we installed all new drywall! The textured paint looked professionally painted and covered all of the imperfections from the wall paper removal.
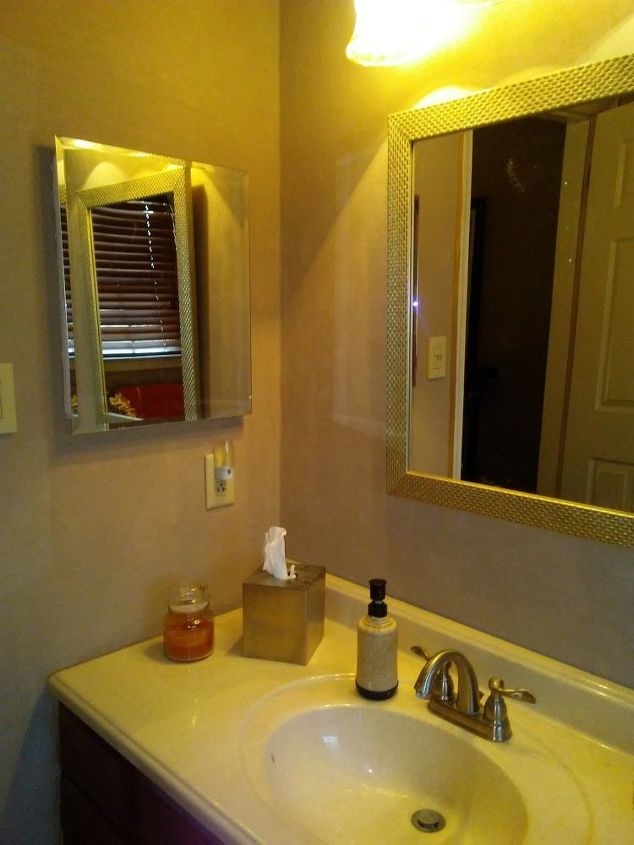
Another view of the finished bathroom after the paint dried. The color "Sandstone" was a great neutral shade that looked like stucco. It is a rich and durable finish that everyone compliments when they use this bathroom!
Comments
Join the conversation
2 of 10 comments
-
Thanks!!! This paint really turned a sow's ear into a silk purse haha! I bought it at Lowes.... it is made by Valspar. This is the only textured paint that I know of.... I tried the other stores and they didn't have it. I have since used this paint on all 3 bathrooms since the finish is so high-end and I have gotten so many compliments on it! It is a little pricier than the normal paint, but is WELL WORTH IT!
-
By the way your walls good look.


Frequently asked questions
Have a question about this project?
So. after painting the walls, I can put up my wallpaper???