


The Black and White Upcycle Project…Plus
7 Materials
$20
6 Hours
Medium
I had a very successful thrifting haul a while back. The items I picked up were random. Nothing was the same and there was nothing that appeared to be related but they all spoke to me and of course when thrifting, the most important thing is price and in the case of all of these items, the price was right. Take a look and see how I managed to pull these items together to make beautiful upcycles.
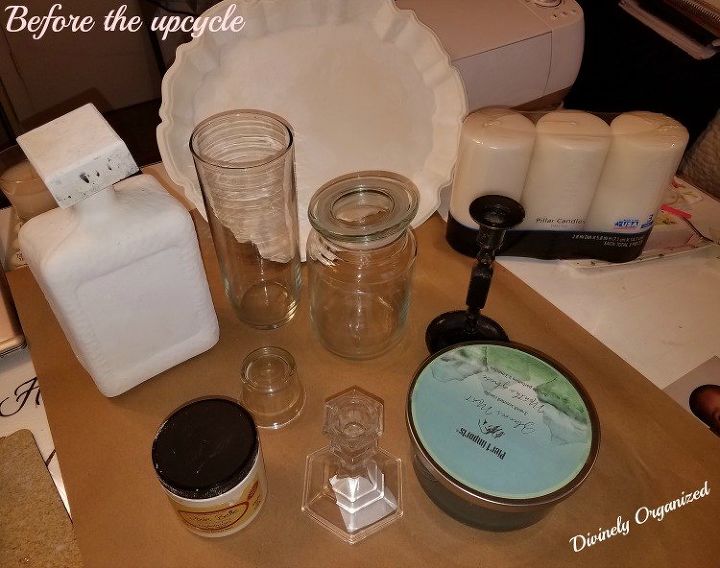
As you can see, there are quite a few thrifted items. However, the candles were not thrifted and the liquor bottle that is already painted in the photo was gifted to me by one of my friends. Also, at the posting of this article, I found another one of the short jars and although they are not completely black and white, they were a part of this thrifting haul and therefore became a part of the “Black and White Project”.
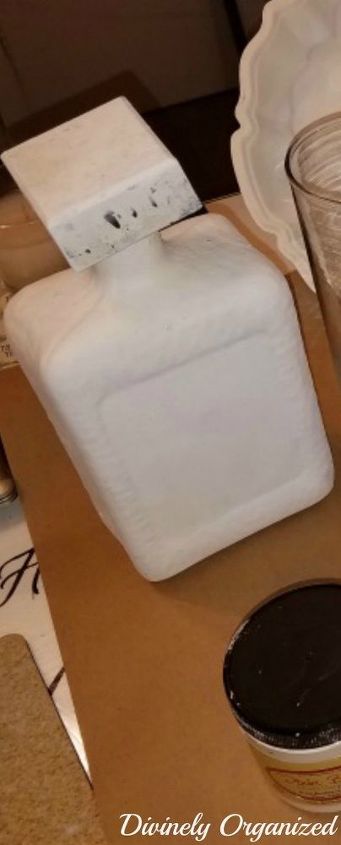
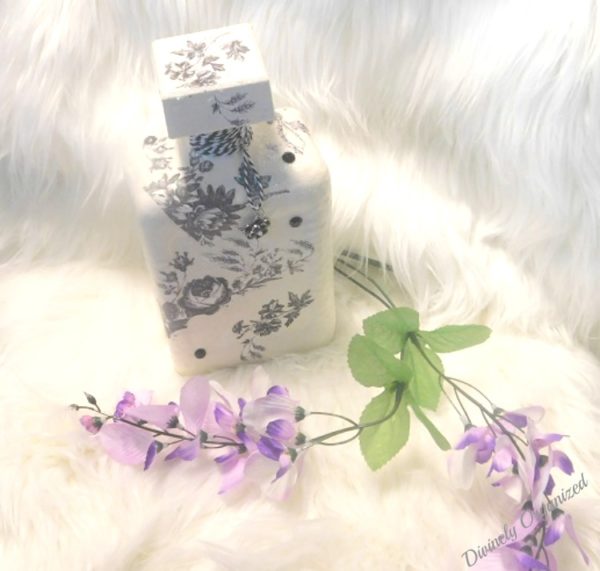
The Liquor Bottle:
This bottle was a gift from my friend. They collect them for me. It was a see-through bottle and I had painted the first coat of paint before I decided to make this a blog/vlog project. The first step was to add what ended up being two coats of chalk paint. For all these pieces I used Dixie Belle, Buttercream as the basecoat.
1. Paint bottle with 2 coats of chalk paint
2. Find a paper you love
3. Cut out the designs from the paper you’ve chosen
4. After the paint is completely dry add first layer of Mod Podge
5. Apply paper cut outs
6. Smooth paper using plastic wrap
7. Add second and third coats of Mod Podge (allow to dry between coats)
8. Finish with Satin finish clear coat
9. Wrap twine around the top of the bottle and add a trinket for style (optional)

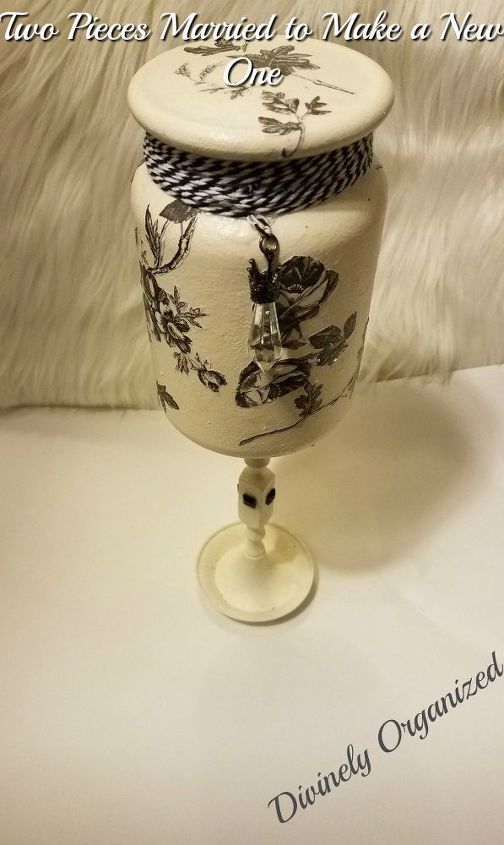
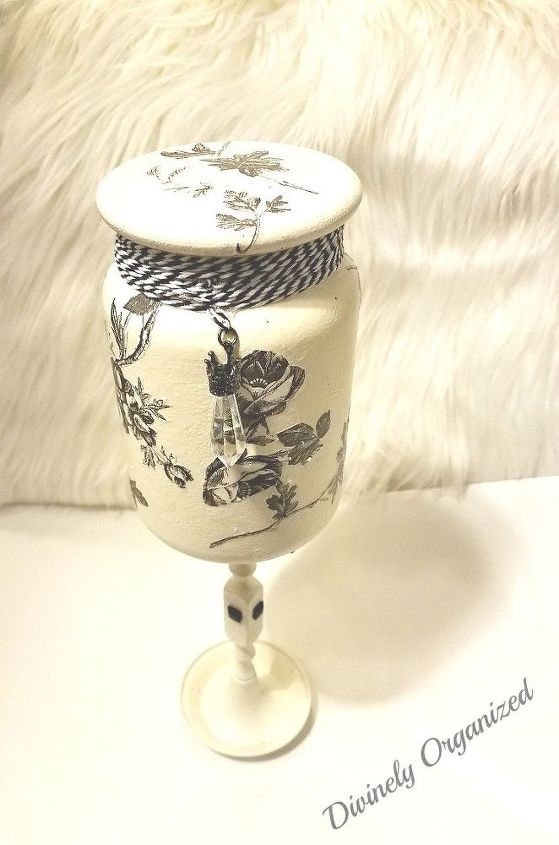
Jar and Candle Holder Combined:
The next upcycle was the jar and the long-stemmed candlestick. I married the two pieces.
1. Add two coats of chalk paint to both pieces
2. Glue the candlestick to the bottom of the jar (I used E6000) be sure to center
3. I like to allow the glue to dry overnight for best permanent adhesion results (this is optional)
4. After the paint is completely dry add first layer of Mod Podge
5. Smooth paper using plastic wrap
6. Apply paper cut outs
7. Add second and third coats of Mod Podge (allow to dry between coats)
8. Coat with Satin finish clear coat
9. Wrap twine around the top of the bottle and add a trinket for style (optional

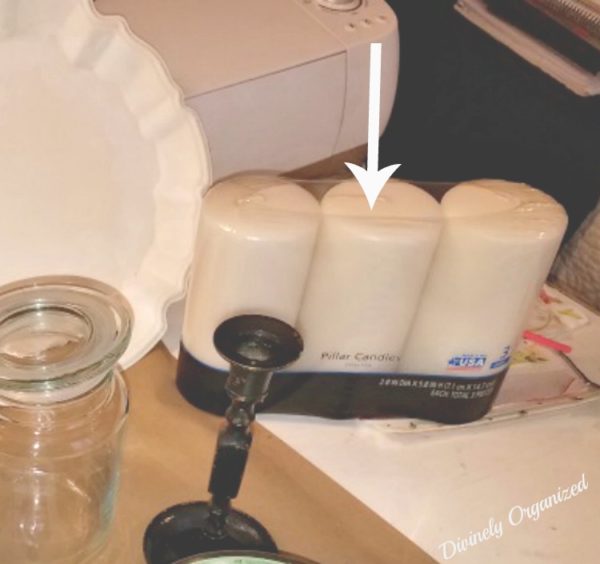
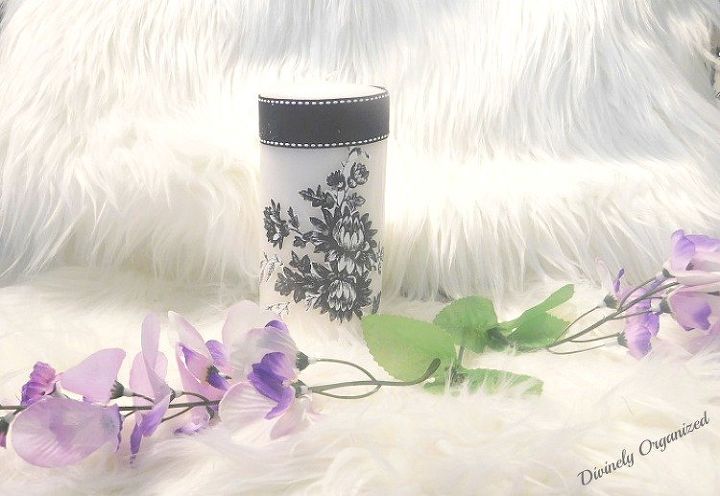
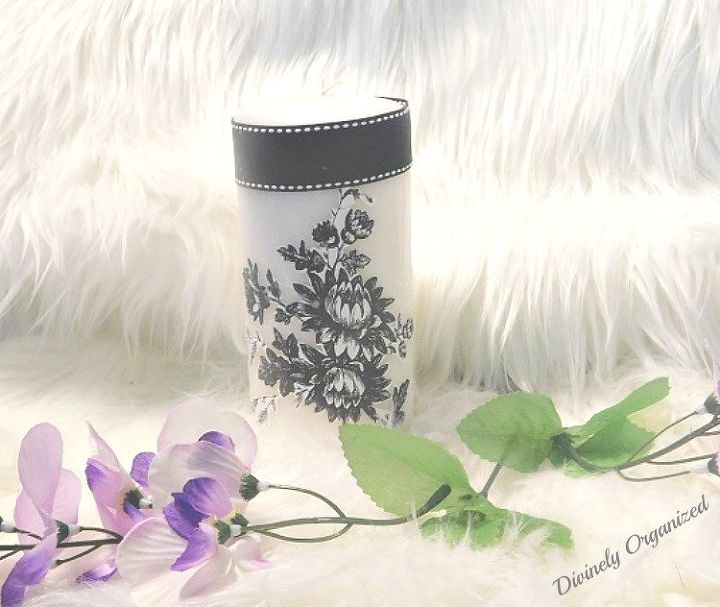
The Candle:
I cannot call the project with the candle an upcycle because they were new, but I can call the project a DIY. The candle is a plain, unscented, white candle. Boring…right? Not for long!
1. You will need a sheet of parchment paper, hairdryer, the shape(s) you want to add and ribbon for this project
2. Choose a picture you like from either a napkin or thin shelf or scrapbooking paper
3. If the paper is too thick it will make it more difficult to melt the paper into the wax
4. Cut out the shapes of the paper you want to add
5. Place your paper/napkin where you would like it on the candle and place your parchment paper tightly over the chosen design
6. Turn your blow dryer to medium or high heat
7. Run the dryer over the design you’ve chosen making sure to hold the parchment paper tight
8. Do not touch the parchment with the hairdryer but do get very close
9. Once the wax begins to come up over the design, you can remove the parchment paper to check your project
10. If not completely embedded, continue to heat until the design becomes a part of the candle
11. Always remember to re-wrap the parchment paper over the design while heating (this will not only protect the design but your fingers as well – The wax gets really hot)
12. I also added a piece of ribbon that I hot glued to the to top of the candle (optional) to finish it off

Get the steps to upcycle the tray and the bonus item on my site. This was a fun project and an inexpensive one as well.
Do you upcycle and put unmatched items together to create a totally new piece with a totally different function?
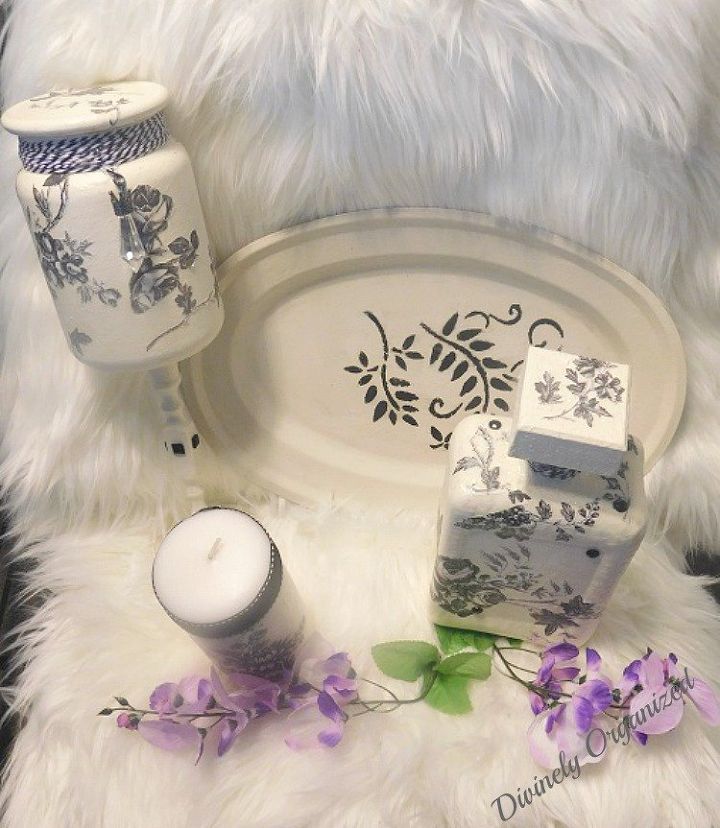
These are all of the black and white items. What is missing is the bonus and you are going to love the bonus. They may actually be my favorites.
Note: The time for this project includes glue and paint drying times.
Resources for this project:
See all materials


Any price and availability information displayed on [relevant Amazon Site(s), as applicable] at the time of purchase will apply to the purchase of this product.
Hometalk may collect a small share of sales from the links on this page.More info

Want more details about this and other DIY projects? Check out my blog post!


Frequently asked questions
Have a question about this project?