


DIY...Spring Felt Banner
6 Materials
$15
2 Hours
Medium
Create a soft and delicate look by dyeing white felt using inks.
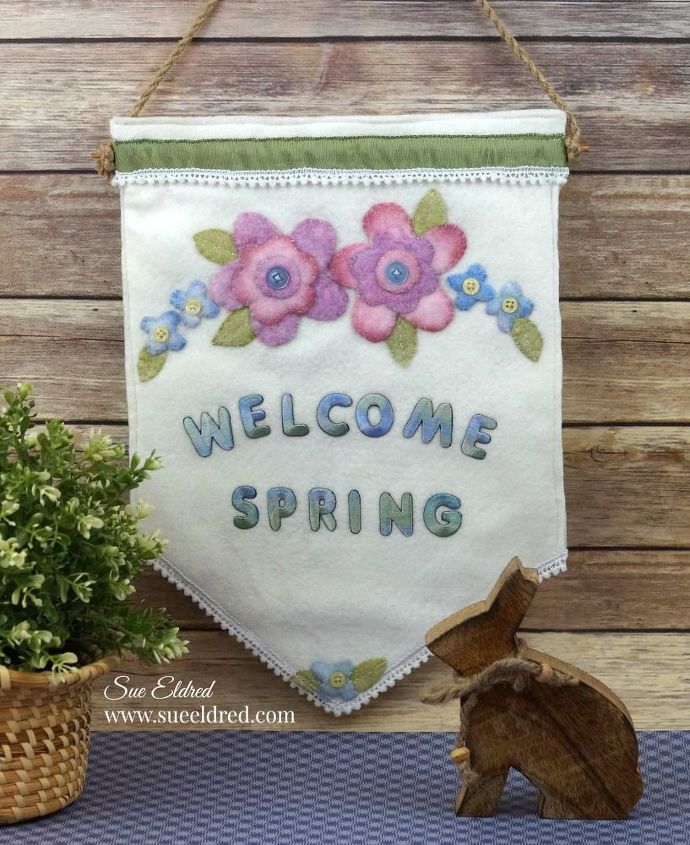
My Welcome Spring Banner turned into a real labor of love.
I began this project with the idea of using fun pink and purple hand cut
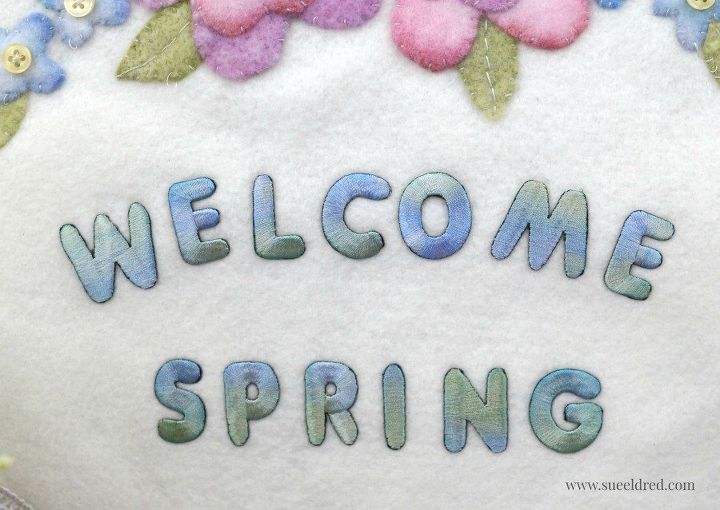
felt flowers. After I cut all the flowers and leaves, I decided to dye the embroidered letters. The letters turned out so soft and delicate, I needed something softer for the flowers.
So…more flowers and more dyeing! (make sure to read all the instructions below.)
I could of kept things simple and glued all the flowers in place, but noooo…instead at the last minute I committed myself to stitching the entire thing.
Let me tell you…I’m not a stitcher! (But, I am pretty satisfied by the way they turned out.)
To make the Welcome Spring Banner you’ll need:
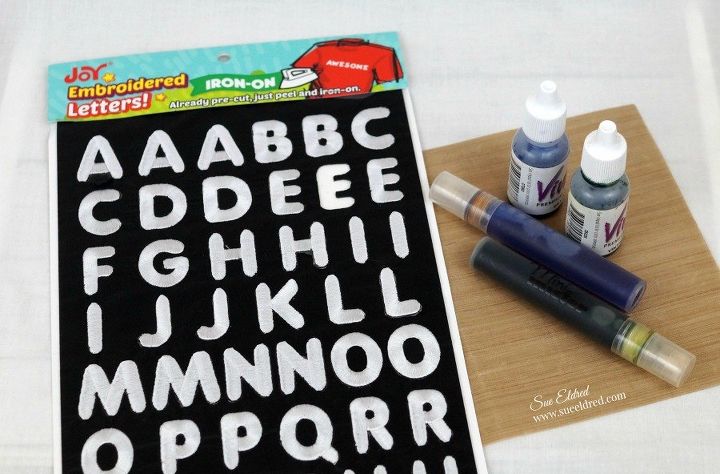
- Joy® iron-on embroidered letter sheet-white
- White Felt
- Dye Ink – blue, green, pink and lavender
- Mini Misters*
(two)
- Small Wood Dowel or Bamboo Skewer
- 18″ Jute
- Needle and thread
- Beacon Adhesives Felt Glue*
- Non Stick Craft Mat
- Buttons
- Trim


- Add several drops of dye ink to each misting bottle.
- Remove letters from backing sheet and place on a Non Stick Craft Mat or (wax paper).
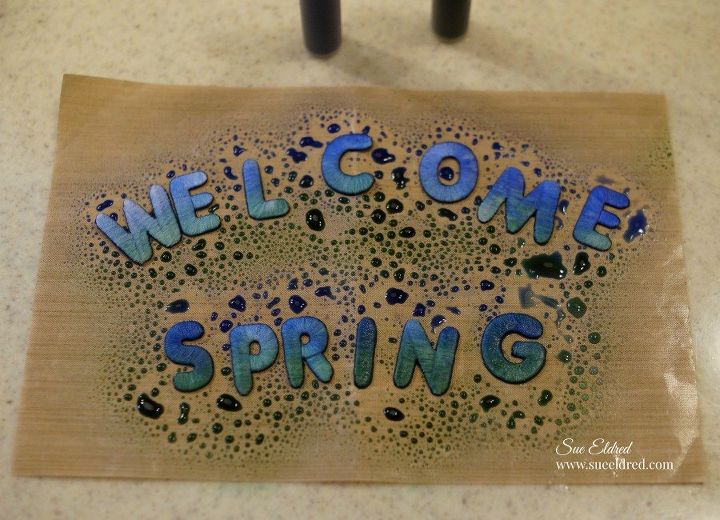
- Spritz the letters with both blue and green ink for a variegated look. Allow the ink to soak into the letters then dab away excess ink and water with a paper towel. Let dry.
Look at how beautiful the letters dried.
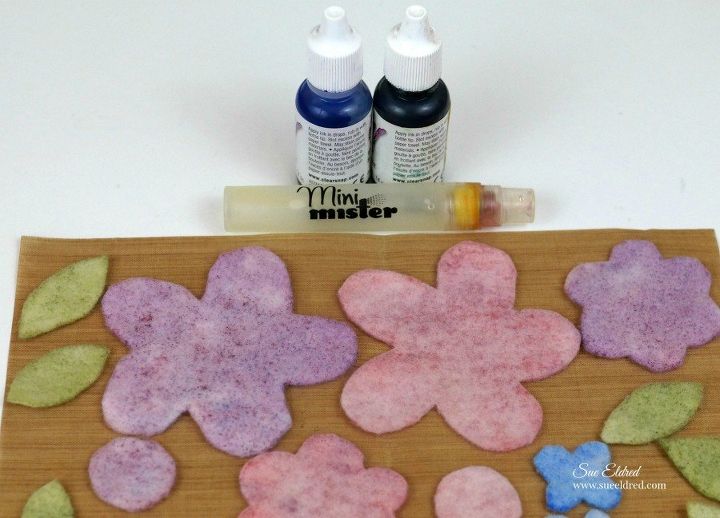
- Create simple, hand drawn flowers (small, medium and large), circle and leaf patterns onto plain white paper. Cut then trace around the patterns onto white felt. Cut out shapes.
- Spray the leaves green, set aside then spray the flowers and circles one color at a time. Allow them to dry overnight.
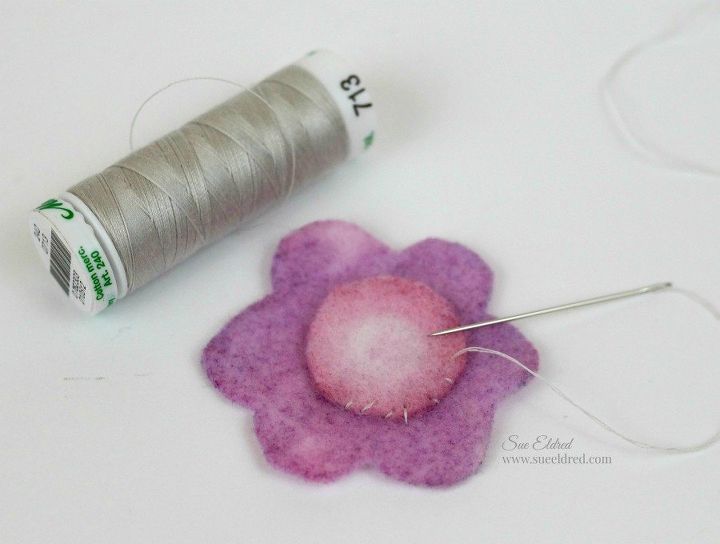
- Layer the circle, small flower and large flower on top of each other then stitch in place. Use a small amount of glue to hold the pieces in place while you stitch.
I love how the ink pooled at the edges of the pink flowers!
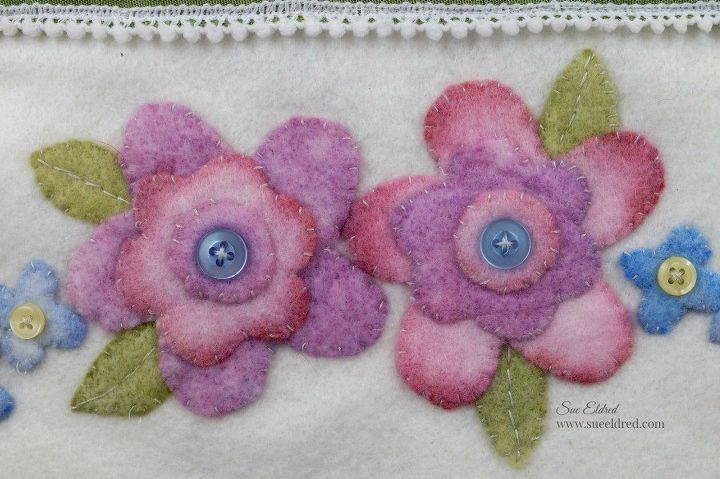
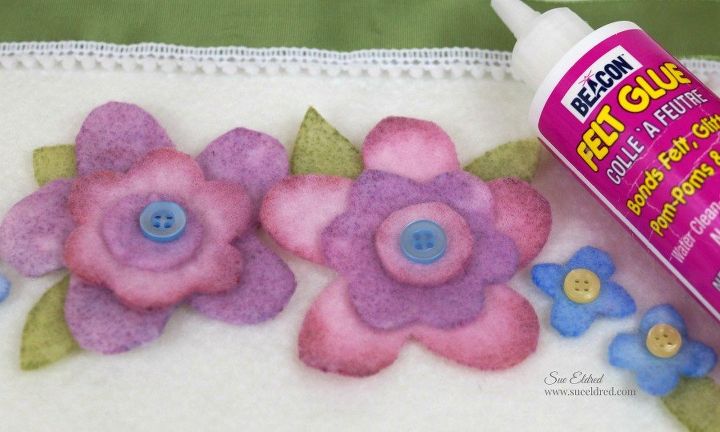
- To create the banner shape, fold a 10″ x 14″ piece of white felt in half lengthways. Cut diagonally across the bottom from the center fold to a point about 3″ up from the bottom corner on the outer edges. Stitch the flowers to the banner using a button at the center of each one. Tuck leaves underneath the outer edges of the flowers then stitch in place.
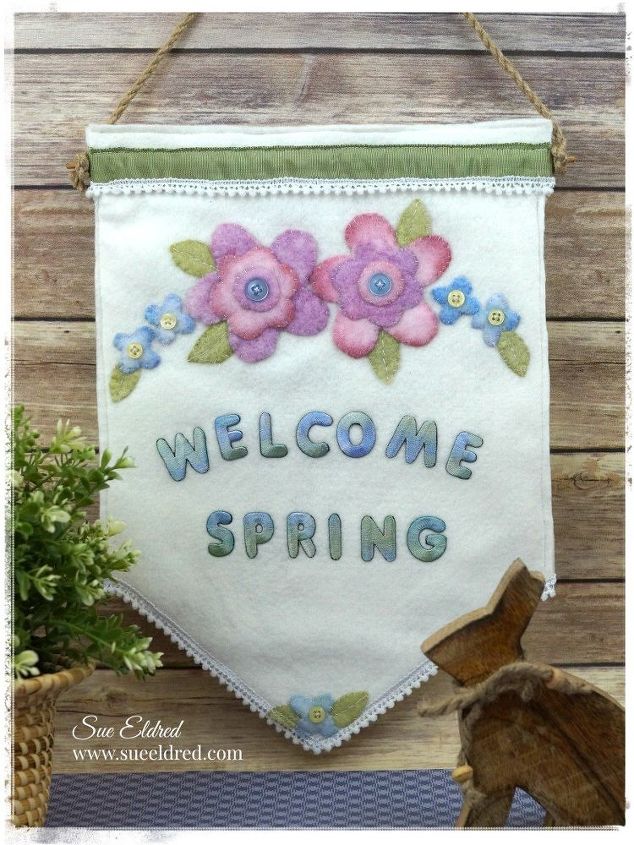
- Set iron to cotton setting, approx. 350°, or follow garment care label. Position letters with shiny side down on felt, then iron the letters in place as shown. Cover letters with a fine cloth. With firm pressure, iron cloth over the letters for 30 seconds. Turn banner over and iron the back of the letters for 30 seconds.
- Use a sewing machine to stitch the banner to backing material, then stitch trim in place across the top and around the bottom edge if desired.
- If you need to finish your banner in less time, glue the flowers, leaves and trim in place, then use a fusible interfacing to adhere the felt banner to a backing.


Any price and availability information displayed on [relevant Amazon Site(s), as applicable] at the time of purchase will apply to the purchase of this product.
Hometalk may collect a small share of sales from the links on this page.More info

Want more details about this and other DIY projects? Check out my blog post!


Frequently asked questions
Have a question about this project?