


Modern Planter Box

by
Glen
7 Materials
$60
1 Day
Medium
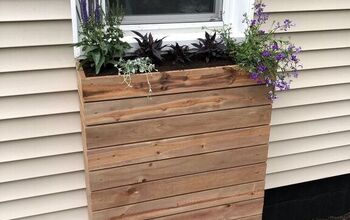
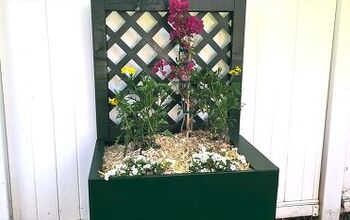
This Modern Planter Box is a simple design that can make a huge impact to any space. You can display this eye-catching planter both indoors or outdoors.
I chose to make an outdoor planter, so I used Cedar lumber due to its durability and insect repelling properties. I painted the planter white, but it will look great in any finish. Although they are not a long-term solution because they can get too big, I planted White African Iris and complemented them with some River Rock.
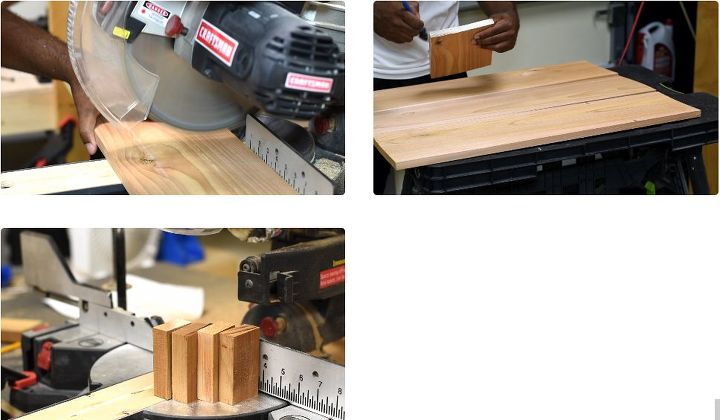
Step 1: Cutting the Wood
Try and buy the flattest lumber you can find; it will make the assembly easier. I used a table saw to cut my 1×8 Cedar lumber to the dimensions under the cut list tab. After all cutting, you should end with 9 pieces.
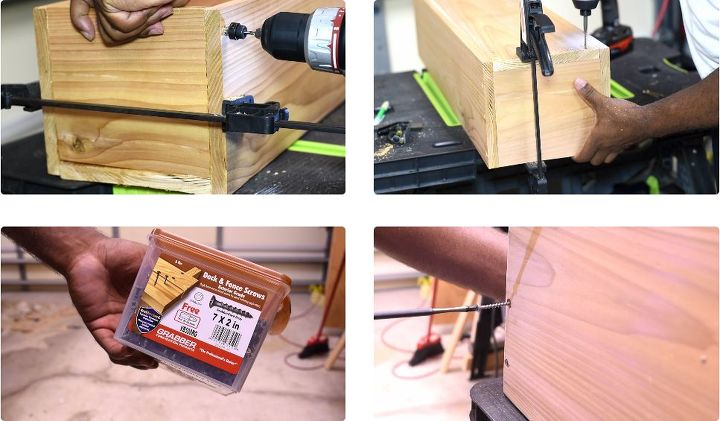
Step 2: Assembling
I used wood glue and screws to secure the pieces together. Use clamps to help hold the box together. Since water will be constantly added to your planter, I recommend using screws that are made for outside application, such as Wood Fence and Deck Screws.
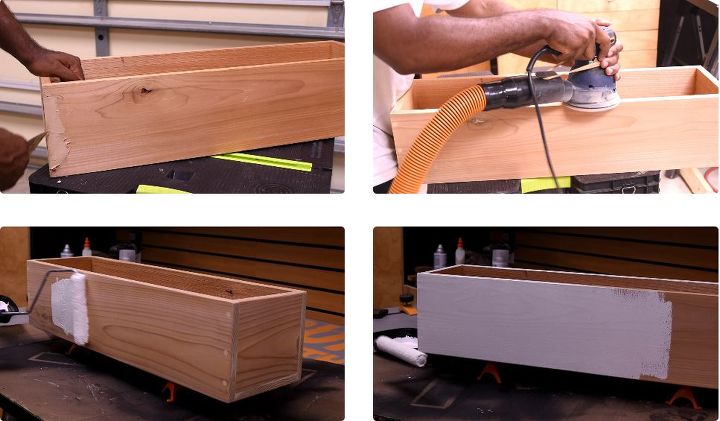
Step 3: Prepping and Finishing
I applied an interior/exterior wood filler to cover the screw heads. Then, I sanded the box down until smooth using 220 grit sand paper. Clean off any sawdust with a brush or rag before applying the finish. Then apply the paint of choice. I used “Pure white High Gloss Latex”

Step 4: Attaching the Feet
Use exterior wood glue to attach the feet to the planter, then screw them in place. I used a combination square to keep the feet the same distance away from the edge. Since I only used wood glue, masking tape was added to hold the feet in place while the weights aided in the adhesion process.
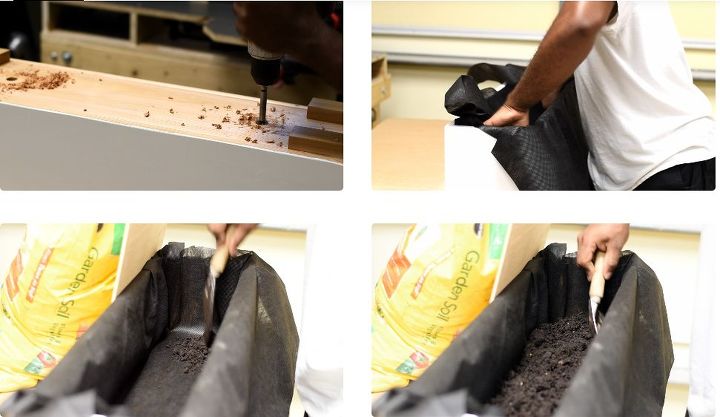
Step 5: Adding Soil
Drill out two holes at the bottom of the planter for drainage. I installed weed barrier, which will also prevent the soil from falling through the drain holes. I used garden soil but was later informed that potting soil is better for this application. Place enough soil to cover the entire bottom.
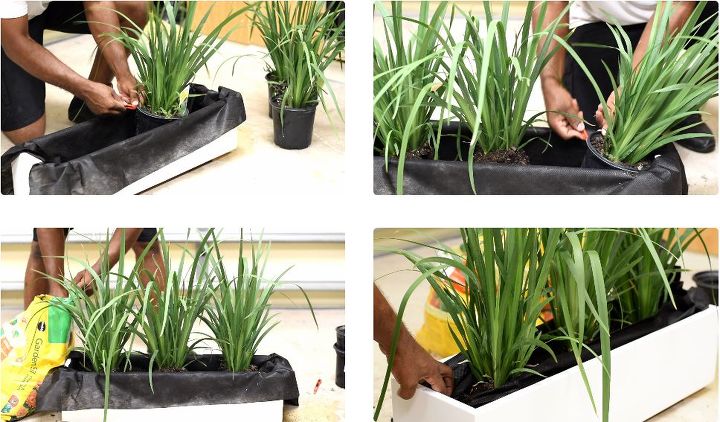
Step 6: Adding the Plants
Remove the plants from the pot and place in the box. Lightly loosen up the roots, taking special care to not loosen them too much. Fold the weed barrier over as shown in the last picture.
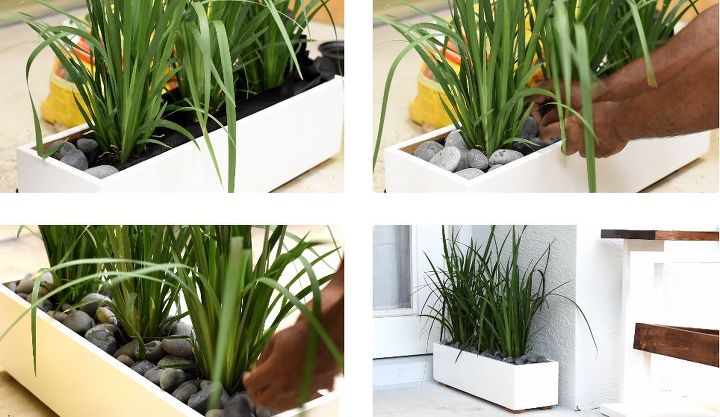
Step 7: Adding Rocks
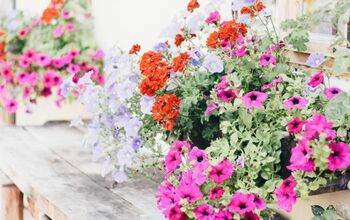
Place the river rocks on the of the weed barrier. Use the rocks to hide the soil and the weed barrier. Now add water and you are done!
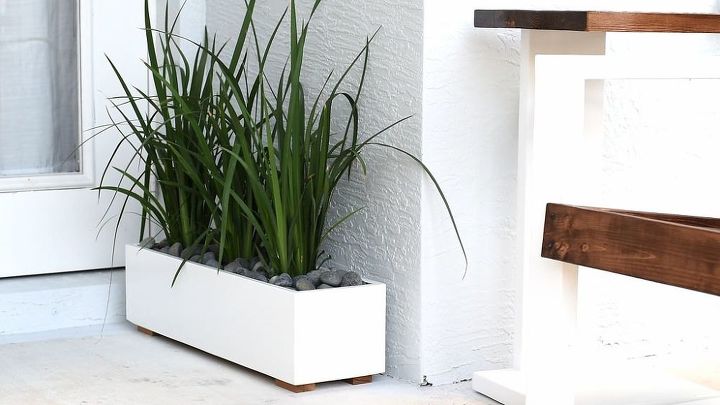
When adding plants either indoors or outdoors, you cannot go wrong with this Modern Planter Box. It is pleasing to the eye and can accommodate a wide range of plants or flowers. My recommendation would be to top off the finished product with some nice accent rocks to set off the whole look of your planter.
{
"id": "5081264",
"alt": "",
"title": "",
"video_link": "https://www.youtube.com/embed/9Irdq6sG5tw",
"youtube_video_id": "9Irdq6sG5tw"
}
{
"width": 634,
"height": 357,
"showRelated": true
}
Check out my Social site
Instagram www.instagram.com/diycreators2015/
Facebook www.facebook.com/diycreators
Youtube: https://youtu.be/9Irdq6sG5tw
Visit: https://diycreators.com/ for future projects.
Comments
Join the conversation
2 comments
-
Thanks for the video. Love your work.
-
GREAT! I LOVE THIS & THANK YOU FOR SHARING!


Frequently asked questions
Have a question about this project?