


DIY Fall Ribbon Wreath in Neutral Colors

by
Emily Counts
6 Materials
$18
1 Hour
Easy
If you love this project, be sure to download my Home Project Planner for help planning your next DIY or organizing project!
Looking for a pretty yet easy DIY fall wreath idea? I have just the project for you! This DIY fall ribbon wreath is super easy to make with limited time and a limited budget.
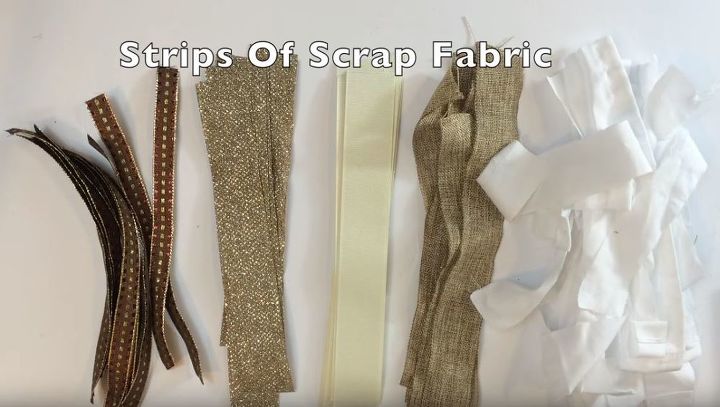
First, cut the ribbon into 8-inch long pieces. For my wreath, I used approximately 4 spools of ribbon. The total amount you use will vary, so I recommend using up about half of each roll of ribbon type and see how far that gets you before cutting more.
Note: Using a mix of ribbons gives your wreath texture and dimension, so choose ribbons with varying colors and looks.
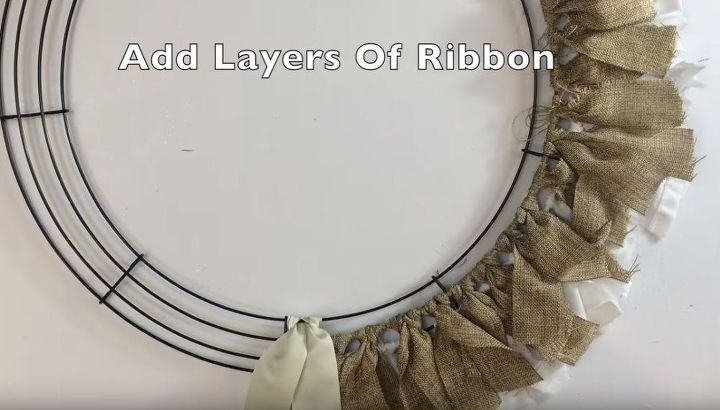
TIE RIBBON TO WIRE WREATH FRAME
Starting with the outside edge of your wreath frame, tie the white fabric (or white ribbon) onto the wire. To tie it, fold the ribbon in half and loop the loose ends through the folded end to create a knot.
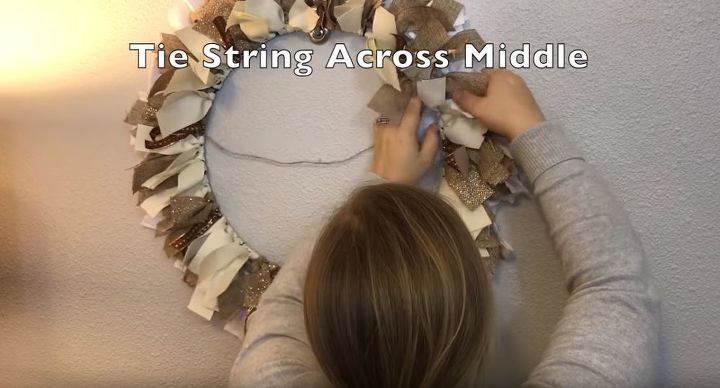
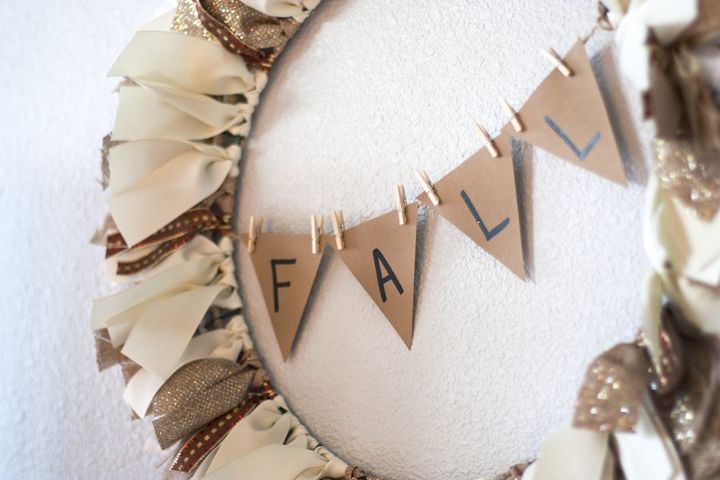
ADD A PENNANT BANNER
Tie a string across the wreath. It’s placed a bit above center on each side and I left it a little loose to create that slight swoop.
And here it is hung up above the end table next to our couch.
I love the combination of burlap and creams with the subtle sparkle on this DIY fall ribbon wreath. Look at all that neutral, textured goodness. And the simple fall pennant banner is the cutest finishing touch!
To learn more about this project and see more pictures and details, visit the full blog post here.
Want more details about this and other DIY projects? Check out my blog post!


Frequently asked questions
Have a question about this project?