


DollarTree Witch Boot Into Victorian Boot Wall Display

7 Materials
$8
35 Minutes
Medium
Hello! I have learned now to place my photo in a collage for description purpose and how I make things. Hometalk only allows a limited amount and now I bunch them together.
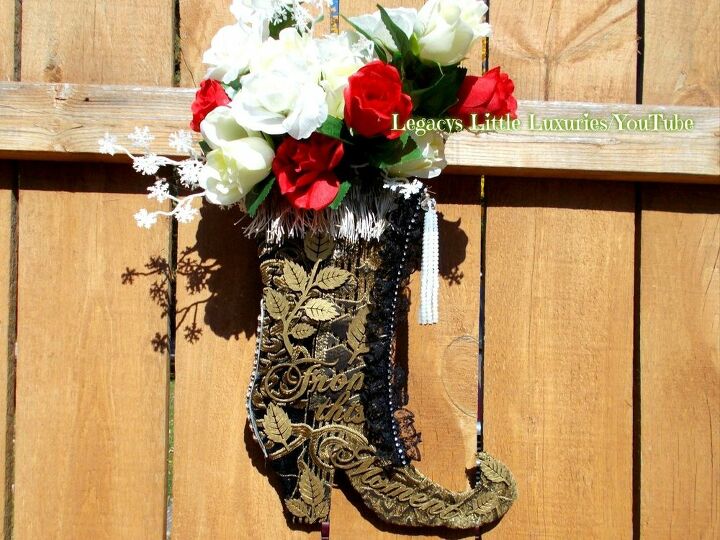
Today, I created an upcycle project from the $1 witch boot I purchased from DollarTree. Actually, this is my third upcycled project with this boot. This display has a pouch in the back, and I can change out the florals during holidays and seasonal changes.
Here is my idea and how I make this cute upcycle. Great gift idea.
Made by Miss Jones, Bay City, MI
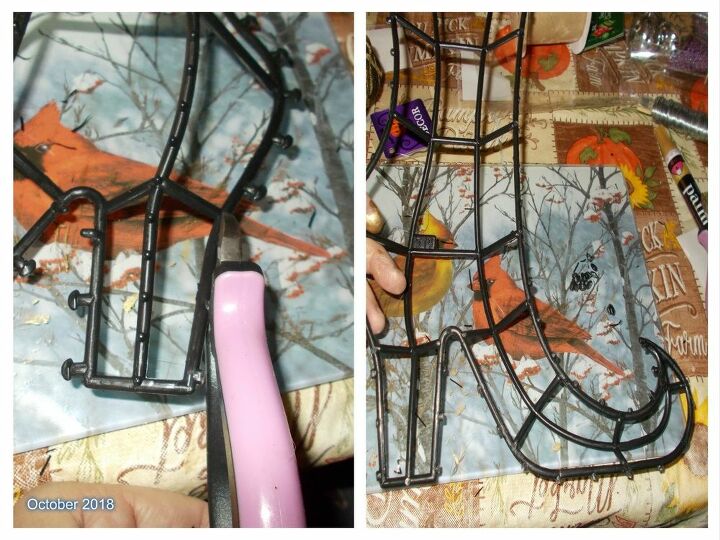
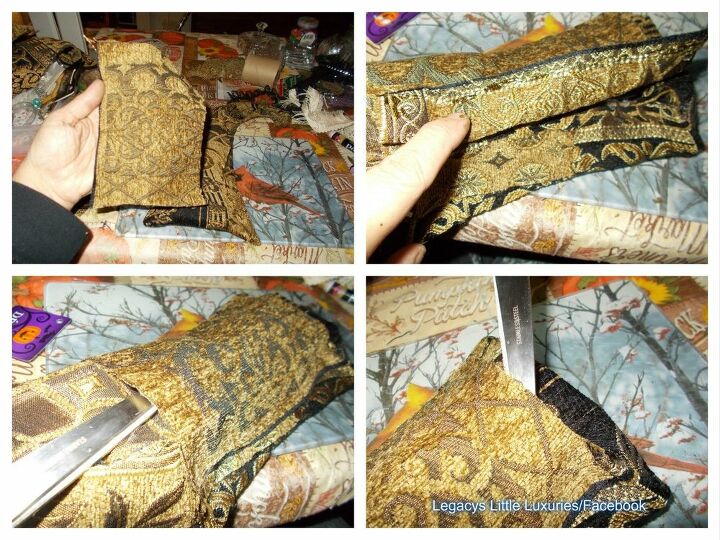
Steps One and Two. Remove all the tinsel. I save the tinsel to make wreath picks. Take wire cutters, and remove all the black nubs around the boot.

Step Three: Use material to cover the boot. Now, I used drapery material, and it is thick. I can use this material, and hotglue it on. I also, flip the boot over. This will not face on the left side, but the toe will face on the right side. Suggestions for material is cotton, use an old blouse, or some type of vintage looking material. Wrap it around, and cover the entire boot on both sides. This one is going to my daughter for a gift.
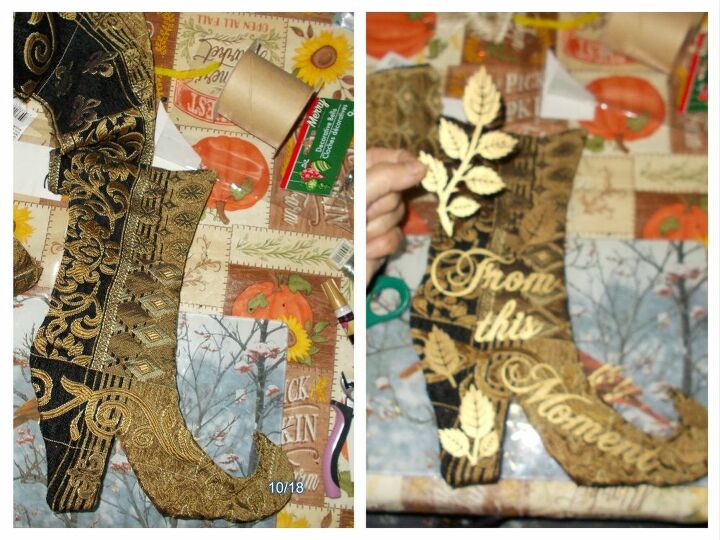
Step Four: I will use chipboard decorations from Creative Embellishments. I used a metallic gold paint markers (easier to control painting smaller objects) and painted leaves and three seperate words. Once they dried from the paint, I arranged them on the boot before gluing. I am adding more embellishments, and thus I paint other items with the gold metallic paint marker. This gold brings out the drapery material, it has gold and black on it. I use hotglue, however, I suggest using Fabri-Tac for wood to materials. I have Fabri-Tac, but since this is going to my daughter, I can always fix it if anything ever comes part. Hotglue is only temporary glue. Fabri-Tac is the best for this idea to last forever.
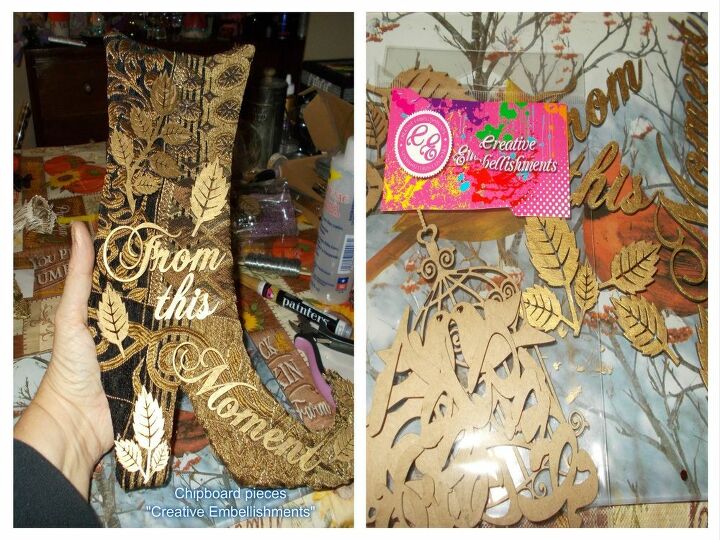
Closer look at the chipboard pieces....
Step Five: In the back, I will add the pocket. I cut out a square from the drapery material, and only glue it along side the edges, leaving a hole on the bottom and opening on the top, and later, can slide in a bouquet.
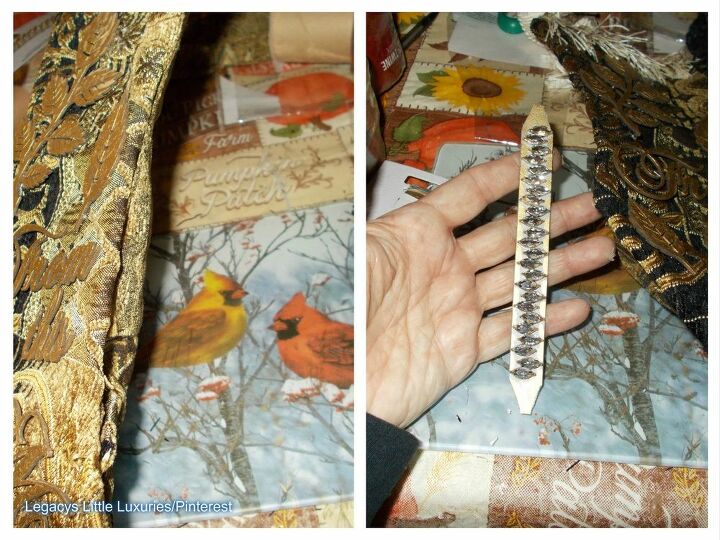
Step Six: I am adding some more trim. I find chockers and necklaces and earrings at Walmarts in the clearence section. I use them to create my crafts and art. This is a chocker, that I will glue on to display the back edge of the boot. I use a earring for a tassel later on. I use lace down the front side and fringe material to create that era of design.
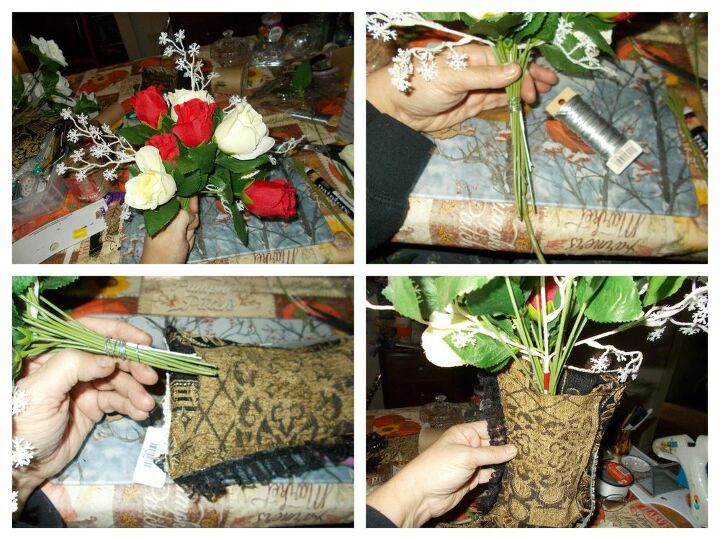
Step Seven: To make a bouquet, I cut off flowers from the DollarTree haul and I cut into the red and white rose bundles. I then added a snowflake pick, and wrapped the stems in wire. I slide it into the pocket. Fluff the flowers accordingly in the front. The pocket holds the bundle nicely.
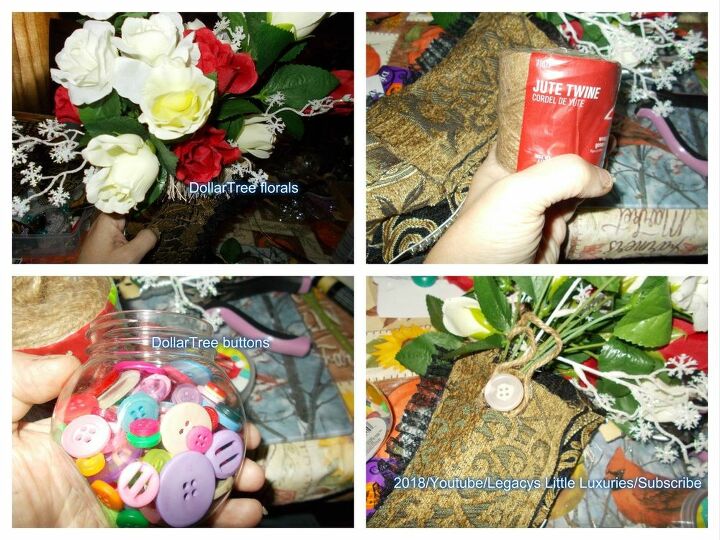
Finally, I used twine and a button for making a hanger in the back.
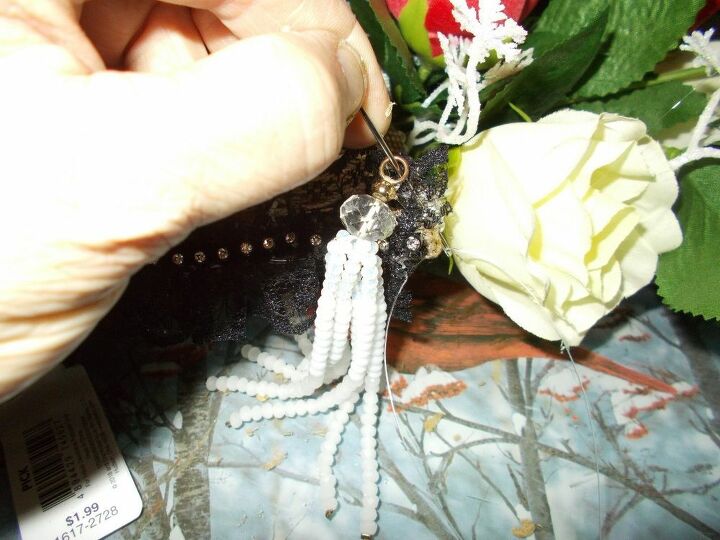
...and this is the earring I used for the Victorian era themed boot tassel. I sewn it on, I did not glue it. I might mention I added black lace and white fringe materials. I find these short, cut up pieces inside the clearance sections at Hobby Lobby and JoAnns. That is where I found the drapery material. It was a section left over in the clearance section. I pick up things here and there. I never know when or how I will use them, until I get an idea. Like I did for this beautiful victorian boot floral display. My daughter will love it.
The boot stays the same design, but the florals can be switched.
Thank you for viewing this little upcycled article. Leave a comment below and I will respond.
Respectfully-
Bless!

Halloween Wall decor I created a month ago....facing left side....
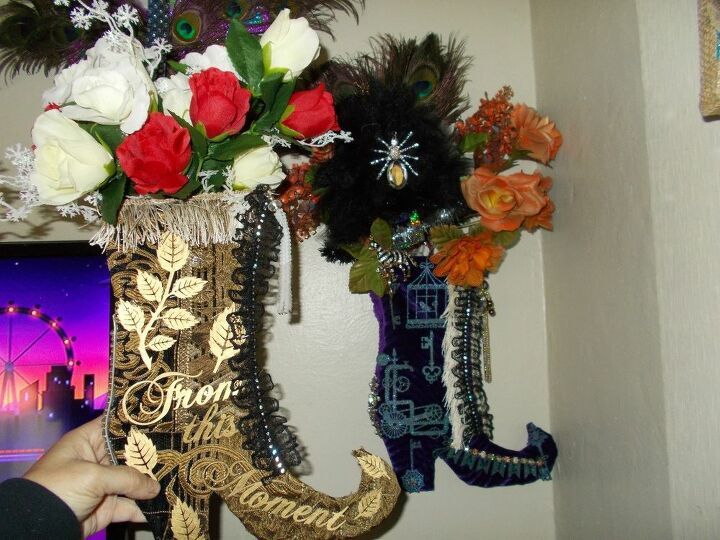
and facing right side, is another one I created. My daughters is the one in this article. Bye!


Frequently asked questions
Have a question about this project?