


Light Your Way With This Easy Lantern

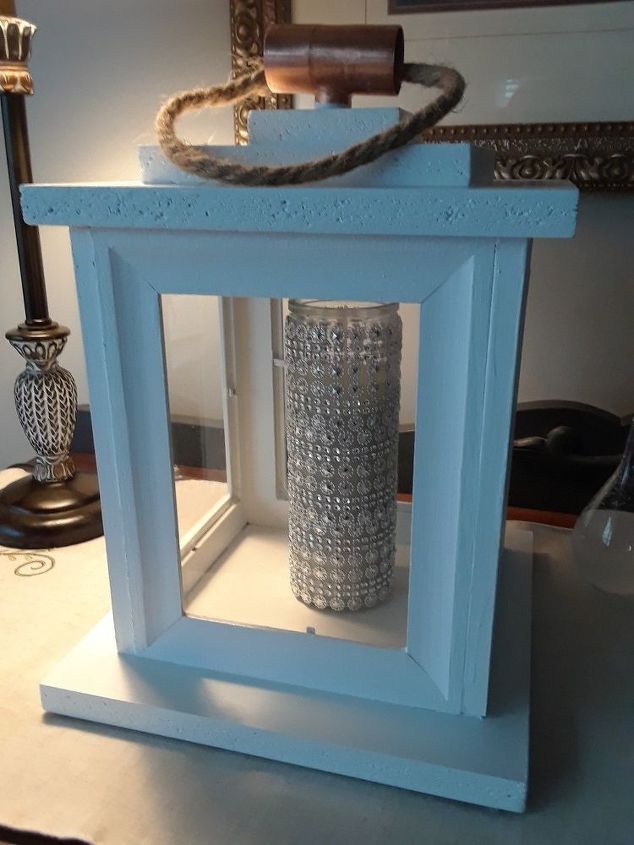
This beautiful lantern was made a few pieces of wood and 4 wooden dollar store frames. It's easy and you can do it too.

I thought of this project one day while I was in the craft aisle of the Dollar store. I picked up 4 wooden frames and got straight to work.
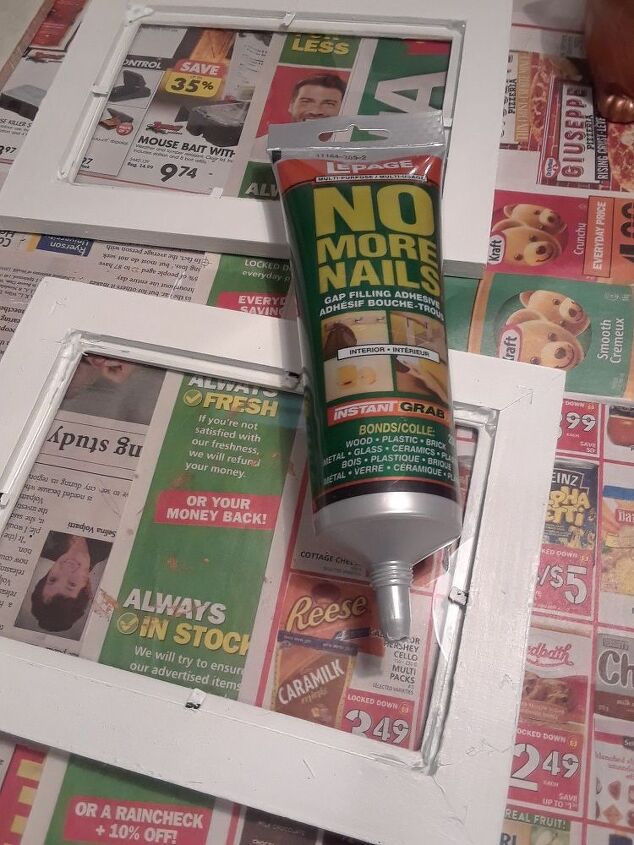
1. I took the 4 frames apart. Kept the glass aside but used only the wooden frame. I kept the hard cardboard backing for another project.
2. Using white paint I coated each frame . I needed a second coat so I waited for that to dry.
3. After each frame was dry I used No More Nails to glue each side to another into the shape of a box.
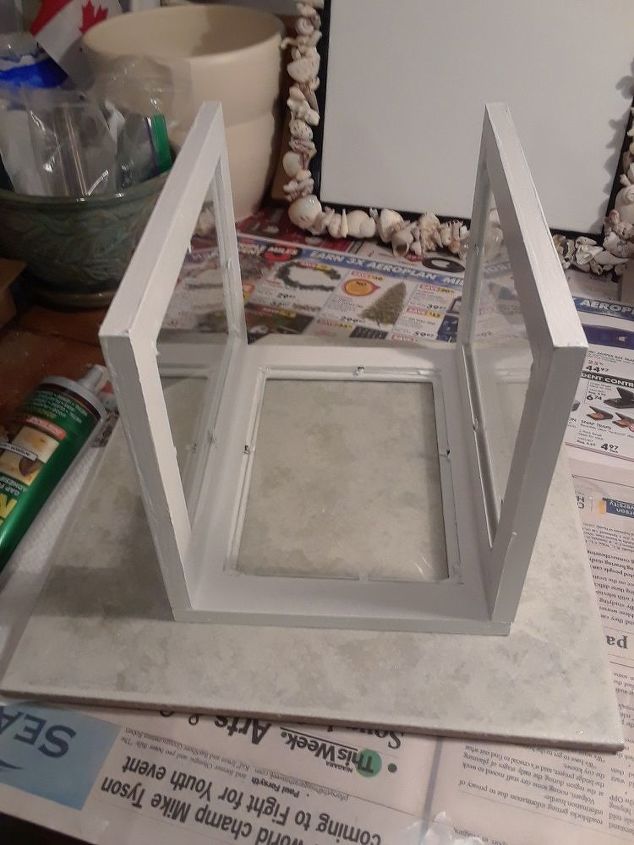
I let the glue dry on the four frames and got to work on the base and the top part of the lantern. When dry I added the 4 pieces of glass back into the frames.
1. Using rough pine I cut 4 pieces of wood. 9 1/2" square, 9" square, 6" square and 3" square.
The largest square was for the base of the lantern, second largest was for the top lid and the two smallest were for the top of the handle.
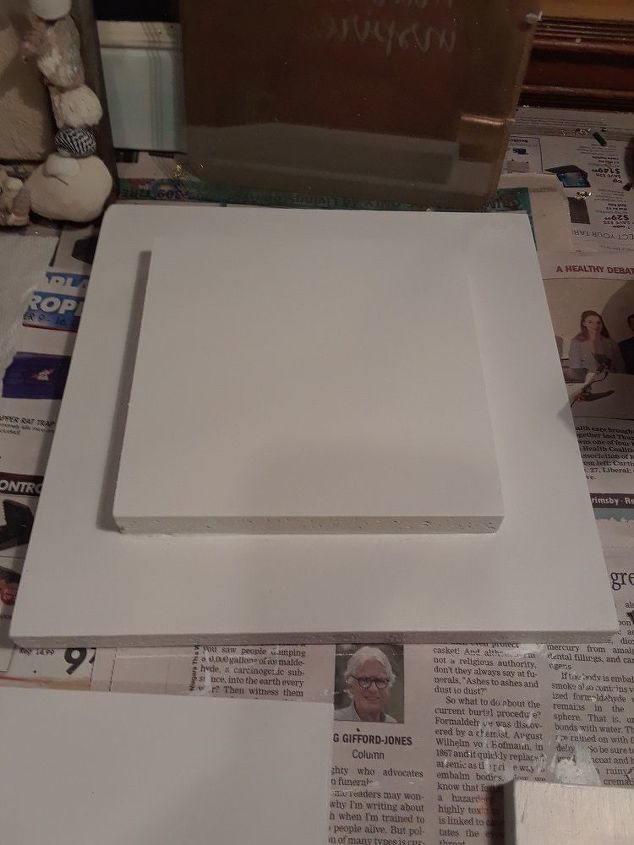
After all pieces were cut I made sure to do a quick sand and wipe clean.
1. I painted the 4 pieces the same color as the frames..which is white.
When all pieces are dry...
2. Take the largest piece. This will be the base of the lantern. Line up your lantern to be in the middle of the base and glue down with No More Nails. I placed a heavy book on this to set and let dry.
In the mean time
3. I took the second largest piece and added the next size down. I then added glue to this piece as well and let it dry.
4. I took the last and smallest piece. I had bought a cheap copper fitting at the reuse store for this lantern. I sized up the fitting and put it into the centre of the wood.
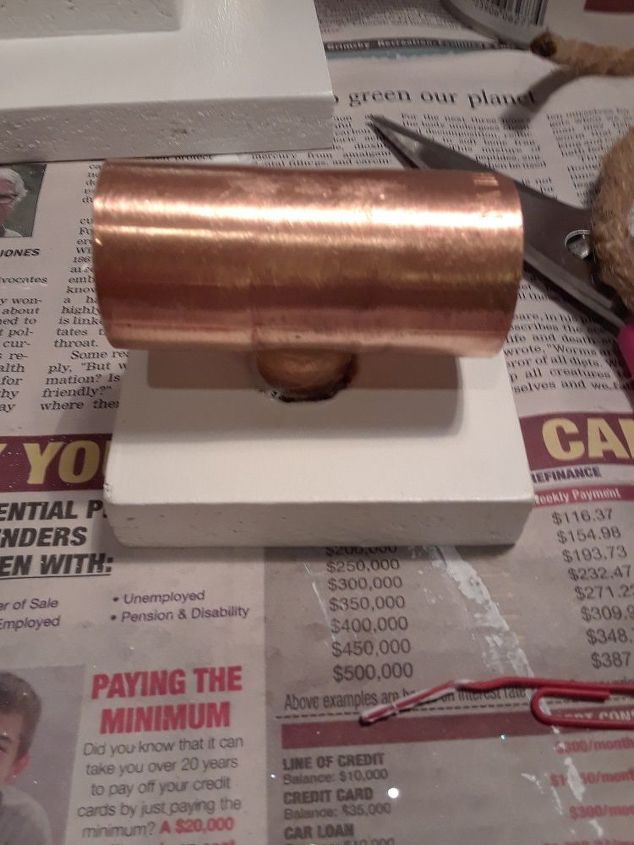
I glued the copper fitting onto the top of the wood. I let dry for 24 hrs.
1. Using a large piece of rope I slipped through the copper fitting and made a knot. This gave the lantern a bit of a rustic look.
Resources for this project:
See all materials


Comments
Join the conversation
-
Hello my hometalk friend,I just love your lantern.You did a very sweet job on your project.I have always wanted to make one of these and now I can.Thank you so much for sharing .Keep up the great work! You did a fantastic job and cant wait to do one or 10 of these.LOL LOL!!!!!CHEERS!!!!!!Bonnie
-
I’m adding this to my project list. Love it!


Frequently asked questions
Have a question about this project?
How do you get at the inside to change batteries for the lantern when they eventually go bad?
How does your lantern light? ...battery lit “ candle?
How do access the inside of the lantern. It looks like it is all glued together all over. I would want to put a candle in the center. Does the top of the lantern lift off the base?