


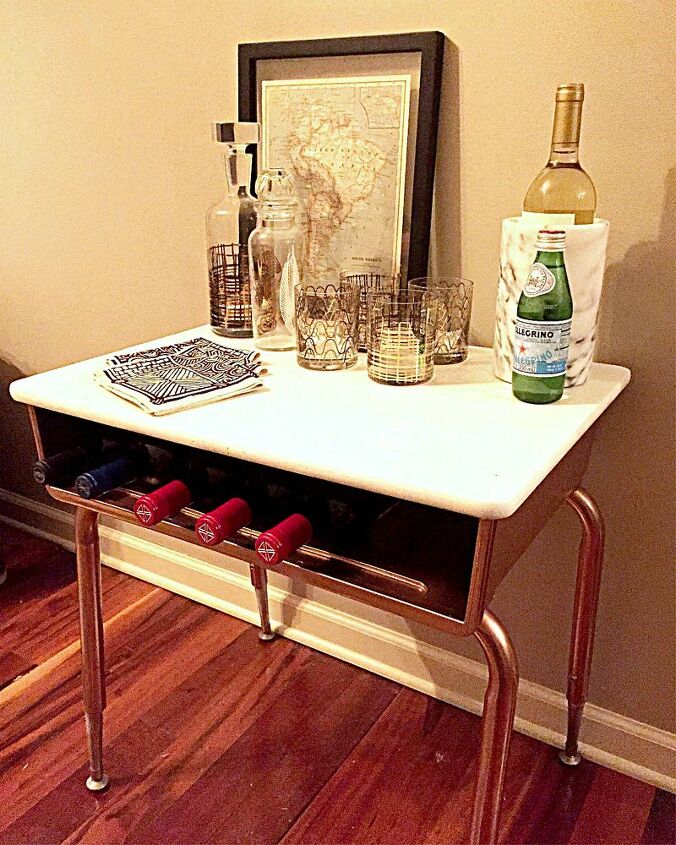
Makeover an Old School Desk Into a Modern Mini Bar

Old elementary school desks seem to be a dime a dozen at the thrift store, and often cost less than $10. Learn how to transform this simple desk into a modern and glam mini bar, perfect for your next party!

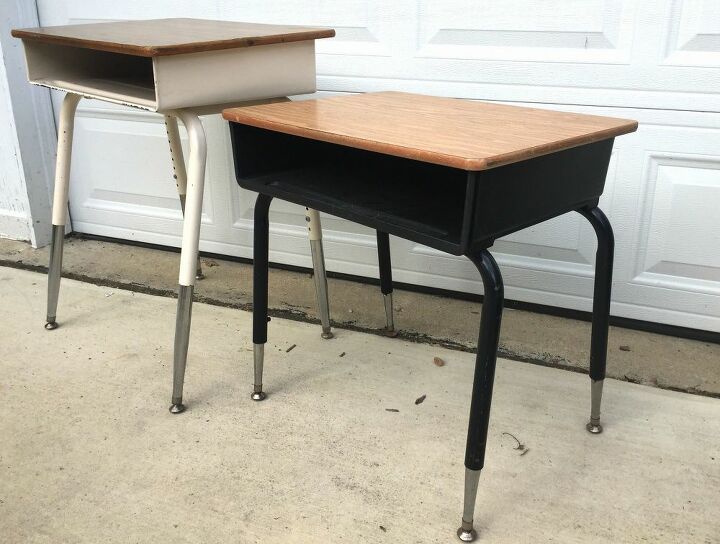
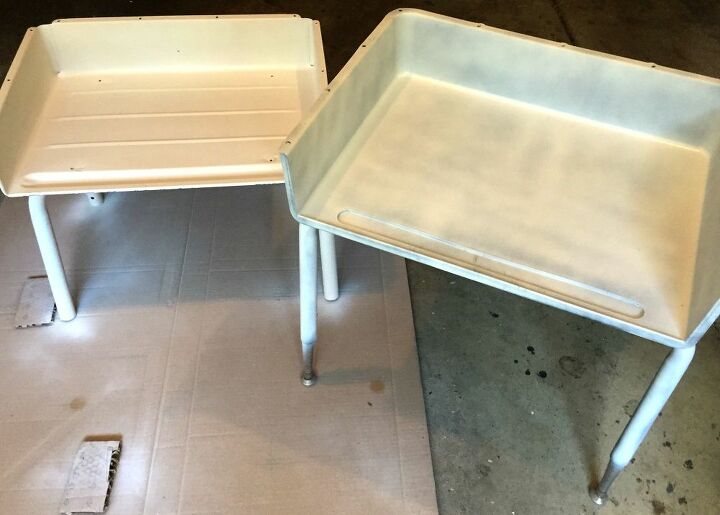
In order to start this project, search out an old elementary school desk. Typically they can be found at yard sales, thrift stores, or Facebook Marketplace. Anyone else remember sitting at one of these?
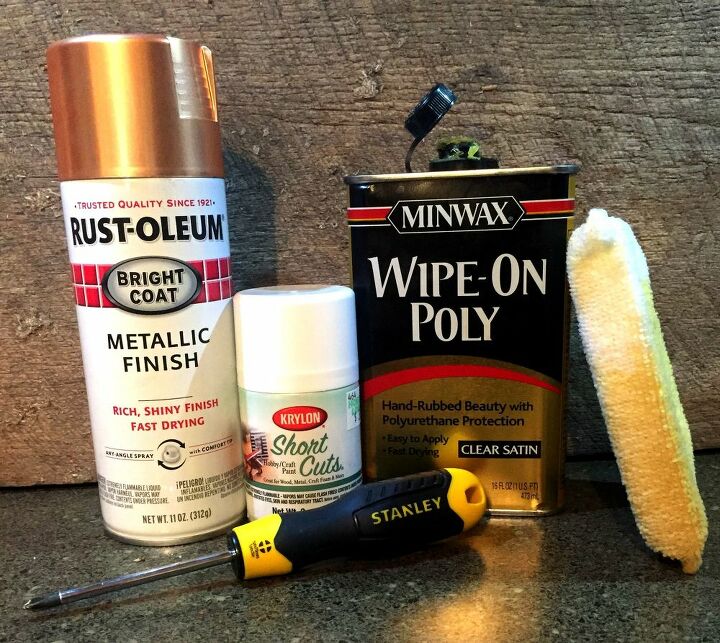
This makeover requires only 5 supplies:
- Primer spray paint (not pictured)
- 2 colors spray paint (1 for metallic finish paint for the base, 1 white, or color of your choice, for desktop)
- Wipe-on polyurethane sealer
- Sponge for sealer application
- Phillips head screwdriver (this may vary depending on how your desktop is attached)
The lengthiest portion of the project is waiting for the paint to dry!
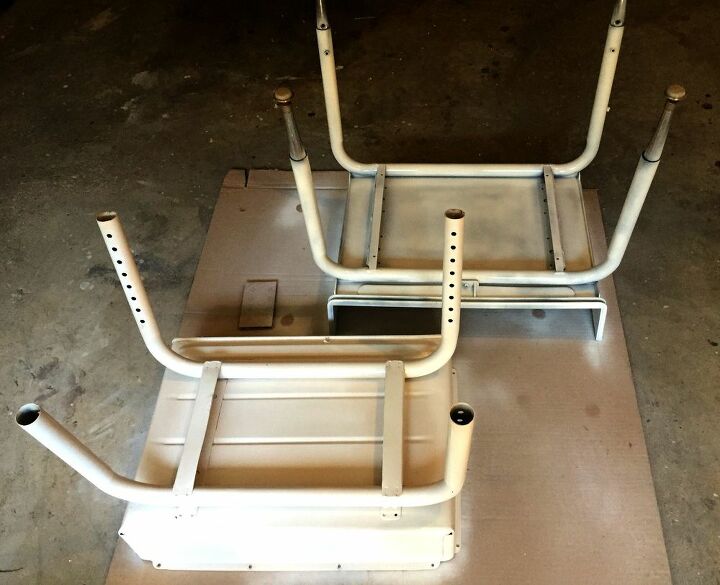
To start, flip the desk onto its top so you can see where and how it is attached. Most tops are screwed in place.
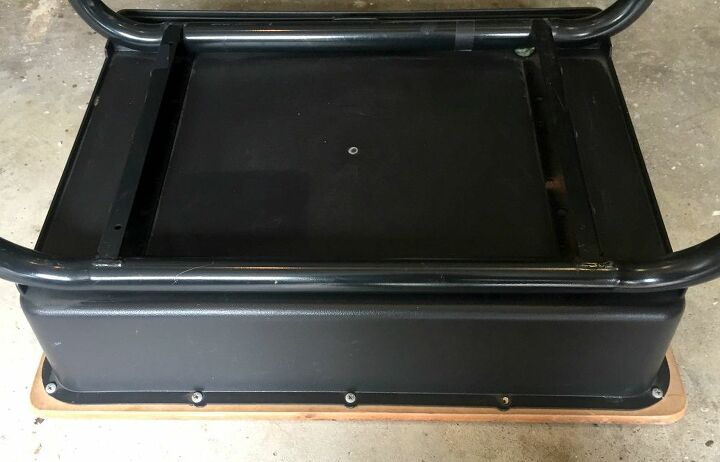
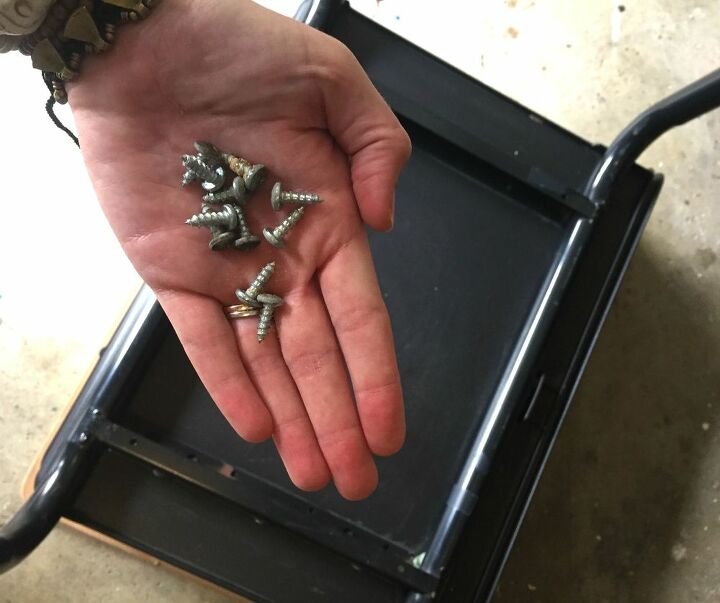
Using your screwdriver, take out all screws around the edge of the desk. Be sure to keep all the screws in a safe place. You will need them at the end to re-attach the desktop. Set aside the desktop for later use.
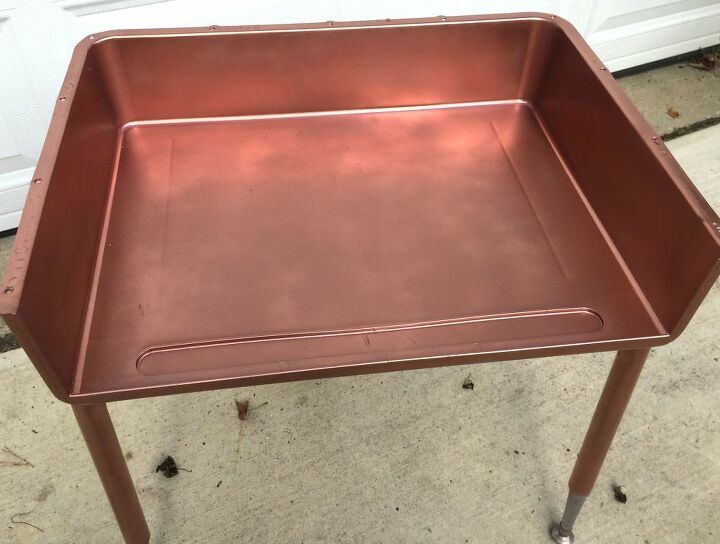
Flip the desk back over onto it’s legs. Be sure to wipe off any dirt or debris with a damp cloth. Once the desk is dry, it is time to prime! I used only one coat of primer, as you can see it doesn’t cover completely which is OK. The primer is just a base that allows the metallic paint to go on smoother.
Once the top side of the desk base is dry, flip the desk over and prime the bottom side of the desk base. One coat is plenty; allow the coat of primer to dry at least 12 hours.
Time for color! Using your metallic finish paint, spray a light coat onto the desk base and allow to dry fully. I used two coats: be sure to hit all those nooks and crannies around the legs, and in the corners.
Remember you will have to allow the top to fully dry and then flip the desk over to paint the under side.
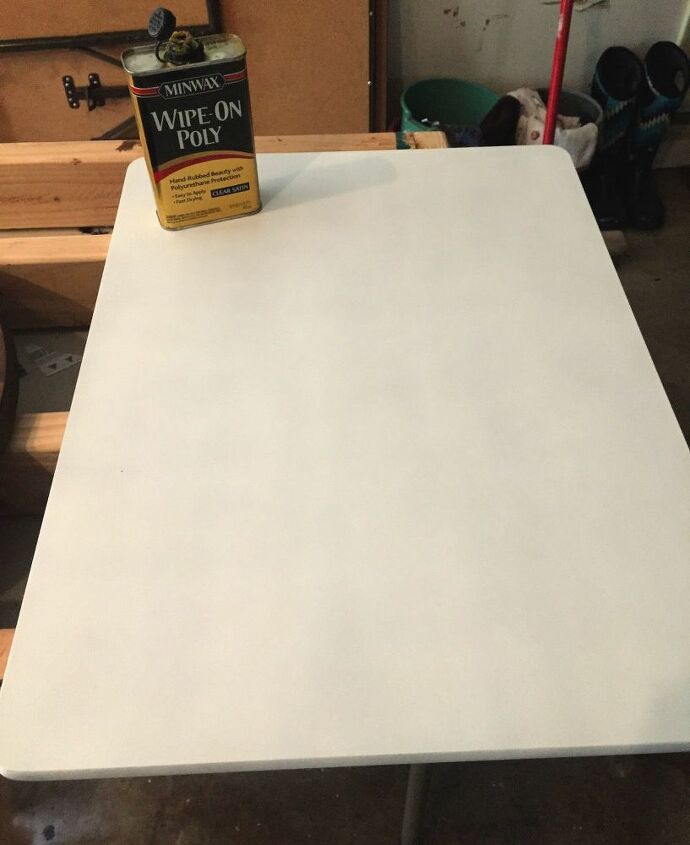
While you are waiting for the desk base to dry, you can get started on the desk top. Start by spray painting the desk top with the gloss white spray paint. I did 4 coats; I wanted it to be as bright and glossy as possible. **BE SURE TO ALLOW PAINT TO DRY BETWEEN EACH COAT** I know, I’m super impatient too, but take your time on this step. It will give your desk top a much smoother, glossier finish!
Once the desk top is dry, it is time to add a poly sealer. This will keep the top shiny and bright throughout it’s use. Soak your small sponge with the poly sealer and wipe lightly onto the desktop. Use light pressure, and light coats. Don’t worry if it looks streaky, it will dry even and clear. Be sure to use at least two coats of sealer.
Once both desktop and base are dry, reattach with the original screws, load up your new mini bar with drinks and you are ready to party!
And in case you are wondering; yes, that storage opening where pencils and notes were forever lost is the perfect size to hold a standard bottle of wine. It will hold 6-7 bottles total, but in this house of winos, its rare we ever have that much wine on hand. :)
Resources for this project:
See all materials


Comments
Join the conversation
-
I really like this but I would be inclined to peel the labels off of beer/wine bottles and decoupage them onto the top. However, this does look classy and I'm more grungy than classy! xx

-
I went the other way and decided to use my topless dry wine bar which I found for planting seeds, etc and a writing surface. I had a perfect piece of wood for the top. I do not drink since 1986.


Frequently asked questions
Have a question about this project?
Why did you have 2 desk there. Just asking.