


Create Functional Storage From Old Furniture

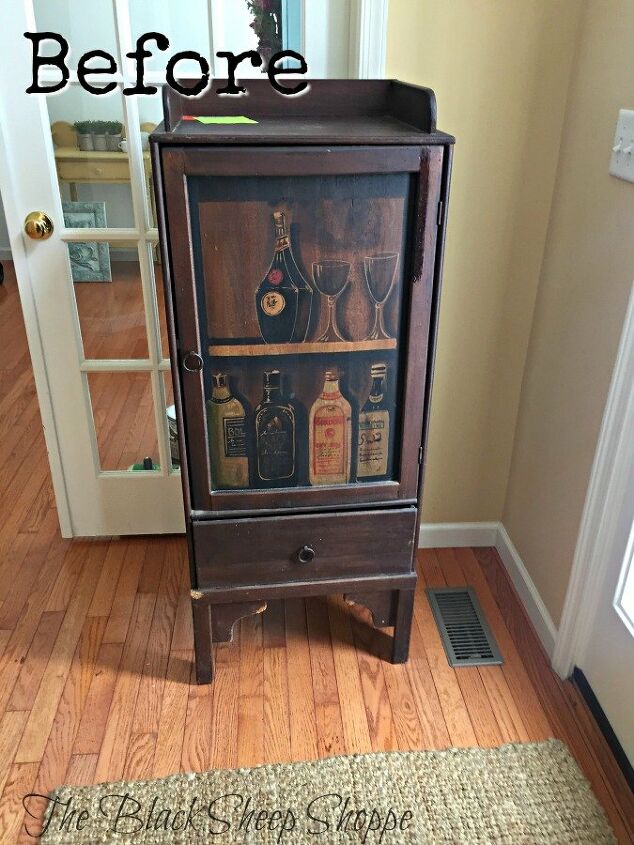
I found this liquor cabinet at a thrift store. Although I didn't actually need a liquor cabinet I decided to buy it because, 1) I thought I could make it into more functional storage, and 2) the price was right at $20!
I didn't have a specific design plan in mind but instead let the design evolve as I went along. My goal was to use as many items I already had on hand to give it a transformation.

The interior had racks for storing bottles and wine glasses which I wanted to remove to create shelving instead.
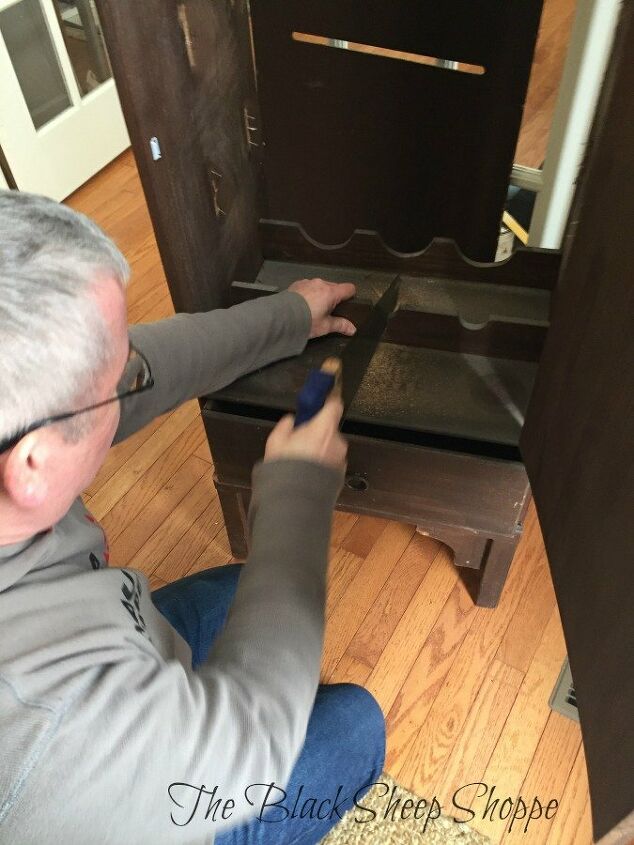
The first step is to remove the back of the cabinet and gut the interior. The racks were held in place with nails, so we began by sawing the center of the racks and then using brute force (hammer and crowbar) to remove them completely.
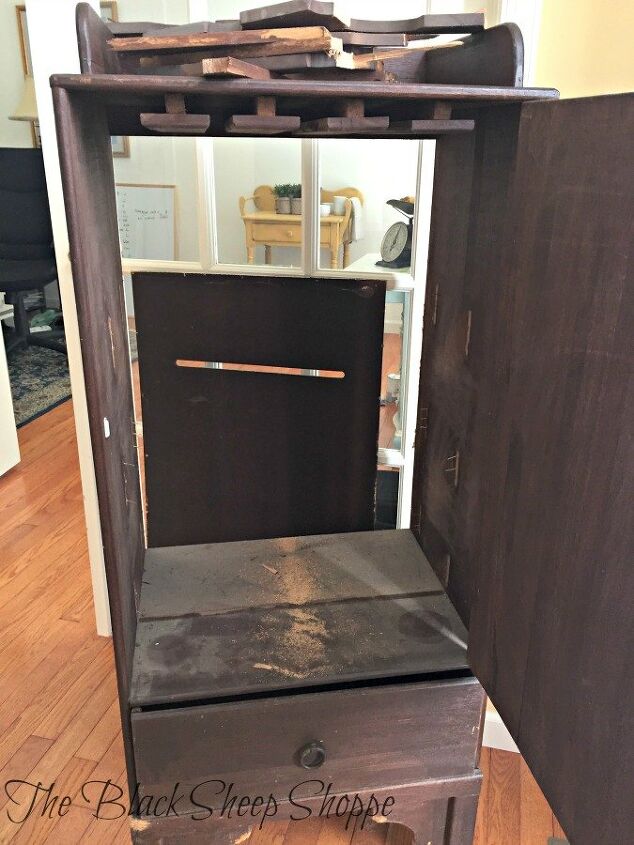
Unfortunately removing the racks created some slight damage to the interior sides. Nothing too horrible, but I would need to take this into account with my final design.
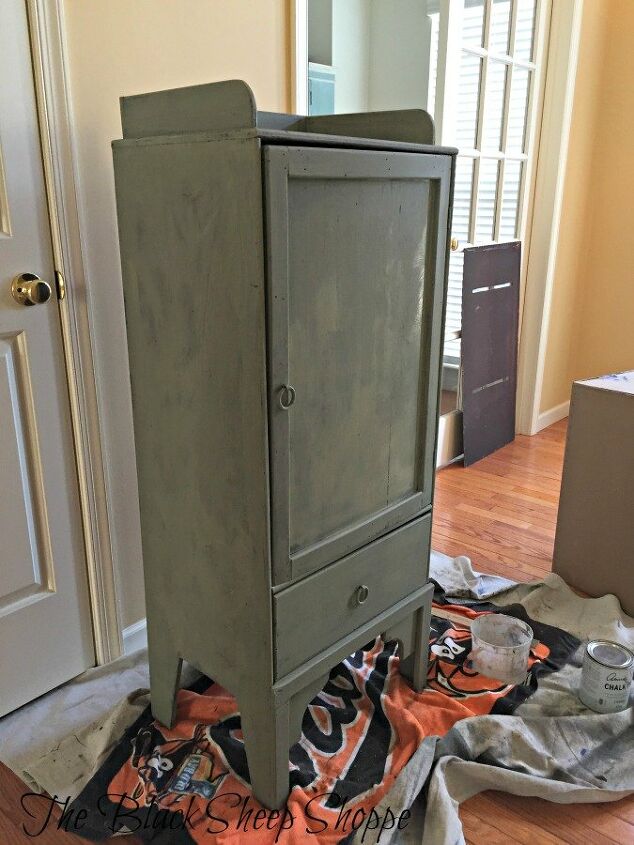
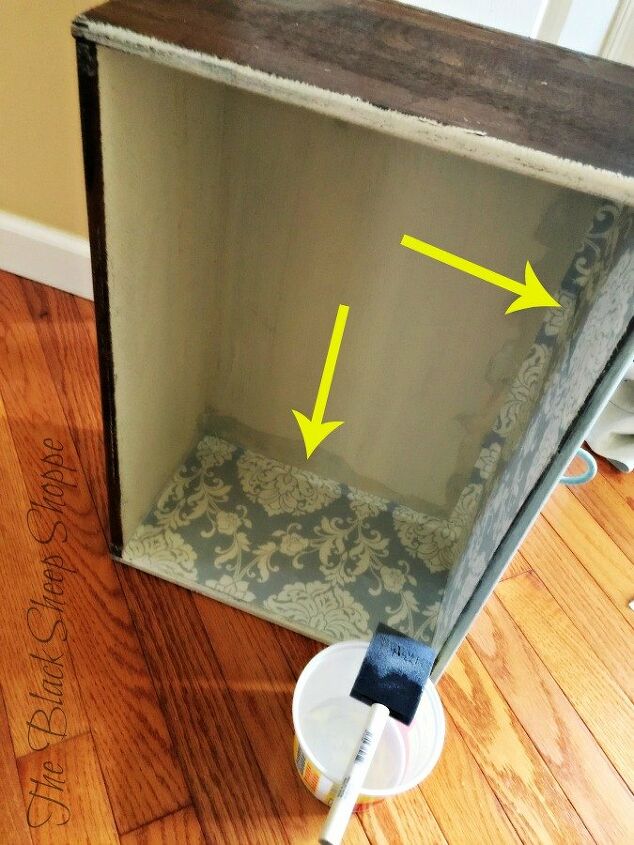
Once the demolition was done I added a quick base coat of paint. The final colors which you will see in the "after" photos are Duck Egg Blue and Old Ochre.

I found a pretty remnant of toile fabric (affiliate link to similar pattern) which I adhered with Mod Podge to cover up the back and side panels to hide the damage.
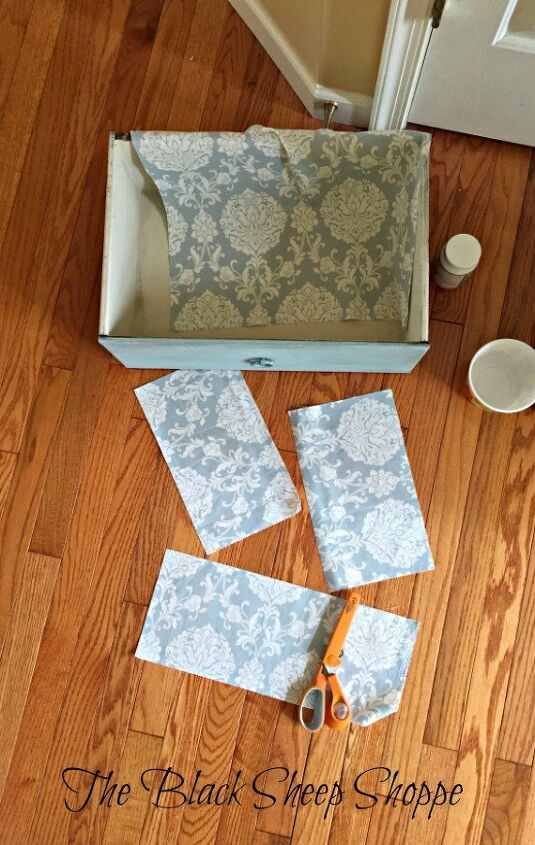
I didn't plan to line the drawer with fabric, but I had enough left over to piece it together. First I cut pieces for the sides and the bottom. I cut the side pieces a little larger than necessary so there would be a slight overlap.
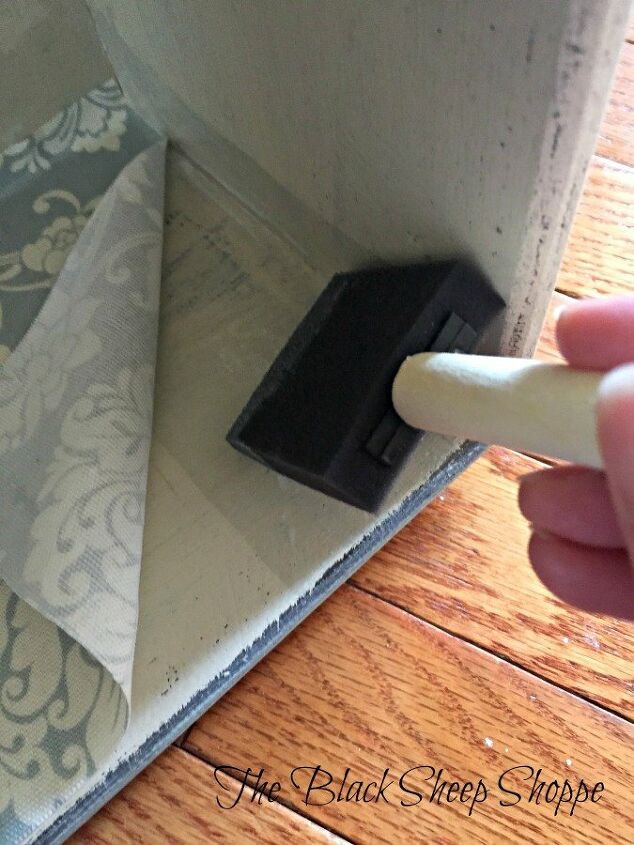
I lined up the cut piece of fabric with the drawer, lifted it out of the way, and then applied Mod Podge.
Next I smoothed the fabric into place.
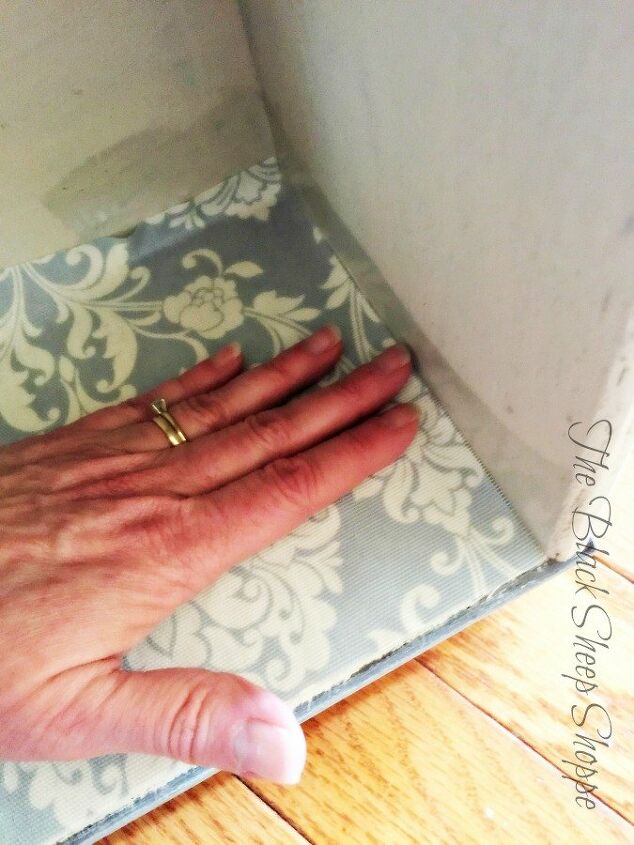
I continued with each of the side panels before adhering the bottom panel. The overlap will prevent any gaps showing through.
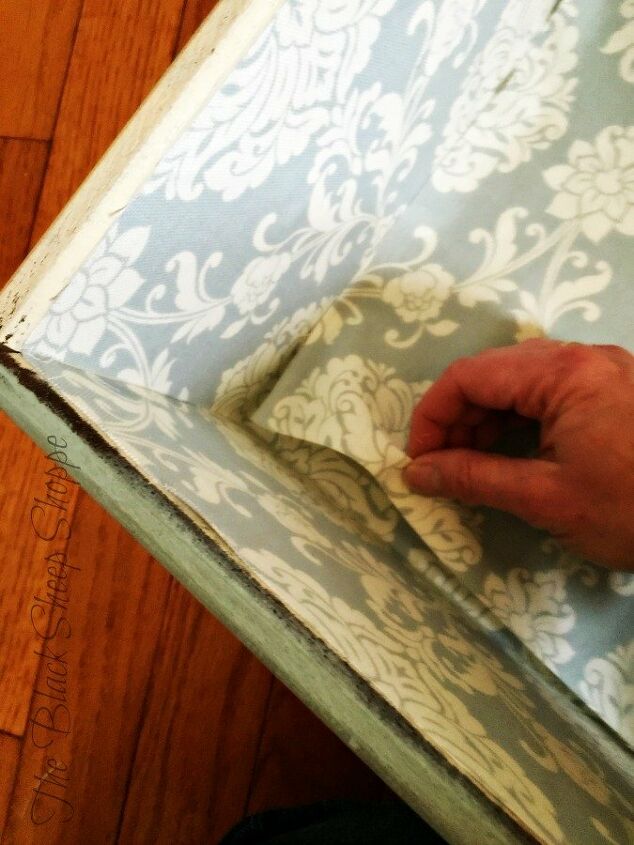
This photo shows the bottom piece of fabric being set in place and overlapping the side panels.
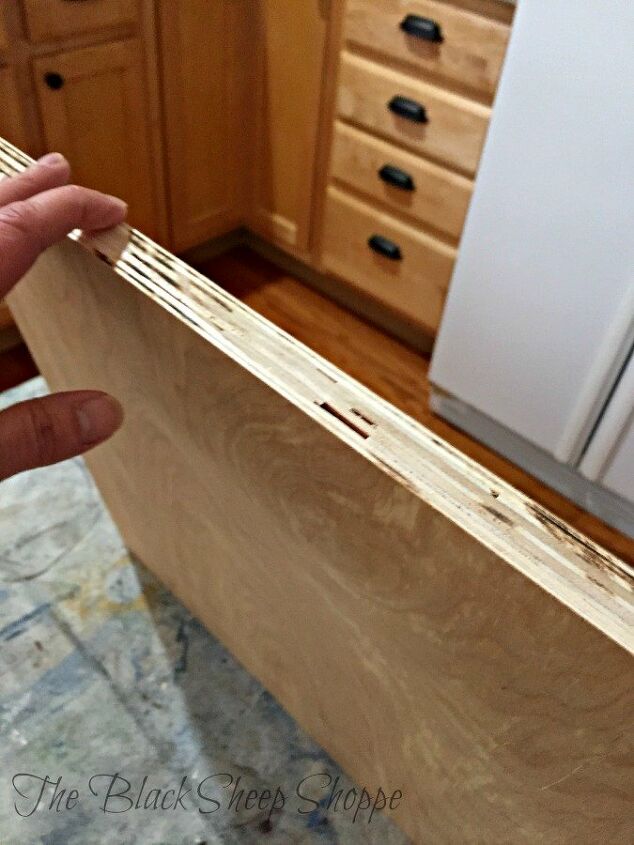
I used some scrap plywood to create a shelf. The exterior edge wasn't too pretty, but that's an easy fix!

I cut a piece of veneer banding (affiliate link) to size and ironed it on (the edging has adhesive on the back which is activated by the iron). Then I painted the shelf and mounted it onto wood brackets.
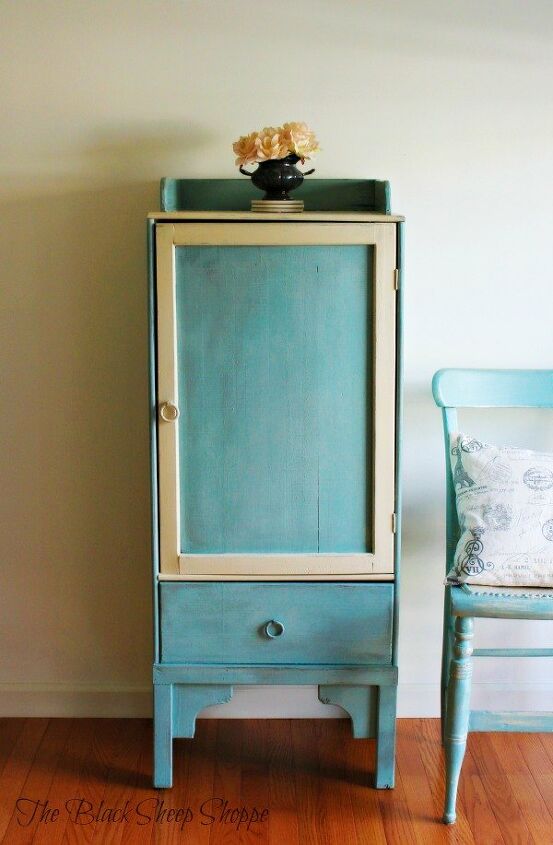
And here is the finished storage cabinet! I think the new color looks so much brighter now.
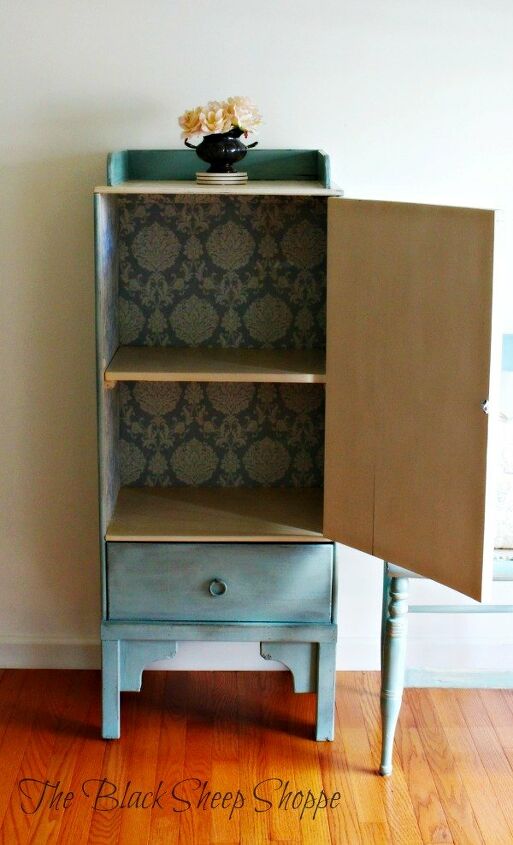
And the interior has much more storage space for linens or clothing. Feel free to stop by my blog for more photos of this project.
Resources for this project:
See all materials


Comments
Join the conversation
-
I bought this exact same wine cabinet from a charity sale! Thanks for the great idea!
-
Nice job, loved the transformation.


Frequently asked questions
Have a question about this project?
That is really cute! Nice Job. When you put the fabric on the inside with the Mod Podge, did you spread the Mod Podge on top of the fabric also?
The inside of the door is different, looks like plywood, or at least, maybe you sanded the original finish. What did you do?