


Filing Cabinet-Turned-Garage Organization

16 Materials
$60
3 Hours
Medium
For the last few years, Rob and I have had this ugly, old filing cabinet down in our basement. He got it from his uncle and we used it to store his old business files, tax documents, and other paperwork that we didn't need on a daily basis but when we decided to overhaul the basement, we decided we were going to put it to the curb. However, I came across a really cool idea that ended up not being as much work as I had thought it would be, and now this ugly, clunky hunk of metal looks a whole lot nicer and is serving a purpose!
{
"id": "4094235",
"alt": "",
"title": "",
"video_library_id": "8091",
"thumbnail": "https://cdn-fastly.hometalk.com/media/2017/07/31/4094235/filing-cabinet-turned-garage-organization.jpg"
}
{
"width": 634,
"height": 357,
"showRelated": true,
"noautoplay": ""
}
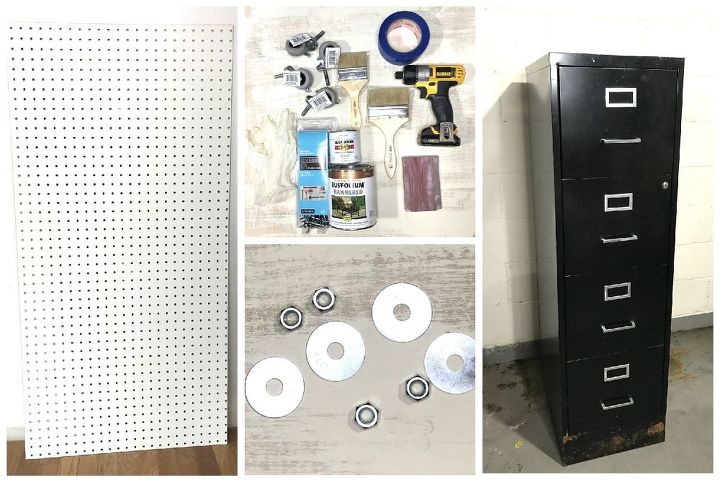
SUPPLIES:
-sheet of peg board
-old filing cabinet
-Do It Best painter's tape
-12v DeWalt drill (choose a bit that will allow for the screw of your casters to fit through)
-sanding block
-3" and 4" paint brushes
-4 casters with brakes
-washers and nuts for casters (You'll want to find the ones that fit to the casters...the casters we purchased did not come in a kit.)
-Rustoleum flat white protective enamel
-Rustoleum hammered copper paint
-Everbilt locking peg hook assortment
-HDX rubber/latex gloves (optional)
Not pictured:
-box cutter
-T-square
-Sharpie
-Teks #8 x 1 in. Phillips Fine Zinc-Plated Steel Truss-Head Drill Point Lath Screws
STEP 1: Prep cabinet
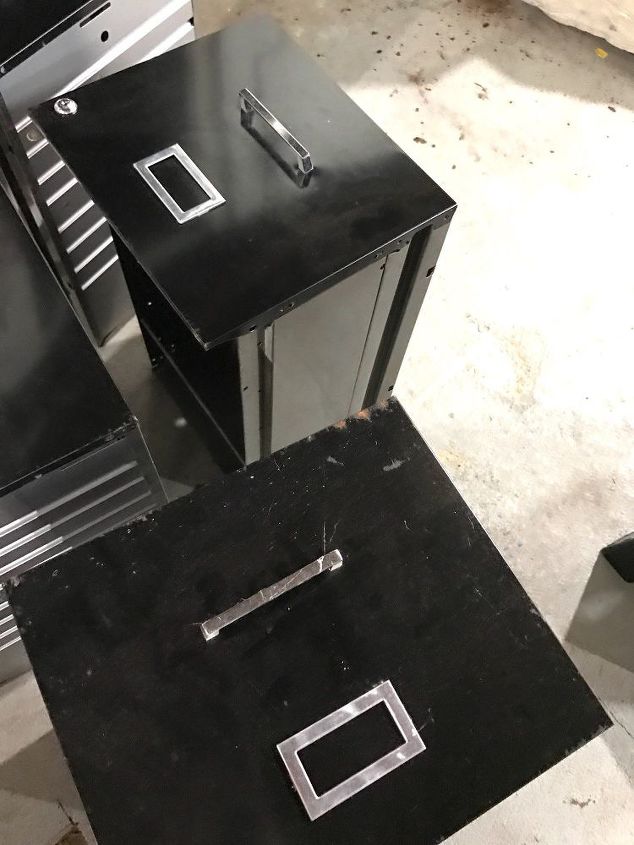
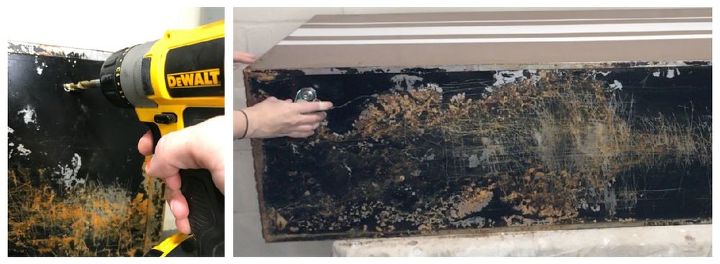
Before the fun parts of painting this ugly cabinet, I had to prep it. I pulled out all of the drawers and unfortunately put them by the road for the metal man to come collect them--too bad they couldn't become another project! 
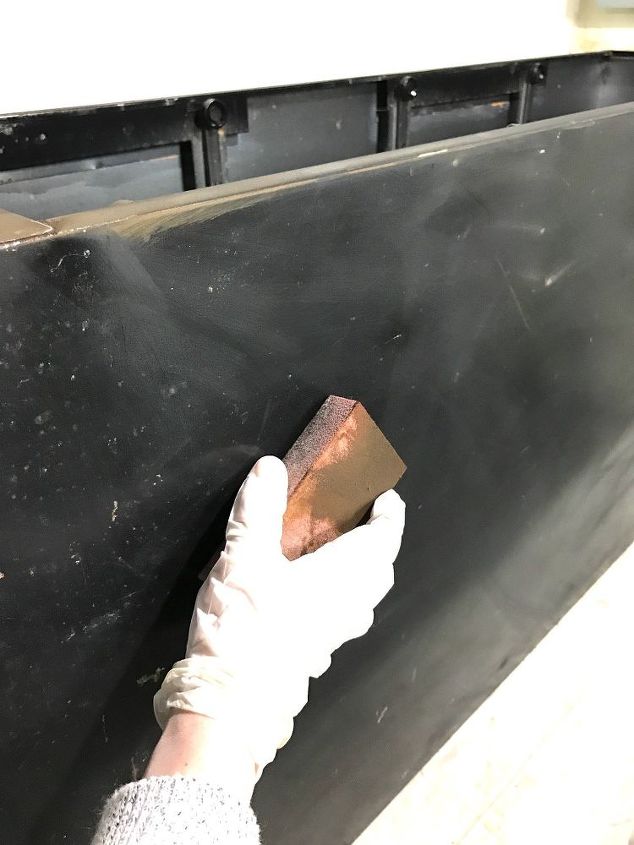
Once the drawers were removed, I roughed up the sides and knocked off the rust with a sanding block. I didn't go too crazy with this part because the goal was just to prepare the surface enough for the paint to get a good hold.
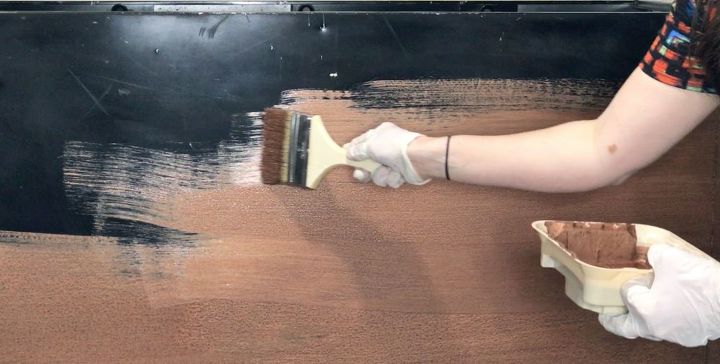
STEP 2: Paint cabinet
Next, I applied one coat of the copper paint to the cabinet. Feel free to do more coats! I felt like with the hammered finish, one coat was good enough coverage for me because at the end of the day, this cabinet would be holding tools in the garage anyway. Rob had warned me that the paint would possibly be a little runny and thin but surprisingly, it was thicker than I had imagined and it gave a good, even coat without being streaky.
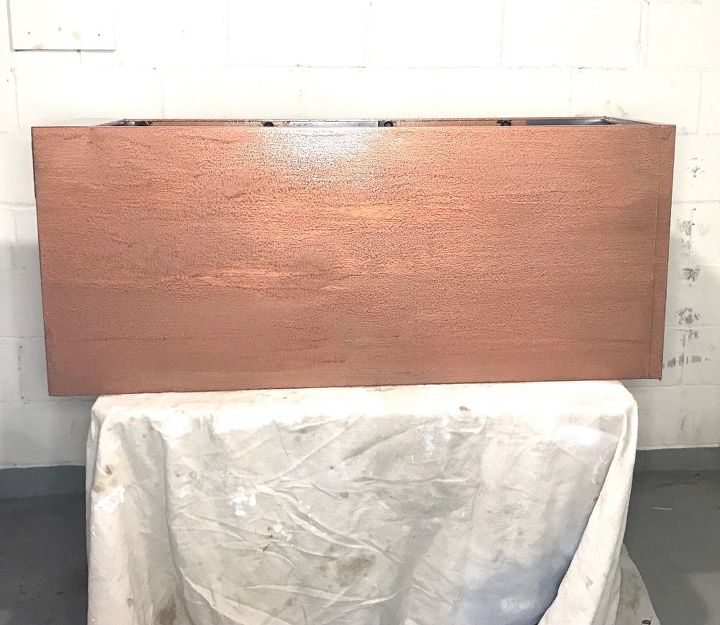
*Note: if you're using the same paints that I did in this post, make sure you're painting in a well-ventilated area. I would have preferred to paint this outside but it was just too cold and we didn't have good enough lighting in the garage so I opened up the doors and windows of our basement, Rob got some fans going, and I was good-to-go with painting without the smell of fumes.
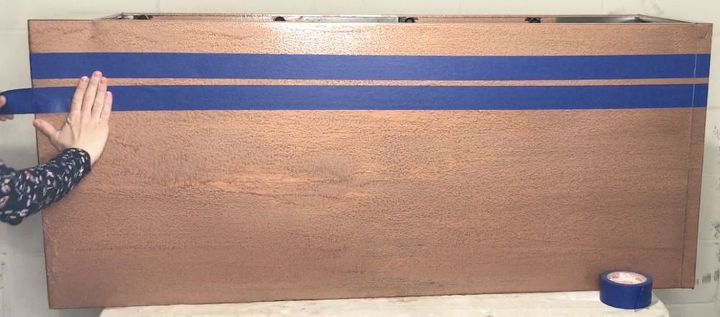
STEP 3: Add design (optional)
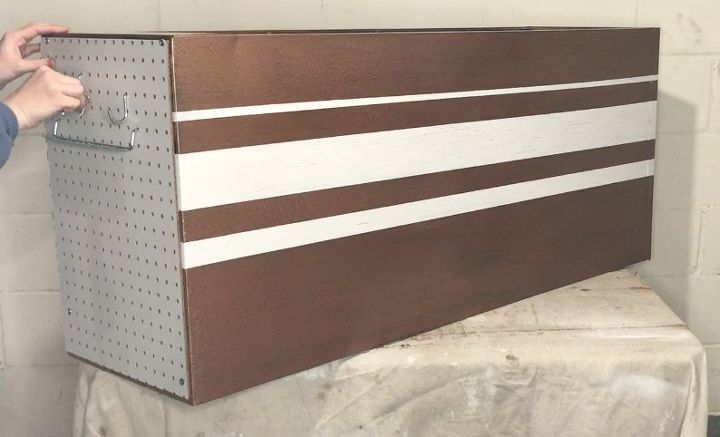
I could have just left our garage organization cabinet copper but I wanted to add a little something to it so it didn't look like a plain box so I decided to add some stripes. I used painter's tape to mask off 3 lines in different widths...
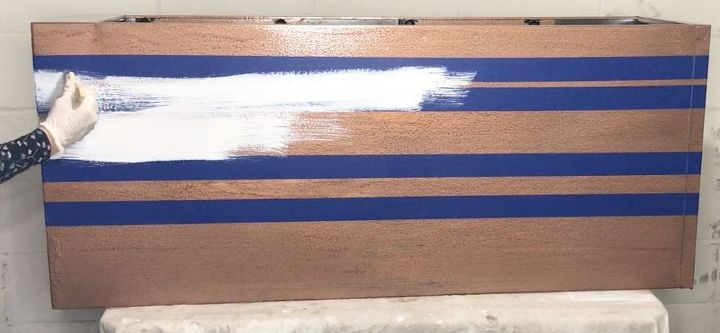
...then, I painted in the 3 lines with flat white protective enamel paint and let that dry completely.
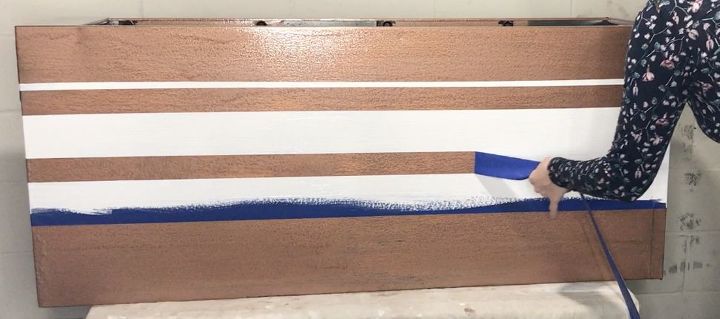
Once the white paint was completely dry, I removed the painter's tape and was left with 3 nice, clean, crisp lines for a bit of an added touch.
STEP 4: Add casters
After the painting was done, I flipped the cabinet on it's back and drilled 4 holes into the bottom corners. I inserted the casters, then reached in to the inside of the cabinet to secure each caster with a washer and nut.
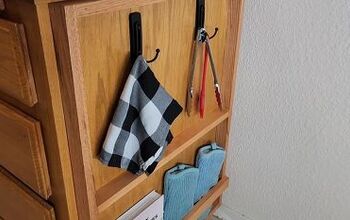
STEP 5: Add peg board and pegs
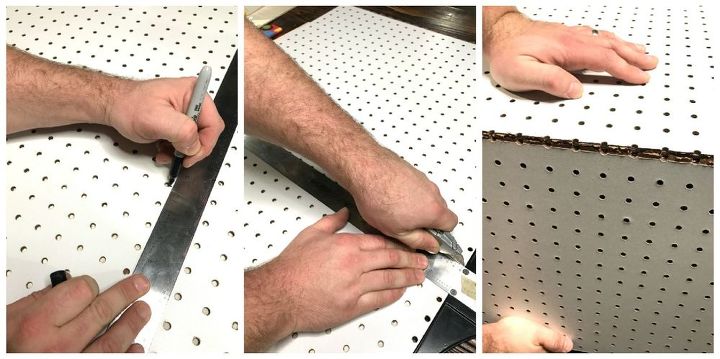
Unfortunately, I was only able to add peg board to one end of the cabinet because, what used to be the top of the cabinet was solid, so unless I cut a huge hole in the metal, I wouldn't be able to use peg board on that end. Thus, I only added peg board to the end that used to be the bottom of the filing cabinet.
Rob measured the end of the cabinet for it's dimensions, then marked the peg board with those measurements. After that, he used a T-square and a box cutter to cut the peg board, and used the edge of my work table to snap the board at the cut line. This was easier than dragging out the table saw!
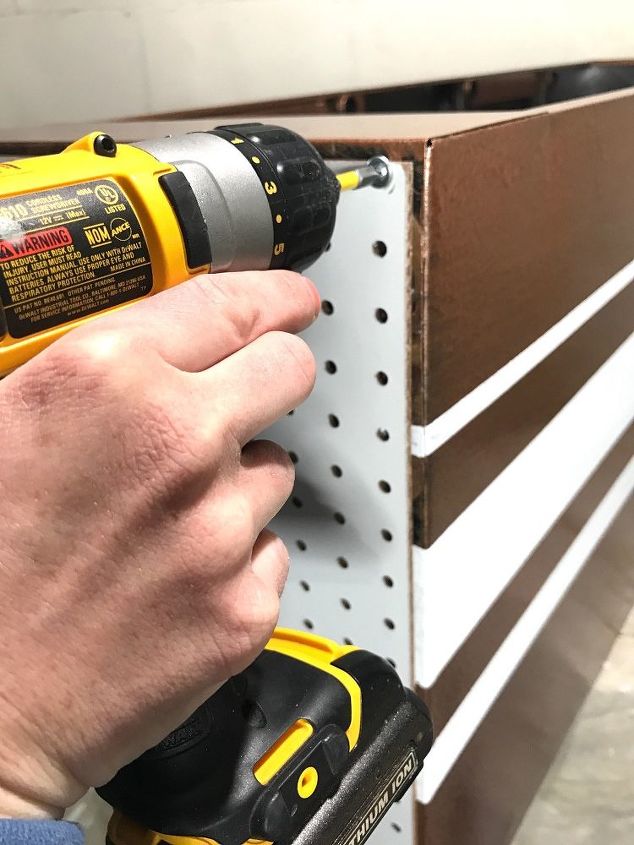
To attach the peg board to the cabinet, I used four 1 1/2" lath screws we had on hand. Make sure you pay attention to where you're putting the screws in because you want to make sure you're going into the metal.
Lastly, I added a few pegs to hang small tools that we keep in our garage. You'll also want to pay attention to where you're putting in the pegs because if your cabinet is like mine, you're limited to where you can put the pegs in around the edges because the metal lip of the bottom of the cabinet prohibits the pegs from going in. I had to put my pegs 2-3 "holes" in from the edge.

I love this little organization idea! It's the perfect way to keep all of our rakes, shovels, etc. together and out of the way. This filing cabinet didn't come with dividers and we decided not to add them in but feel free to get some slats of wood to create 4 separate boxes within your cabinet!
Resources for this project:
See all materials


Any price and availability information displayed on [relevant Amazon Site(s), as applicable] at the time of purchase will apply to the purchase of this product.
Hometalk may collect a small share of sales from the links on this page.More info
Comments
Join the conversation
2 of 202 comments
-
I like the idea of finding a use for an old filing cabinet, that may otherwise end up in the land fill.
-
Great job 👏


Frequently asked questions
Have a question about this project?
Wouldn't it be easier to just build a box instead of using a filing cabinet ??
What did you do with the drawers??
GREAT IDEA👍🏻👍🏻👍🏻👍🏻👍🏻