


How to Make a Chalkboard Entry Organizer
15 Minutes
Easy
One of the reasons I love my husband is that we are so different. For instance, he likes to use the counter next to the backdoor in our kitchen as his keep-all for everything in his pockets–which also includes stacks of post-it note messages to himself. I am opposite in that for one, I do not do this and secondly, it drives me insane! Enter my solution for the Chalkboard Entry Organizer.
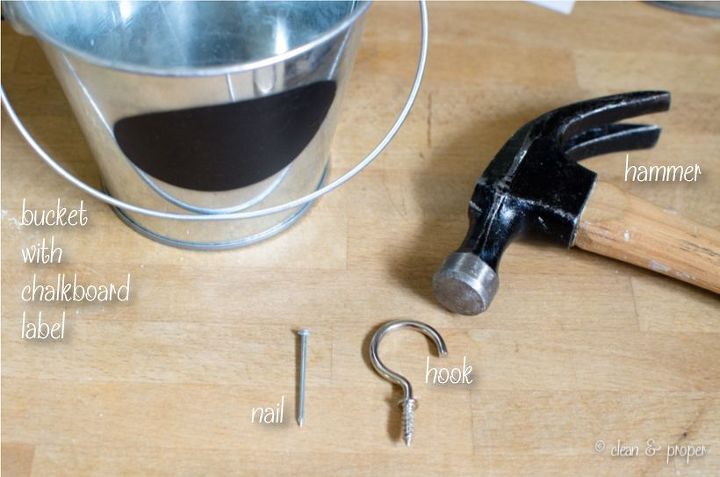
You will need:
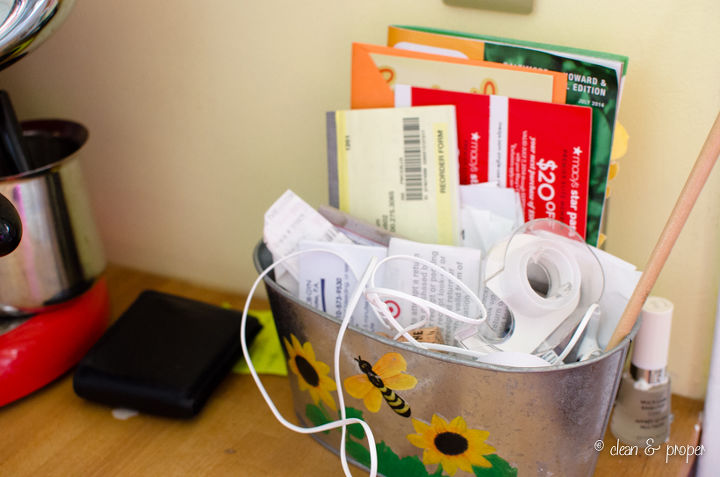
Start by taking your current clutter and sorting it into piles.
Label your chalkboard stickers accordingly so they correspond with the items you need to sort.
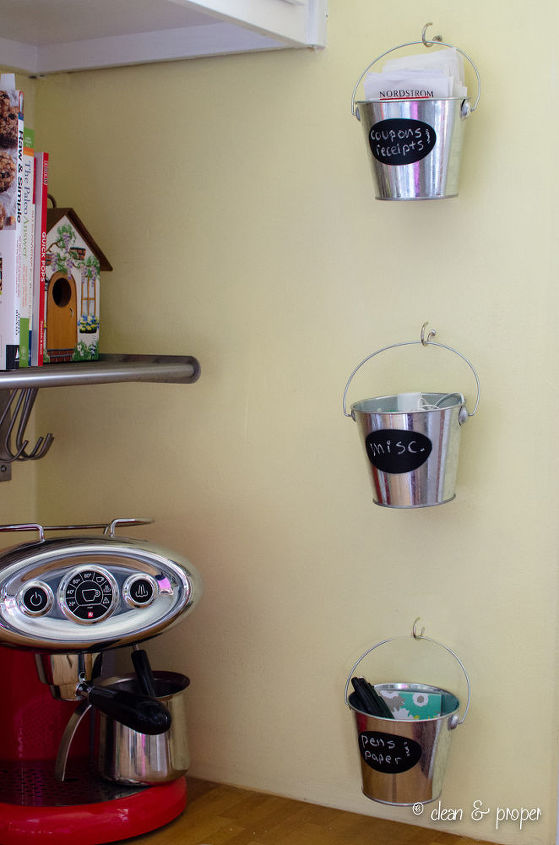
Using a pencil and ruler, mark where you’ll be hanging your buckets. Mine were spaced 11″ apart.
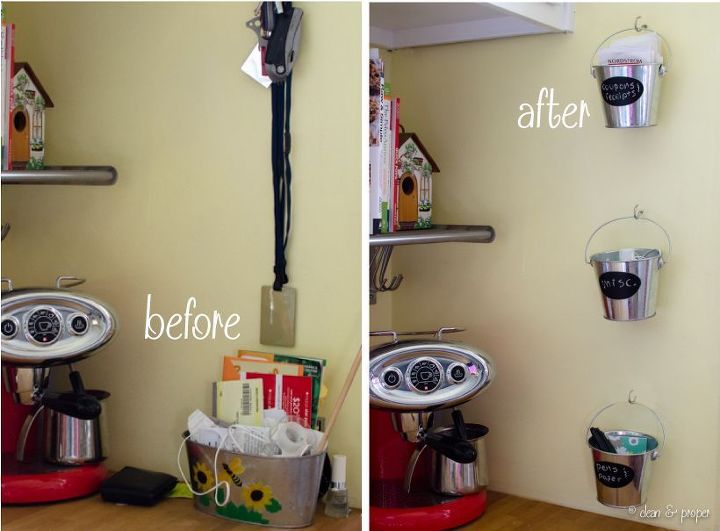
Depending upon the material of your wall and the weight of your buckets (mine were very light) screw in the picture hooks. Some walls may require a stud or wall anchor. For my walls, I simply needed to use the hammer and nail to create a small hole in the wall. From there I was able to remove the nail and screw in my picture hanger.

Want more details about this and other DIY projects? Check out my blog post!
Comments
Join the conversation
1 comment
-
Great idea! My counters would be so happy if I did something like this.


Frequently asked questions
Have a question about this project?