


How to Make an Easy Faux Galvanized Flower Bucket
I love a great faux finish!
They're usually a lot easier than you'd think and they produce results that are often hard to distinguish from the real thing.
They're usually a lot less expensive too. Here's how I transformed a 50 cent thrift store pail into a French-style flower bucket similar to one I found at Wayfair for over $50!
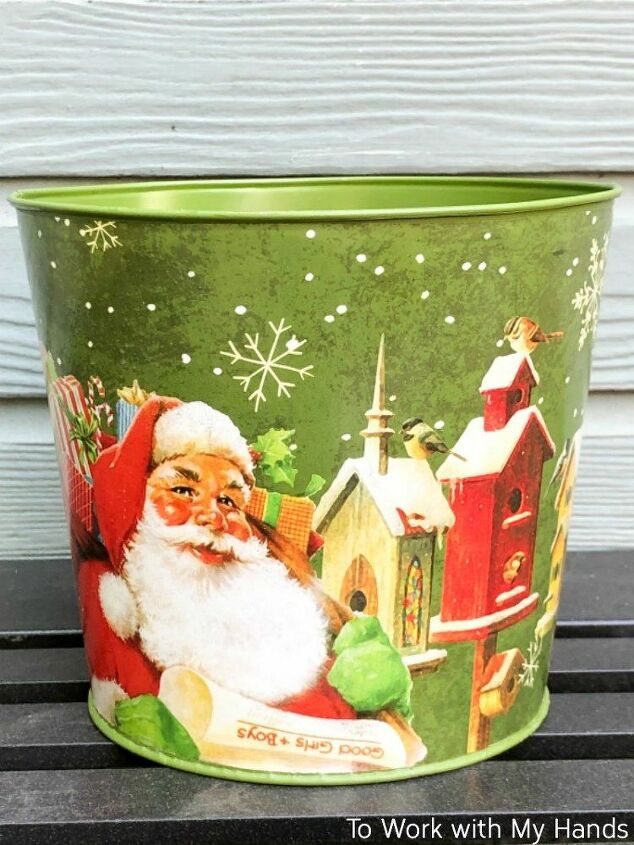
Santa came to the wrong town today because he got a makeover so big that he's nothing but a memory now.
I found this pail at a thrift store a long time ago. It still had the original store tag on the bottom - $11.99.
It came home with me for a mere 50 cents and sat in my thrift stash until I had an inspiring project idea - which happened this week.
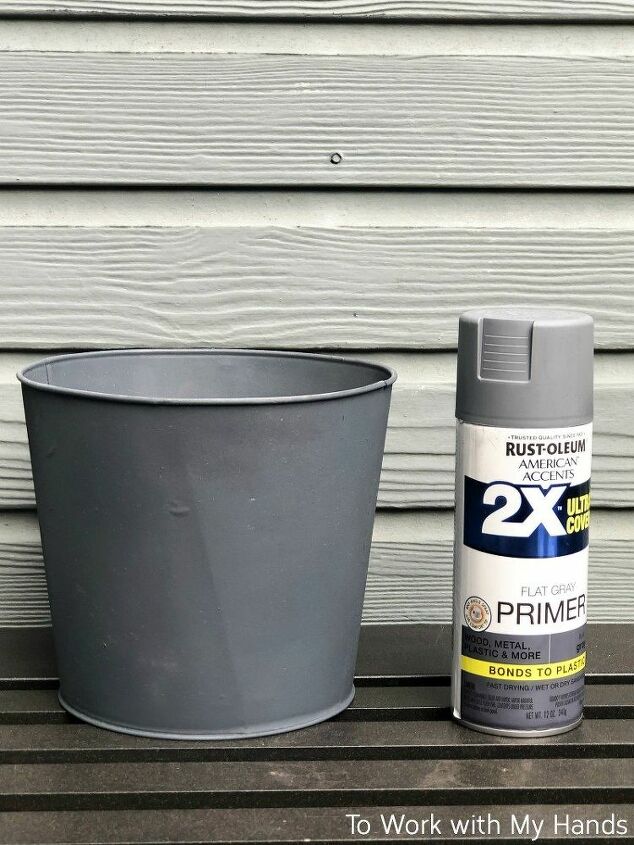
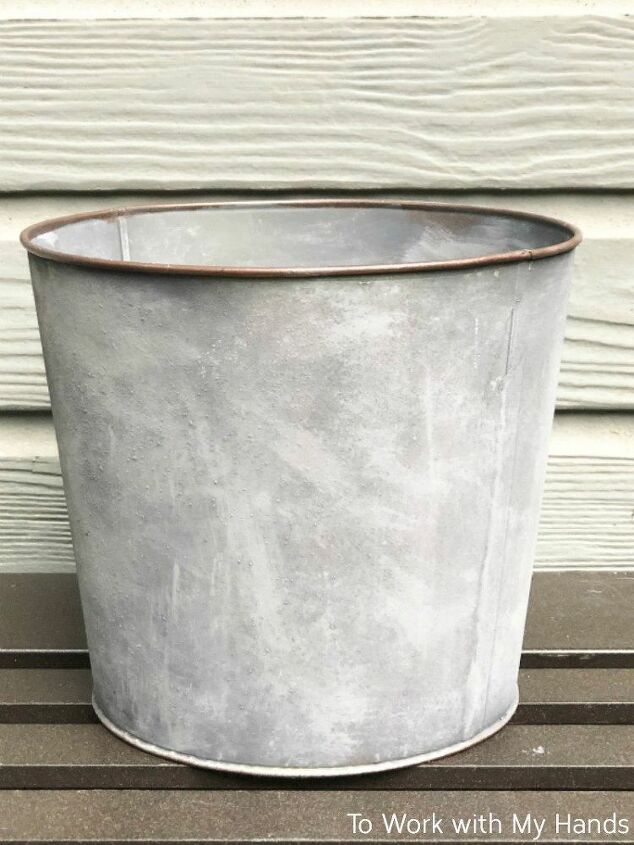
Since I was going for an aged look, I didn't want a shiny finish and used flat grey primer for the base coverage.
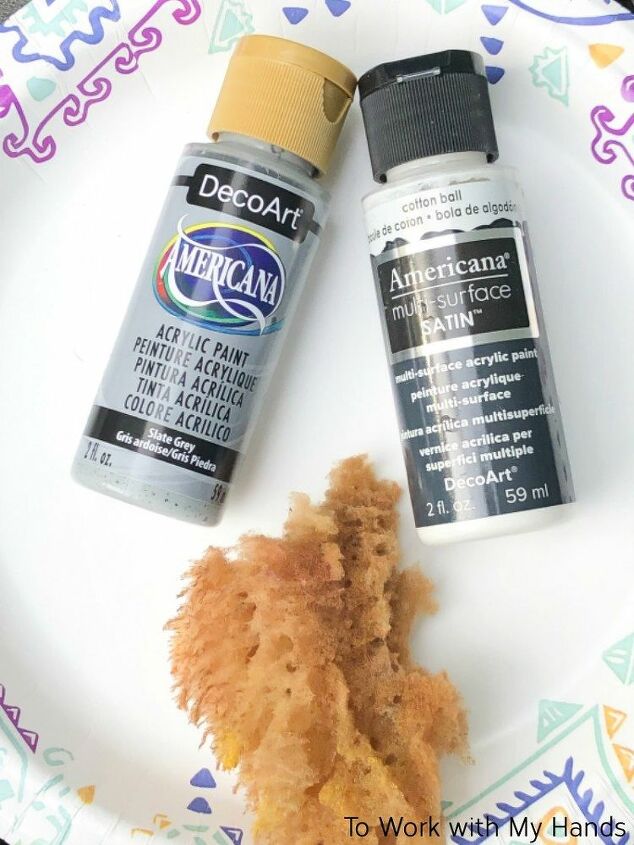
Here's what really works the magic though - acrylic craft paints.
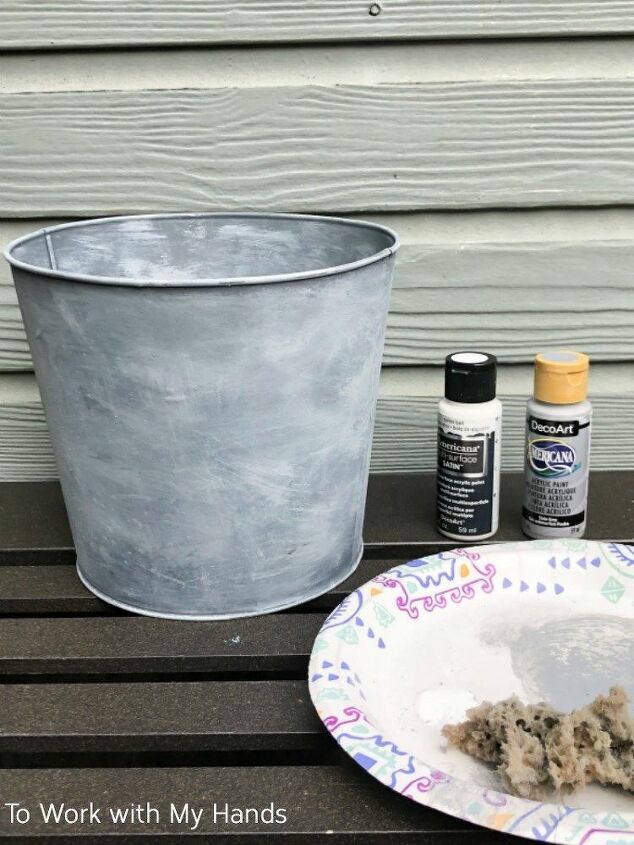
I used a light grey and white, dabbed on and blending in with a damp sponge.
Look what happened next:
Isn't that a dramatic difference?
It took a couple of applications before I was happy with how it looked. The first try wasn't blended well enough and looked like...paint smeared on a bucket! (I've got a pic of that on the blog if you want to check it out.)
The second coat really made the difference though and when I looked for galvanized metal, I could see it.
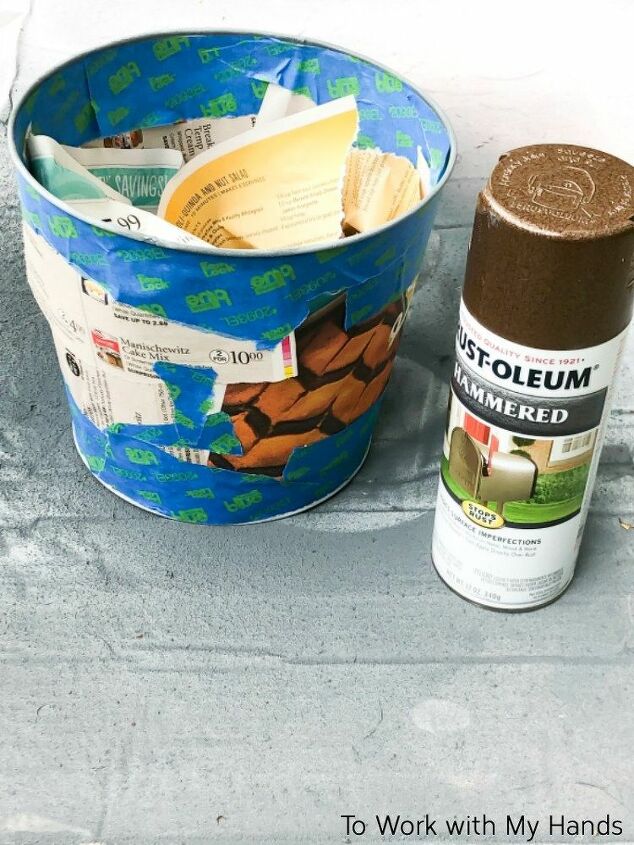
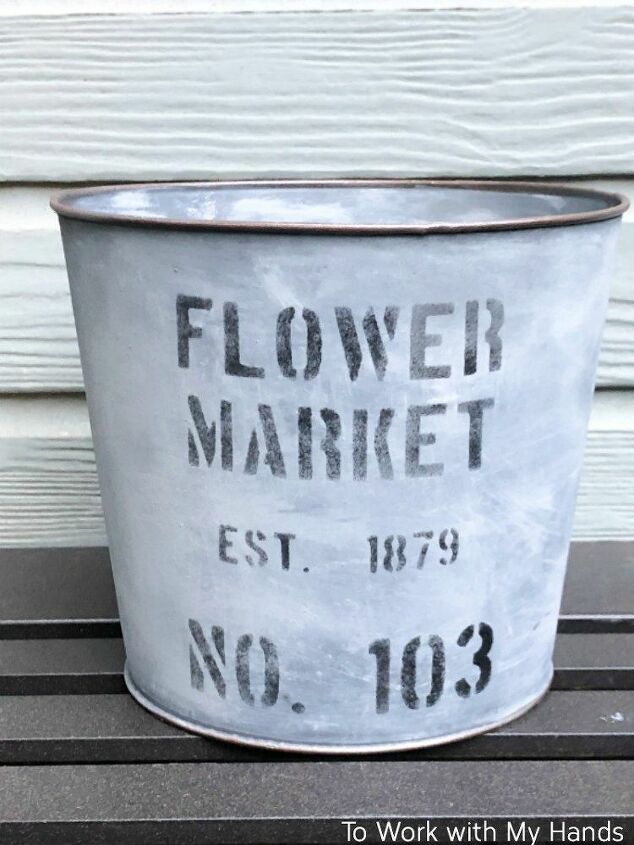
But it still needed a little help to look like it had been on the job for a while and a brown hammered finish paint was ideal.
I taped off the top and bottom rims, then hit them with two light coats of paint.

I designed a new stencil for the project, taped it to the side of the bucket, and gave it a light transfer with black paint.
If you're new to stencil art, here's my best tips for a flawless transfer every time!
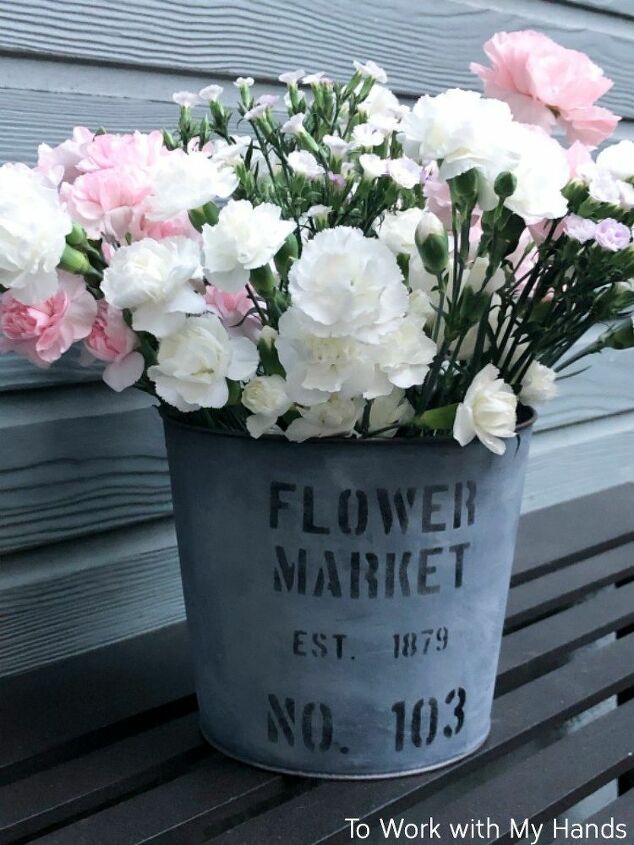
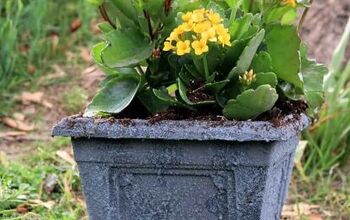
Filled with a brimming bouquet of pretty flowers...it almost whisks me away to a beautiful European flower market.
At least in my imagination. 
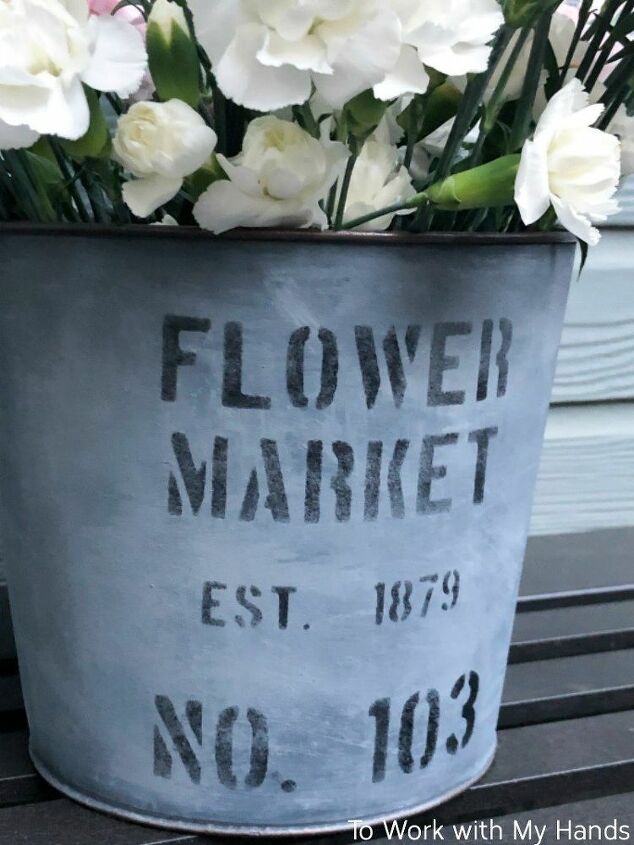
So what do you think...does it look like aged galvanized metal to you?
Stop by the blog for more great thrift find projects, get your FREE Thrift Shopping Cheat Sheet, and check out the entire series of posts - How to Thrift Shop Like a PRO - for hacks you can use to snag the good stuff every time you shop!
Click the link below to visit.
Happy thrifting!
Live Creatively,
Karen

Comments
Join the conversation
-
Nice but Santa was so cute.
-
Nicely done.


Frequently asked questions
Have a question about this project?
Did you seal it?
Looks great! What a super idea! Thanks for sharing!
I have a popcorn bucket but it has raised design. How do I Get rid of raised design?