


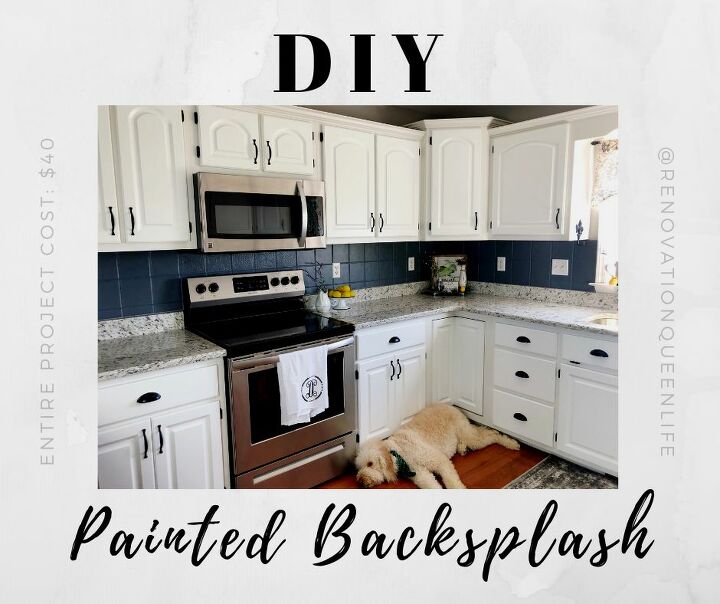
DIY Painted Backsplash

Wanting to update your kitchen without breaking the bank? This DIY project only requires a few supplies and can be done in an afternoon! Paint the outdated backsplash you currently have and save some major cash!
Follow me on IG for more DIY projects: @renovationqueenlife
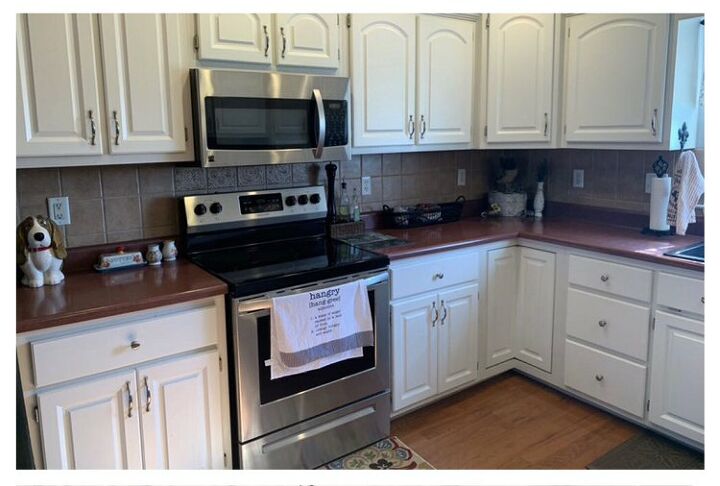
BEFORE
The cabinets are 20 years old, but in great shape. With an updated backsplash and new countertops, this kitchen now looks brand new!
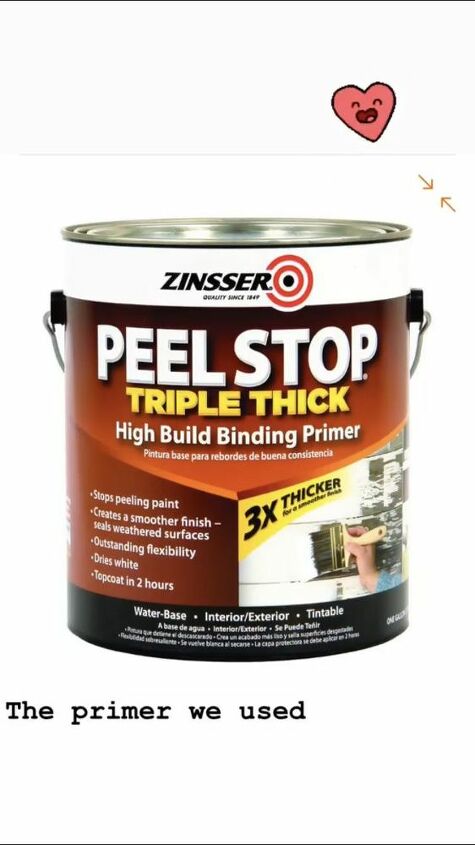
STEP ONE: PREP
Lightly sand down the surface of the backsplash with sandpaper. I used 100 grit with my electric sander.
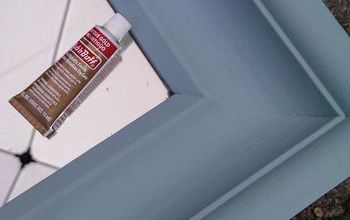
Then apply a thin coat of Zinsser Peel Stop Triple Thick Primer.
I was surprised at how thin and milky the primer seemed, but it did a great job!
Don't be scared by the appearance of the primer after it dries!
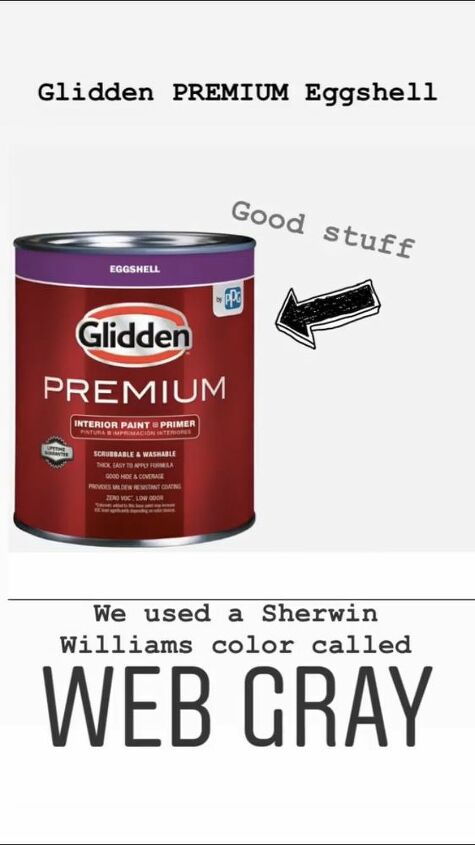
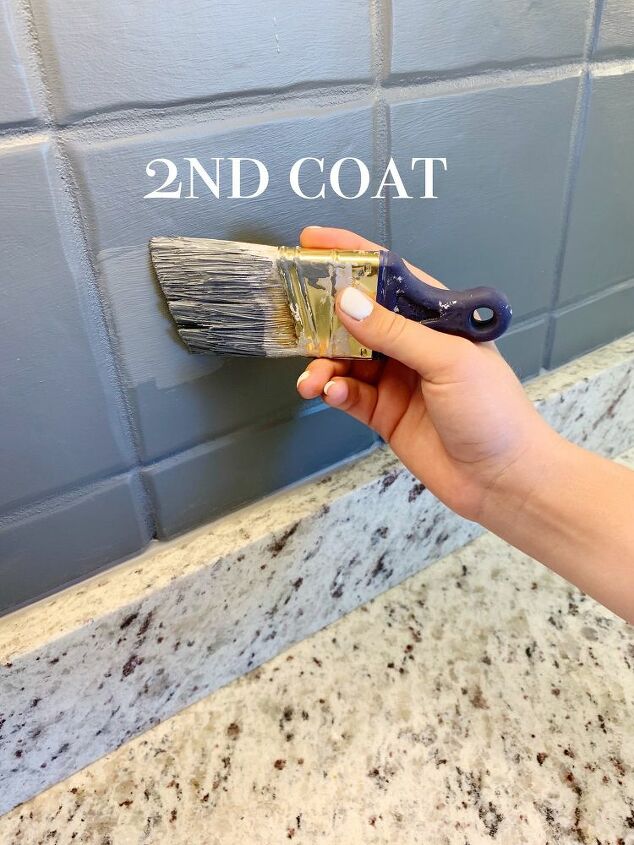
STEP TWO & THREE: PAINT
Paint two coats of whatever color you have decided to use. For this project, I used Sherwin Williams Web Gray.
Glidden Premium is my favorite type of paint, so I always have the paint counter at Home Depot mix my Sherwin Williams color in Glidden paint, but I'm sure you could use any brand that prefer.
For this project, I used eggshell because I wanted the tile to have a matte look without being so flat that every finger print showed.
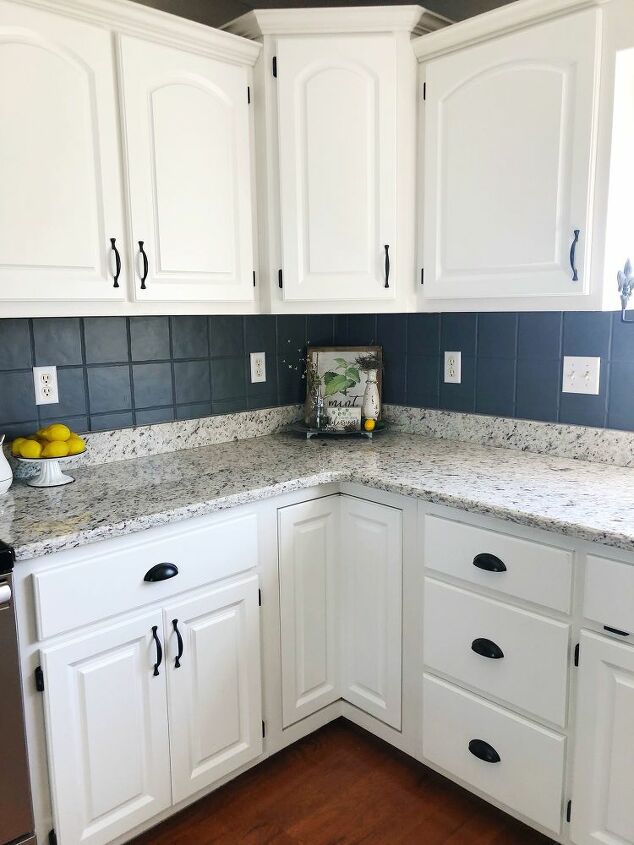
Painting the existing backsplash saved quite a bit of money, so we were able to splurge on some nice granite countertops.
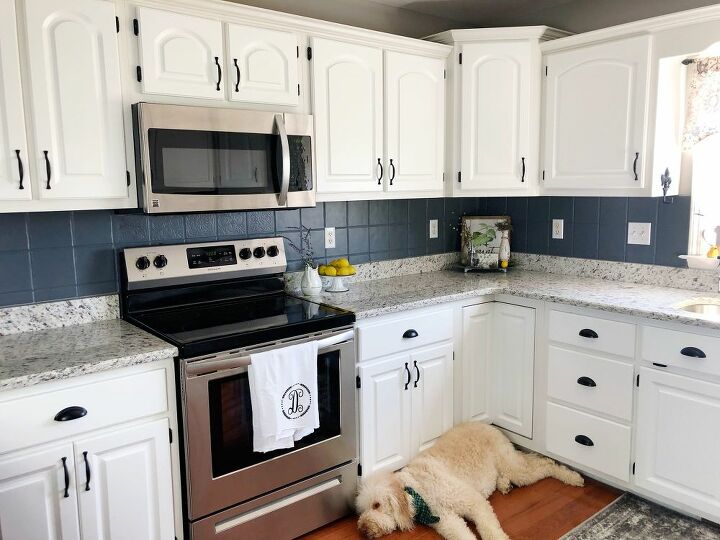
Oliver approves!
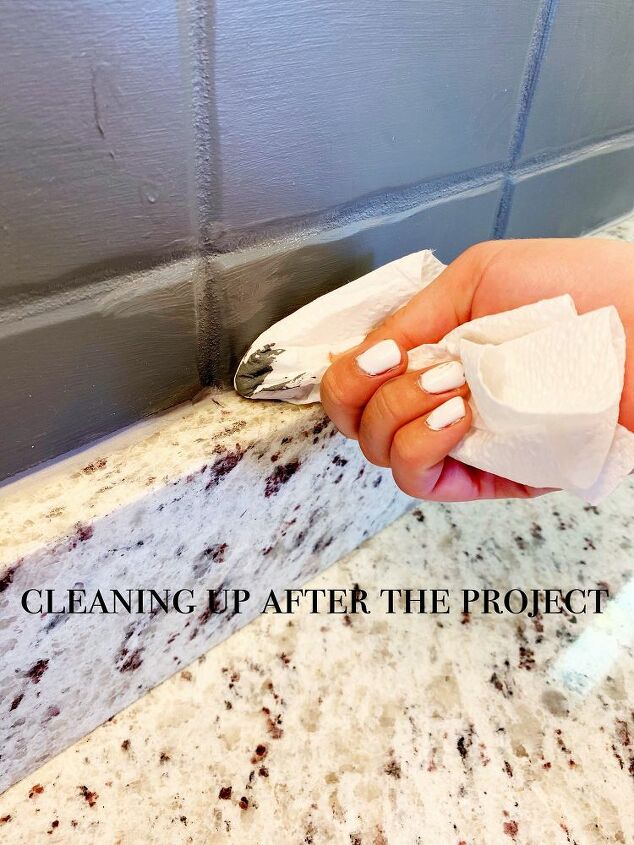
Please Note: You could continue on with a sealant or a glaze, but I did not. The backsplash has been done for approximately six months now and does not have a single scratch! It has held up wonderfully!

Now, this kitchen is ready for at least another 20 years of service!
Resources for this project:


Comments
Join the conversation
-
Your furbaby is too cute
-
GREAT JOB…..but the curtain has to go.


Frequently asked questions
Have a question about this project?
If you have textured tile do you need to sand before primer?
Does this work on old formica?
I see you changed out the drawer pulls, but I'm wondering about the cabinet hardware. Did you paint the original handles and also the hinges? I have the same ones and I am trying to decide what to do about my hinges. Any thoughts or help is appreciated.