


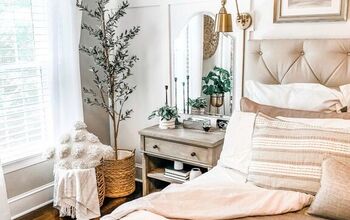
Tree Branch Bedroom Lighting

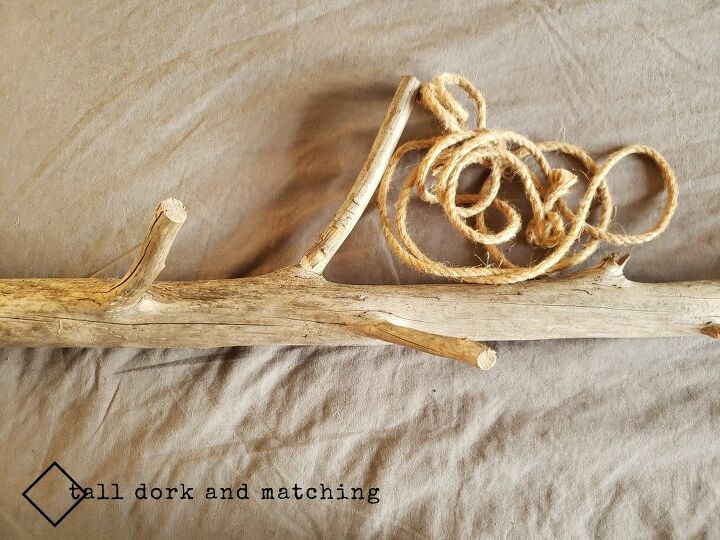
Back one day when we didn’t live together and had to do the whose-house-shall-we-stay-at dance (Matt always won because he had a dog). Abby was on her way over one day and stumbled along a long dried out branch on the side of the road. As she does, she brought it inside and waited for inspiration to strike. And as usual, that branch was propped up against the wall for close to a year, a move, and countless other completed projects.
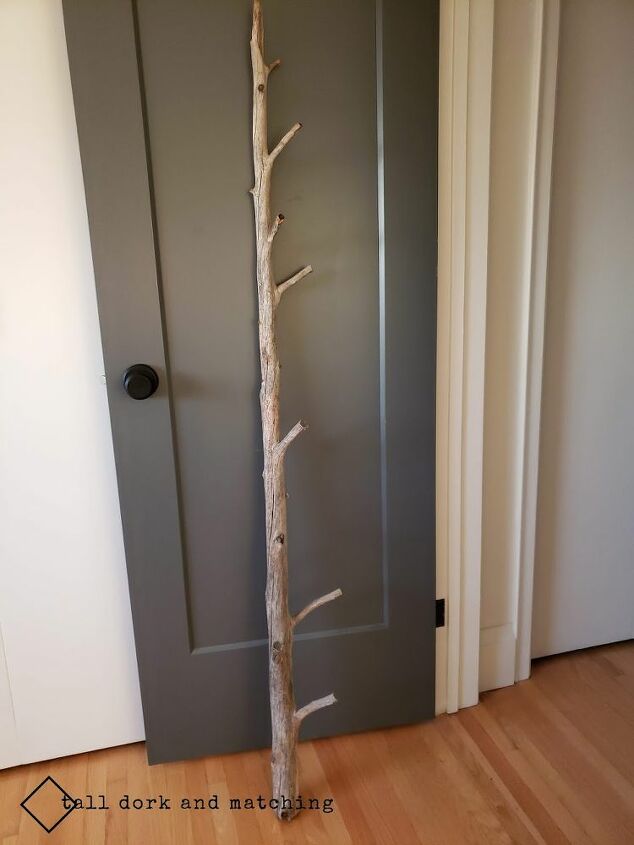
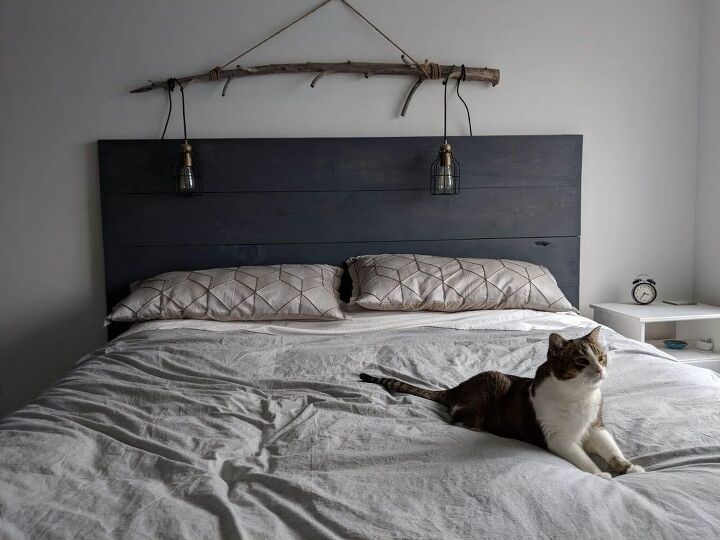
After we moved in together, our new place was short on space, so we did a DIY Ikea hack on our nightstands to maximize space ( tutorial for another time!) but didn’t want to waste precious table top space on lights….This is how the branch finally found its calling!
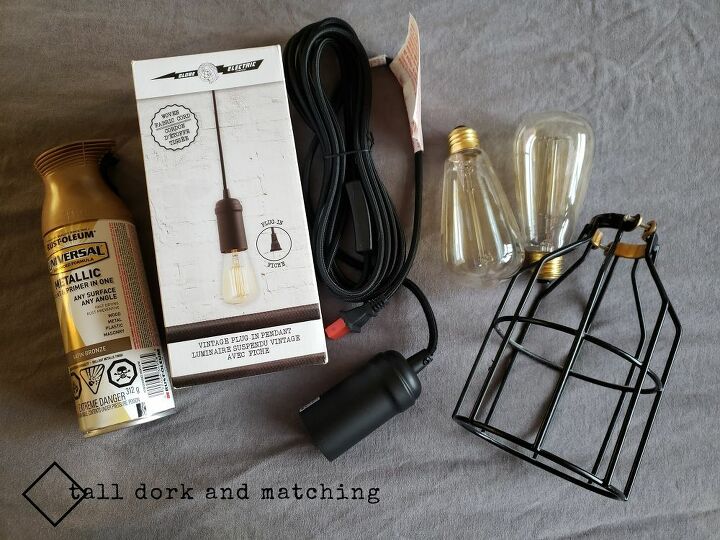
Things you’ll need for this project:
- Branch
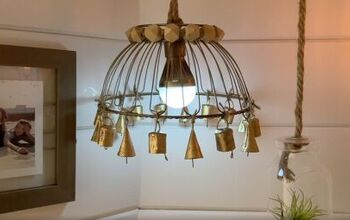
- 2 basic pendant lights
- 2 light cages
- 2 Edison bulbs
- Spray paint – We used Rustoleum in Metallic Satin bronze
- Painters tape
- Rope
- Scissors
- Hook
- Anchor
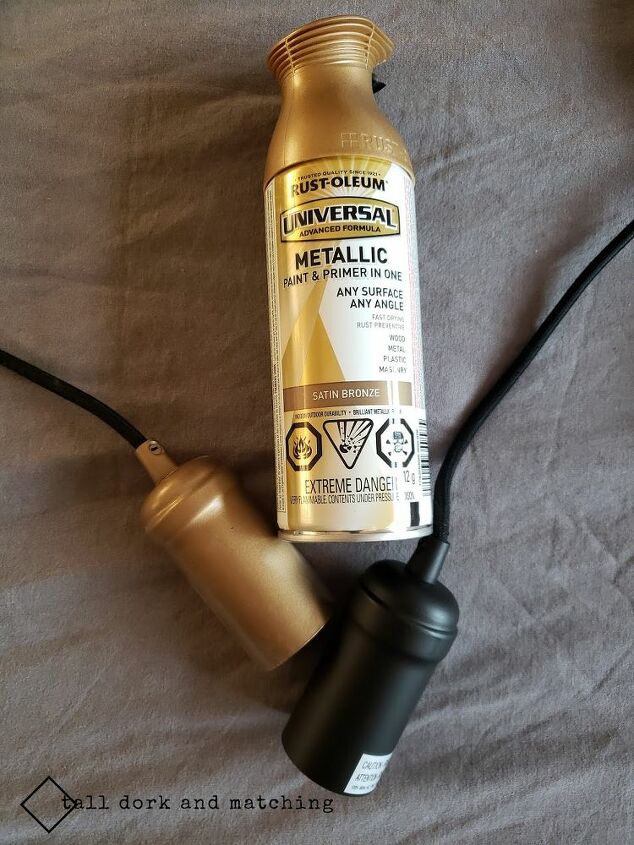
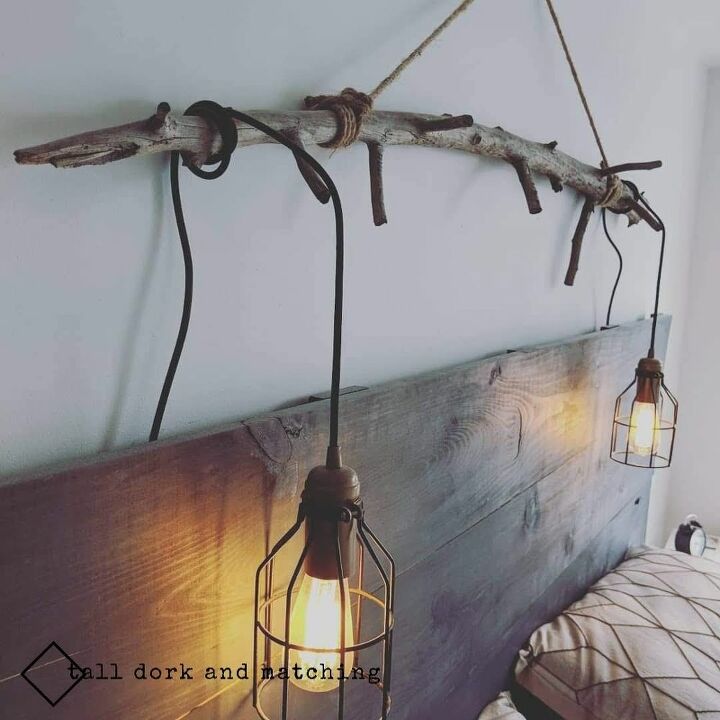
We started by spray painting the metal part of the pendent light. We protected the cord by wrapping it in painters tape and did 3 light coats of spray paint. We liked the gold as it tied in the golden handles on the nightstands we had.
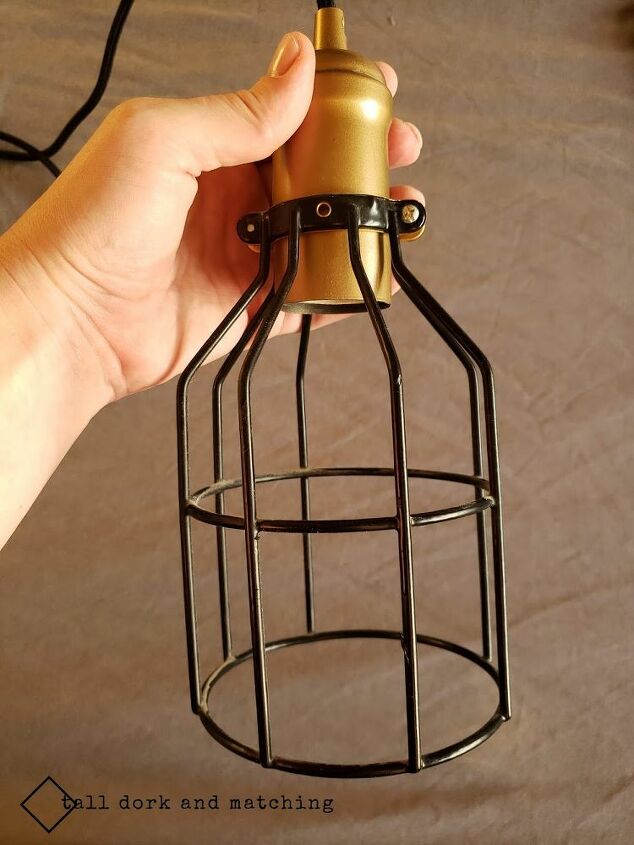
Once dried, we added the cage to the pendant. There should be instructions on your cage but basically you just loosen the screws on the cage, slide the cage onto the pendant, and secure in place by tightening the screws back up. Easy!
We then hung the branch by tying rope to both sides of the branch. We did 2 basic knots and tied the excess rope off so it didn’t stick out. Once its tied and hung you can rotate the rope a bit to hide the knot behind the branch. The most important thing is that it’s secure. Speaking of secure…You will want to hang the rope on a hook that is in an anchor so it is very secure in your wall. You do not want this falling on your head while you sleep!!

Once it was secure, we wrapped the pendant cords around the branch, and voila, a space saving rustic tree branch light.
What we learnt from this project:
-Originally we didn’t want to have the cages. We wanted just the exposed Edison bulbs. When we hung it up, it looked great! However they get real hot and damaged out headboard a bit. If you plan to have the bulbs rest against anything, consider the cage. If you are going to have the branch suspended from the ceiling then exposed bulbs without the cages would look amazing!
If you're looking for more DIY tutorials like this. Pop over to our Blog. We love hearing from you too if you have any feedback
Resources for this project:
See all materials


Comments
Join the conversation
-
This is very cute. I made a similar one and wrapped twine around the light cord so that it all blended in better.
-
Cute for sure, but...my husband would surely bang his head on the hanging lights! Me too, probably...


Frequently asked questions
Have a question about this project?
How do you turn the switch off and on? I don't see the on/off switch. Love the idea planning to use it!
What kind of anchor did you use? Would like to see what it looks like.