


Budget Boho Lighting
The next time you need a little extra lighting, grab a colander and make this amazing boho-inspired light.
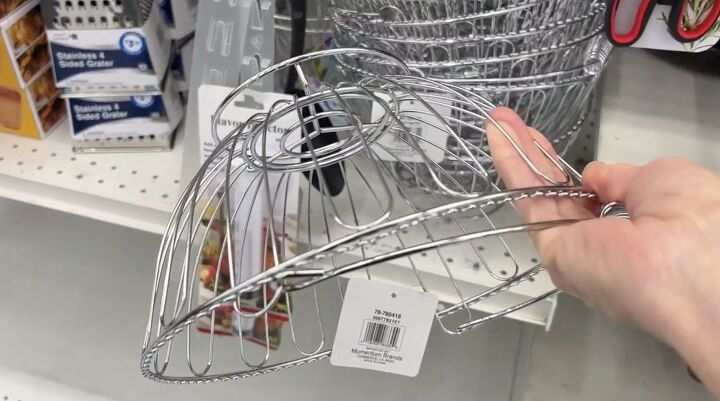
For today's DIY, we are going to head over to the dollar store, and grab a metal colander. Find a colander that has a shape that you like.
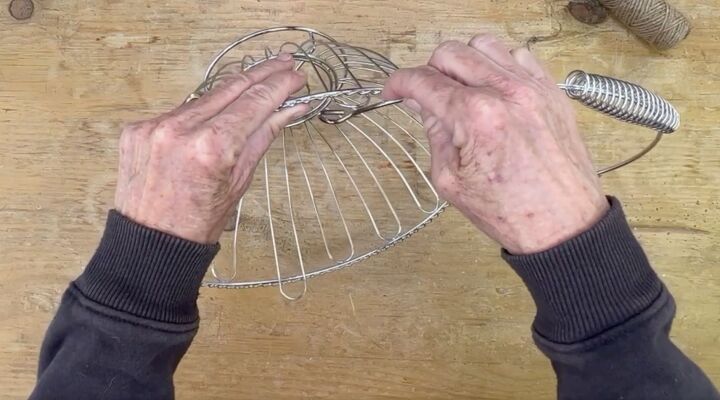
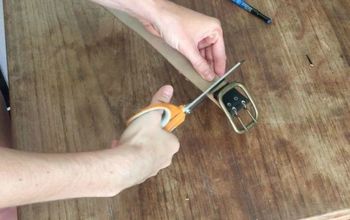
The first thing you'll want to do is to remove the handle. It should slip off pretty easily but you may need a pair of pliers to help.
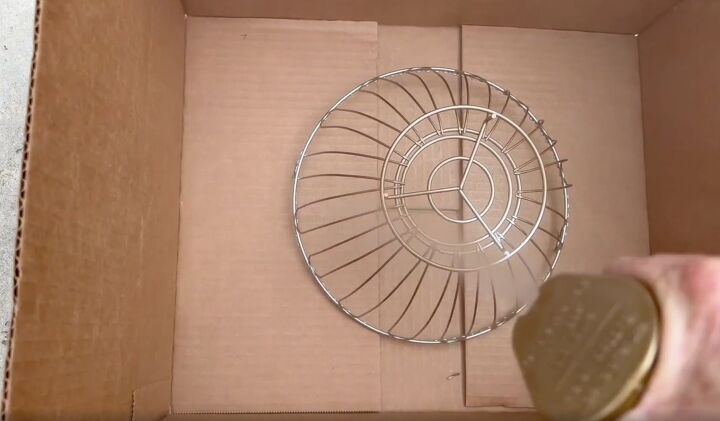
Then you want to grab some gold spray paint and spray it all gold. It will change up the look of it instantly.
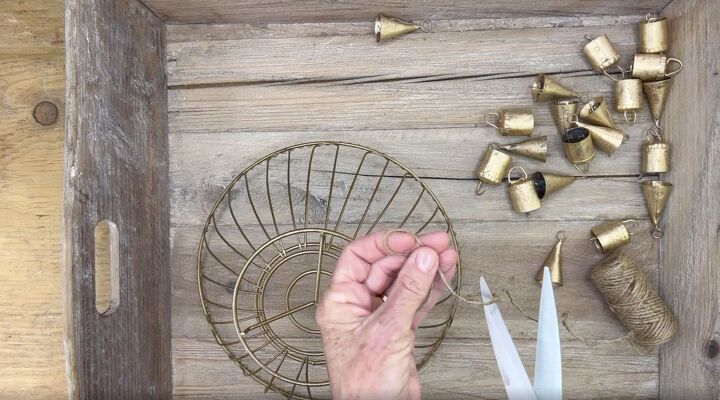
Next, you want to find something to embellish the lamp with. I chose these cool bells that were easy to attach. I started by cutting some twine about a four-inch length.
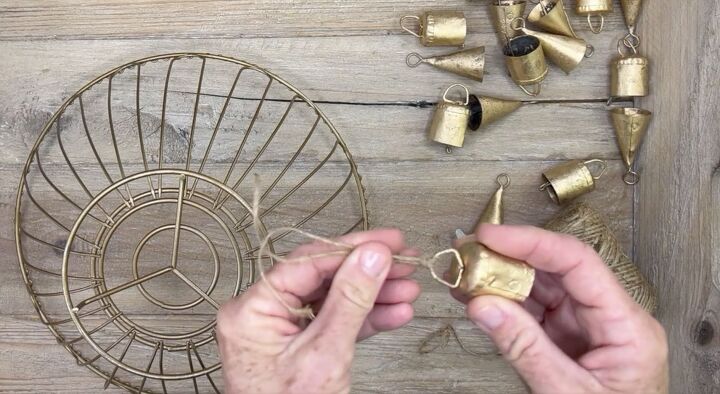
Fold it in half and take the loop side and slip it through the ring on the bell.
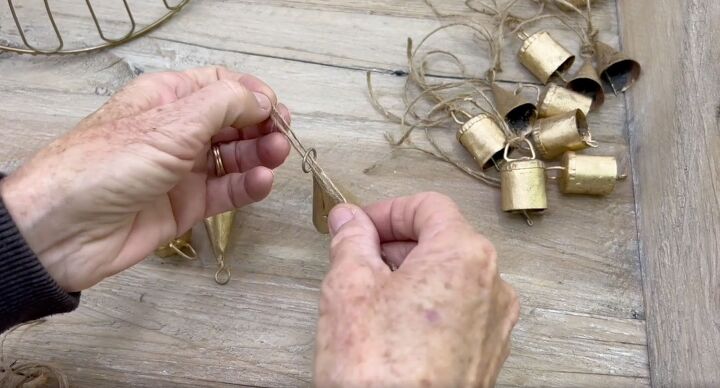
Continue doing this to all the bells until you have enough to go all the way around your chandelier. If you don’t want to use bells, you can always use shells or crystals or something else that you find at the dollar or craft store.

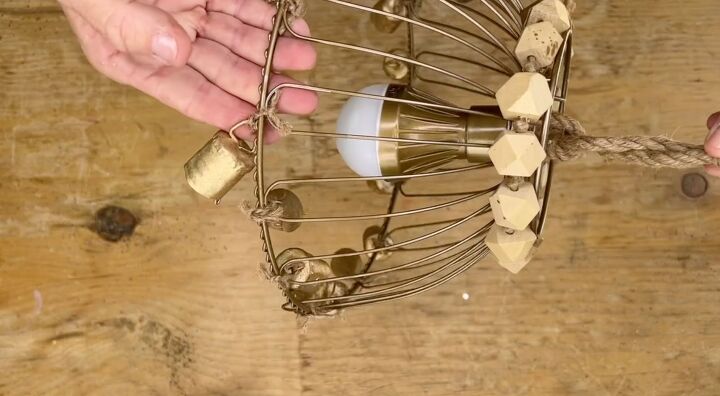
Once you have enough, you want to start adding them to the colander. Grab your first bell, and tie it right onto the colander.
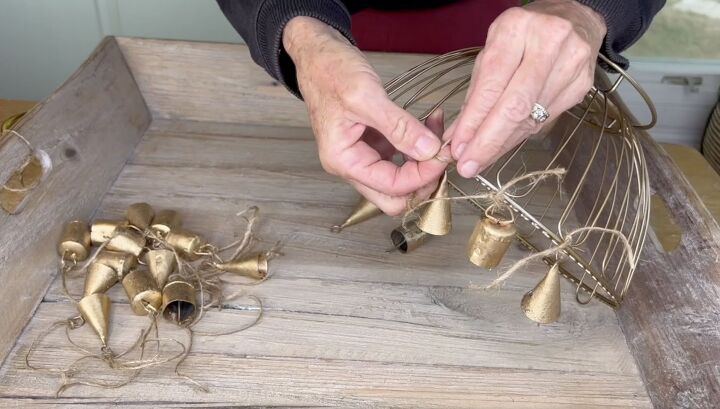
I added one to each loop alternating between different styles of the bells. Continue all the way around, double knotting each one to hold it in place.
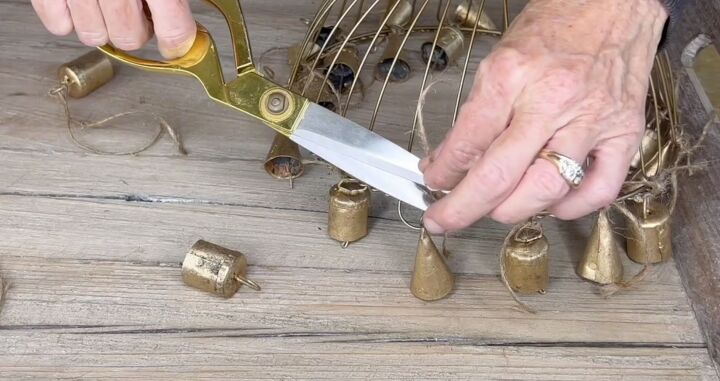
After they are all attached, trim off the excess twine from each bell. I like to keep a tiny little tail still remaining because it gives it a cool, boho kind of vibe.
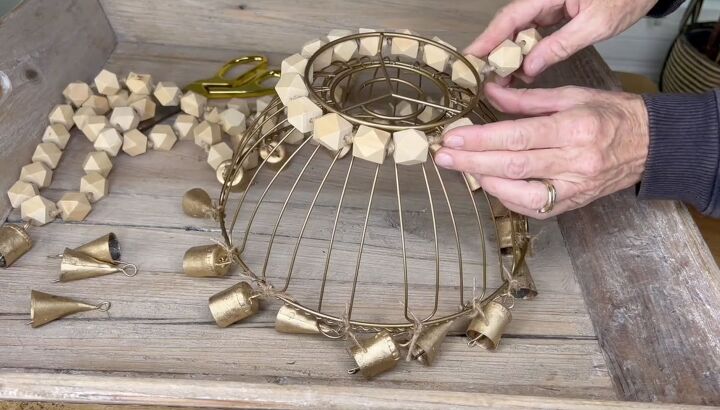
Next, you want to grab a wood bead garland. I chose one that was more geometric but you can choose any shape or style that works for you.
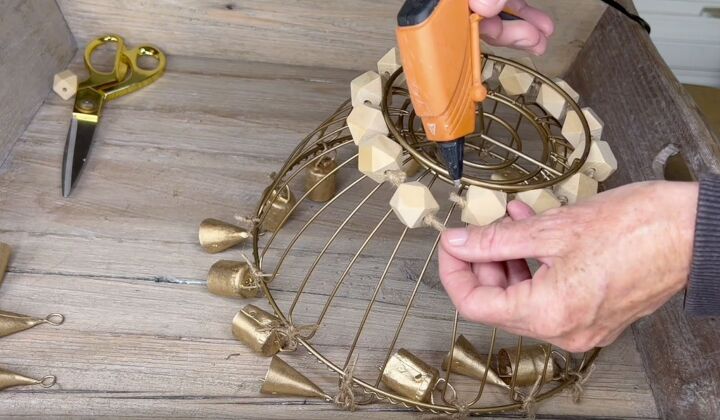
Attach the garland under the lip at the top of the light fixture. I used a little hot glue to attach the ends together.

To hang the chandelier, I threaded some thick twine through the top of the colander. I tied a knot to hold it in place and left it a few inches longer than I needed.
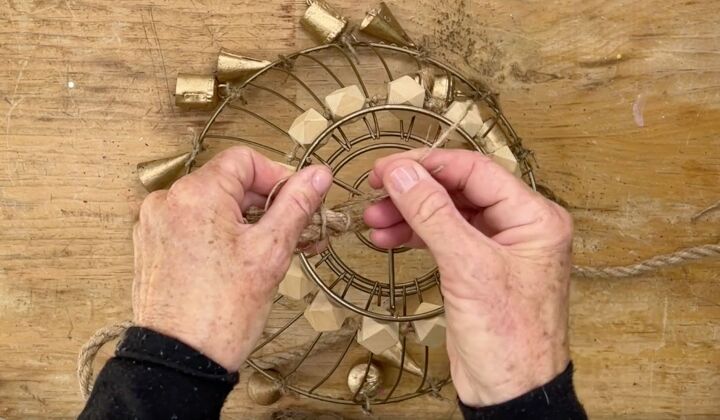
I used thin twine and wrapped it all around the ends of the thick twine to give it a nice finished look.
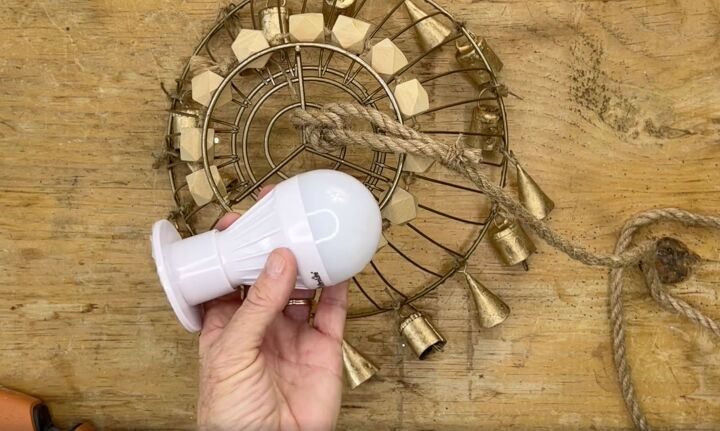
To light the chandelier I chose a battery-operated light bulb that has a little holder with a magnet to hold it in place.
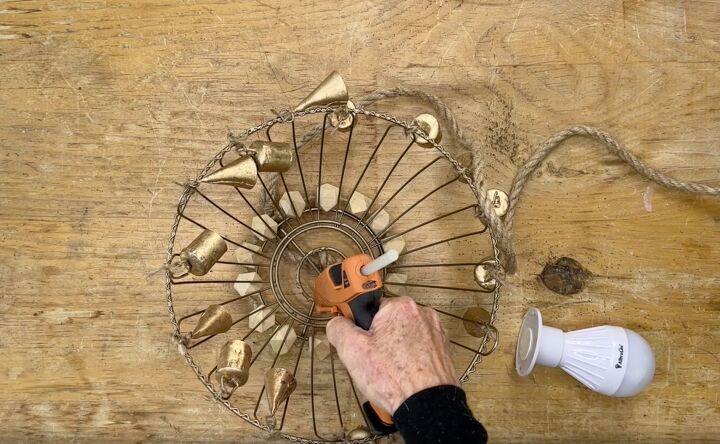
I used hot glue to attach the holder to the underside of the colander top.
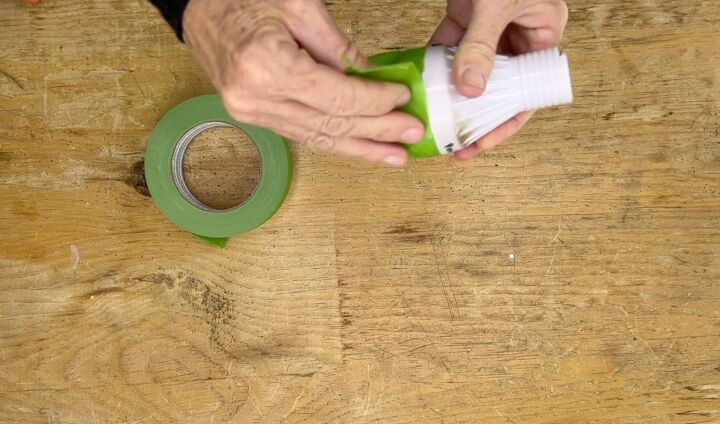
I decided I didn't want it to be white since it's an open chandelier so I put some frog tape along the top of the light bulb.
Then I took the same gold spray paint and painted it.
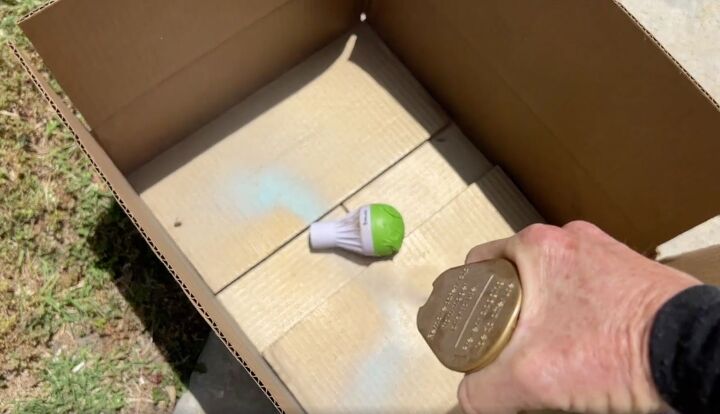
I also sprayed the holder piece and stuffed the inside with a tissue so that the magnet didn’t get painted.
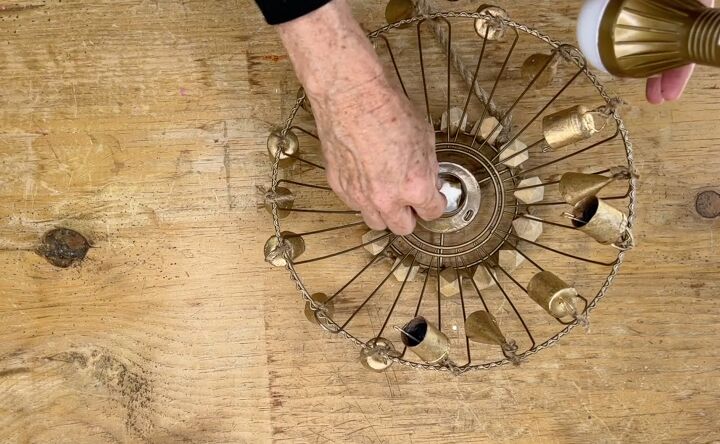
Once both sides were dry, I popped the lightbulb into place.
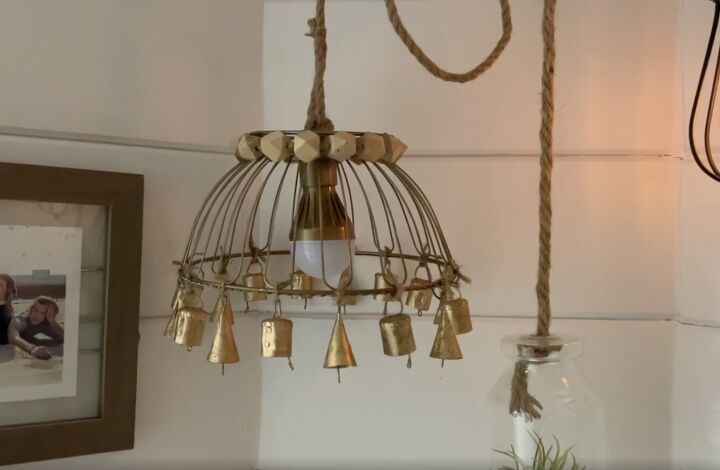
Look how cute this is. I put this in our guest bathroom and it is so cute and very boho chic.
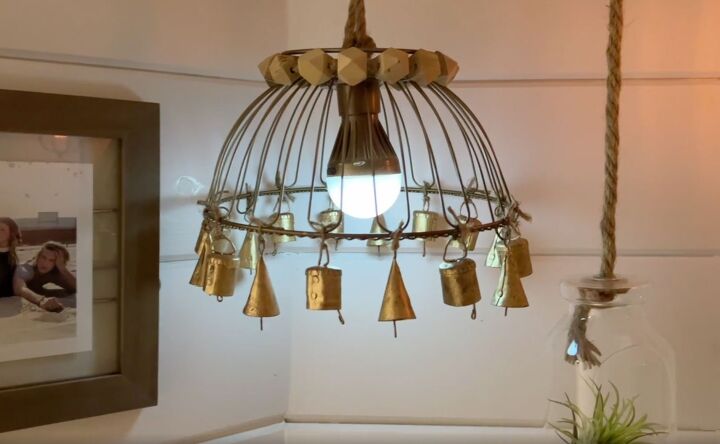
I love the way it turned out and I can see it in so many different variations. I can see it with little pompoms or really anything because this light fixture is so easy, so versatile and the style possibilities are endless.
Resources for this project:
See all materials


Comments
Join the conversation
-
Brilliant idea! Thank you!
-
Really cute!


Frequently asked questions
Have a question about this project?