


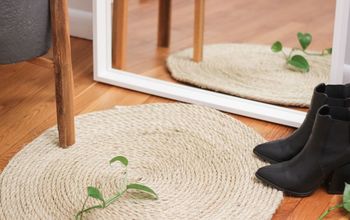
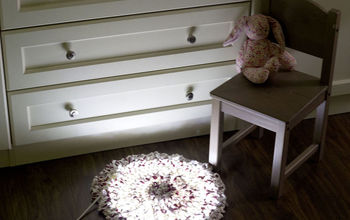
Rope & Spandex Rug

If you're looking for a fairly simple but versatile rug, you may want to try this project out. Though it's a little time consuming, the end result will definitely be a conversation piece (shortly after I finished mine, my sister-in-law came over and saw it as she was leaving, saying, "Hey! Nice rug!" :))

As the mornings get colder, I get less and less excited to hop out of bed every morning. This made my morning routine MUCH more enjoyable!
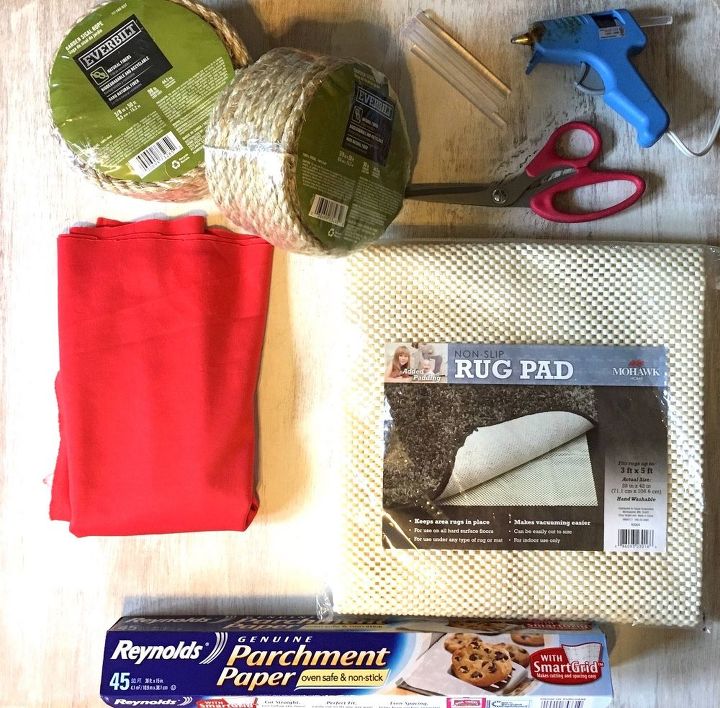
SUPPLIES:
- 2 rolls sisal rope (3/8"x50')
- 1/2 yard spandex material (you can use multiple colors or just one like I did)
- 3'x5' non-slip rug pad
- hot glue gun/sticks
- scissors
- parchment paper
STEP 1: Measure & Cut sisal rope
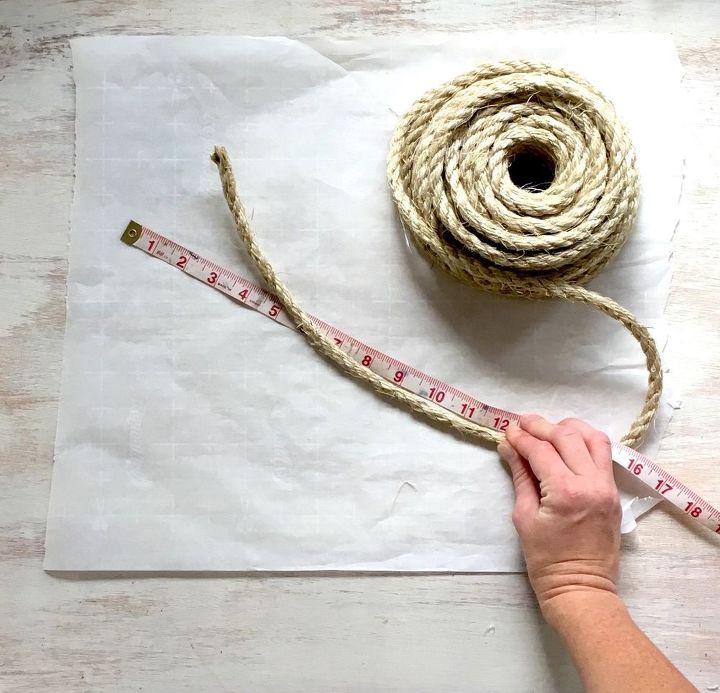
First, I measured and cut strips of sisal rope--I got about 8 strips out of each roll of sisal. I documented all of my measurements, however, unfortunately due to technology issues, my document didn't save and I lost all of my measurements!
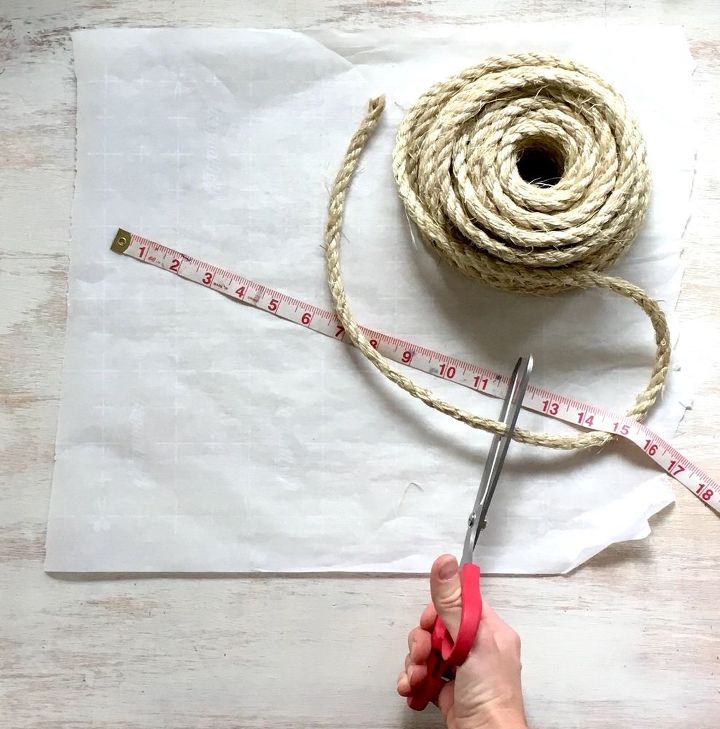
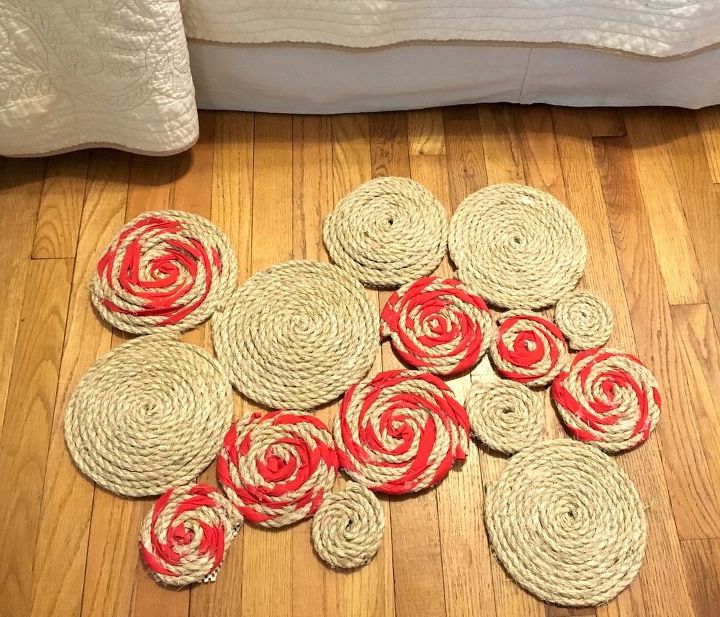
There isn't really an exact formula to get your measurements--you just want to make sure you have at least 3-5 different sizes--my rug turned out to be approximately 24.5"x30" when I was finished and I used all of my sisal rope. You can make your rug as big or as small as you'd like.
STEP 2: Coil plain rope
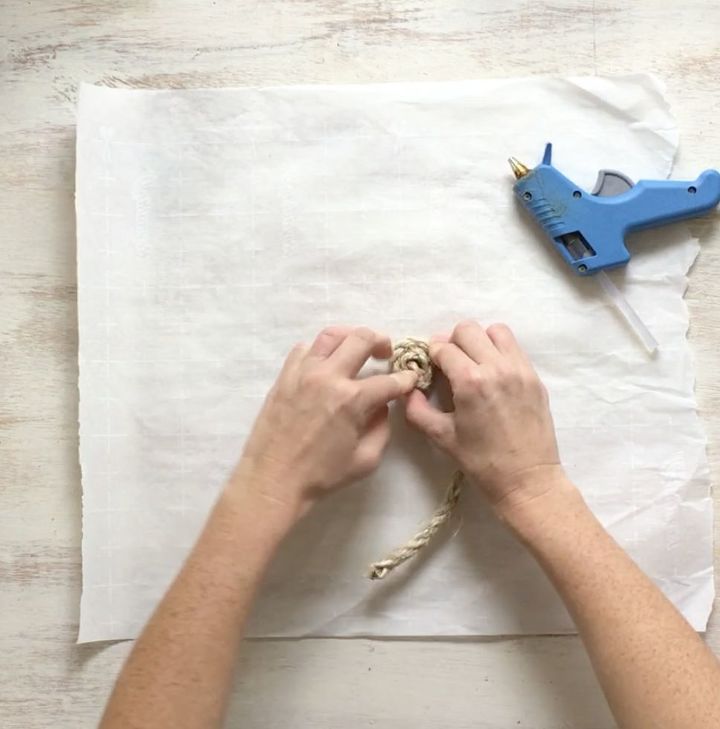
For this step, all I did was take a strip of sisal rope and, using hot glue as I coiled, I wrapped the rope back onto itself.
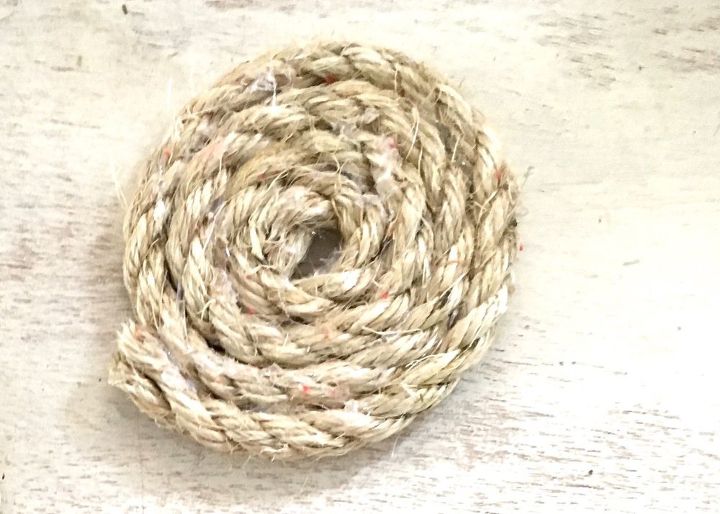
You'll want different sizes of the plain sisal rope so that the spandex-wrapped rope pops when your rug is all finished.
STEP 3: Coil rope with spandex
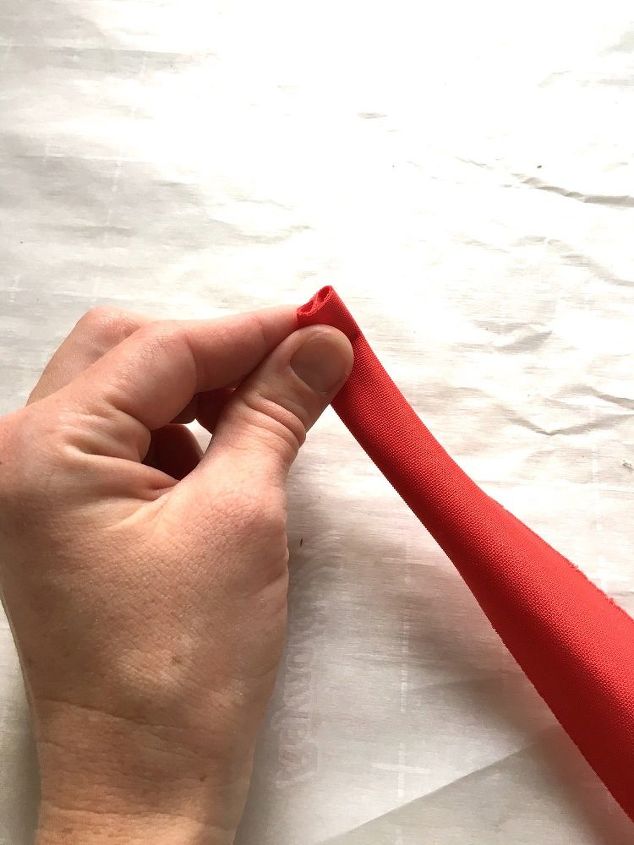
Next, to create the coiled rope with spandex, I took strips of spandex and folded them in thirds, added a little dot of hot glue to keep the end of the strip together...
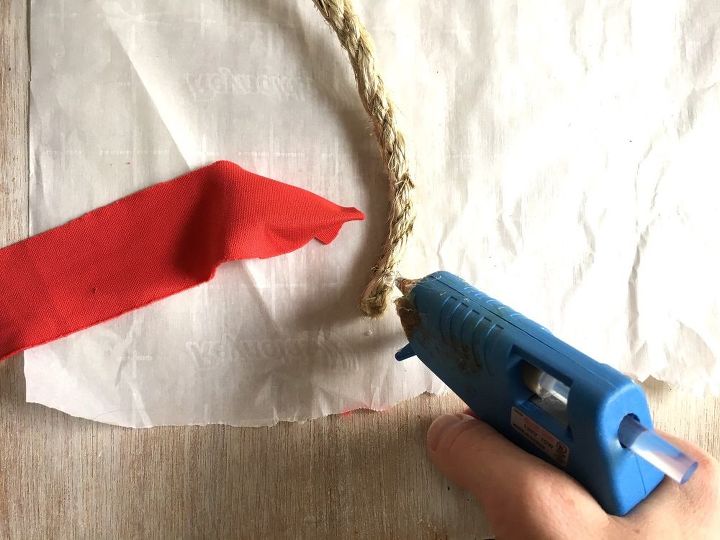
...then I hot glued the spandex to the end of the rope.
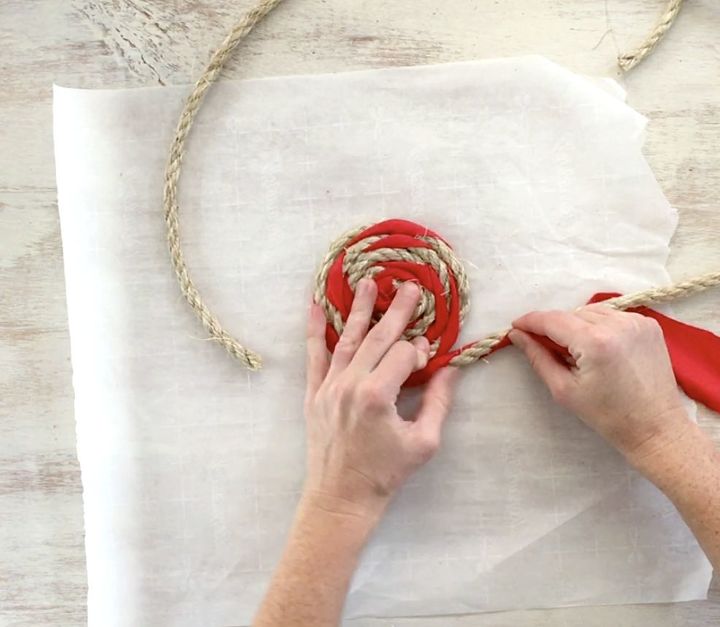
Once the end of my spandex strip was secured, I began wrapping the spandex around the rope while also wrapping the rope onto itself. I tried to hold everything tight so that there was spacing between the spandex and the rope.
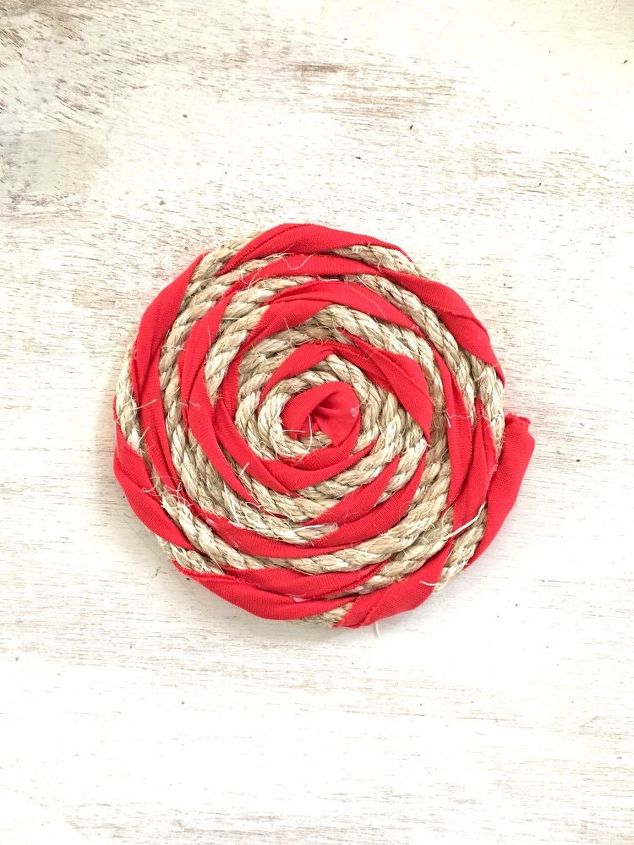
Here is what your spandex-wrapped rope should look like.
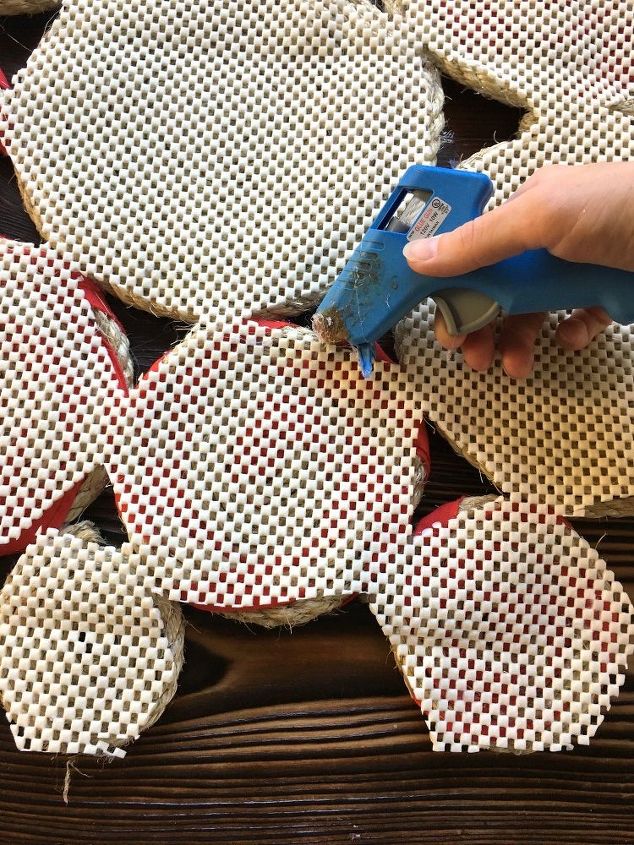
STEP 4: Arrange rug design and hot glue rope circles together
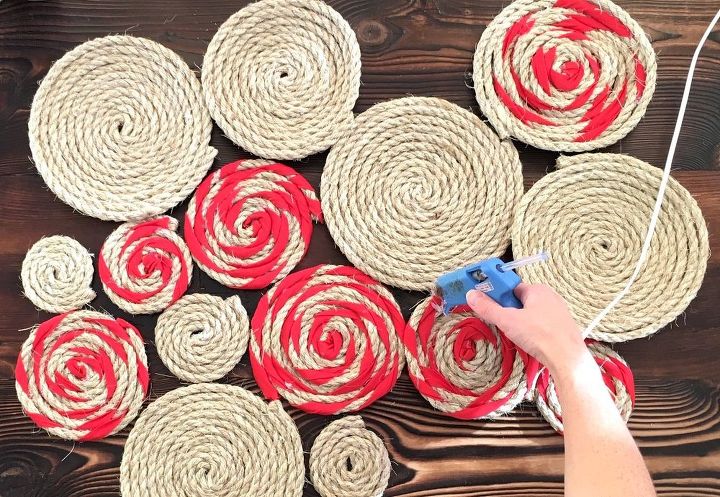
*Note: for this step you'll want to ensure that your GOOD SIDE is faced DOWN!
Next, I laid out how I wanted my finished rug to look. I didn't have a method at all for this--I just tried to make sure that the finished rug wasn't going to be too symmetrical. You'll want to essentially do this step backwards--have your glued, ugly side facing up and add small strips of hot glue where the circles touch. This is to make life easier for you when you get to the next few steps.
*As you'll see in my final photo, I made the mistake of getting ahead of myself and gluing and attaching my rug pad on my good side {insert my tantrum here}. You can't tell from the photos but I wasn't a happy camper that I made this mistake.
STEP 5: Glue & Cut rug pad
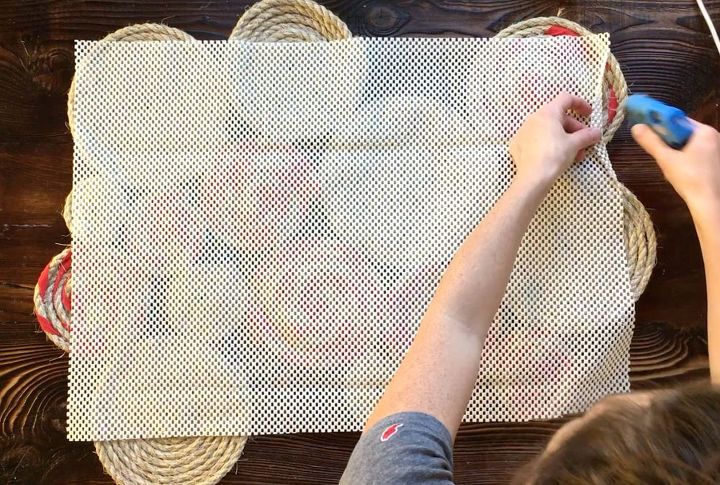
After I glued my circles together, I measured out a piece of rug pad and glued it to the rug (again, this should be done on the BACK of the rug!).
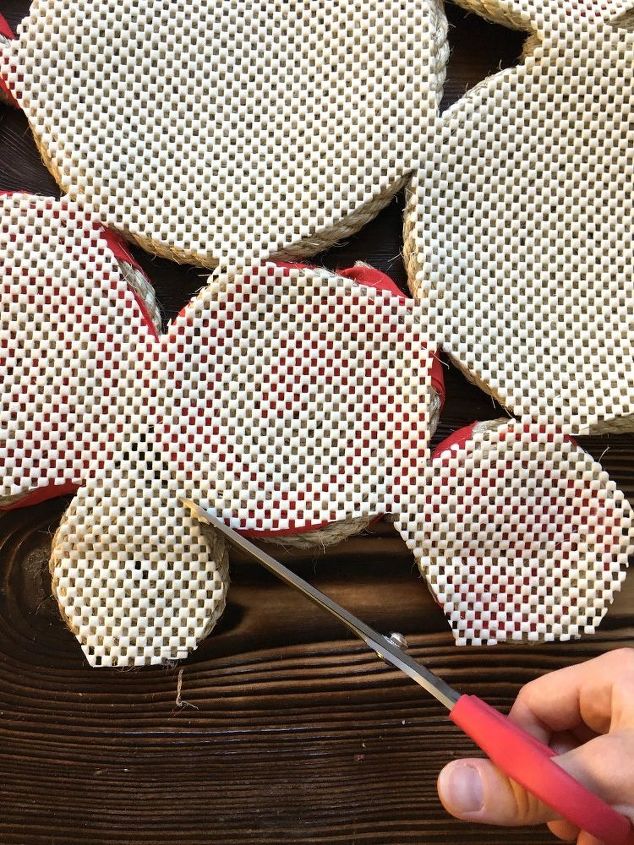
Once the outer edges of the rug pad was glued to the rug, I cut away all of the excess...
...then, I went back and glued the inner edges of the rug pad.
Though I messed up with the rug pad being glued on the wrong side, I'm still happy with the overall look (from a distance). I think the red circles almost look like peppermints so this could pass as a rug for my Christmas decor.


Comments
Join the conversation
-
Love this💕 great job
-
I'm thinking of just doing one in one big circle. Thanks for the idea!


Frequently asked questions
Have a question about this project?
Very clever, well done
How do you clean this rug ?
I like it. Does it itch the sole of the feet?