


Easy Laundry Room Sign With a Rub on Transfer

Years ago I bought these rub on transfers meant to be assembled as an easy border, remember the craze of wallpaper borders?? These, I recall were bought in a package of six identical transfers so I shared them with family members for their laundry rooms. My parents were moving at the time and mom just stashed it away for later, actually 15 years later! Now as seniors they have moved once more and a sign made with the transfer will be more practical.
For this project I recycled an old welcome sign she had, originally it had a decoupaged picture on it.
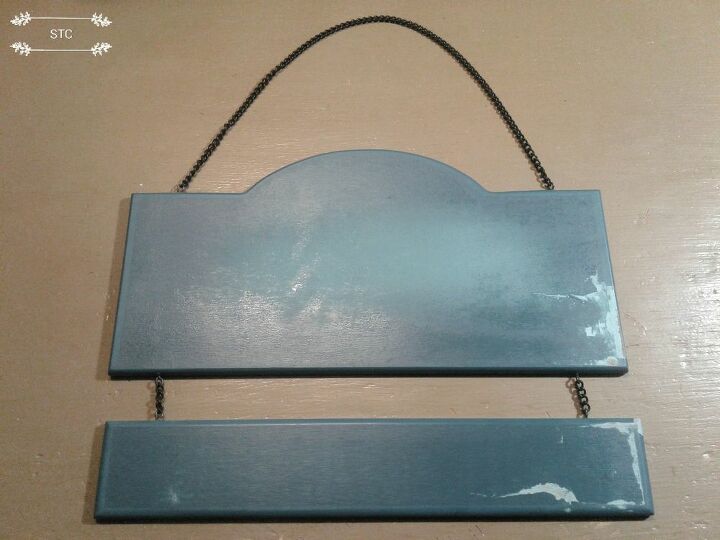
I gave it a light sanding with 180 grit pad to remove any last remnants of glue.
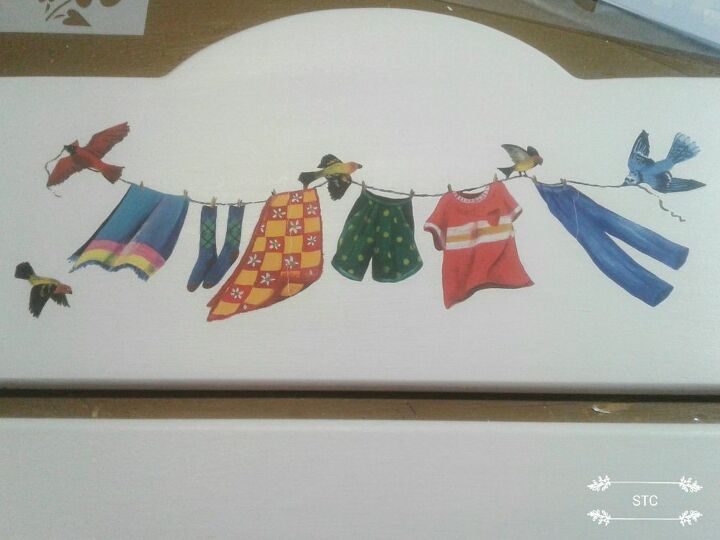
Once it was dry I could place my transfer on and decide on the design and layout, no set plans just create as I go along.
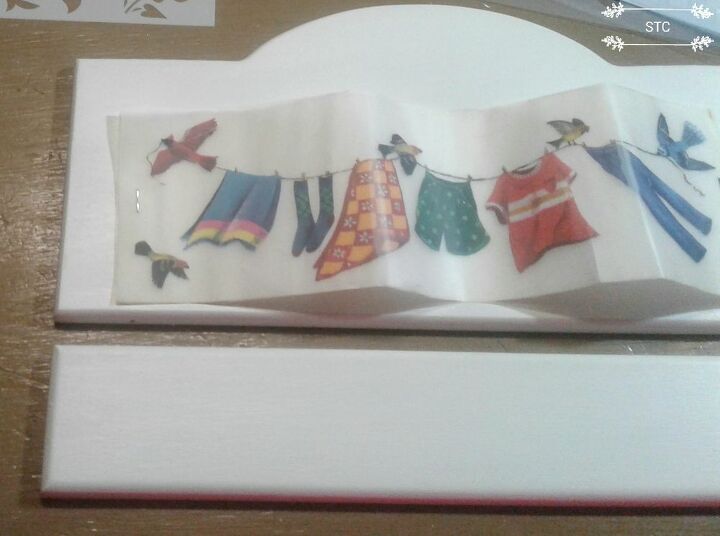
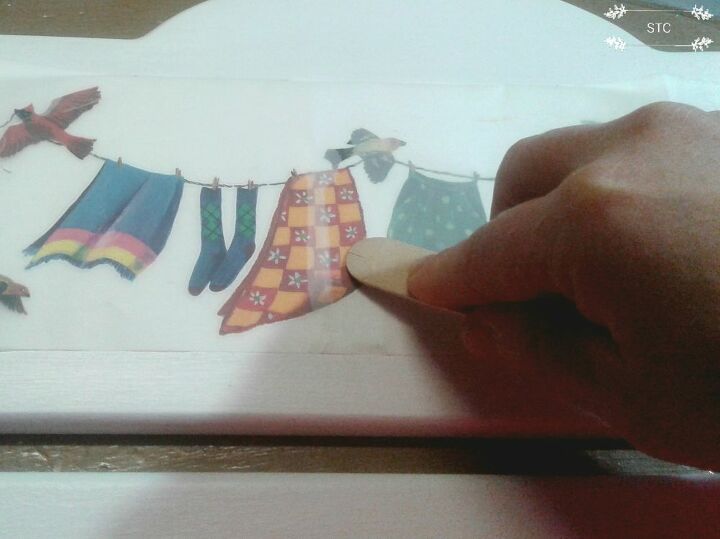
Once I committed to the placement it's as easy to apply as the name suggest, rub it on until it all releases underneath. I used a tongue depressor to rub it on because it's what was handy, a credit card works fine too.
Once the film looked opaque I gently lifted one side to check on the progress while firmly holding the other side in place. I didn't want the placement to shift as I was midway through.
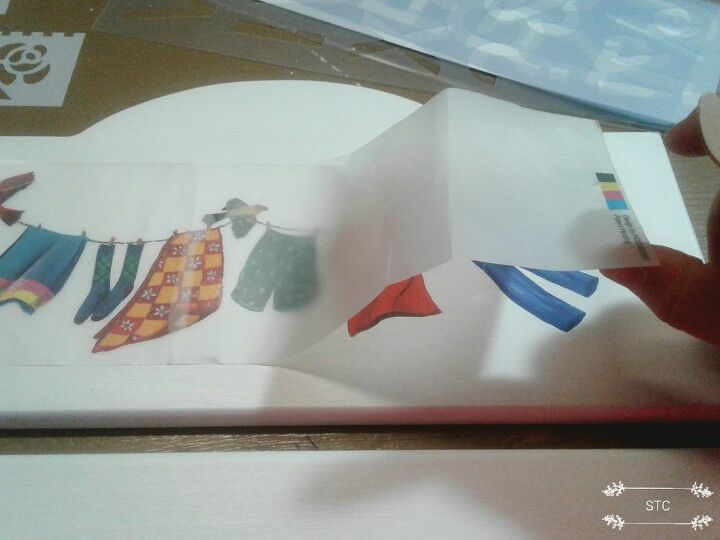
If I missed a spot it's easy to fix, lay the film back down and I simply rubbed over that area to get the pattern to release. Once all of the design had been applied I could then safely toss the film.
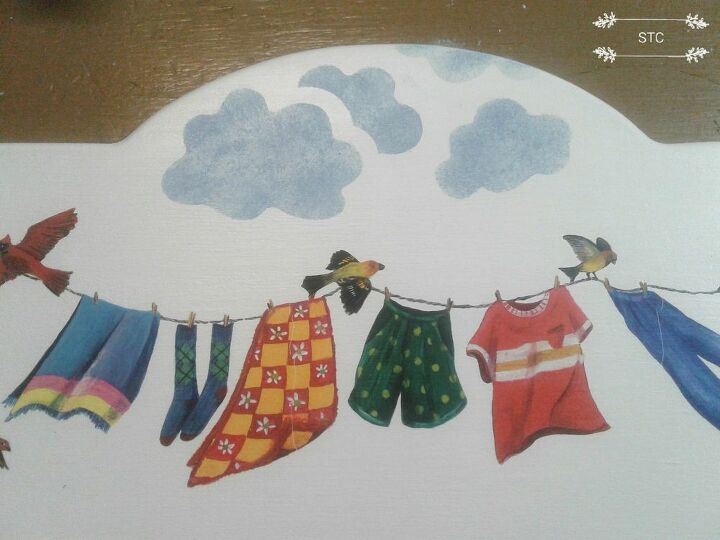
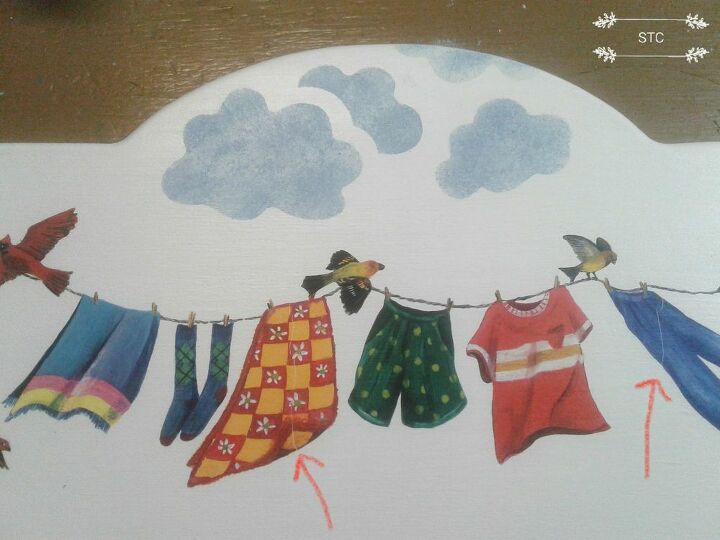
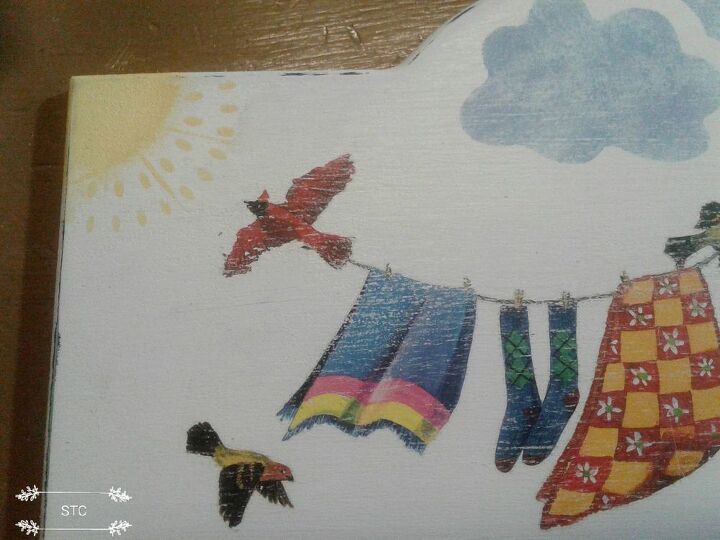
There was something telling me it needed more, but what? I went through my stencils to see what would match in theme and scale because many of them were bigger than this decal. I found some clouds that were suitable so I stenciled those on with my chalk paint.
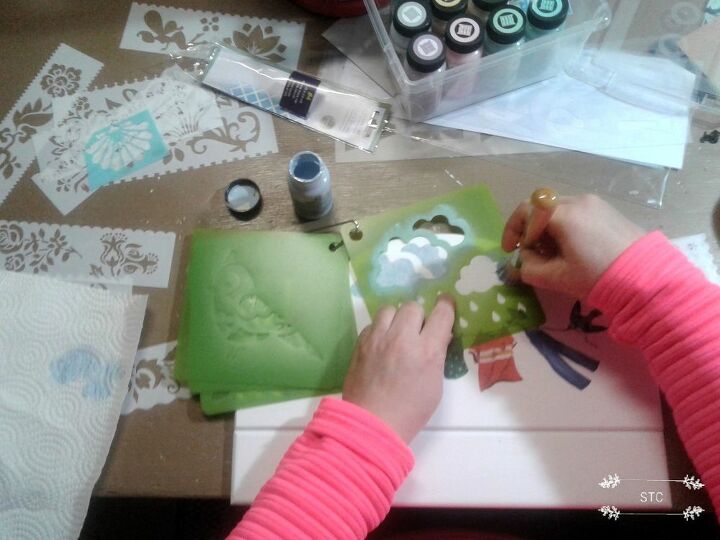
Okay so I have clouds, I didn't aim to completely paint them fully with blue paint because clouds are never solid colors
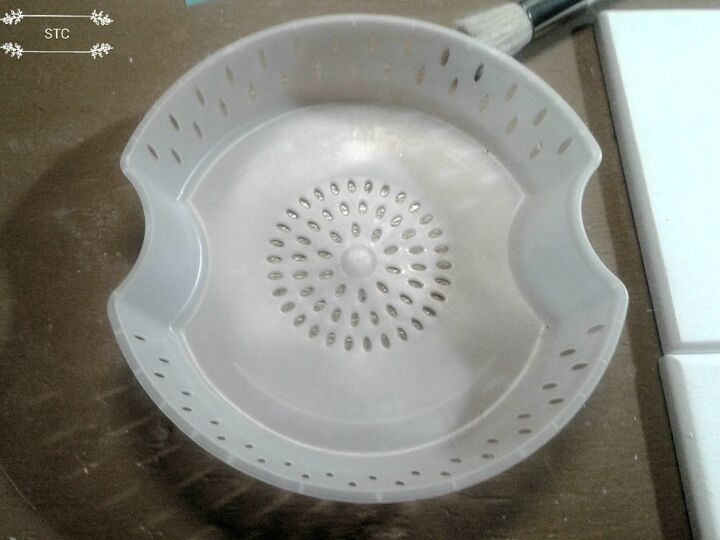
Next I'd need a sun if that clothes is ever going to try on the clothesline! I didn't have a sun stencil...hmmm how about the Healthy Choices Steamer bowl? Lol...I keep a few of most food containers and I thought these were great for craft projects, a strainer and a bowl!
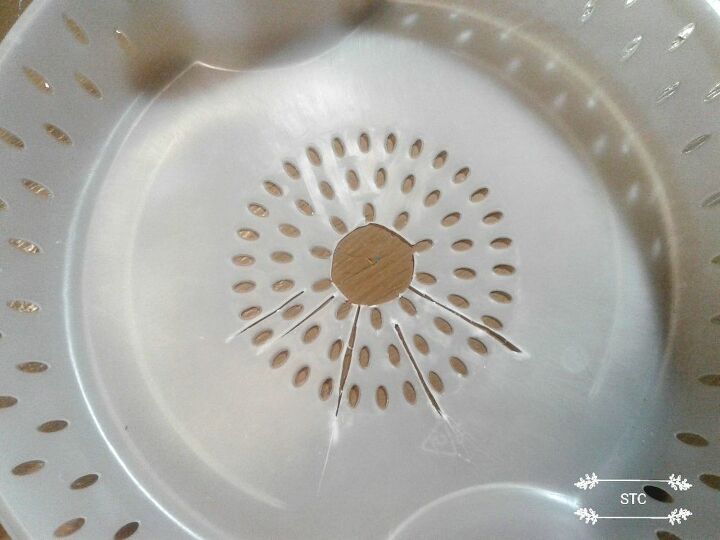
Do you see what I saw? Look closely in the center there, okay I'll give you more help. See the circle in the middle? I saw it as the sun with its rays shooting out. So I started cutting with my utility knife, again no plans just going with the flow.
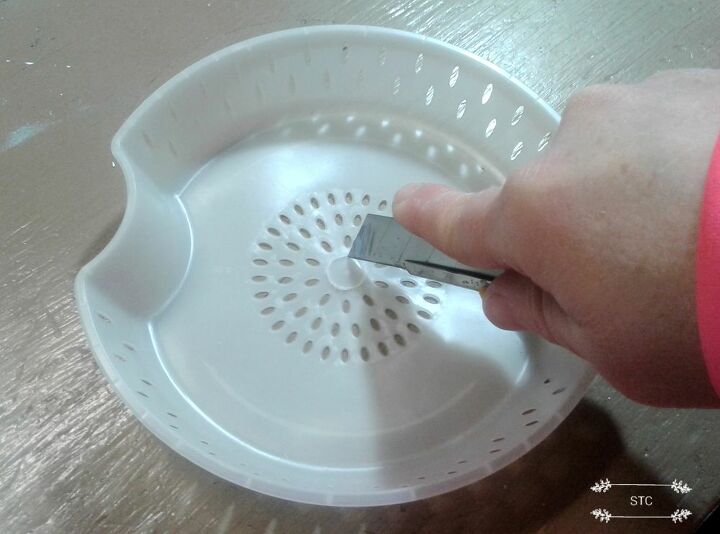
I added in a few slits to act a little more of how the rays shoot out from the sun, it's crude but I'm willing to try it.
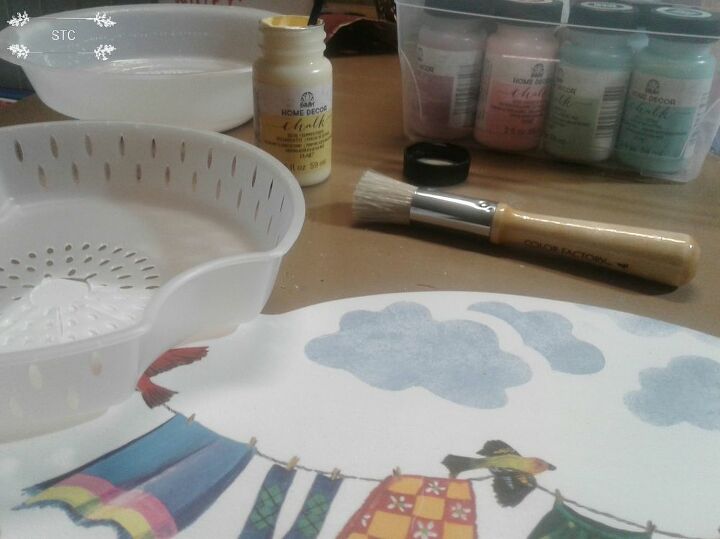
I placed it in the upper corner because that spot looked a little bare. Here goes nothing....yellow chalk paint and a food bowl stencil!
Tah-dah! I think it turned out pretty good!
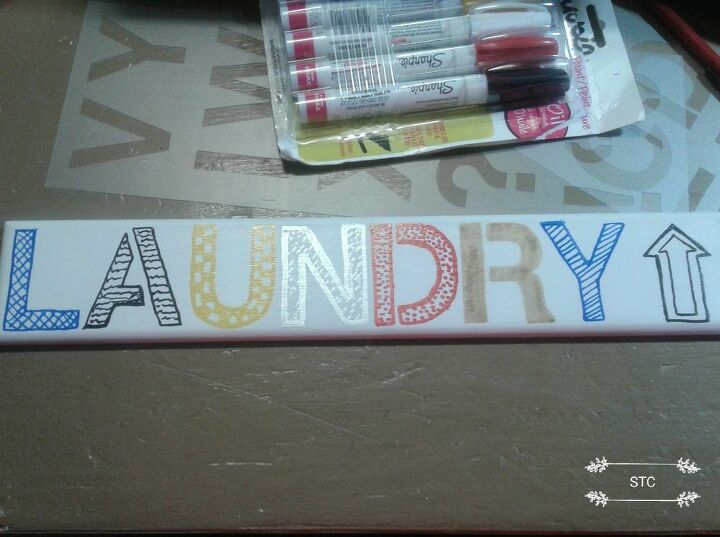
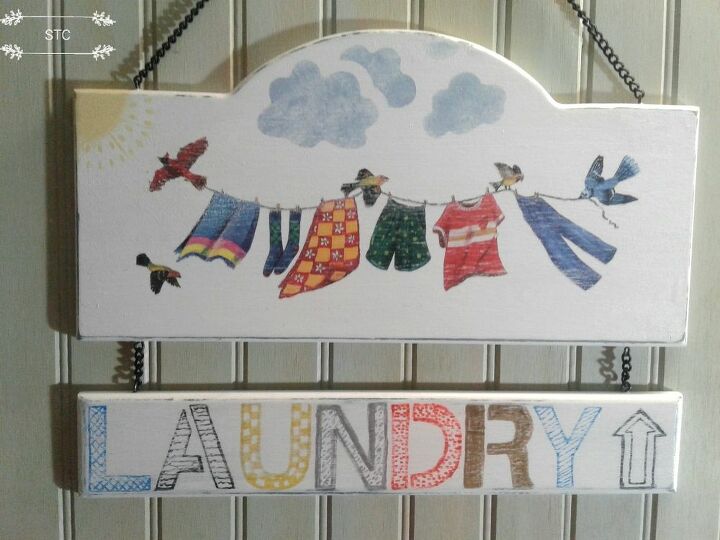
If nothing else I like to have a laugh while I'm crafting and yes I had one again with my laundry sign for sure. Onward I went to the bottom portion, I had just planned to spell out the word Laundry, nothing fancy or complicated. I pencilled in the letters first because I wasn't sure how the placement would fit.
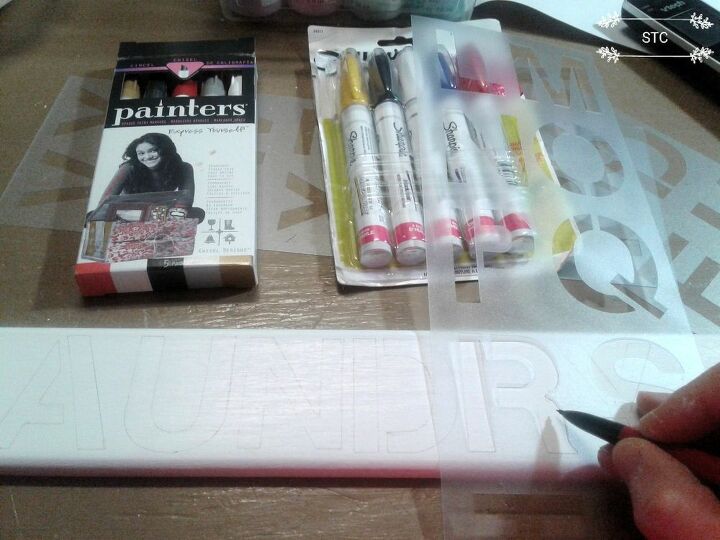
I had just enough room to put an arrow which points to the laundry room! I traced over the letters with my paint markers and I also filled them in in an assorted print look as you'd see fabric with check, dots, squiggly lines, etc. I did this to match the clothing colors on the transfer and to disguise my squish lettering!
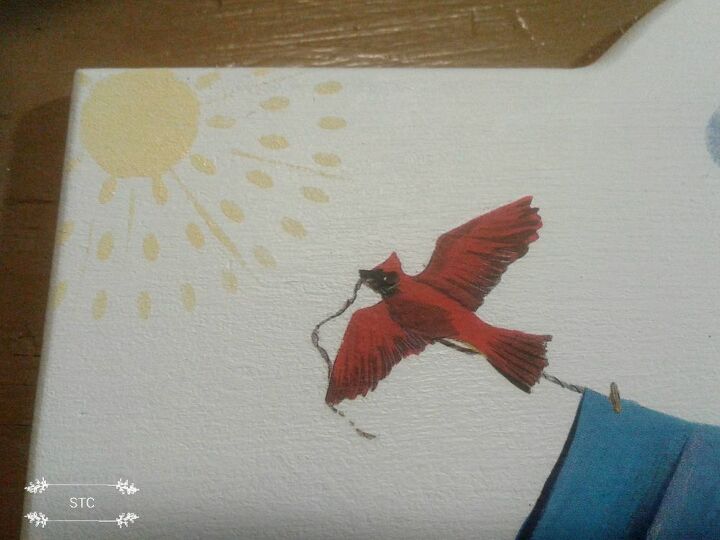
So remember I said at the beginning of the post that the transfer was old. It had started to show it's age because it had gotten folded and bent over time which cracked the transfer design. See the arrows below, nothing serious just enough for me to think....distressed!!
So I grabbed my sandpaper once more and focused on the edges and corners mostly while giving it just a light swipe along the flat surface area.
*I added more yellow to the sun on the corner to try the clothes faster! 😄😄😄 I think I liked it better before but the scale wasn't big enough to match the cloud size to me...oh well I tried.
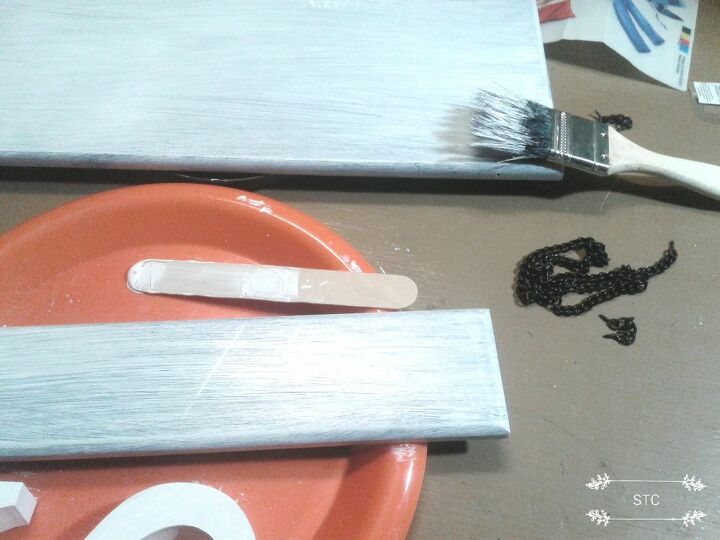
I gave it a couple of light coats of polyurethane after everything was distressed to my liking.

The chains were added back on once it was dry and it's ready for a final inspection before it leaves my craft room.
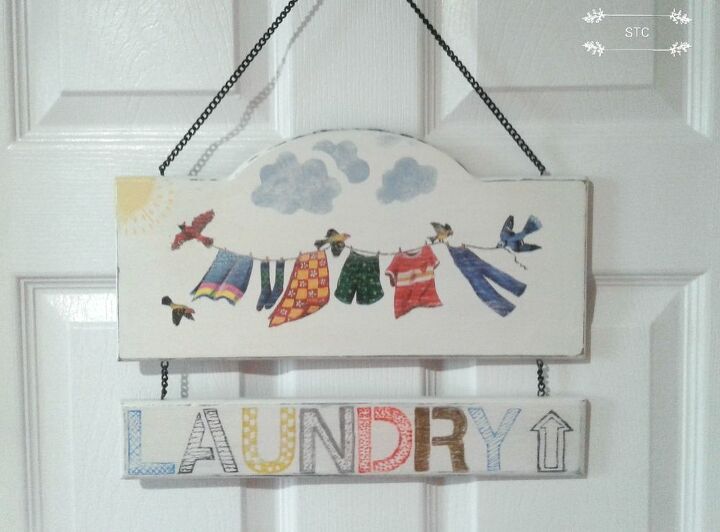
Now to hang it on my laundry room door as it will be displayed at my mom's place as well.
*Cost estimate based on small amount of each product used to create just one sign. Most supplies were from previous projects and or recycled.
As the saying goes, " better late than never" for these old items that were put aside for so long. I hope this has inspired you to always look beyond what things appear to be whether it's an old sign or a used food container. Always think on your feet, thanks for following my creative process.


Frequently asked questions
Have a question about this project?