


Washi Tape-holder From a Bamboo Steamer

Here’s a pretty way to display you collection of washi tape by using that unused bamboo steamer that only takes up a space in your kitchen cupboard.
My bamboo steamer imploded recently. I have no idea why. Perhaps I wasn’t steaming enough dumplings and it decided it wasn’t needed anymore. Ag shame!, as we say in these parts, don’t worry, we shall find a way immortalize you yet...
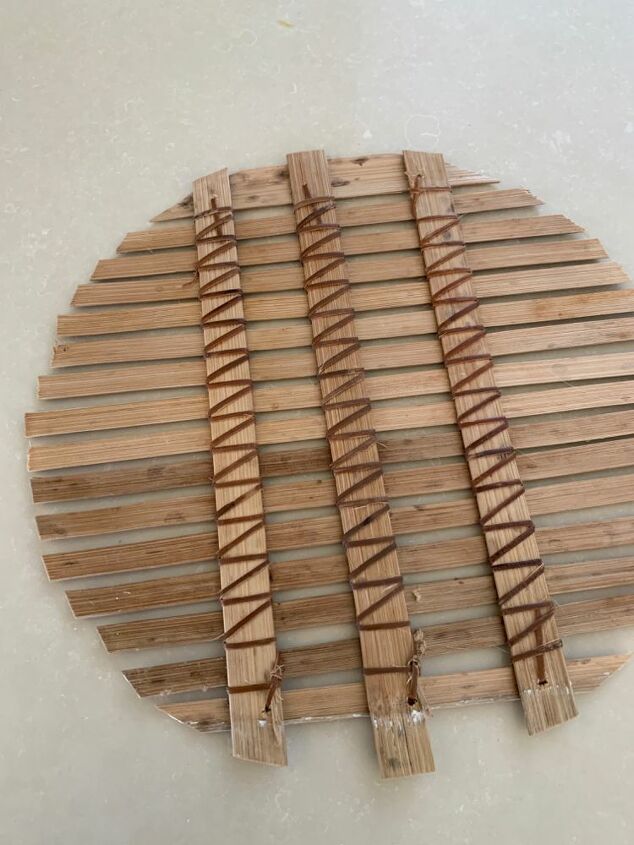
The rack: One of the parts I was left with was a rack. I have seen these sold separately in Eastern supermarkets, sometimes with metal rims, so you don't have to sit around and wait for your steamer to retire.
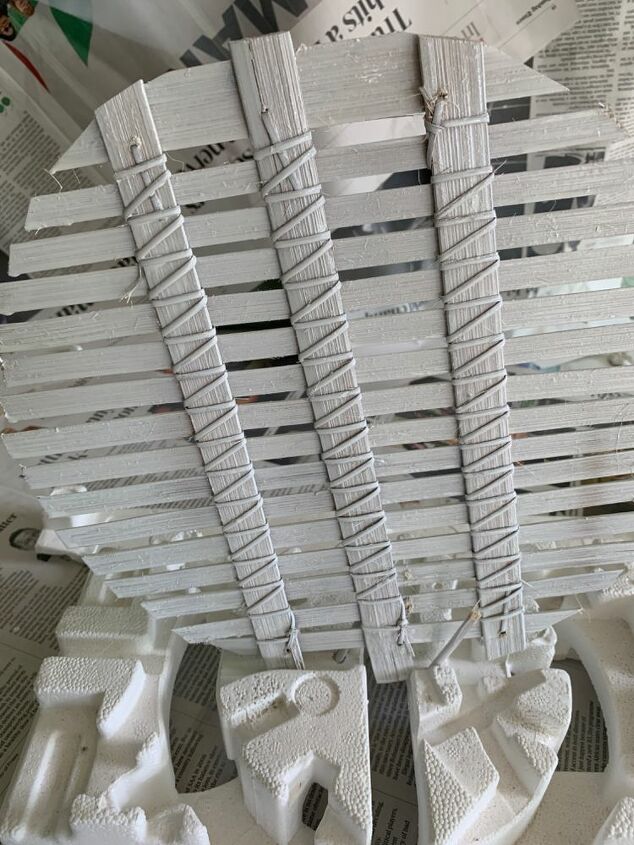
The first order of business was to get rid of the mouldy spots by spraying it with white chalk paint. This was done by sticking it into a polystyrene mould using pieces of skewer. Just remember that polystyrene does not like normal spray paint. I didn’t really notice this with the Rustoleum Chalked. A clear coat of matte varnish will provide extra protection.
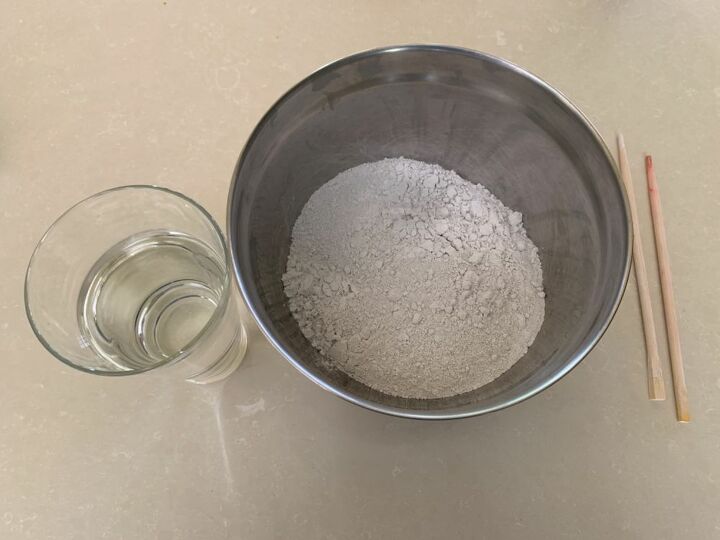
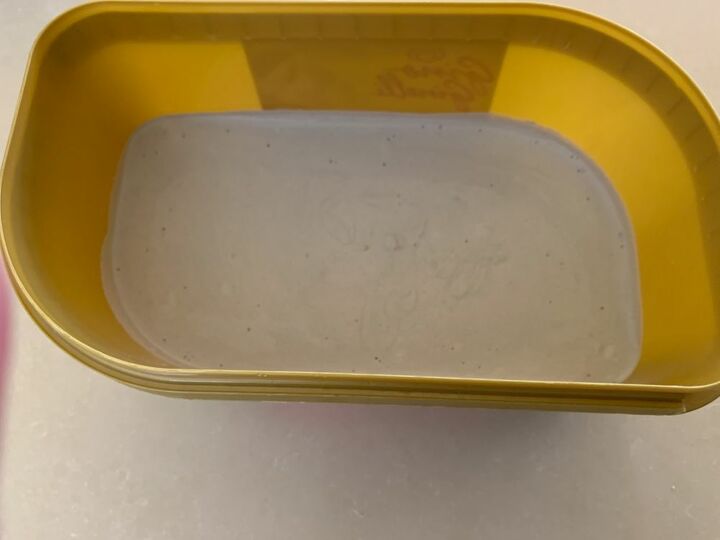
The stand: To make a stand (and I am glossing over a whole lot of false starts here including a couple involving air-dry clay and joint compound) I decided to use plaster of paris mixed with water and a plastic ice-cream holder as a mould. Although a bit brittle, plaster of paris is by far the easiest to work with. I mixed it into a medium paste, poured it into the mould and waited a day for it to dry properly.
After previous failed attempts I decided not stick the steamer directly into the base before it set.
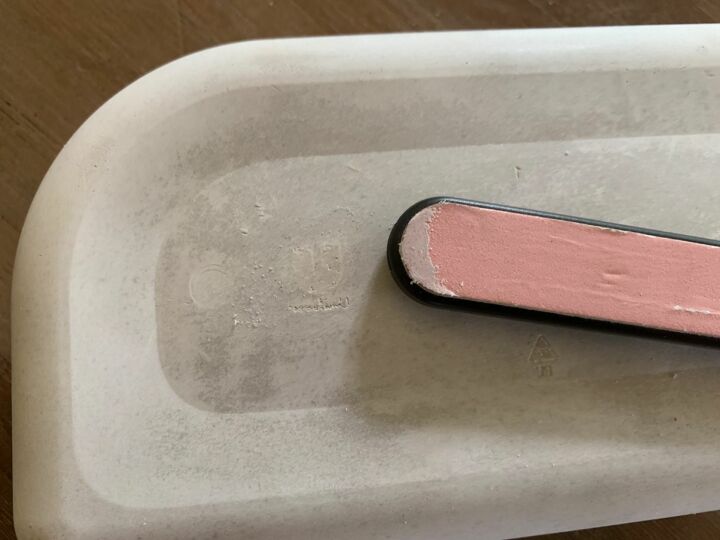
After unmoulding it, I used a nail file to buff out the unsolicited advertising that Unilever managed to sneak in and to smooth the edges.
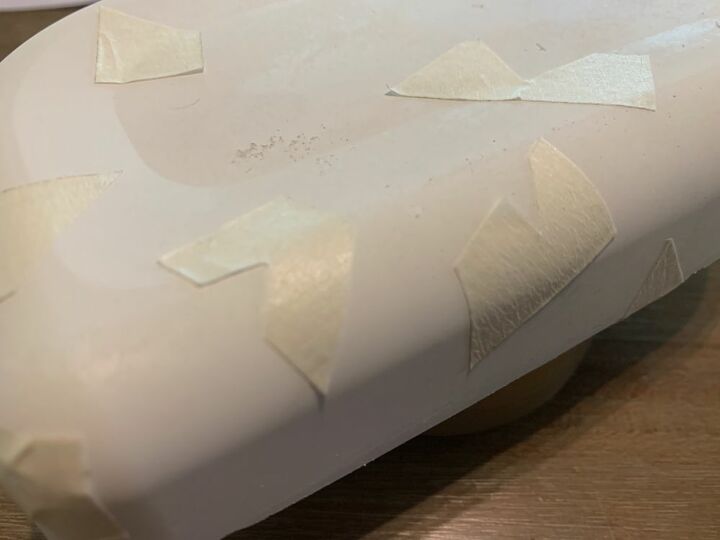
Having given it a coat or two of white chalk paint, I cut some masking tape shapes and stuck these back on and sprayed the stand light grey. The buzzword ‘wabi-sabi’ springs to mind and I was quite pleased with how it turned out - patches and blurs included. Be careful when applying and removing the tape, mine stripped some of the plaster in some spots. A coat of clear mat varnish helps to protect everything.
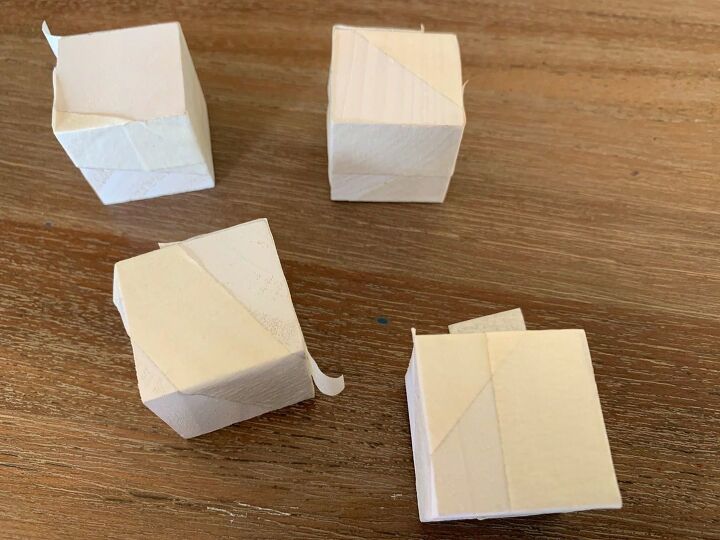
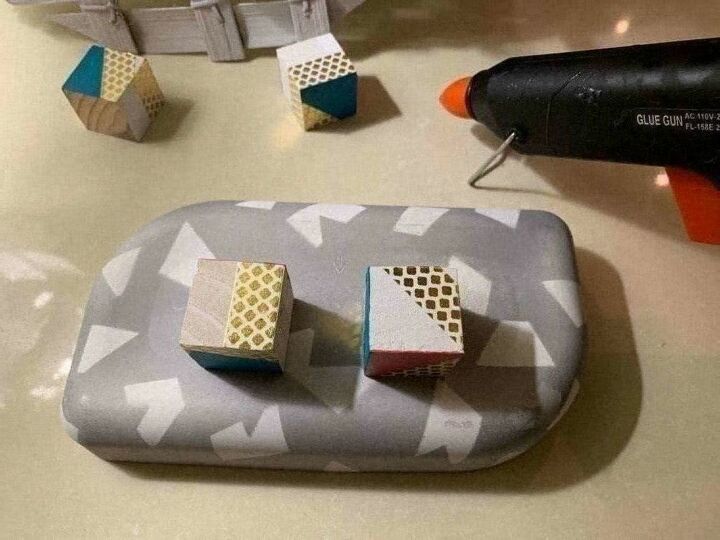
The stabilizers:To grip and stabilize the steamer part to the base, I spray-painted 4 little wooden blocks that you can buy at craft stores. I also decided to put some extra designs on them by painting areas. In order to do this, please don't follow my example and use masking tape to mask them, the wood grain is far too rough and you will get bleeds. I ended up using correction fluid and washi-tape to fix things. Perhaps another type of tape would work better.
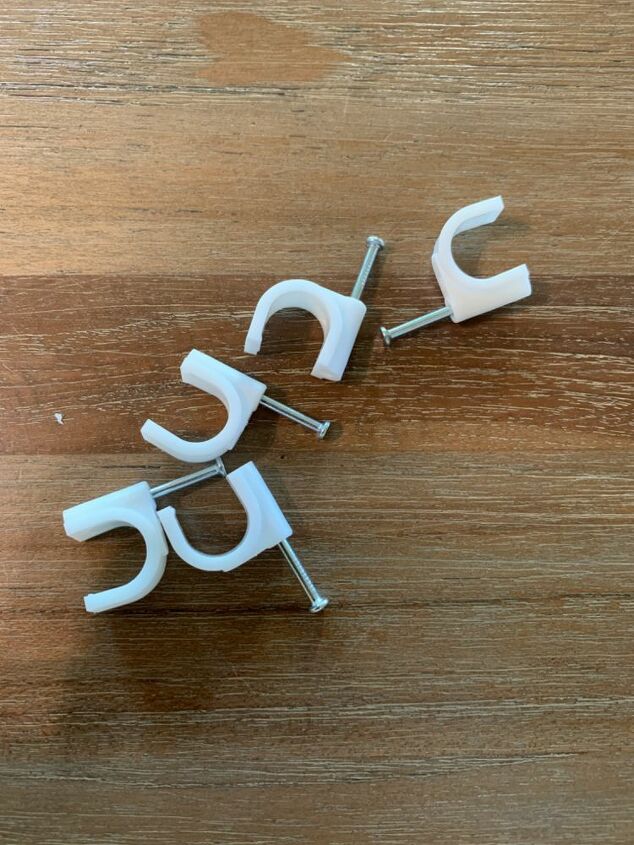
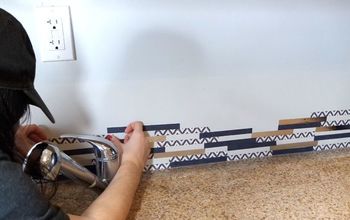
The hooks:To make the hooks, I used big electric cable clips such as the ones pictured above. Take a roll of washi tape with you to the shop to ensure that the ones you buy will be big enough to carry a roll of tape.
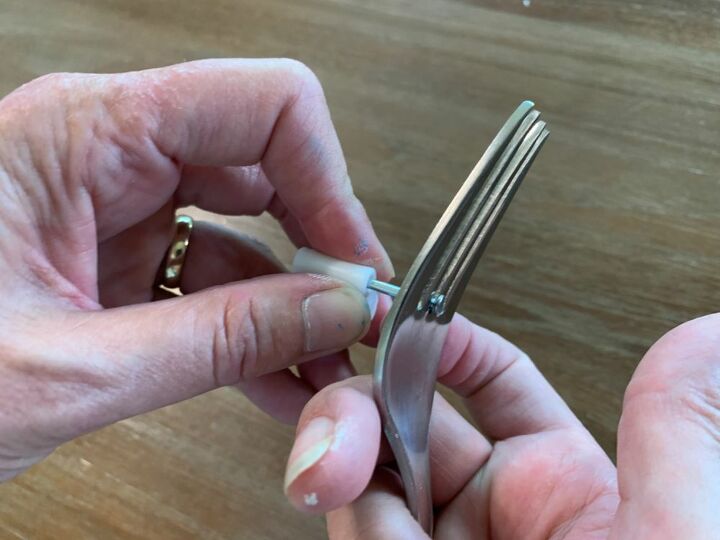
I stripped the nails out using a fork. You may also need to hold the clips in a dishcloth so your hand doesn’t hurt.
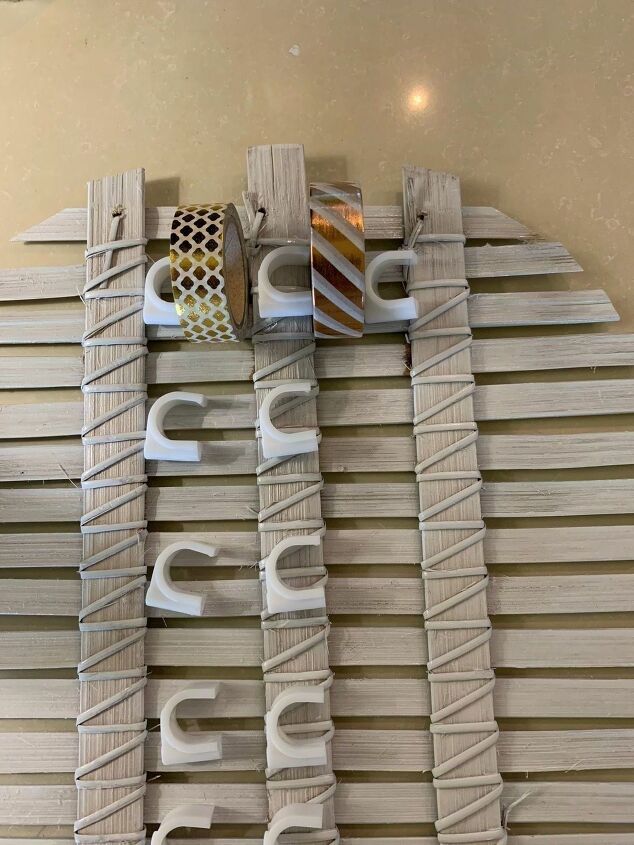
Sticking the clips: I positioned the clips on the steamer rack. It is important to plan how much space you need between, as well as below and above each hook in order for the tape to be hung and removed. The direction of the hooks might also differ depending on whether you are right or left-handed.
Then, using a glue gun, I stuck the hooks in place. Note that the picture above does not show the final direction of the hooks, just where I wanted to place them on the rack.
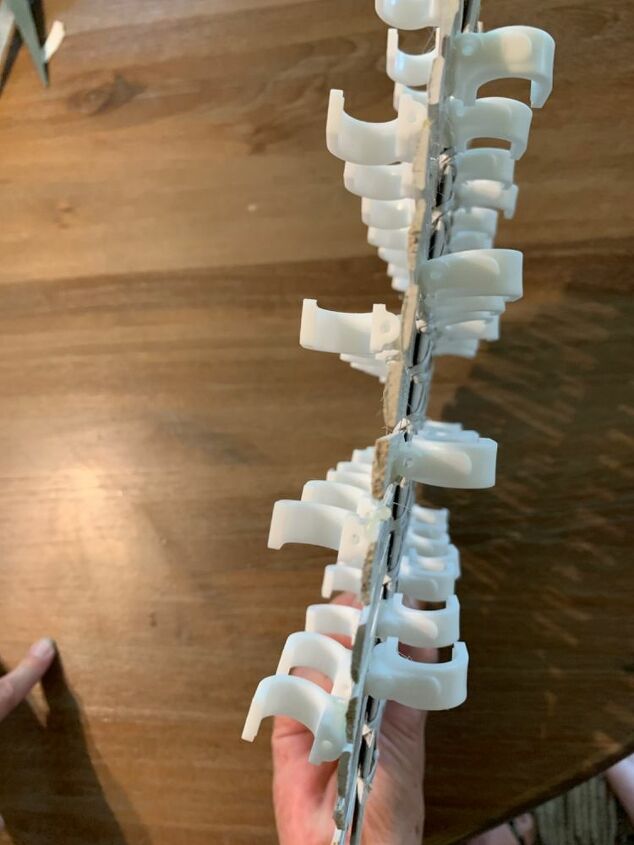
And remember that you have two sides to work with so you have plenty of space to hang tape from.
Final assembly: With the hooks done it was time to put everything together. I found the position of the blocks on the base (check to see that they fit between the ribs of bamboo), glued 2 of them beneath as well as on the side where the bamboo would be stuck. Working quickly I then stuck the rack into postion. Finally I placed glue on the bottom and one side of the remaining 2 blocks and stuck these to the bamboo and base. These obviously act as stabilizers so it is important to get them right.
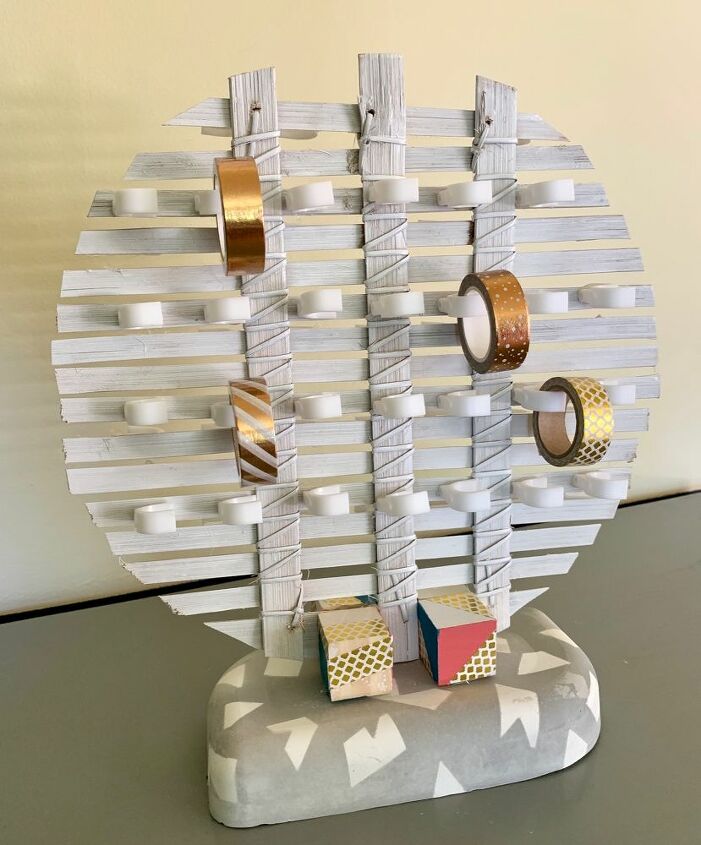
I think this was one of the best ways to repurpose the steamer. It is so pretty I'm actually scared that putting more rolls of washi tape on it will ruin the look. How's that for logic!
Update: You may need to also glue the bottom horizontal slat where it meets the 3 vertical ones to give extra stability.
Resources for this project:
See all materials


Comments
Join the conversation
-
Oh my goodness! I LOVE this project! The creative way you used items meant for entirely different purposes is just genius! VERY crafty of you! Honestly, I have absolutely no use for a tape rack, but now I'm looking around at random obsolete objects, thinking "hmmm, what else could that be?".
-
What a great idea. Love your vision. My only thought would be to put it on a lazy Susan so that I can turn it when I’m working at my craft table.


Frequently asked questions
Have a question about this project?