


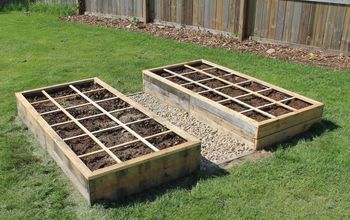
How To Build Raised Garden Beds (That Will Last!)
I’VE BEEN WAITING TWO YEARS FRIENDS, TWO YEARS! FOR MY GARDEN DREAMS TO BECOME REALITY. I’VE HAD GRAND PLANS FOR THE LAYOUT AND JUST HOW I WANTED EVERYTHING, INCLUDING MY RAISED GARDEN BEDS, TO BE. THE TIME IS NOW! MY DAYS OF COUNTING DOWN ARE OVER! LET’S BUILD SOME BEDS!
Being responsible home owners, when we moved into our current place we attended to other house needs that were higher on the to-do list. Our home had been a rental, and there was a few projects that couldn’t be put off. Look at us being all grown up. (pats myself on the back) Thankfully this year we finally get to build a garden fairytale, with raised garden beds as the main attraction, in our backyard!
You might be thinking, but Eryn, you could have made a simple garden on the fly to get by until building a huge garden. And you’d be completely right! Actually, I kind of did. The last two years I planted a few staple veggies and herbs in pots in and around our patio. They were fun, pretty, and functional. The pots produced enough to add to a summer salad or grab some basil or parsley for a kitchen dish. But, it wasn’t enough to can with. Friends, I love canning and preserving! I’ve got a whole spot dedicated to it here!
WHAT TYPE OF RAISED BED SHOULD YOU MAKE?
At first, in all my planning and dreaming, I had decided to go with galvanized steel raised beds. My father in law actually loved this idea when I shared it and made two just like them, so I was able to see them in action.
However, after thinking it over for a couple years, I decided they were just a little too heavy duty for me. First off, I don’t need them that high or deep. While tall beds would be great for someone with back problems, I didn’t see the needs to make them that large, and then also having to purchase all that soil to fill them.
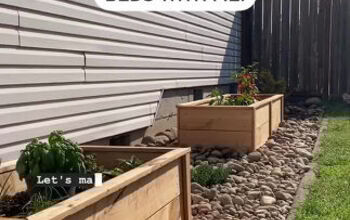
Secondly, the steel beds rang in at about $150 a piece, and although we’ve waited for two years so we could spend a little money on making our garden amazing, I’m still being as frugal as possible. The beds we ended up making came in at about $110 per bed. Maybe at first that doesn’t seem like much of a savings, but the beds we made were about double the length of the galvanized steel beds. And when you’re making four of them, that ends up saving a substantial bit of money and gives us much more space to plant!
WHY WE DIDN’T GO WITH CEDAR RAISED BEDS
Soooooo many people make their raised garden beds with cedar wood, since it’s great for resisting mold and rot. However, cedar boards that are as thick and large as the ones we used would have cost much more money. Most cedar garden kits you find in stores are made with flimsy, thin boards. After a few summer and winters the boards begin to warp, and pull away from each other leaving you with garden beds you’re constantly trying to repair. The screws end up stripping out, and eventually you’ll have to put new beds in. Moral of this story: if you have the extra cash go with thick, 2″ cedar boards. If that’s not possible, using Ground Contact Hem Fir Pressure Treated Lumber is the way to go! Just our two cents!
MATERIALS
- 4 2x8x12 Treated Ground Contact Hem Fir Pressure Treated Lumbar
- 2 2x8x8's Treated Ground Contact Hem Fir Pressure Treated Lumbar
- 1 4x4x8 Treated Ground Contact Hem Fir Fence Post
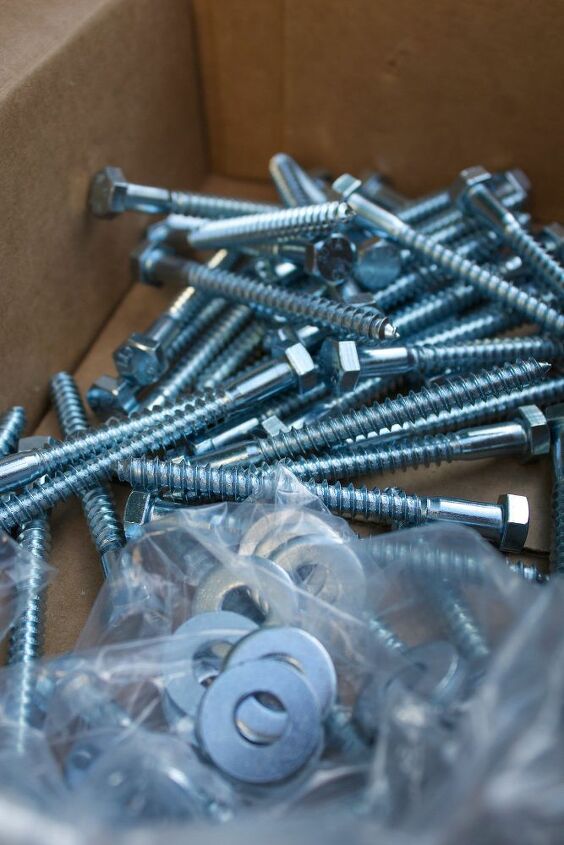
- 36 2.5" Lag Screws with Washers
TOOLS
- Chop Saw
- Impact Hammer
INSTRUCTIONS
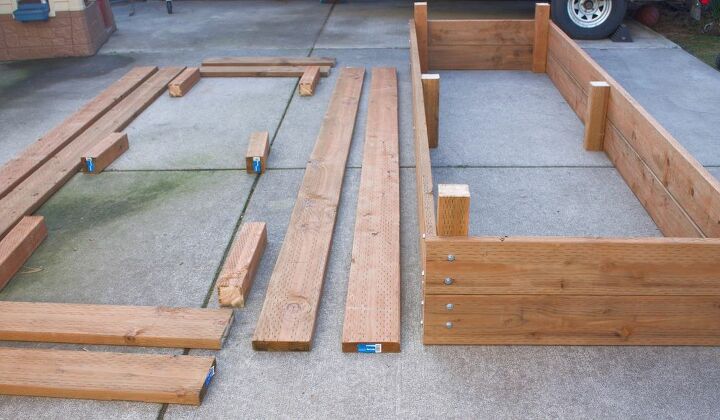
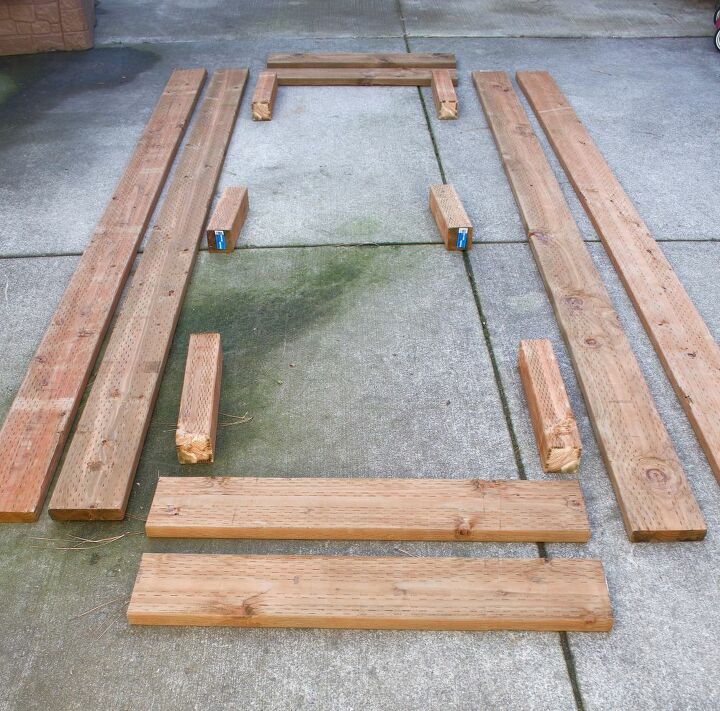
- Cut the two, 2x8x8's treated boards into four, 3.5 feet boards
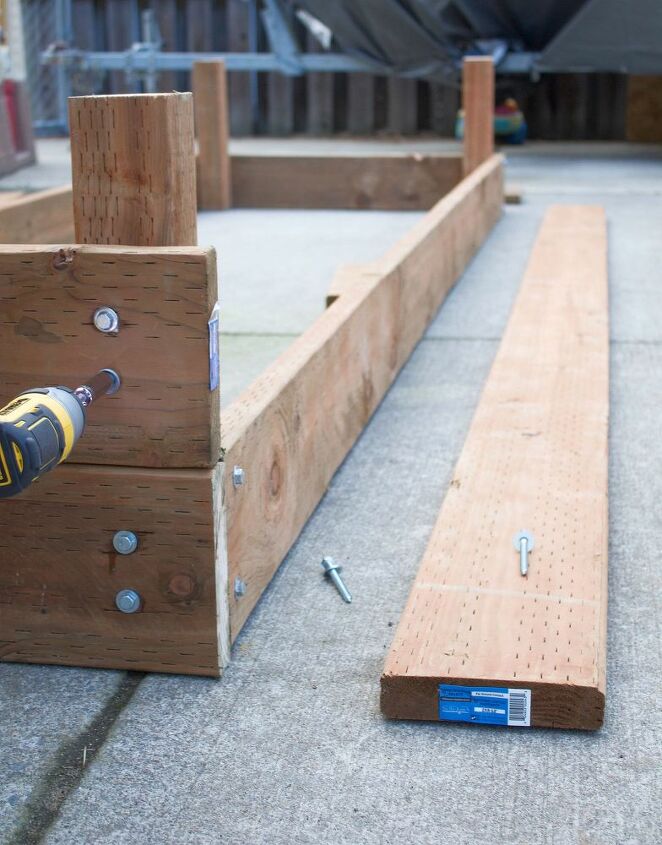
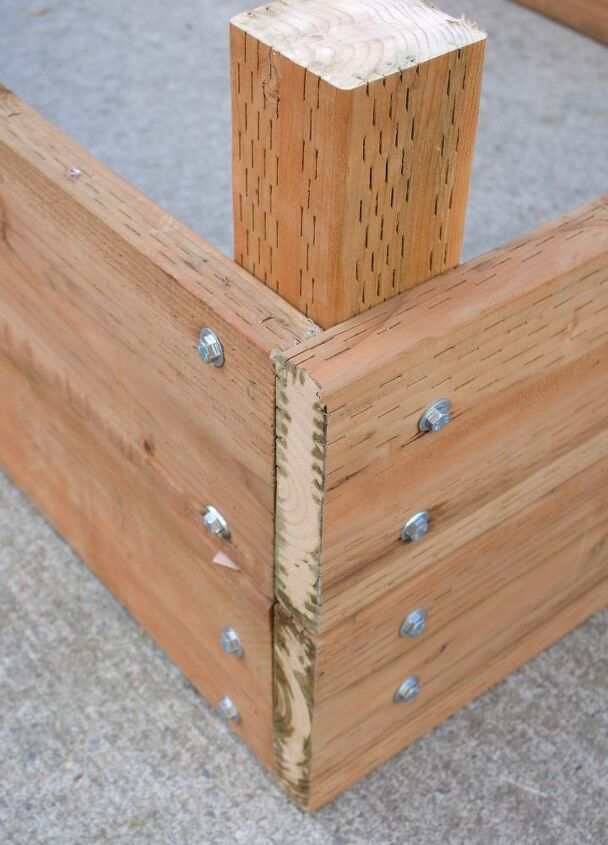
- Cut the treated fence post into four, 20" sections (the four corners) and two, 16" sections. (two support braces in the middle of each bed)
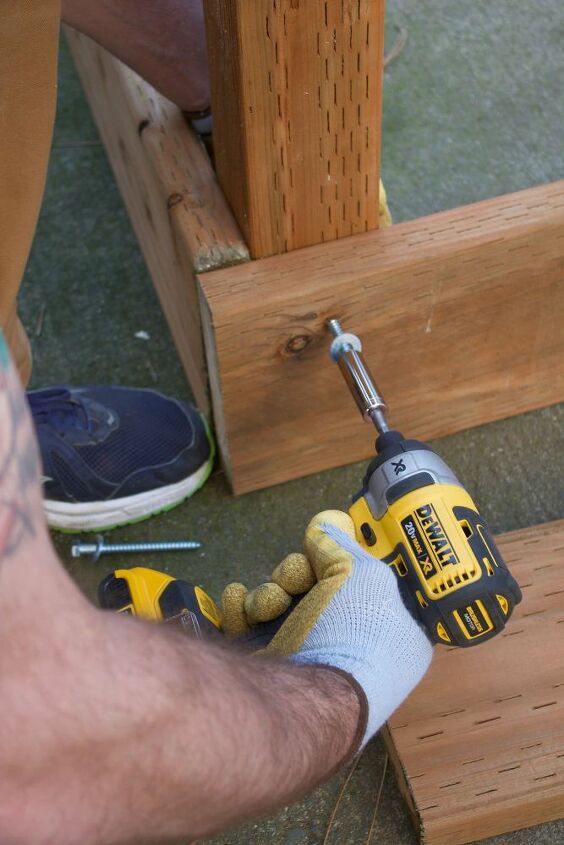
- Use the 20" fence posts as the base for your corners. Starting with a long 2x8x12 board, line it up flush to the corner of the post and secure to post using lag bolts screwed into place with an impact hammer or socket wrench.
- Do the same thing with the 3.5 foot board on the other corner. Continue for all bottom boards, making sure you stagger the lag bolts so you dont hit one with the other when making the corners.
- Lastly, connect the two, 18" posts into the inside of the bed, directly in the centers of the 2x8x12 boards. See pictures in blog post.
- The posts on the ends of the four corners of the beds stick up 4" above beds. These are meant to be placed into the ground, securing bed into place. Essentially you made the bed upside down, and it will need to be flipped when putting into place.
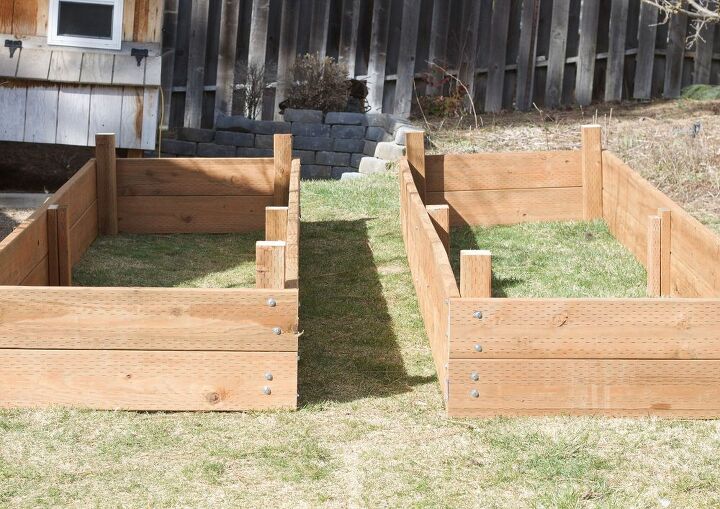
We’ve made four beds in total, and now are waiting for the weather to improve (it’s currently snowing in March!) before we cut into the ground spots for all four, flip them, and secure them into the dirt.
Hope this post helps make your garden dreams a reality!
Resources for this project:
See all materials


Comments
Join the conversation
-
Very nice and they look great.
-
Thank you! I have a bunch of shiplap cedar boards that I can use, as well as several 4”x4” posts. The shiplap won’t be as sturdy as the boards you used, but they’ll probably last as long as I’ll need them as I’m 72 yrs old & my gardening days are numbered. I’ll probably make mine a bit taller so I don’t have to stoop as low. The lag bolts & nuts will be my only expense, other than the soil, if I use potting soil. With 2 acres of land, I have plenty of dirt that grows good gardens. I’m just not physically able to have a regular garden any more. I appreciate your plan!


Frequently asked questions
Have a question about this project?
What kind of soil do you use in this beds??