


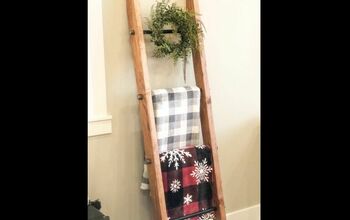
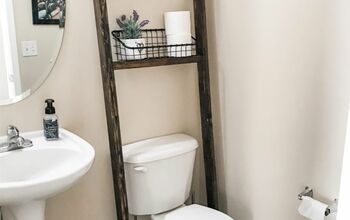
Two Toned Blanket Ladder

I created this DIY Blanket Ladder for our living room and absolutely love how it turned out! This ladder definitely adds a cozy vibe to any space & the best part is you may already have the materials kicking around!
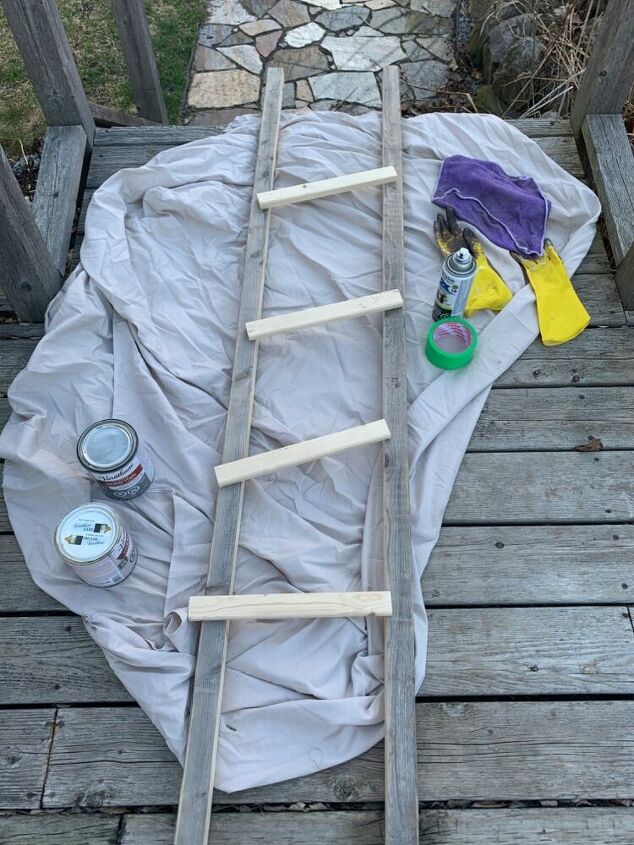
For this DIY blanket ladder I decided to use scrap wood we had around the house. I simply cut 2” x 2” strapping to use for the rungs and we also cut a 2” x 4” in half to use for the side pieces of the ladder. You can cut your wood to whatever length you want. My ladder will be 6’.

To give your ladder the two-toned look I used painters tape to tape off where I wanted the paint/stain to meet. This is completely up to you and your personal preference on how you want your ladder to look. I chose to only paint less than half of the top section of the ladder. I then used black spray paint to paint the top half of the ladder. Be sure to paint the rungs that will be at the top half of your ladder as well.
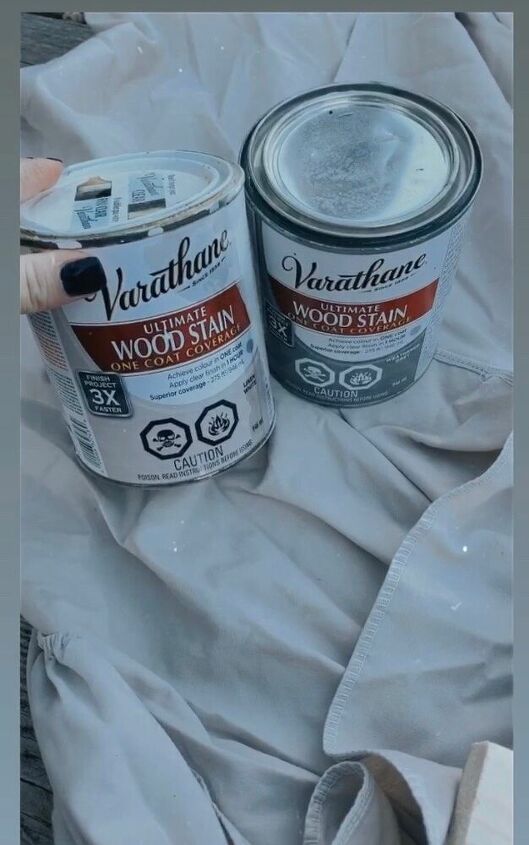
I decided to chose two different colours of stain for the bottom half of the ladder. Varathane is always my go to for stain choices. I picked these stains to try and create a whitewashed grey look.
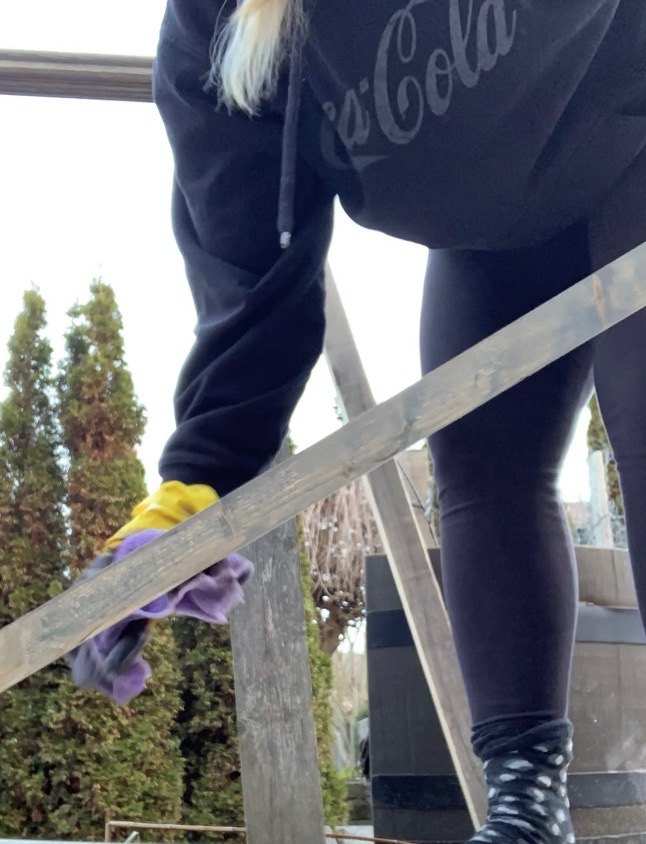
Be sure to wear gloves for this step & it’s always good to be in a well ventilated area (like outside), it’s also a good idea to wear a mask if you have one. I used a lint free rag (use something you don’t mind throwing away) and alternated between the two colours of stain until I got my desired look. Something to remember is that you can always add more stain. I always apply light coats of stain and wiped off any access. A little bit goes a long way!
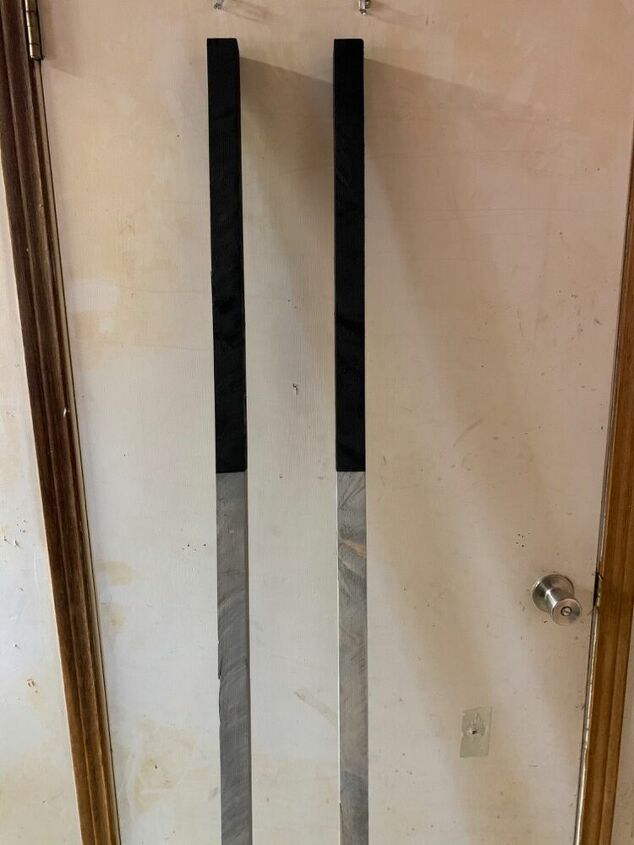
This is what the ladder looked like after applying the spray paint and stain. One thing to remember is that after your done painting the top half (and the paint is dry) you will remove the painters tape and move it up to the bottom of where your paint stops. This will ensure you get nice clean lines where the paint and stain meet. I then let the ladder dry over night prior to putting it together.
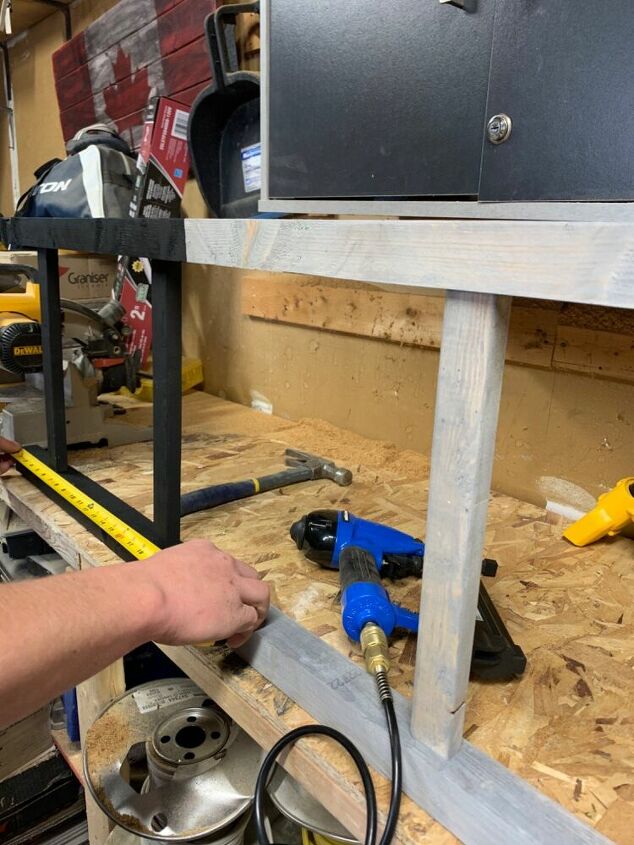
The next step is to measure where you want your rungs to sit and how far apart you want them to be. I decided I wanted the rungs on the inside of the ladder. The spacing is personal choice and what you want your ladder to look like. I personally wanted a small space at the top and a bigger space from the bottom run to the bottom of the ladder. This step may be helpful if you have someone holding the ladder in place so you can set your rungs up how you want them, and someone else can measure the distance prior to nailing them together.
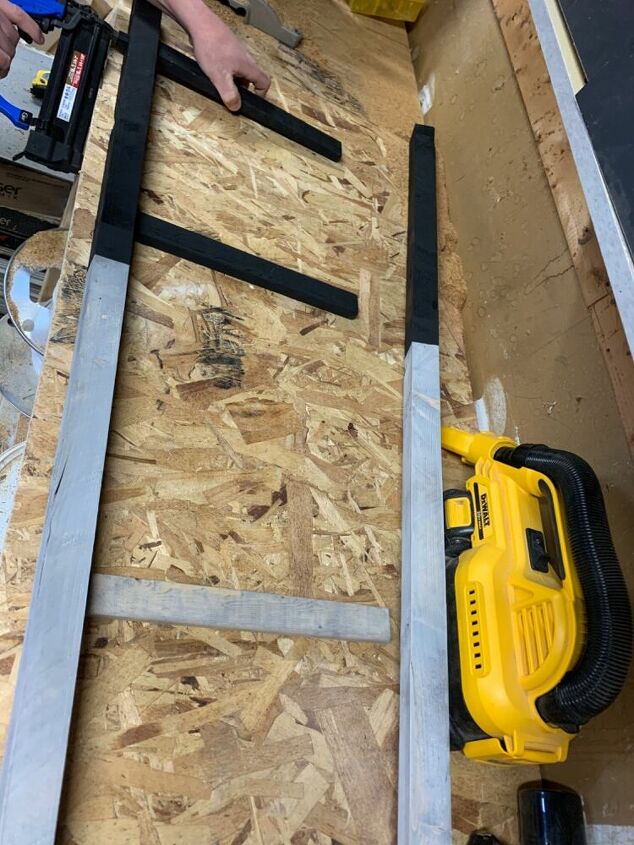
The final step is to assemble your ladder. We used a Brad Nailer and simply nailed finishing nails through the outside of the ladder into the rungs. You can hardly see the nail head on the side of the ladder, but if you don’t want to see the nail head you can simply paint/stain over it like I did.
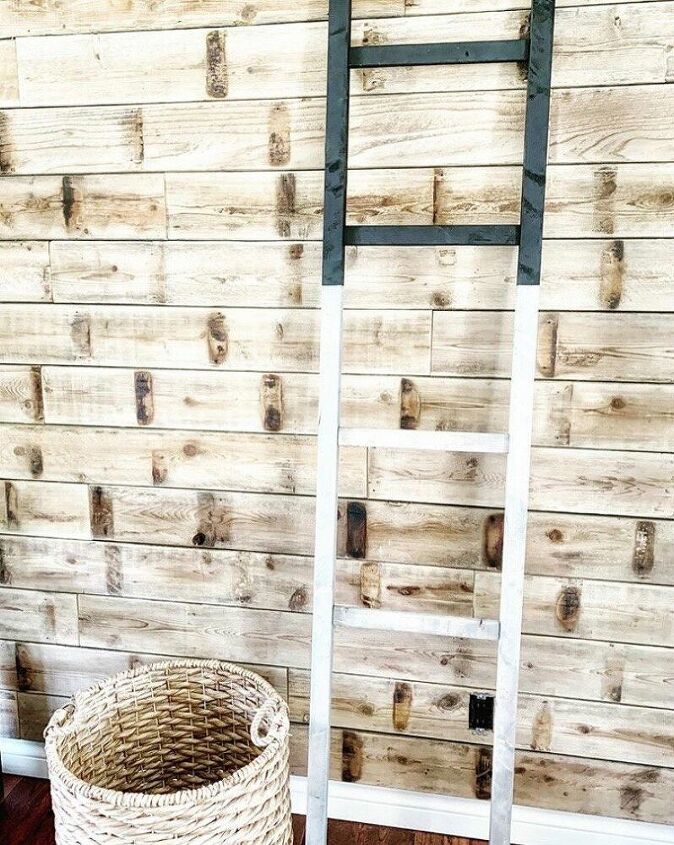
We put our ladder in our living room & it definitely makes it feel nice and cozy!
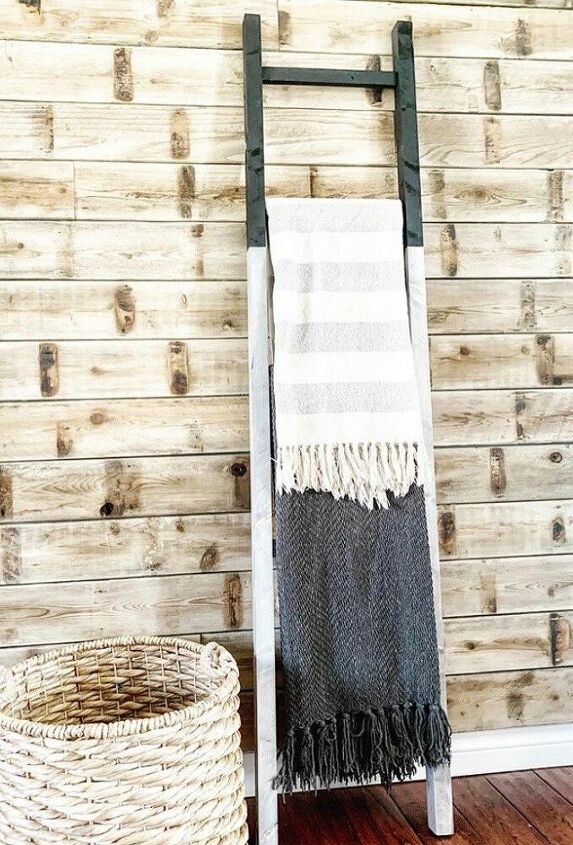
Love how this project turned out! The best part is I did not have to go and purchase anything additional as we used items we had on hand.
Resources for this project:
See all materials


Comments
Join the conversation
-
love this idea!! thank you
-
This is AWESOME!! Love what you do.


Frequently asked questions
Have a question about this project?
What happened to the black at the top of the ladder? It looks green and black in the final picture.
Did you attach the ladder to the wall? If so, what did you use?