Easy DIY Blanket Ladder

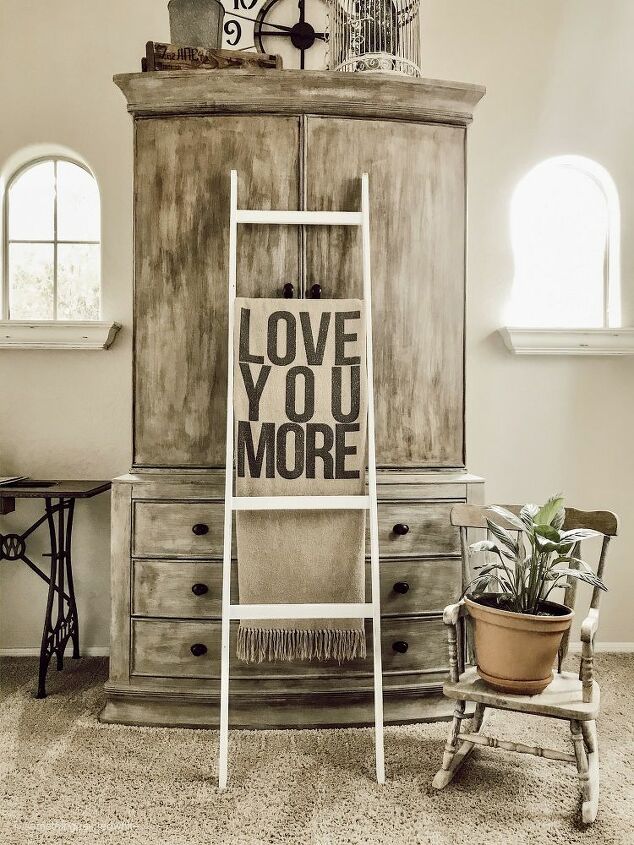
When I first attempted building a wooden blanket ladder I loosely followed some ideas I found on Pinterest... it turned out rather short and squat. It was a 5-foot ladder that had 4 steps (or rungs, if you prefer) that were 18 inches wide. It was just not tall, painted white, and handsome like I wanted.
The ladder I eventually built and fell in love with, and the one we will be building here is modeled after, is 6 feet tall with 5 steps that are 16 inches wide, and about 1 foot apart. (doesn't that sound sexy?)
I'm no engineer but I think that works out perfectly when you can buy lumber in 6 and 8-foot lengths. 8 feet will get you 6 16 inch steps. In my case, it was almost 6 because I got one of the cuts off a little bit. (don't be embarrassed if it happens to you... it happens to everyone at some point!)
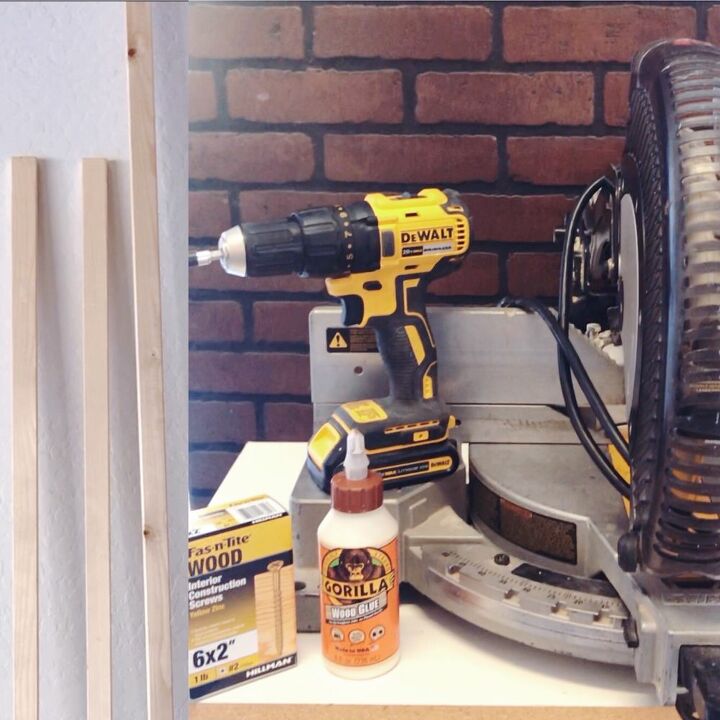
Here are a few helpful hints on the materials and tools list. I could say pro tips, but I'm no pro and these are just things I learned by building several of these and figuring it out for myself:
- power tools (i.e. saw, drill, sander) aren't necessary to complete this DIY blanket ladder, but they will make the job (and many other jobs you might do) SO much easier.
- if you do get power tools, invest in good ones (or get ones that are really really cheap so you don't mind replacing them often)
- spend the extra couple of bucks and get really good lumber. The savings will be in the time you get back by not having to spend so much time sanding. The wood looks better too.
- measure twice, cut once.
What you're going to need to get started.
Materials:
- 2 - 1 x 2 x 6' (ladder sides)
- 1 - 1 x 2 x 8' (ladder steps)
- 10 - 2" wood screws
- sandpaper
- wood glue
Tools:
- saw
- screwdriver/ drill
- tape measure/yardstick
- hammer & punch (or nail or screw)
Safety Equipment:
- goggles
- mask
Taking the Edge Off
We'll start with sanding. If you took my advice and bought good quality wood, and were willing to spend the time sorting through the stack to find straight, smooth pieces, you won't need to spend as much time on this as if you went the cheap route.
I used 150 grit sandpaper to take the edge off, but you can follow that up with 300 grit if you're really feeling ambitious and want a smoother finish. You'll only need to sand all of the sides of each piece of wood, but only one end of each of the 6-foot lengths. Everything else will be covered.
Make sure you take off any edges or spots that might catch on a blanket or quilt, especially on the corners or around any knots.
Once you have everything sanded all nice and smooth, it's time to start sawing.
BUT FIRST!
There is a lot of wisdom in the saying "measure twice; cut once". Many a piece of wood has been saved from the scrap pile by going back and checking again. But for this cut, we're going to measure once (ok, measure it twice just to be sure) and cut 5 times.
Baby Steps
We're going to cut our 8-foot board down to make the steps for our ladder. We only need 5, but if you cut just right you'll be able to get 6. If you cut like I do, you'll get five (which is fine).
Using your ruler/tape measure, make a mark 16 inches from the end of the 8-foot board. (Don't try cutting 16 inches from the middle, it won't work.) Then using your handy-dandy saw, cut at that mark.
Again, you don't need a power saw, but it will make the work go so much easier.
You can either measure off another 16 inches, or you can use the first step that you cut and measure using that as a guide.
Keep in mind that if your steps are not pretty darn close to the same length you may need to line them all up and make a cut through them so they are all the same.Cutting the Feet
When the ladder leans against the wall, you want it to be as stable as possible and also look as nice as possible. One of the most dramatic enhancements is to make the feet sit flat on the floor. A 10-degree angle on the bottom of each of the side boards works out just about perfectly.
As with the steps, it's pretty easy to line those boards up, maybe use a couple of clamps to hold the boards together, and make one cut through both boards at once. That way you know they each have the same angle. Oh! And we are cutting them with the angle on the wider (2") side.
Now take that extra step that you have left over (or part of a step or a piece of scrap 1x2) and cut about a 6-inch length with that same 10-degree angle on one end. Save this for later.
And that's it for the saw!
Not let's break out the drill.
Drilling the Holes
In order for the DIY blanket ladder to look amazing and still be useful, you need to space out the steps a little differently than a regular ladder would be. On a 6 foot ladder, the measurements should (can... you do what you want) be done at 18, 30, 42, 54 and 66 inches. That will leave you with about 6 inches at the top. Start the first one at 18 inches so that your blanket (or quilts or towels or whatever you're displaying) can be kept up off the floor a bit.
If you're measuring from the top, you'll use 6, 18, 30, 42 and 54 to measure down. That's what I did. It's just how I roll.
No matter how you measure for the holes, make sure that you also get in the center of the boards, which on the long side of a 1x2 will be .75". Cuz it's really a .75x1.5. Lumber is silly. And a liar.
Now using a drill bit the same size as your screws, drill holes in each of the marks. I used a drill press, but you can use a regular drill if you hold it really straight.
Helpful tip... if you've been waiting for an excuse to buy a drill press, this just might be it.
One Step at a Time
Step Prep
This little step will make it so much easier when it's time to attach your little steps. (I love wordplay)
Using a punch/nail/screw/other pointy object, make an indentation in the center of each end of each of your steps. Make it significant enough that it will be pretty easy to tell where it is when you can't see it. We'll use that when it's time to put it all together.
Putting It All Together
Getting the steps lined up and straight can be a bit tricky... it's really easy to get them off a bit on each side and end up with a ladder that has crooked steps or, even worse, a ladder that doesn't stand straight when it's leaning against the wall.
Fortunately, we've already done the magic step that will help ensure we get this part right.
Leaning your side boards up against a wall (or workbench as I've done), put a wood screw in each side board until just the very tip is sticking out. Then put a bit of wood glue on each end of one of the steps.
Remember when we punched a hole in each of the steps? Well, now you're going to use those indentations to make sure that the screws line up with the center of each step; right where you put that indentation.
When you get them lined up, tighten the screws down until they are in just enough to hold the wood in place but don't tighten them up yet.
A New Angle on Things
Remember when we cut that 10-degree angle on the extra step/piece of scrap wood? Break it out; it's time to use it!
Holding that piece flush with the side, line up your step so that it sits flush against that piece. Hold the step in place and tighten the screws until they sink just a titch into the side board, just enough to be out of the way.
Make sure the angle of the step matches the angle of the ladder! You want the skinny (1x) side of the board to be parallel with the floor.
Repeat for the remaining 4 steps.
Finishing Touches
Now that your easy DIY blanket ladder actually looks like a ladder, it's time to put the finishing touches on. And by finishing I mean stain or paint.
You can use whatever your favorite DIY method may be... pretty much anything will look good on this ladder! For the one you're seeing here, I used Varathane stain to get a good base color, then followed it up with Behr "Bit O' Sugar" made into chalk paint (I show you how to make chalk paint here).
When the paint is set, distress that puppy by taking a bit of the white off in spots using 150 grit sandpaper; just enough to let that pretty stain color peek through. Then seal it with some Rustoleum Chalked Protective Topcoat for that extra layer of protection and finish.
Get a Grip
This part is not mandatory, but you'll really appreciate having it done.
The very last step is to attach something to the bottom of the ladder to keep it from sliding down the wall and across the floor when you have it loaded with your favorite decor.
All you need to do is get some type of non-slip material, cut it to size and attach it to the bottom of each side board.
I used SoftTouch Self-Stick Non-Slip Surface Grip Pads, but you could use anything non-slip that you could firmly attach to the ladder.
Ta-da!
Lean that puppy against a wall and throw some blankets on it!
Easy DIY Blanket Ladder Reveal
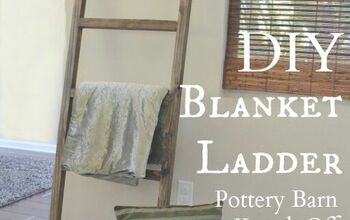
If everything has gone according to plan, and your cuts were sure and straight, you now have a beautiful, easy DIY blanket ladder that you can proudly display in your home. It's even better if you put some blankets or quilts or other pretty soft stuff on. Use these for yourself, or make a bunch for your friends and family. Or make some to sell at the Farmer's Market you way-too-hastily agreed to be at!
Now It's Your Turn...
If you take the plunge and make a wooden blanket ladder of your own, shoot me a picture. I'd love to see how it turns out!
Happy Building!
Cindy 
PS:
I'd love for you to visit me on Instagram @somethingpaintedwhite
And over on my blog at www.somethingpaintedwhite.com
Enjoyed the project?
Resources for this project:
See all materialsComments
Join the conversation
-
-
 Deb Dickrell
on Jan 03, 2021
Did you make the "I love you more" blanket?
-










Frequently asked questions
Have a question about this project?
I love this and it’s what I’ve been looking for to use as a towel rack in my bathroom. It’ll accommodate the different age range/sizes of my grandchildren.
My questions are how far from the wall are the “feet” of the ladder? And what would you recommend for securing to the wall?
Beautiful! How did you do that raw wood look on your furniture!?
Hi I love the ladder but did you also paint the armoire it is leaning against. If so would you mind sharing the colors?
Thx