


DIY Outdoor Lanterns
Let there be light, well the flameless candle outdoor lantern type light anyways. If you took a peek at our patio makeover design board you know I have been swooning over these wooden outdoor lanterns from Target! They are beautiful but I wanted two & couldn't spend $80 on them. So I decided to try & DIY them!
Is it crazy that these two lanterns only cost me $3 in wood to make?! That is a huge savings I can now put towards a new fancy outdoor rug 😉 The best part is that I was able to adjust the sizes to fit my space. So let me show y'all how I made both of these lanterns in less than 1 hour!

- (3) 2x2
- Scrap Piece of 1x6
- Wood Glue
- Stainable Wood Filler
- 2" Nails
- Paint/Stain
- Plastic Shower Curtain Rings
The first thing I did was decide how tall I wanted the lanterns to be. I ended up with one 2ft lantern & one 1ft lantern.
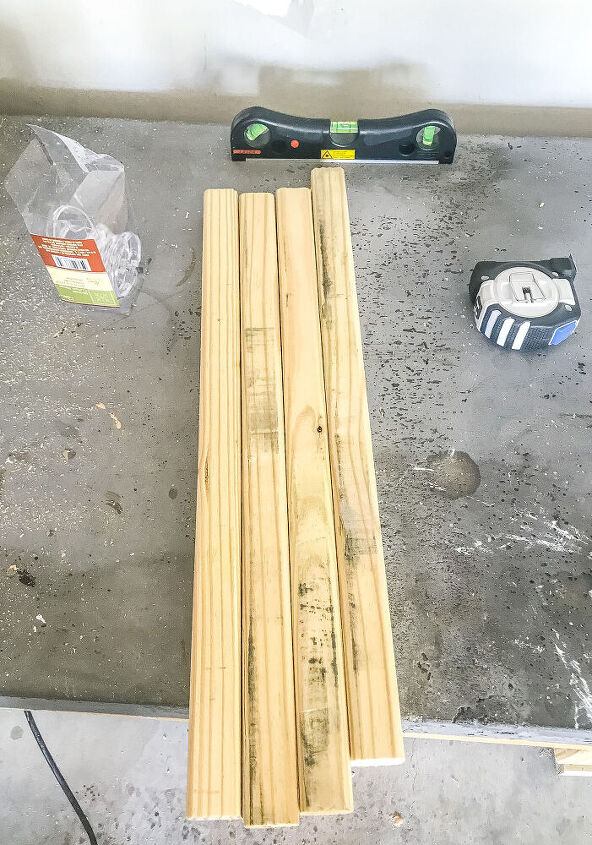
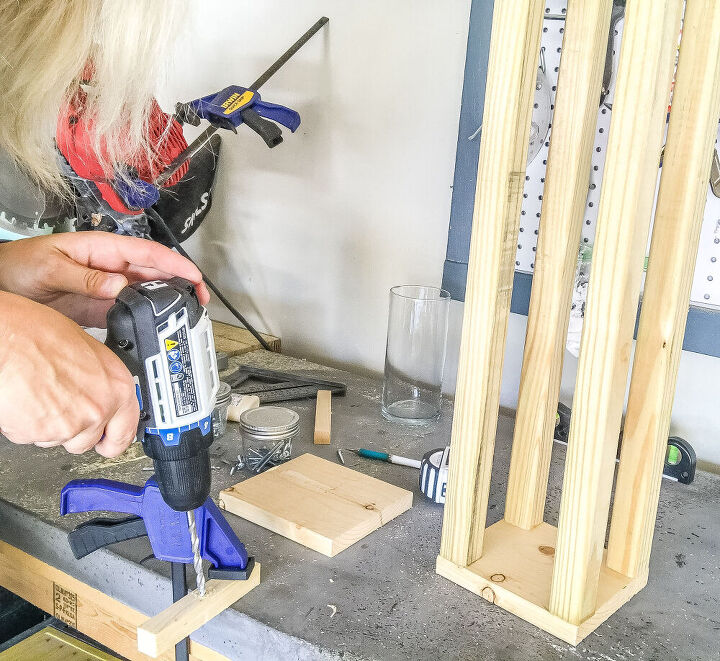
Once I figured out how tall I wanted each lantern I cut the legs (2x2 pieces) to the desired height minus 2in.
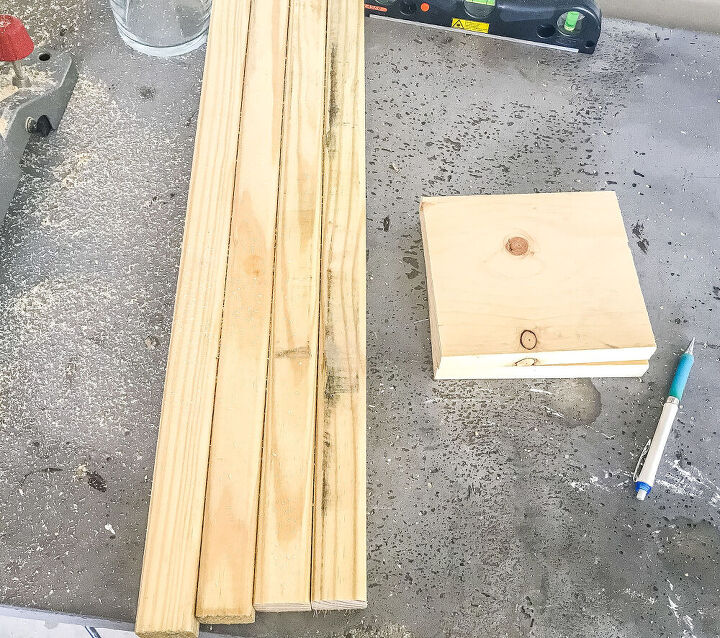
Next, I cut my 1x6 board into two pieces for my base & topper. My bases ended up being about 6in tall & wide.
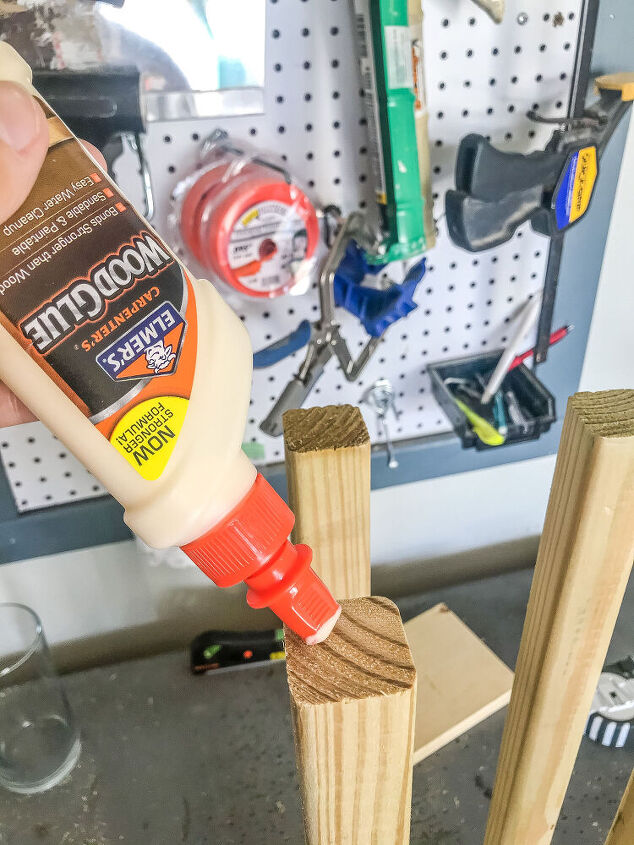
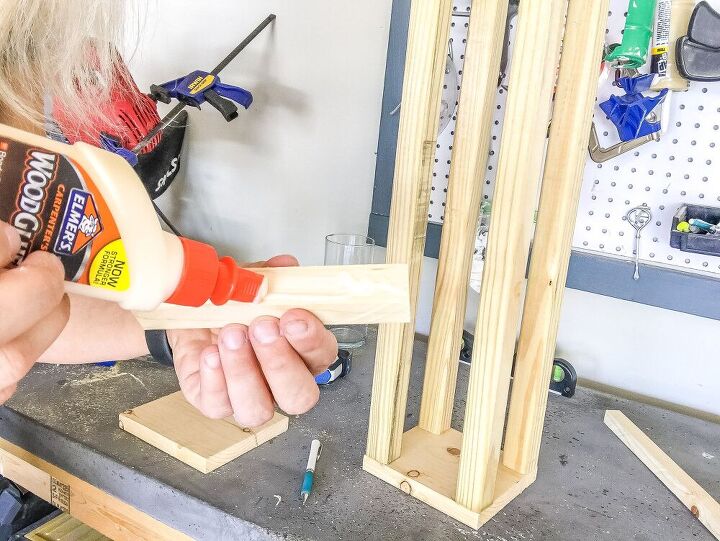
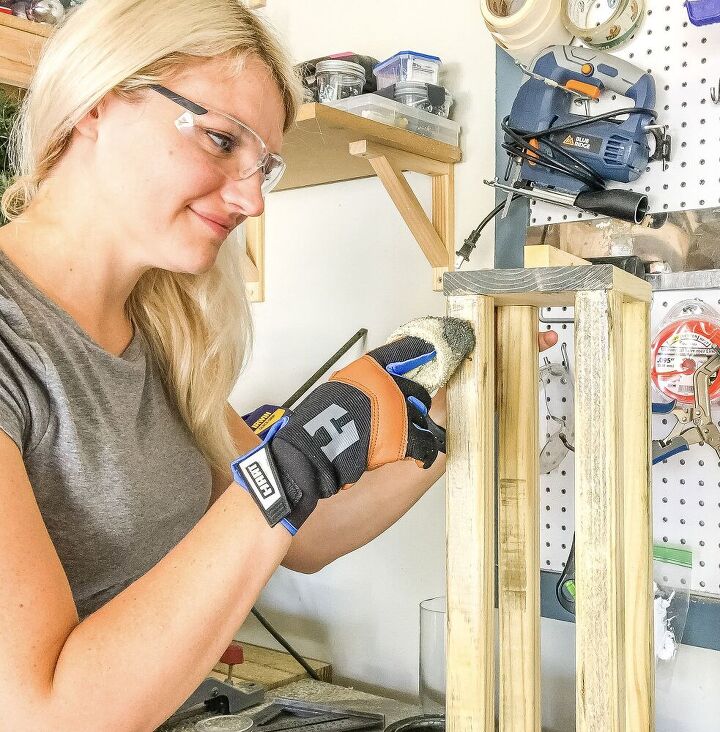
After all my pieces were cut I started to assemble the lantern. I lined each leg up with the edge of the base piece & attached it with wood glue.
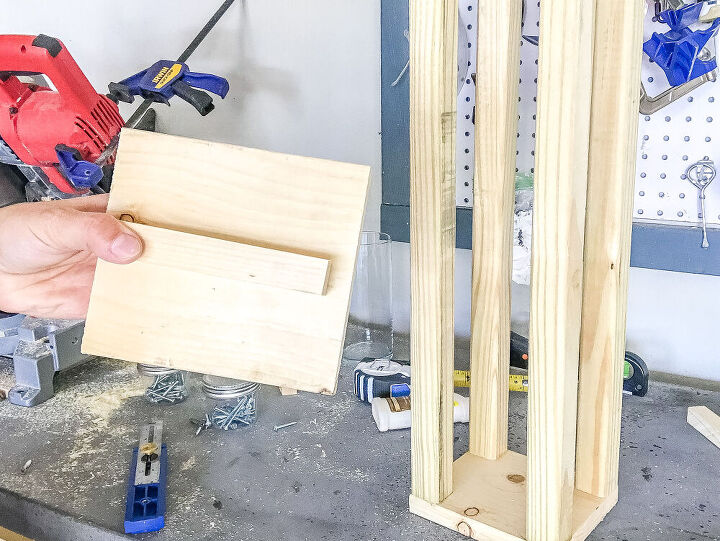
Now its time to start working on the topper. I wanted to add a small piece of 1x1 to the topper for the handle to go through. Something like this ⬆️
Before I attached it to the topper I drilled a hole through the center where the handle will attach later.
After the hole was drilled I attached the small piece to the topper with wood glue.
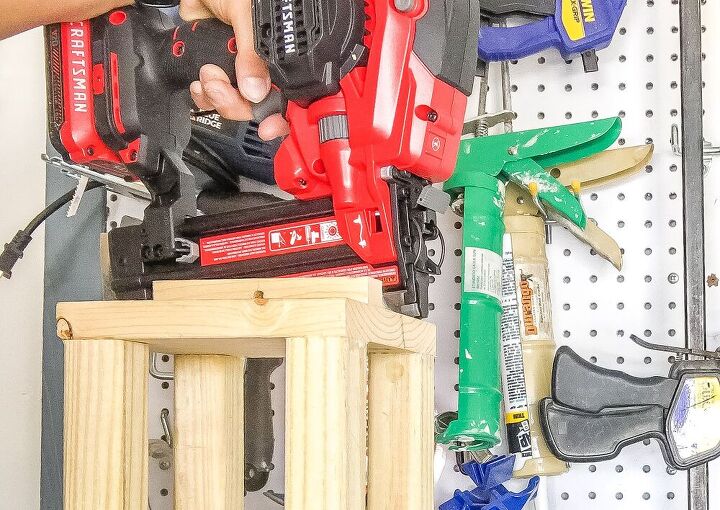
Attach the top the same way as the bottom using wood glue. After all the legs are in position with the topper & base secure them with 2in nails. After you secure the top, flip the lantern over & nail in the base.
You could also use flat head screws but because its decor & not anything that Eli will be swinging around (hopefully) the wood glue & nails should be enough to hold it all together!

Once everything was secured I filled in the nail holes with this stainable wood filler. It was my first time using this type of wood filler & it worked really well for the small nail holes!
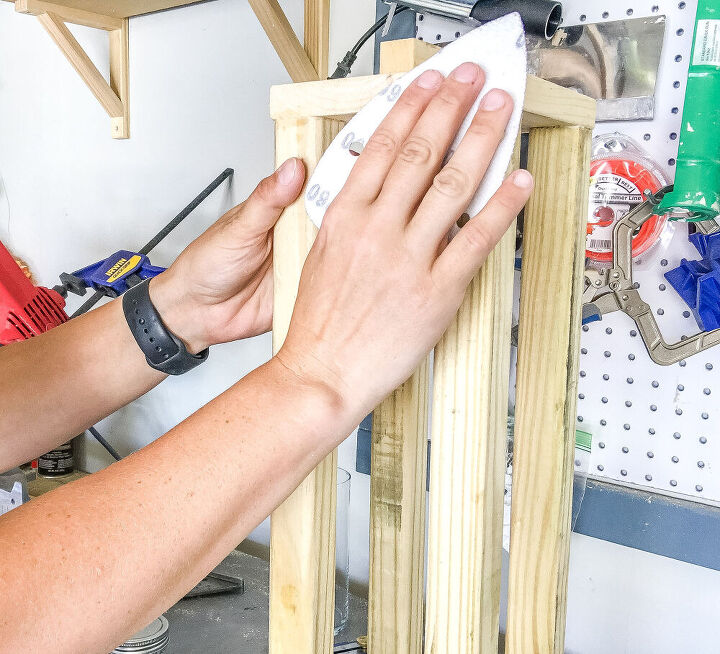
After the wood filler has a minute to dry you can sand the entire lantern.
Now its time to stain (or paint) the lantern. I went with Minwax Classic Gray & gave each lantern 2 coats.
TIP: Wearing gloves while staining is always a must for me because I hate having my hands look yucky & dirty for 2 days!

Finally, for the handles, I used leftover plastic shower curtain rings from the Dollar Tree! I simply spray painted them black & used black hole glue to secure them to the predrilled hole from earlier!
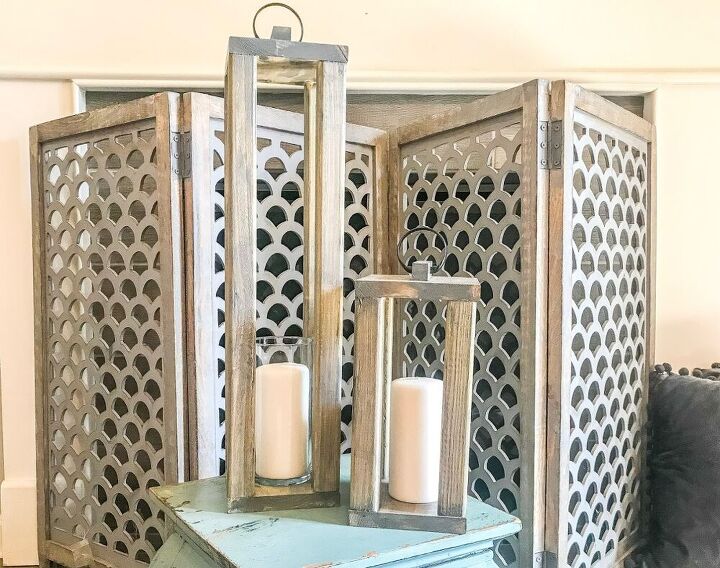
Easy outdoor DIY wooden lanterns for under $3 worth of wood! I am so happy with how they turned out & how budget savvy there were to create. The best part is it only took me an hour of working time (30-minute dry time) to make these beauties. Let me know what yall think & if we came close to our inspiration lanterns.
Want to see more of my DIY outdoor projects?! Head this way!


Comments
Join the conversation
-
Charming and so many options besides stain. Love the handles too.
Annie🦋
-
Really beautiful great work love your screen the fret.work.is.very.elegant


Frequently asked questions
Have a question about this project?
Do you put string lights inside? If so, how do.you pit them in?
Very cute and creative, not to mention practical! 2questions. How long were the 2x2’s before you cut them, and were the candles easy to insert after the lanterns were made?
Could I use wood pieces from a wood pallet to make this ?