


Raised Stenciling the Easy Way!

We found this French provincial lingerie chest online for a great deal! Problem was.. It had damage from stickers on the side. So adding texture was the perfect solution.
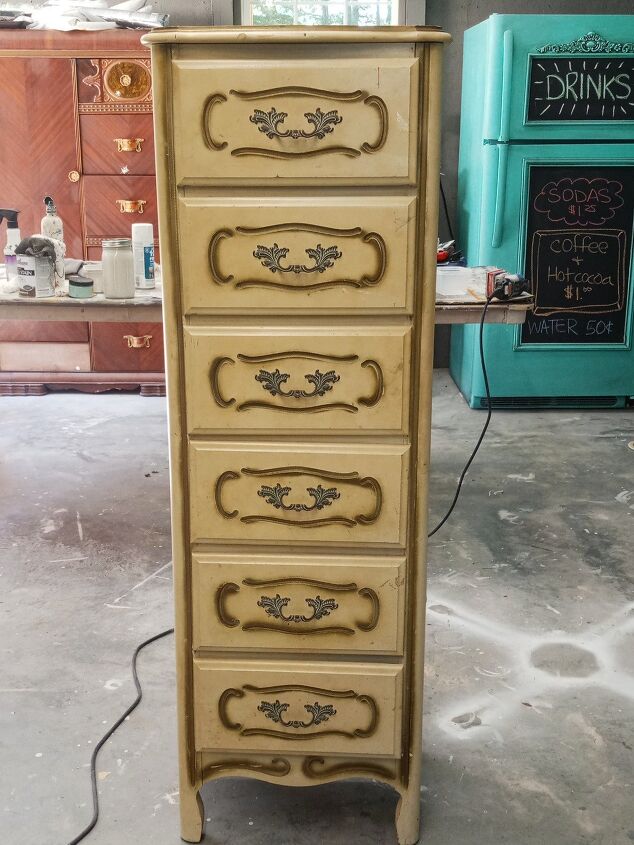
After cleaning really well with TSP... I also removed the hardware so that I could paint that separately.
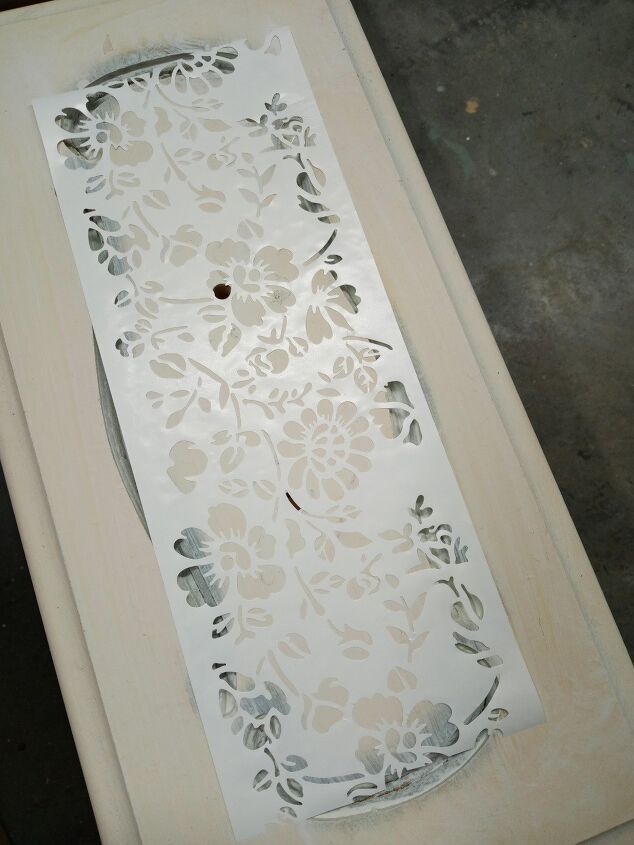
This has to be the best product on the market for stenciling. Redesign by prima has rolls of stencils that stick right to the surface and you can cut it to fit. Genius and easy! I decided to do all the sides and the raised front panels on the drawers.
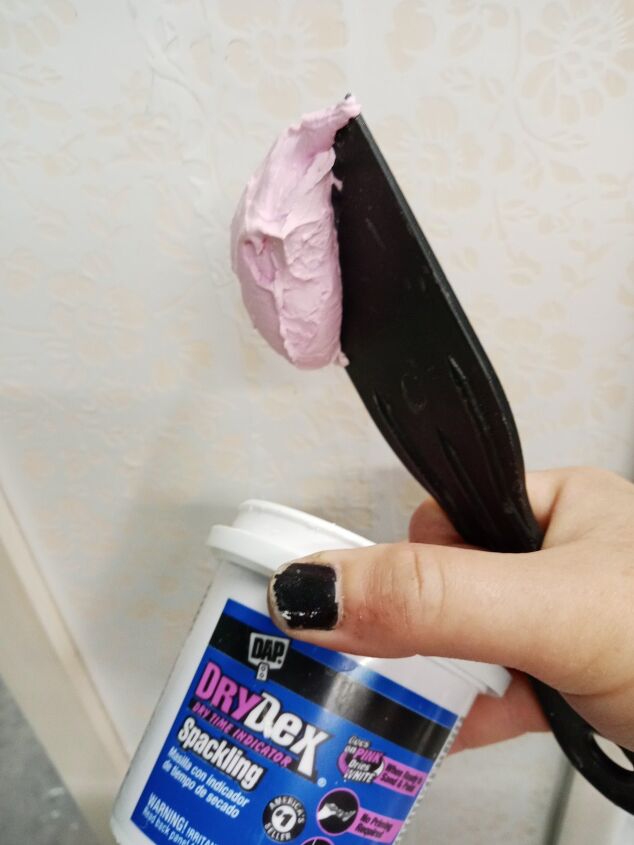
To make the raised stencils I used simple spackle. I like the pink stuff that turns white when dry so I know it is completely ready before painting. I also used a plastic putty knife but you can use whatever you have on hand that would scrape off the extra spackle.
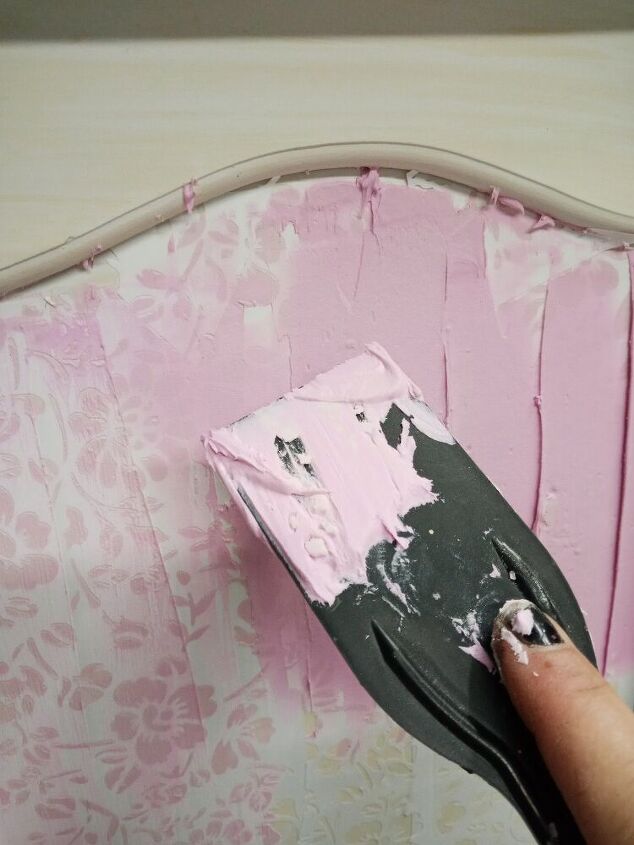
At first I put it on pretty thick. Then I realized it wasn't showing the pattern as well as I had hoped.. so in this case less was more. I applied the Spackle in small sections because it does start to dry pretty fast and scraped the extra off and reused in the next section.
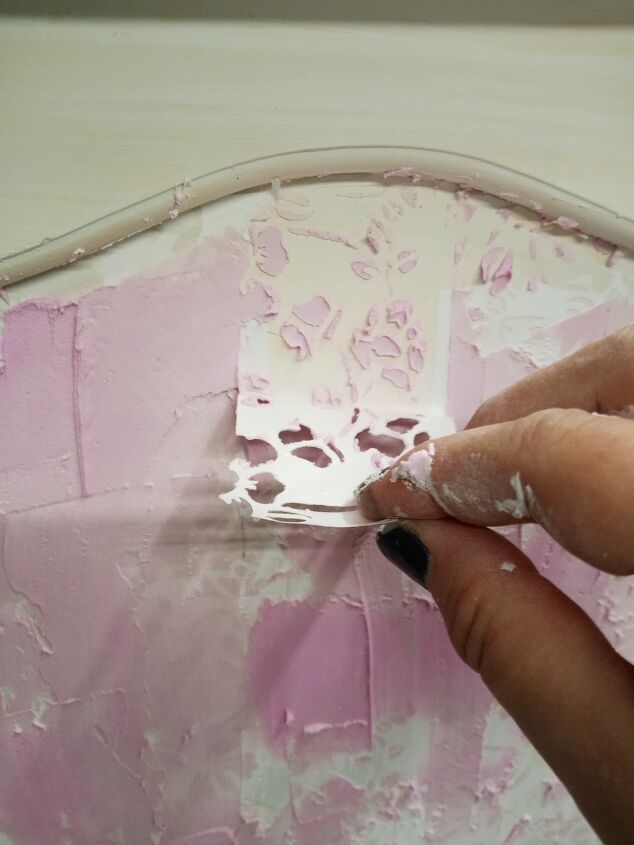
I wanted to check my work before it dried just in case I wasn't happy and wanted to fix anything. Carefully pull away the stencil so that it does not smear or smudge your raised design.
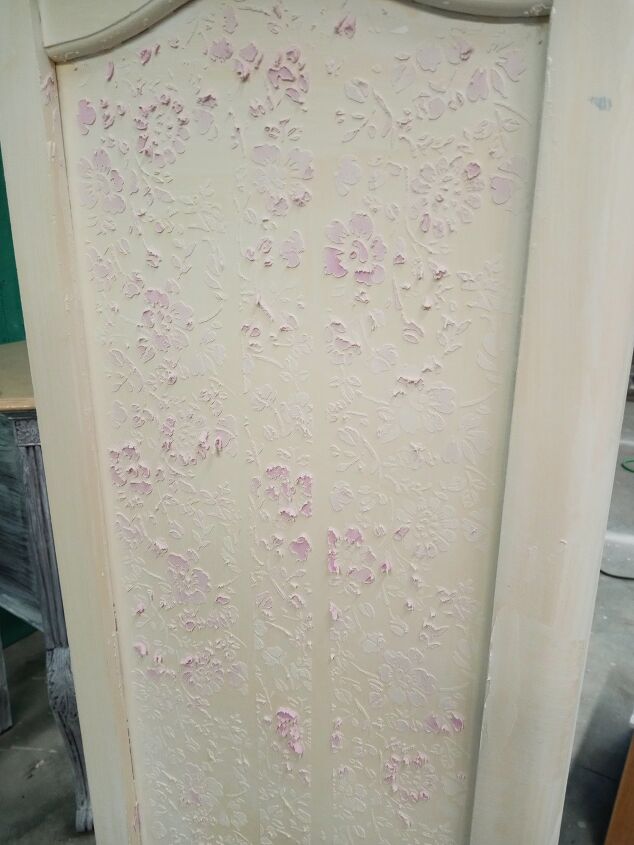
So once again here is the perks of spackle that is pink when wet and dries white when dry. You can see when it's ready to paint!
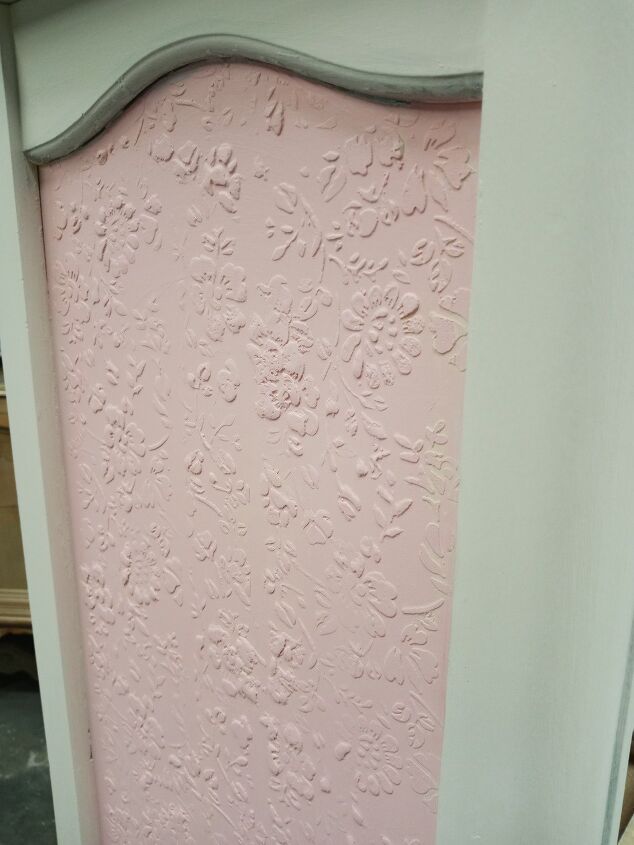
Paint right over your design. If you don't care for the unevenness of the spackle, you can lightly sand with a sanding sponge that is high grit between coats of paint. Since I wanted the white of the Spackle to come through, I waited until I was finished painting my second coat before sanding.
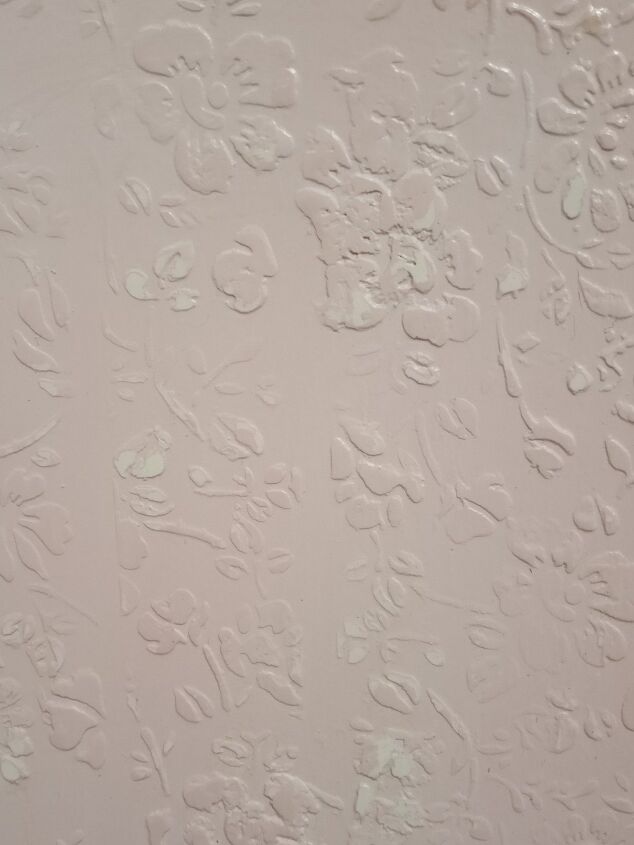
Here is a close-up view after I finish painting two coats of chalk paint then sanded and sealed with Retique It polyacrylic.
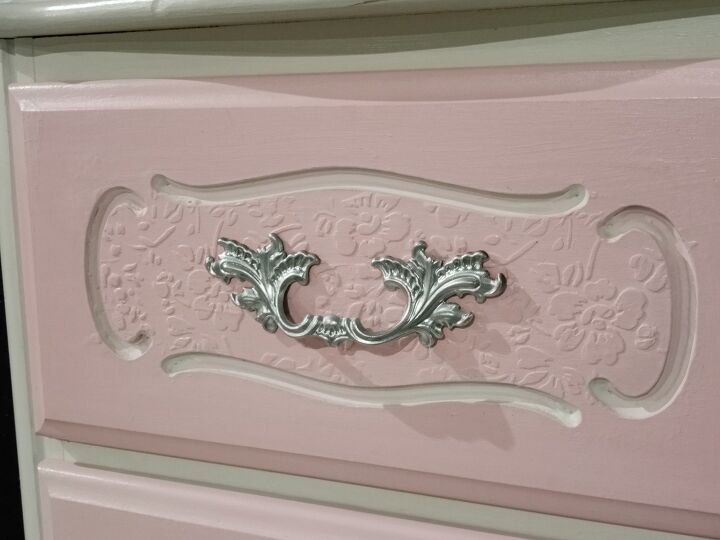
To update the hardware I used simple spray paint in a silver. What a difference it makes! I also decided to add a little glaze to the details and whitewash over the pink paint to soften the look.
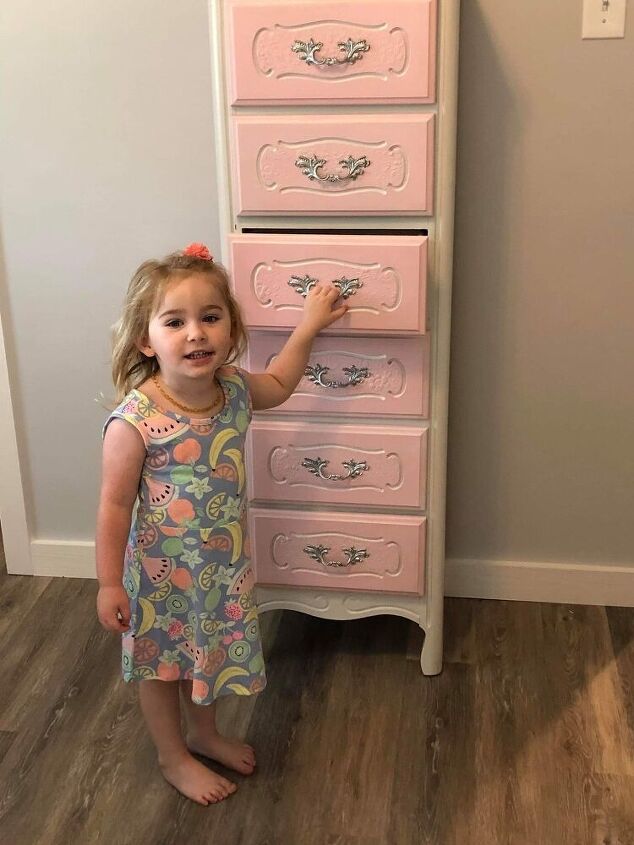
The little girl who this went to was so excited. She now has a one-of-a-kind dresser that fits her style perfectly.
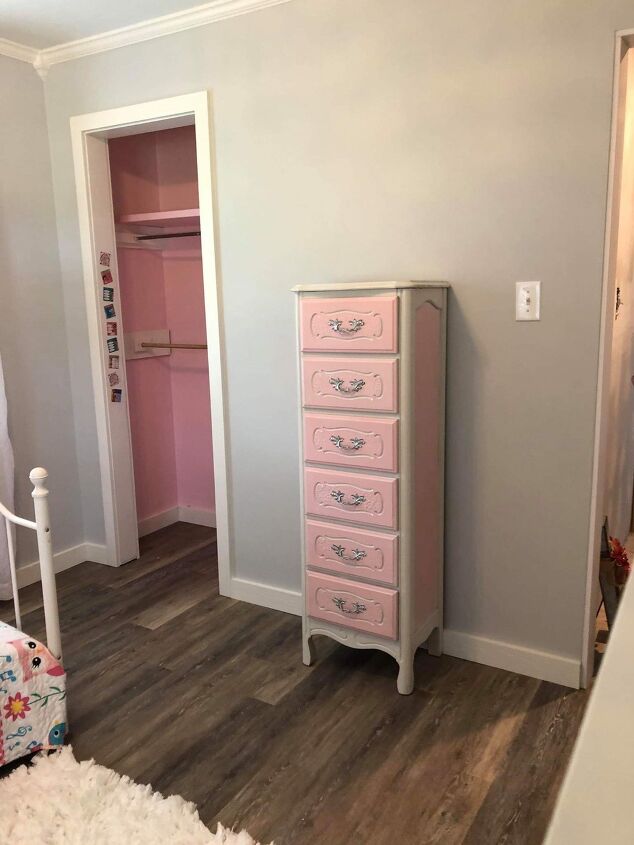
Totally new look for an outdated piece.
Resources for this project:
See all materials


Comments
Join the conversation
-
Hope that dresser is secured to the wall so it doesn’t tip over when she opens & reaches to get something out of the drawers, especially the higher ones!! Adorable little dresser!!
-
Looks like she needs a step stool!


Frequently asked questions
Have a question about this project?