


Laundry Room Makeover

I finally designed my laundry room, it only took 8 years 😆 our dryer was acting up a bit, come to find out after the fact that the duct was clogged! Oh well, I got a new, well deserved (if I say so myself) washer & dryer.

Hometalk Recommends!
Let’s see... first things first...clear everything out, clean, prep walls, choose paint color, plan and measure where you want everything to go.
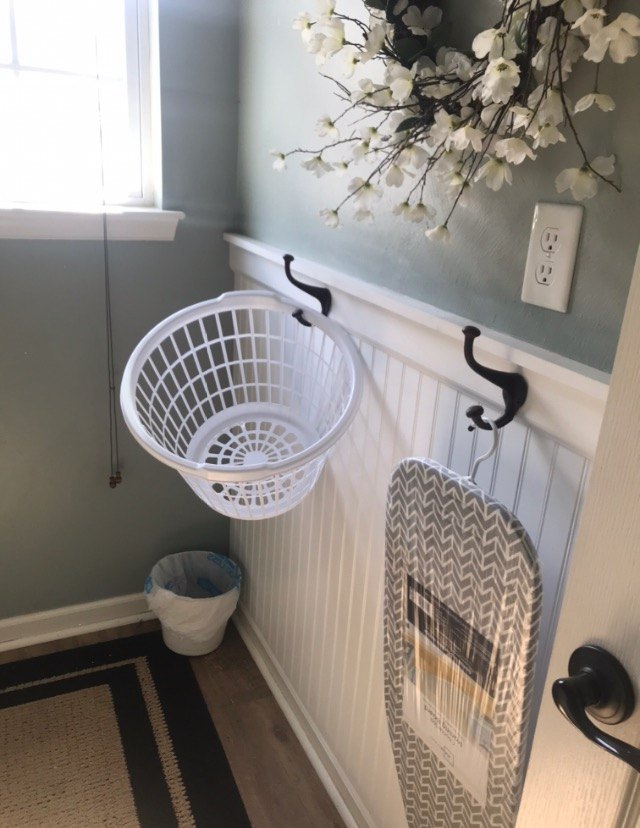
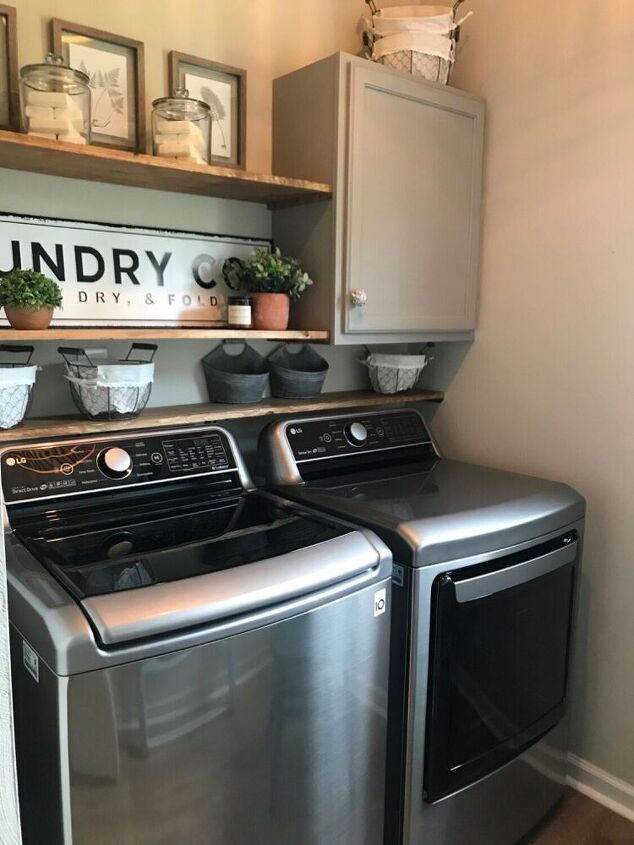
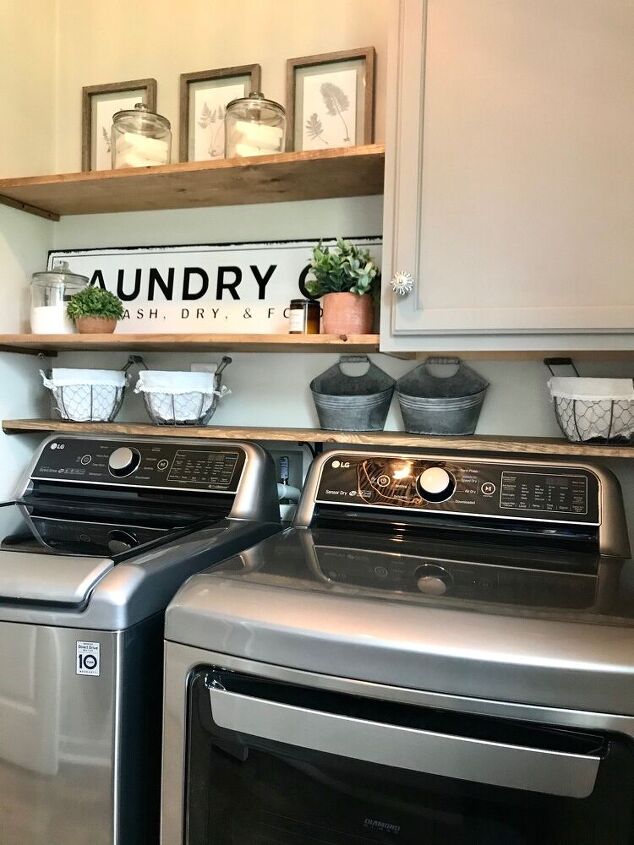
I actually had the board and hooks before so that was nice! We bought the board from Home Depot, attached it with a nail gun, also measure a long piece of wood for the top, then attached our hooks and bar for hanging mops ect... also from Home Depot.
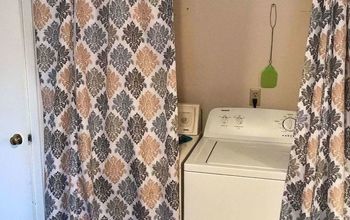
What a mess!!! Idk how I looked at this for that long 😂 I got a head start on the paint, while waiting for my washer/dryer. I used Gatherings by magnolia home.
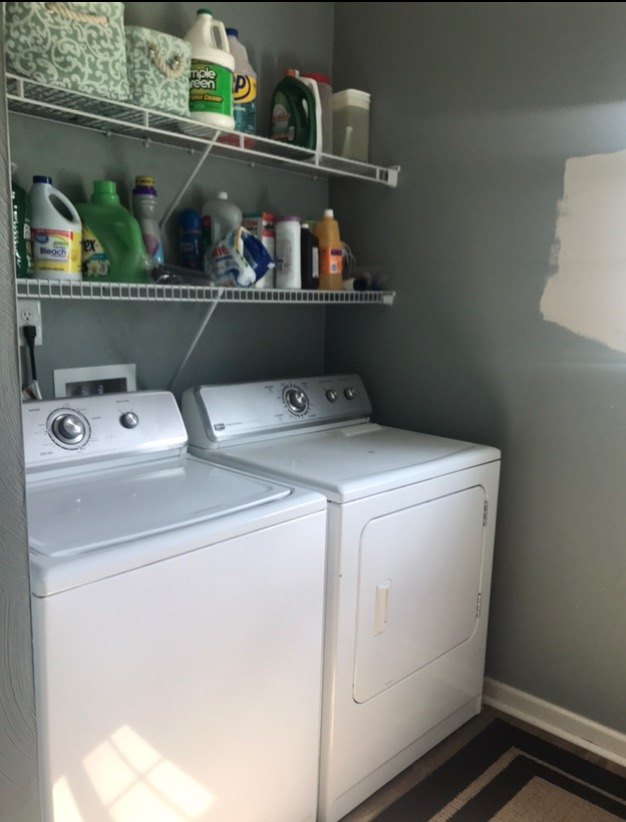
We took down the shelves once everything was moved out, then used wall filler to cover the holes.
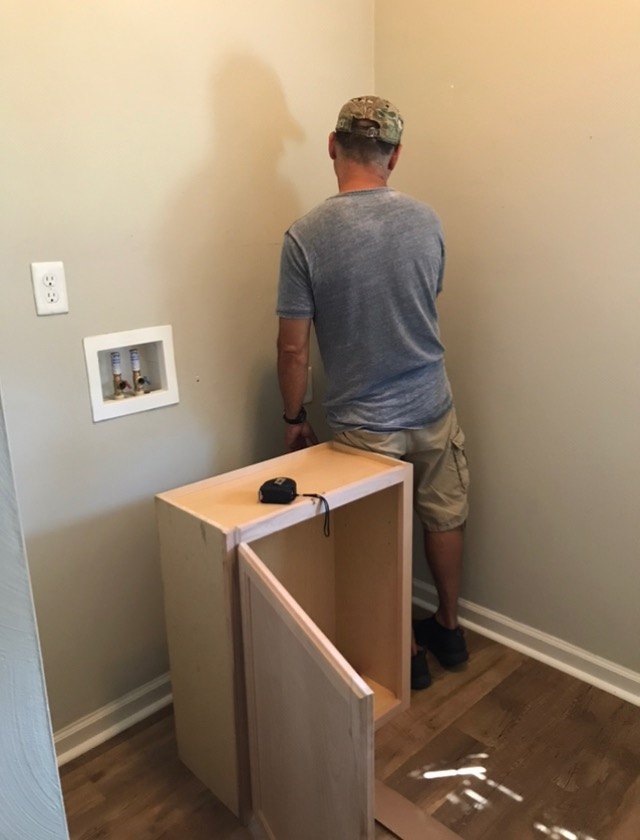
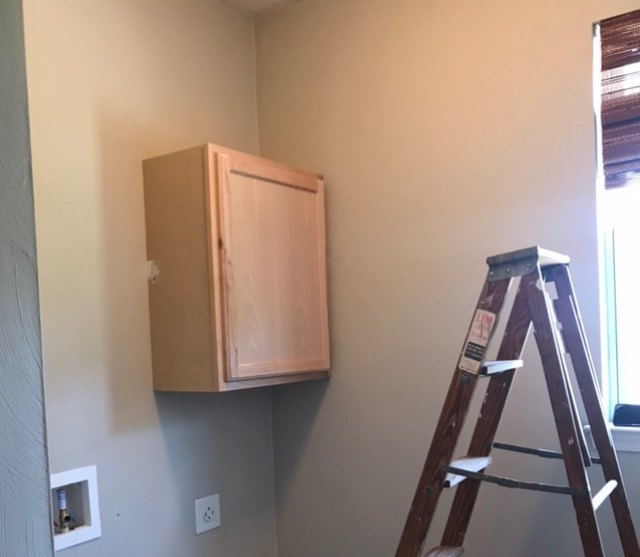
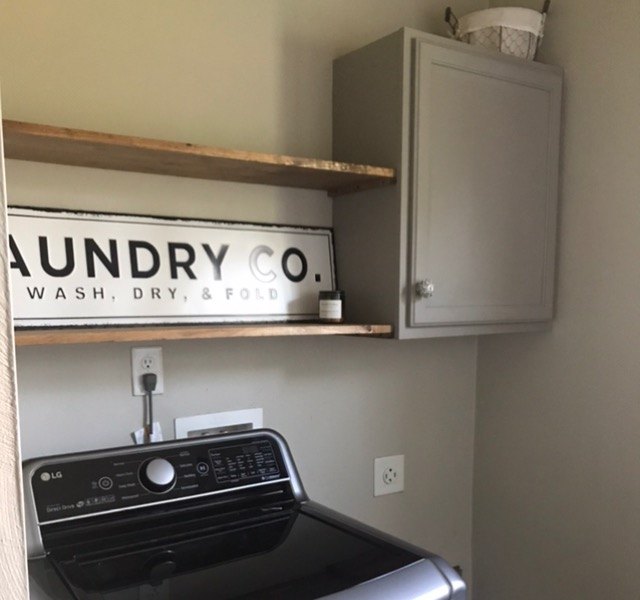
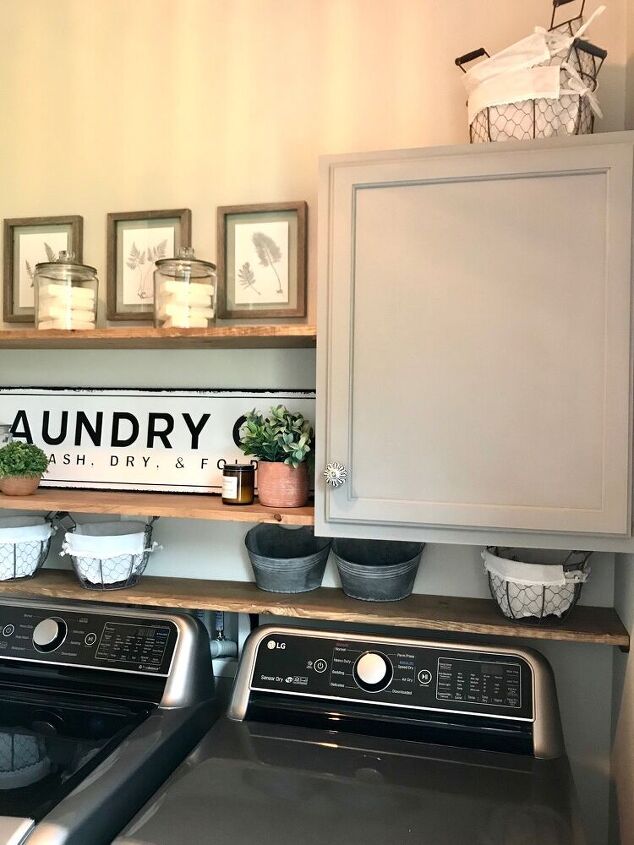
I found the perfect sized cabinet at Home Depot for about $75. Here, my husband is finding the wall studs to attach the cabinet. He is using a Stud finder.
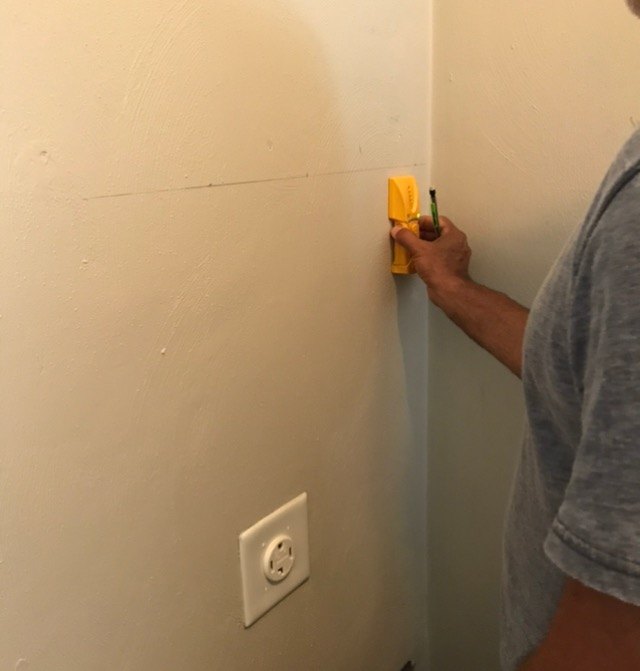
Once we find the studs, we can safely attach the cabinet.
Check the level with a spirit level. Adjust if needed!

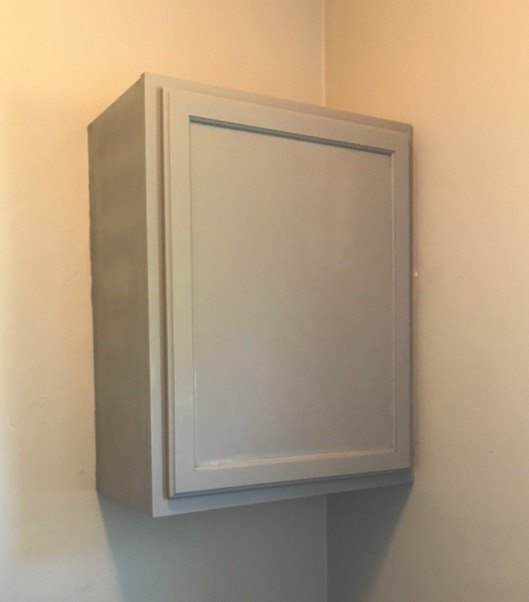
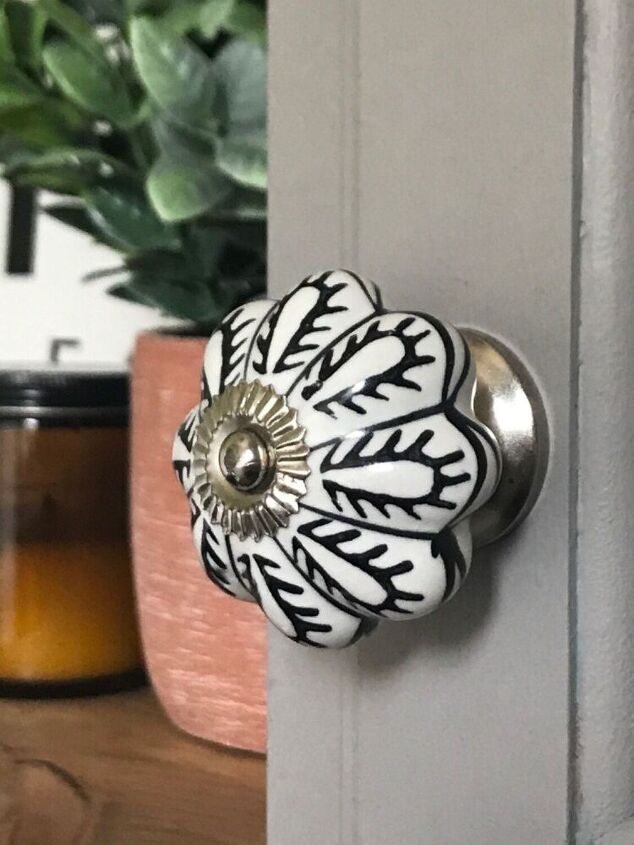
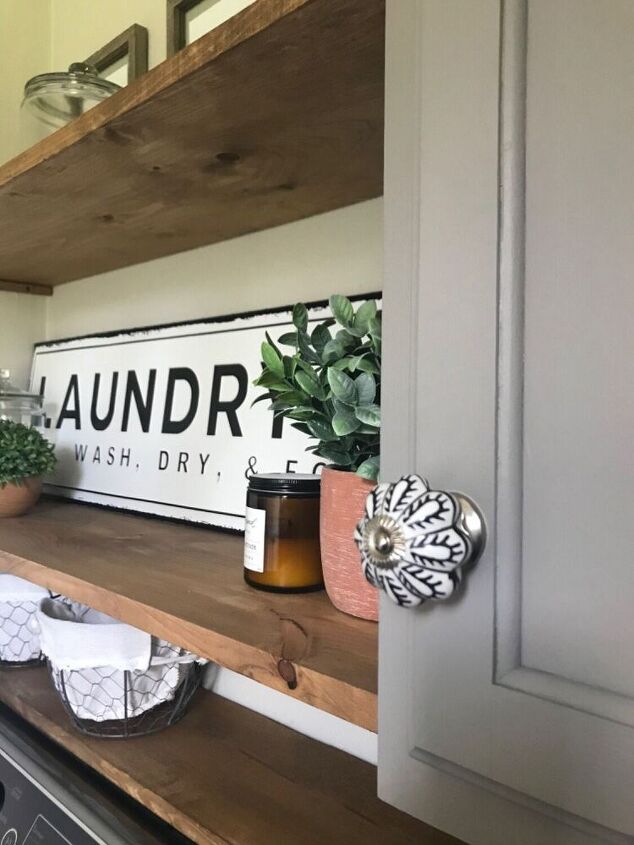
I chose a neutral color a little darker than the walls to keep it flowing. I used this beautiful black & white knob from Hobby Lobby to match my art.
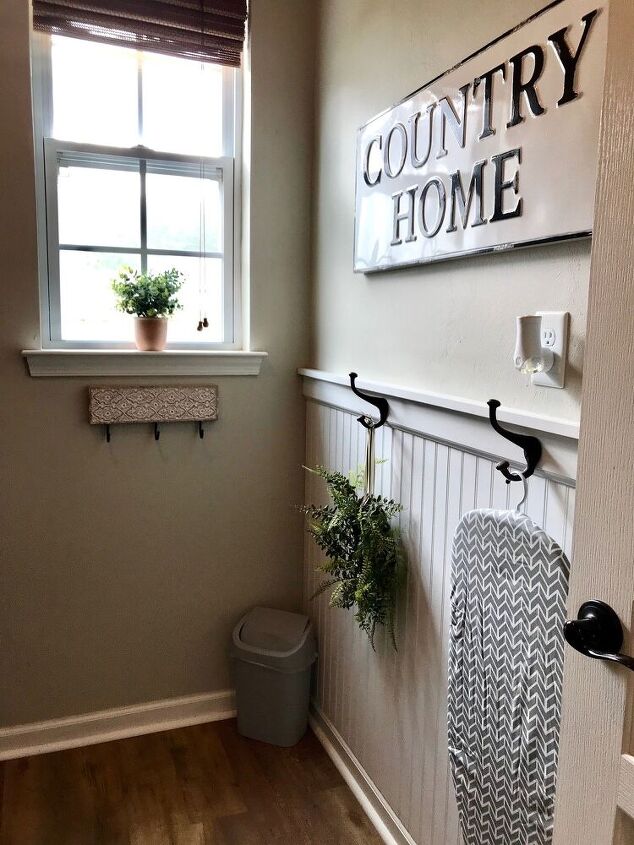
It’s coming together! We rarely use an ironing board so it made sense to donate it and buy this little one from Walmart, which was around $7.50 it hangs perfectly against the wall.
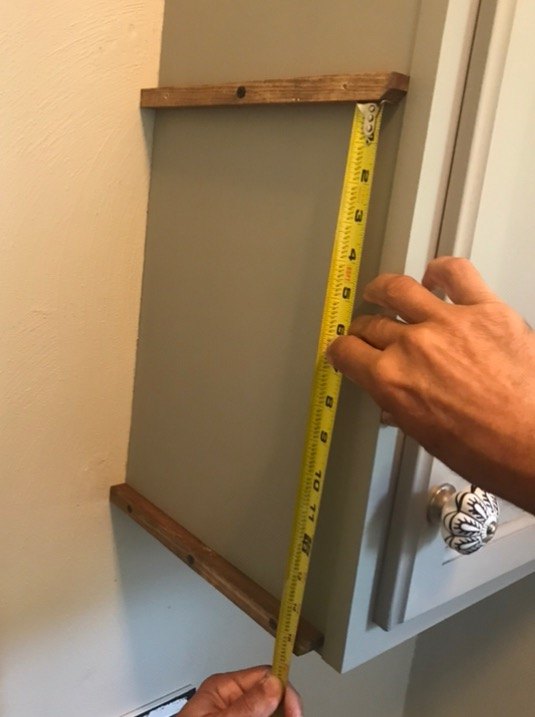
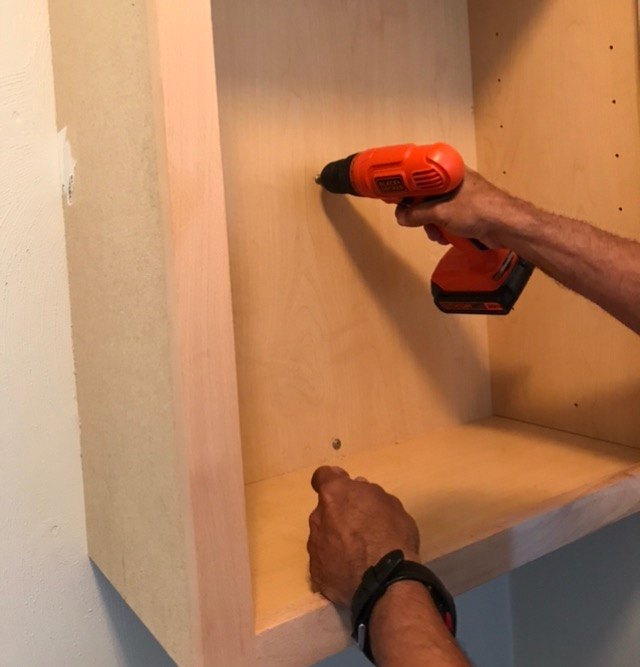
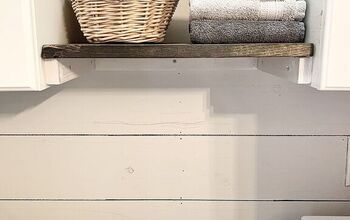
Above, my husband measures and cuts pieces of wood that will hold my shelves, which are also cut to fit, stained in Early American. They are screwed into the side of the cabinet and the wall.
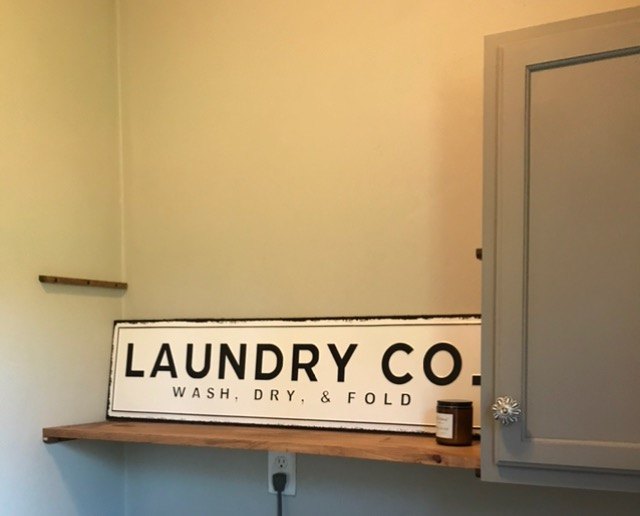
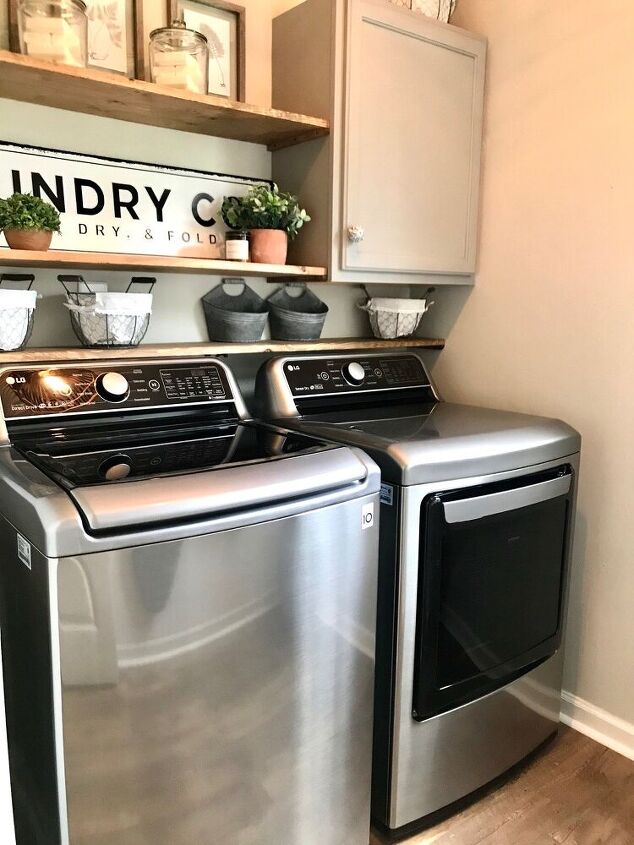
My laundry sign fits perfectly on the bottom shelf. I purchased it from kirklands.
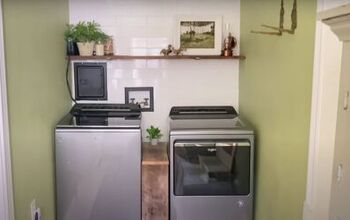
I was really excited to receive my washing machine, but the dryer was damaged so I had to wait another week for my dryer! 😞 No worries, that gave me time to finish our shelves.
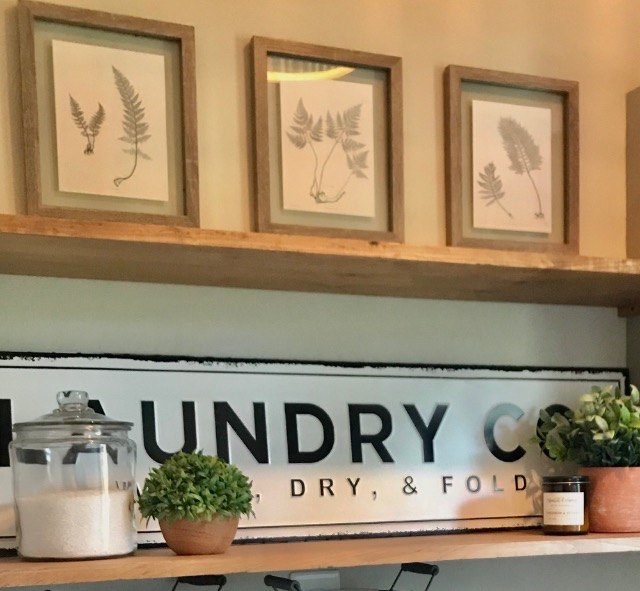
I love creating my own art ect.. I found these floating frames from Ross for about $6.50 each, then looked for free printable fern art online. I printed them black & White to match the rest of the art and details.
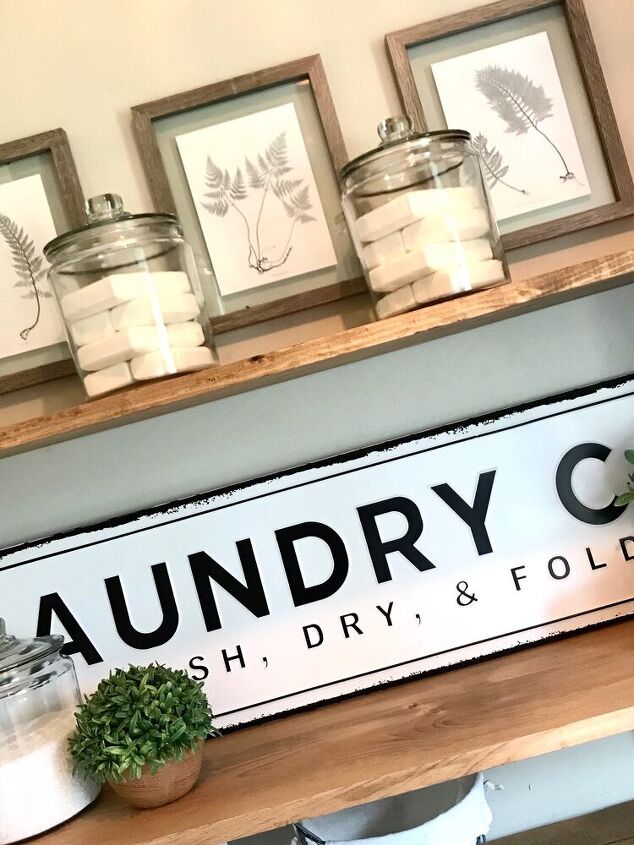
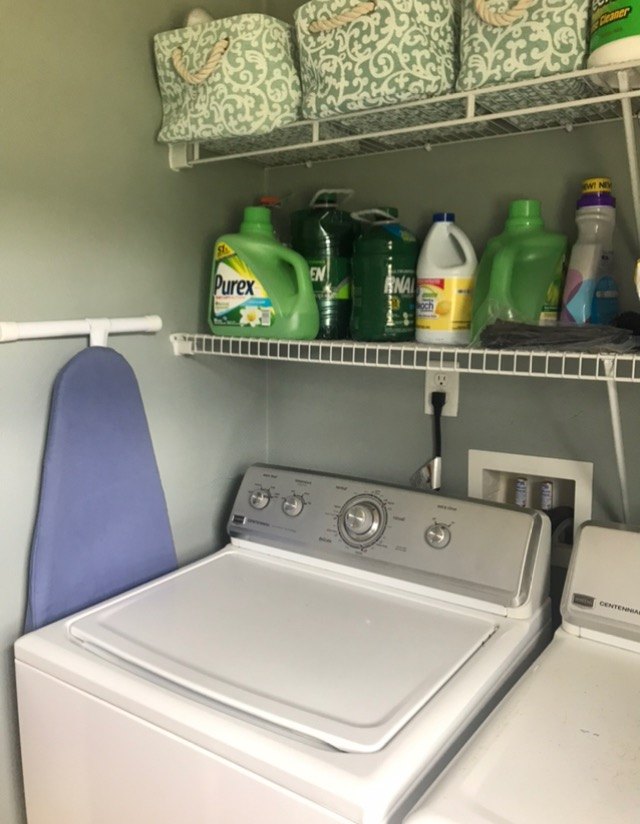
Using these clear jars from Walmart at under $6 I filled them with soaps Just for fun and dimension.
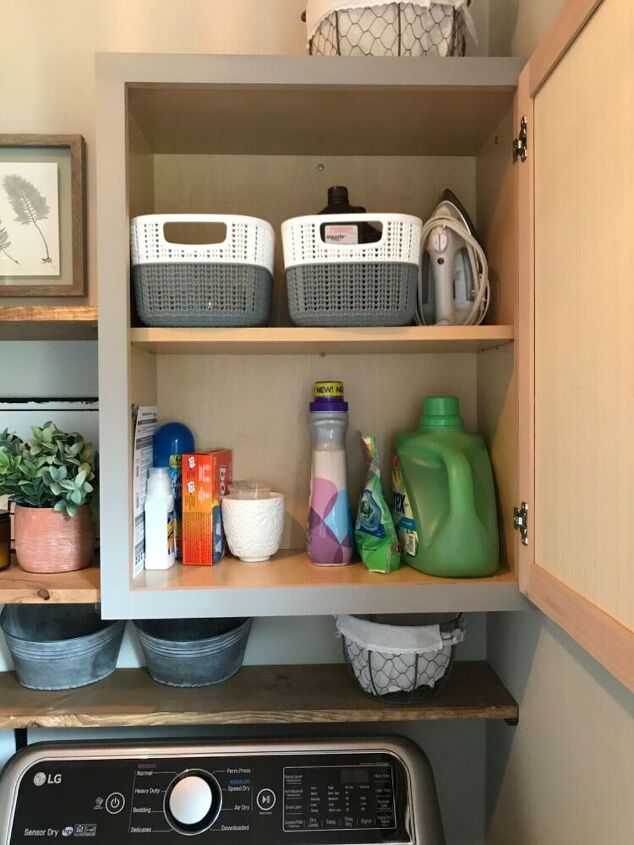
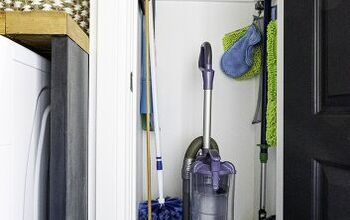
Now I can hide all of the essentials away and it’s the perfect amount of storage!
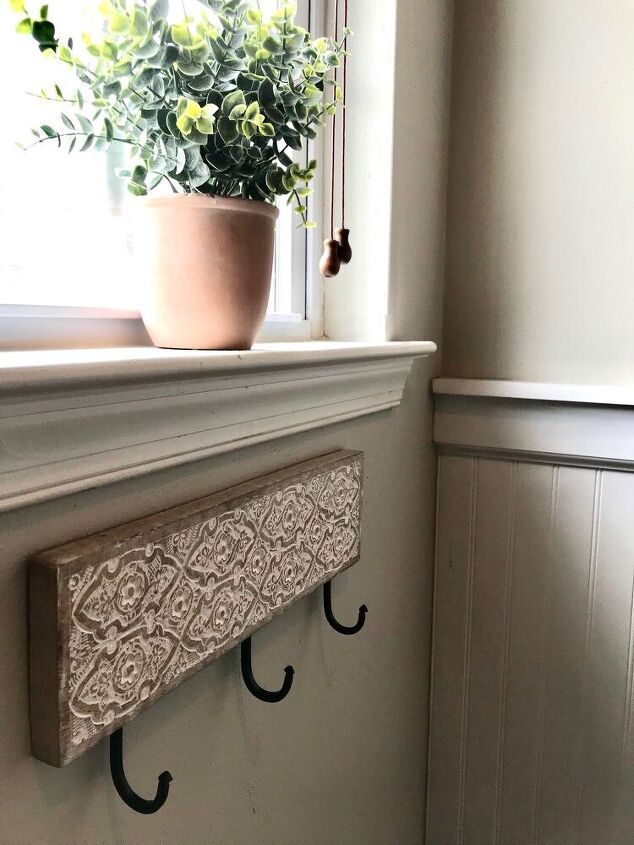
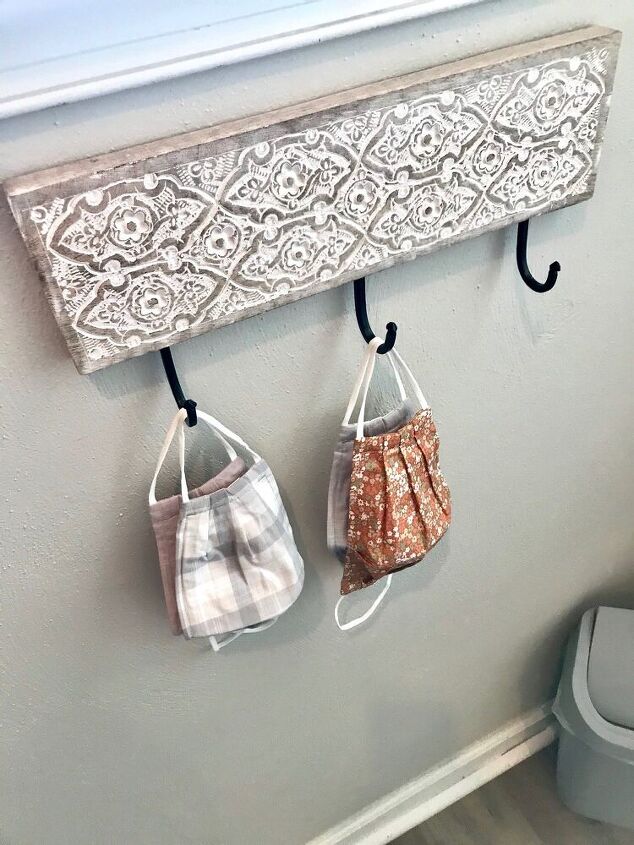
I’ve added another little hook set for small things such as hats, masks ect...
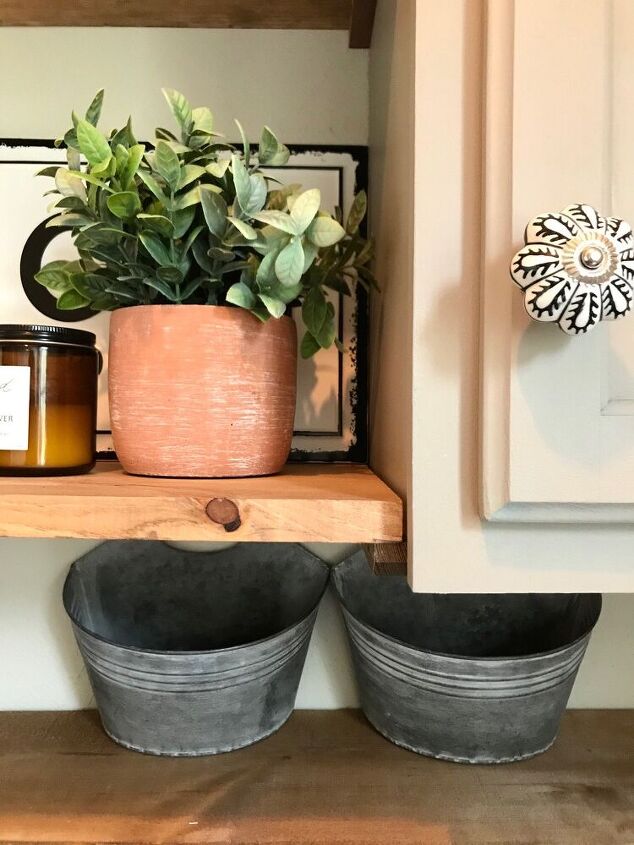
I love using plants to design spaces, it’s always nice to look at while doing laundry! These can be found at Marshalls, Ross or TJ Maxx.
It’s finally complete and I absolutely love how it turned out! I can’t stop washing things 😂 that won’t last long lol! I love our new washing machine and dryer, especially the little tune they play Lol!

I wanted to add that I found all of the baskets at Ross and Hobby Lobby. They are great for small clips, pods ect..
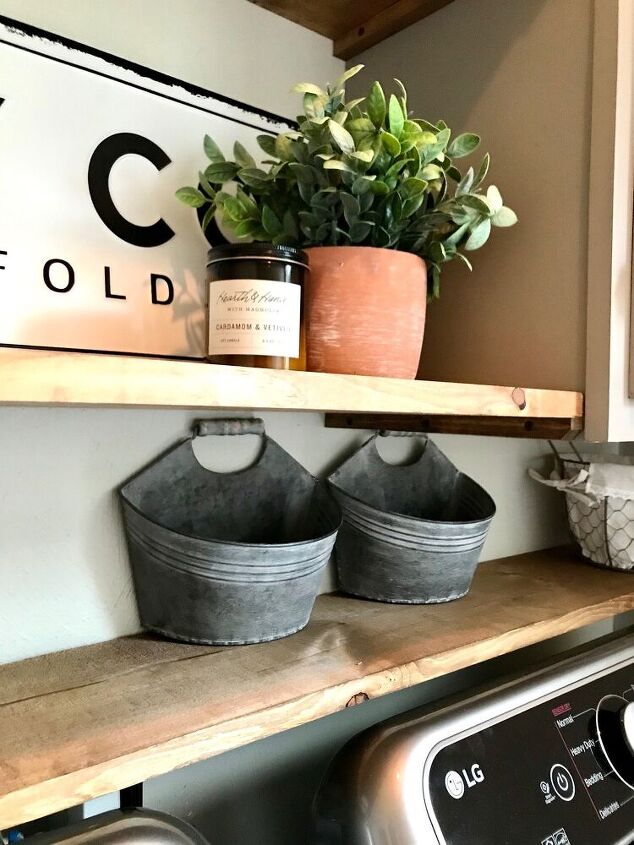
The candle is from magnolia home and can be found at Target. It smells so good!
As always, thank you for stopping by, I’ll be doing laundry 😂


Comments
Join the conversation
-
This is so beautiful!! You’ve given me great ideas to improve my laundry room as well!!
-
It’s lovely. Very nice. Do you still have a drying rack somewhere? I couldn’t be without mine. We hung it below the cabinets we put across the top similar to yours.


Frequently asked questions
Have a question about this project?
I would just like to know how you hung your planks
Where do you put your dirty laundry?
The planks did not bow after time ?