


Create a Beautiful Ocean Scene on Virtually Any Surface!

Alumilite Ocean Art Kit Tutorial by Mixed Media Girl
This post was sponsored by Alumilite. All opinions are my own.
Music by Josephine’s Alibi

Mix your epoxy with equal parts A and B. Mix up about 3 ounces per square foot of surface (if your surface is 2 square feet, you would need about 6 ounces of epoxy and would mix 3 ounces of part A and 3 ounces of part B). Mix up slightly more than you need to ensure you have enough epoxy for your project.
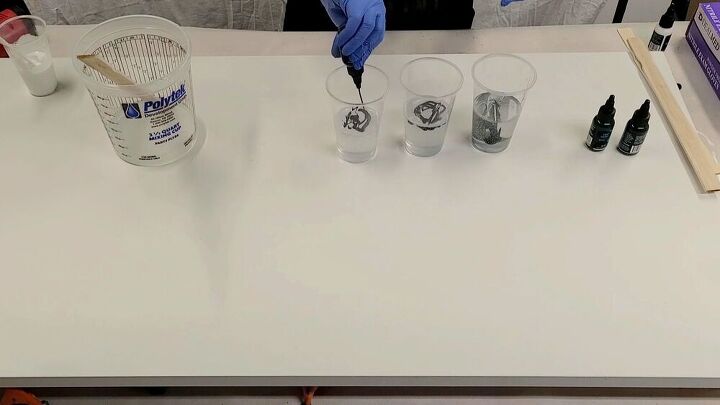
Divide your clear epoxy into 4 containers and add your colors. For the blue, ocean blue, and tan colors use equal parts of the resin, with less resin in your cup for the white (you need the least amount of white for your project). Use no more than 15% of your colorant to the epoxy, though I recommend using only 5-10%. The less color you add, the more transparent and light your colors will be.
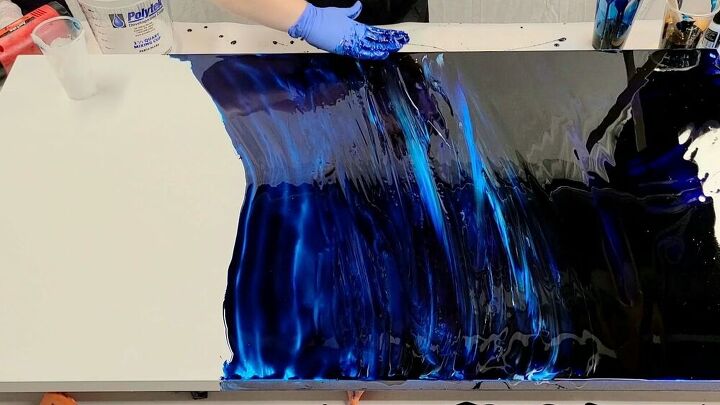
Start out by pouring the blue resin on your surface, then add some of the ocean blue next to that. Spread these around on your surface as far as you want the water to go. Add white as desired to lighten up the blue or add some interest. Don’t forget to cover the sides of your project.
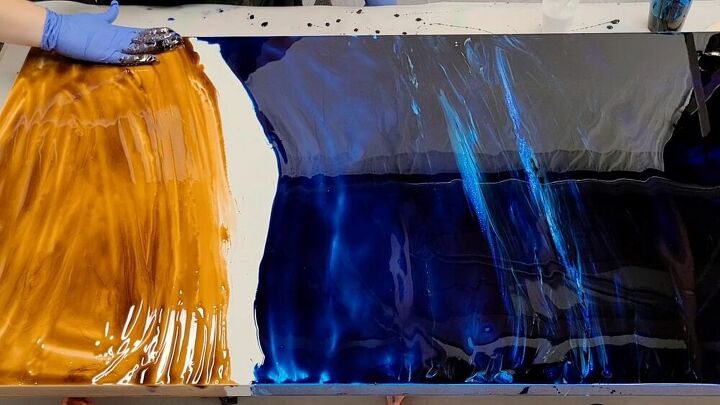
Add your tan color, covering the rest of your surface up to the blue area. You can also add real sand on top of this if you would like. Don’t forget to cover the sides of your project.
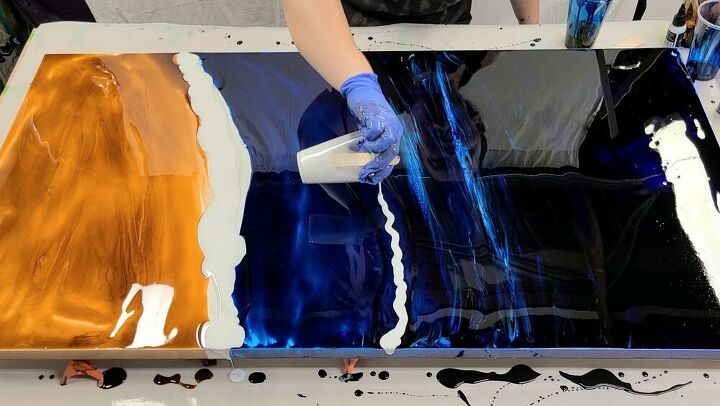
Add a line of white in between the tan and blue, as well as in the blue as desired. You can add as many waves as you wish. Start out slow with the white, you can come back in with more later on if you wish.

Use a heat gun to spread the white out, pushing it over the tan and over the blue. You can also push some of the blue over the white. You will see as the epoxy moves around it will create some lacing, mimicking crashing waves. Add as many waves as you like.
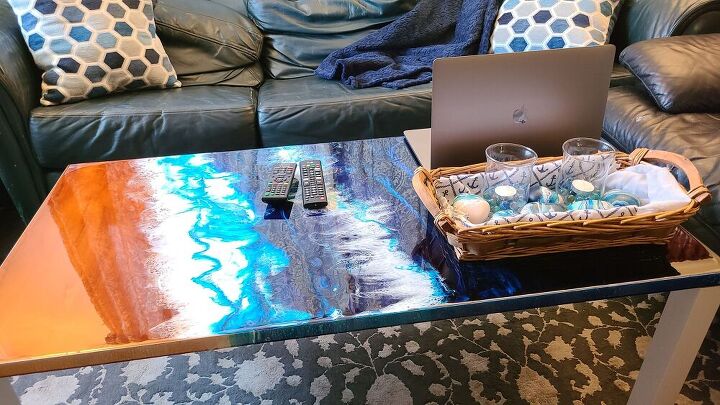
Let your piece cure for about 24 hours, then apply a clear top coat if desired. At this stage you can also add more layers of waves if you wish, which will give your piece more depth. If you are doing this on a piece of furniture, always finish with a final clear coat.


Comments
Join the conversation
-
Omg thank you for this! My only experience with epoxy was turning two round slabs of wood into small tables. It was fun ,but we made a lot of mistakes such as not waiting a year for the wood to dry. And messing up the blue color a bit. But it was fun and good practice! I will definately try doing something like this on a blank canvas.
-
The page for the art kit has been removed. I would love to try this but seems like a lot of work for me to do. Hopefully sometime in the future.


Frequently asked questions
Have a question about this project?
Do you have to use a heat gun? Love love this! Beautiful! Kiddos!!!
Can I do a round table fir my dining room. It has so many scratches on it its not real wood got it from Ikea and its white.
Would I be able to do this to a bathroom countertop and do you think it would hold up to regular bathroom countertop wear and tear?
Thank you
Melanie