


Simple DIY Bathtub Tray
Create a simple modern farmhouse style bathtub tray in 6 easy steps!
When we did our bathroom refresh recently, one of the items on my list of accessories was a bathroom tray. I wanted both functionality and a simple design. Many of the trays I saw online had all the bells and whistles. A book holder, a hole for your wine glass, etc. Although those features were wonderful, it wasn't really what I needed.
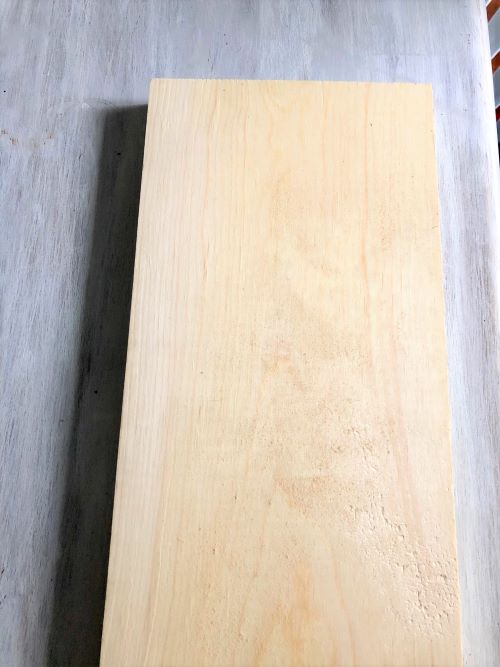
So instead I decided to create what I envisioned. The first step in doing so was to look through our scrap pile of wood and find a piece wide enough to suit my needs. I came across this nice piece of 1"x6" and it was perfect. All I needed to do now was measure the length I would need and cut it to size.
To find out what length I needed, I simply measured the width of my tub from the inside ledge to the outside. It measured just over 28 1/2". Since I wanted a little overhang, I decided to cut my piece of pine at 29 1/2".
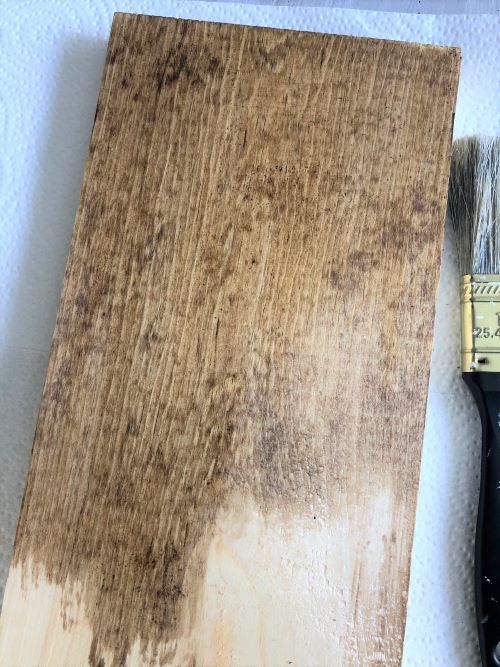
Once the wood was cut to size, I sanded it down well to remove the sharp edges and a few spots on the top and bottom. When it was as smooth as I could get it, it was time to stain. I used my favorite stain Early American, and gave the tray 3 total coats. I drying time in between each coat, and then allowed it to dry completely overnight.
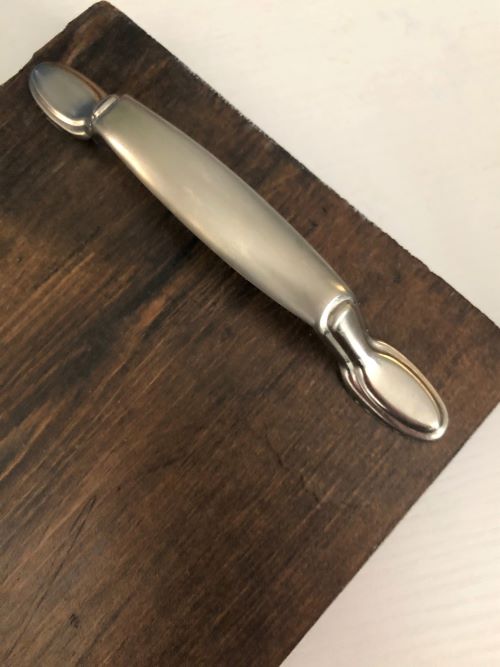
For ease of moving the tray I decided to add some handles that I had in my stash as well. To attach it was as simple as drilling pilot holes, and screwing the handles on. The best part was that in the next step I was able to hide the screw holes on the bottom quite easily.
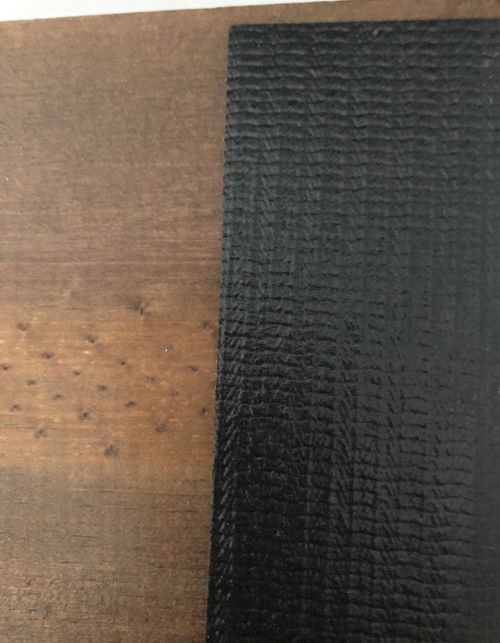
To keep your tray from sliding around or off the tub ledge, you'll need to add non-slip grip pads to both ends. The pads I had come in a 4" x 5" sheet. So I just measured where the pad would need to be on the tray and cut the sheet to fit. Then I removed the paper backing and adhered the grip pad to the back of my tray. It just so happened it lined up almost perfectly with the screw holes, so I didn't need to fill those in.
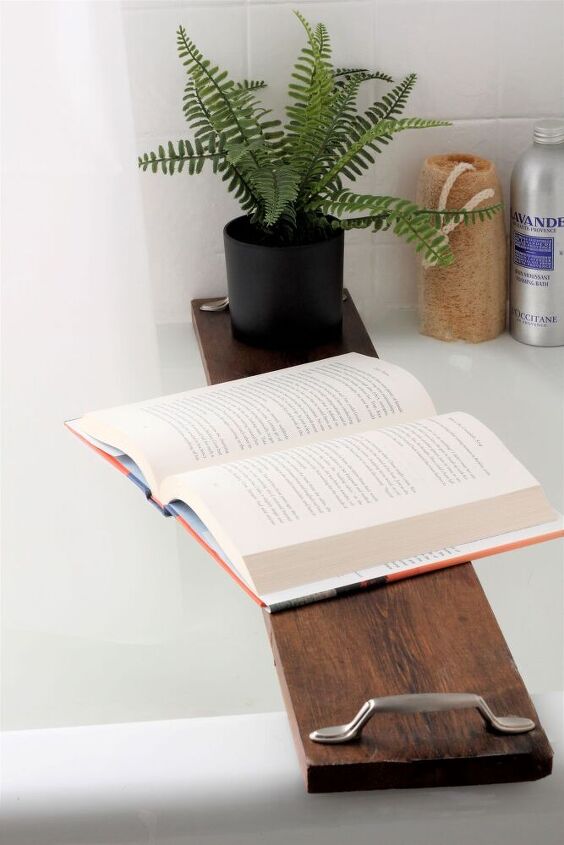
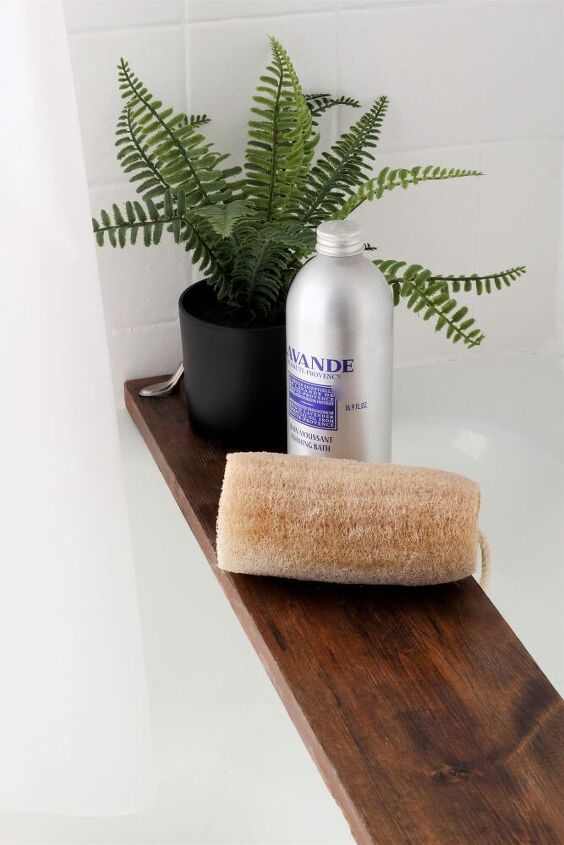
The last step was to give my tray two coats of a quality water repellent sealer. Again, I gave it one coat, allowed that to dry 1 hour, and the final coat dried overnight. Then the tray was ready to use! As you can see the tray is wide enough to hold a book.
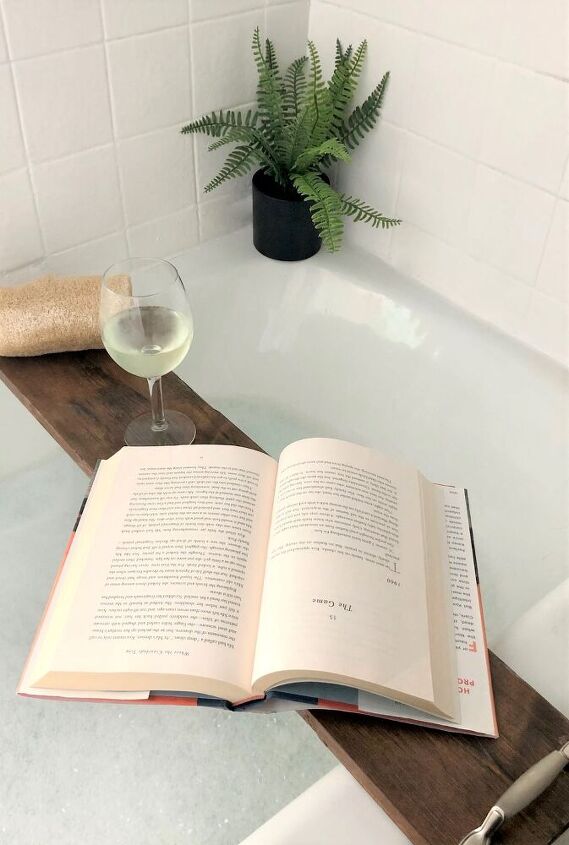
And there is plenty of room for a glass of wine too! Since I used scrap wood and I had all the other materials the total cost of my simple bathtub tray was $0! Outside of the drying time for both stain and sealant, the total time it took to put the tray together was about 30 minutes! You can find my full tutorial and material list in my link!


Comments
Join the conversation
-
I think this is a must. It is a perfect item for a nice hot long soak.
-
We just remodeled our house and I got a new bathtub. I've liked at these trays at lots of places. This has inspired me to make my own. Thanks for the suggestion.


Frequently asked questions
Have a question about this project?