


I've Been Framed!!

My builder-grade mirror was terrible. Not only did it look cheap, but had some chips on the edges. Since I re-did my bathroom on a budget (see my other posted project!)
https://www.hometalk.com/diy/bathroom/inexpensive-bathroom-re-do-in-the-colorado-mountains-44341071?cid=8491359%3Fcid%3D8491359
---tell me what you think! :-)
...I did an inexpensive "fix" for the mirror. Here are my steps.
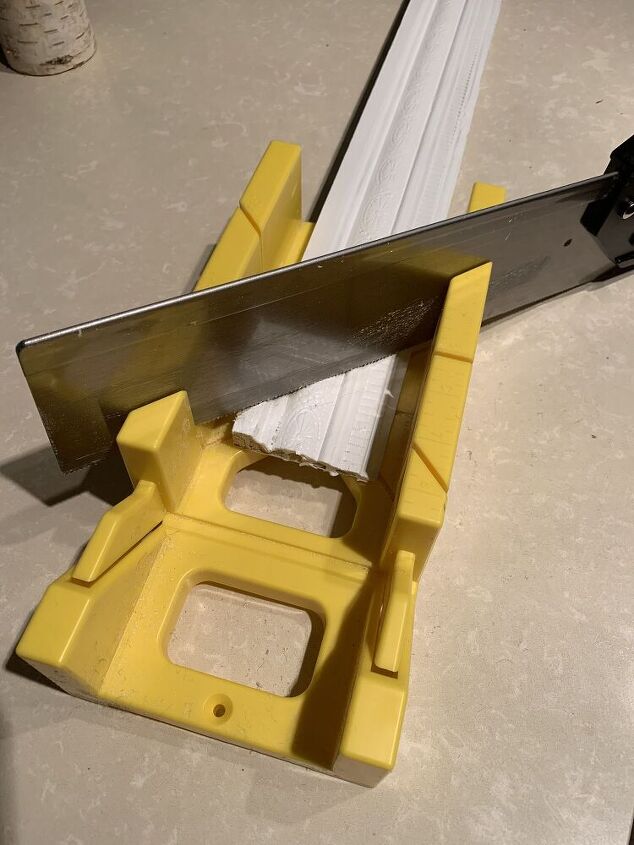
Measure Twice, Cut Once
Measure the mirror and decide how you want the frame to fit. Use a chop saw (I wish!) or miter box to cut 45 degree angles -- to piece the frame together.
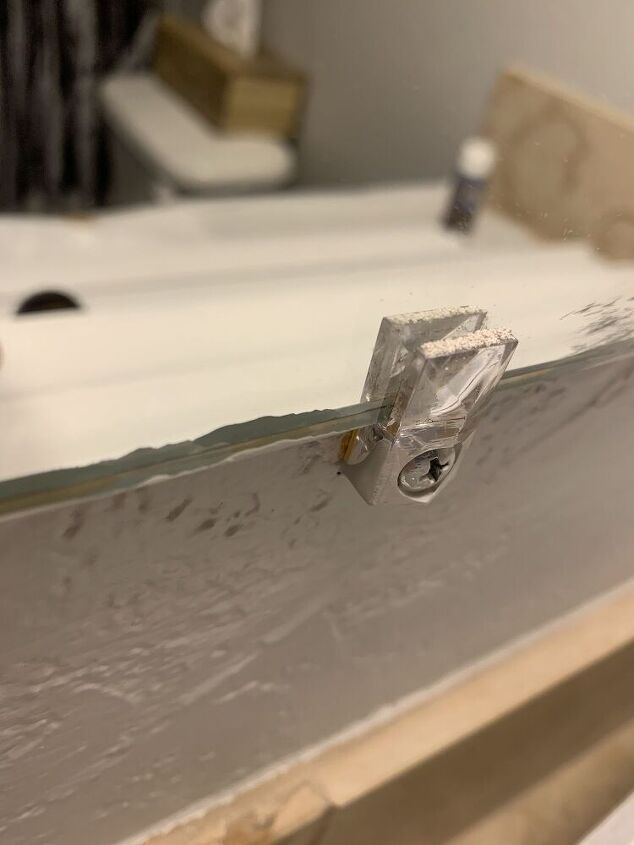
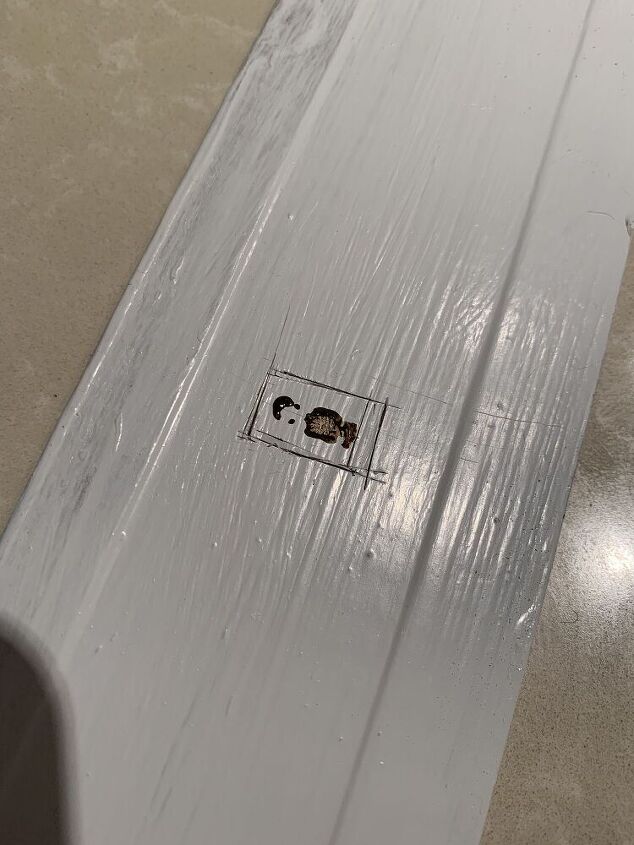
A "Problem"
The mirror had raised "diamond" plastic screw-in clips to attach it to the wall. I had to find a way to accommodate the back of the frame.

Sand!
I took course sandpaper and smoothed down as much as I could -- without compromising the integrity of the clip.
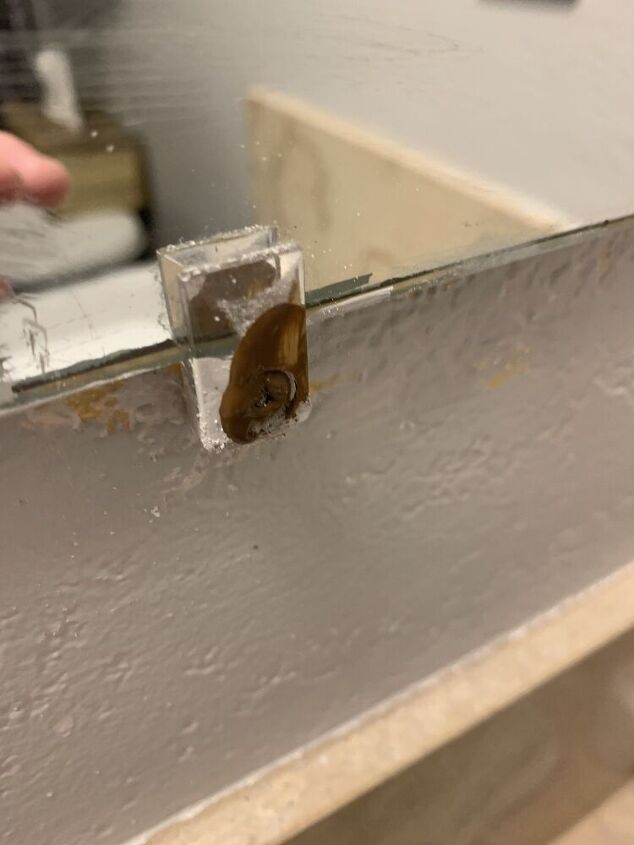
A Solution!
I used brown craft paint to dot each clip. I used the wet paint in the following way...
The Sweet Spots
You can see the brown paint dots... where I would have to hollow out the trim... to make it flush with the mirror.
Use Box Cutter
...to cut a rectangle around each brown spot
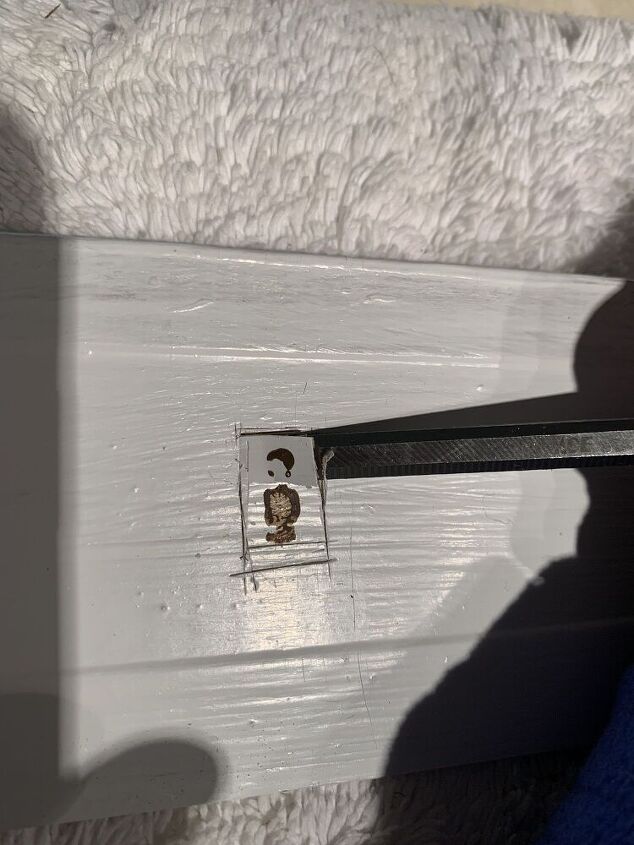
Starting to Chip
I used a hammer and 1/4" chisel.
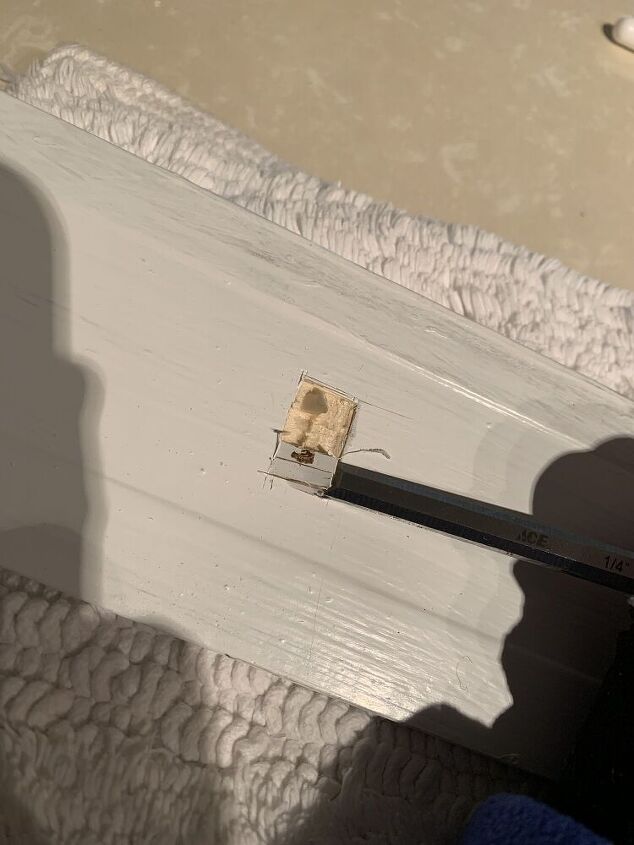
"Well Chiseled"
I chiseled out an area that would accommodate the mirror clip(s)
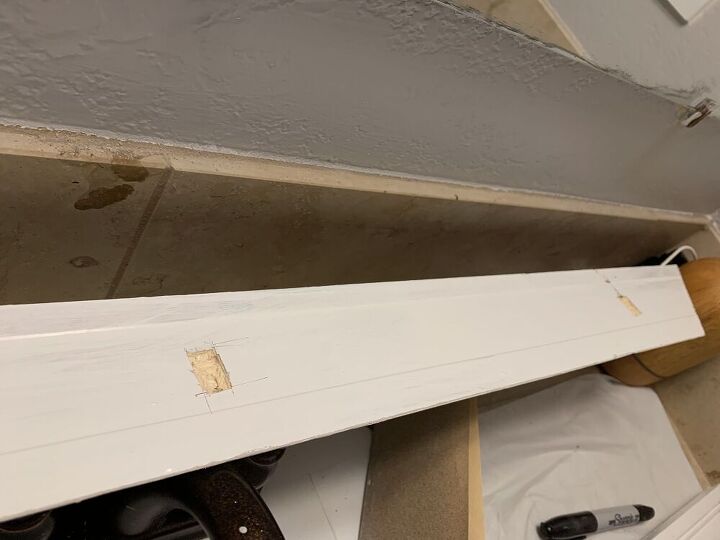
The Back of Trim
...hollowed out -- and ready for mounting
FYI: you DO have to paint the back of the trim... It's for a MIRROR!!
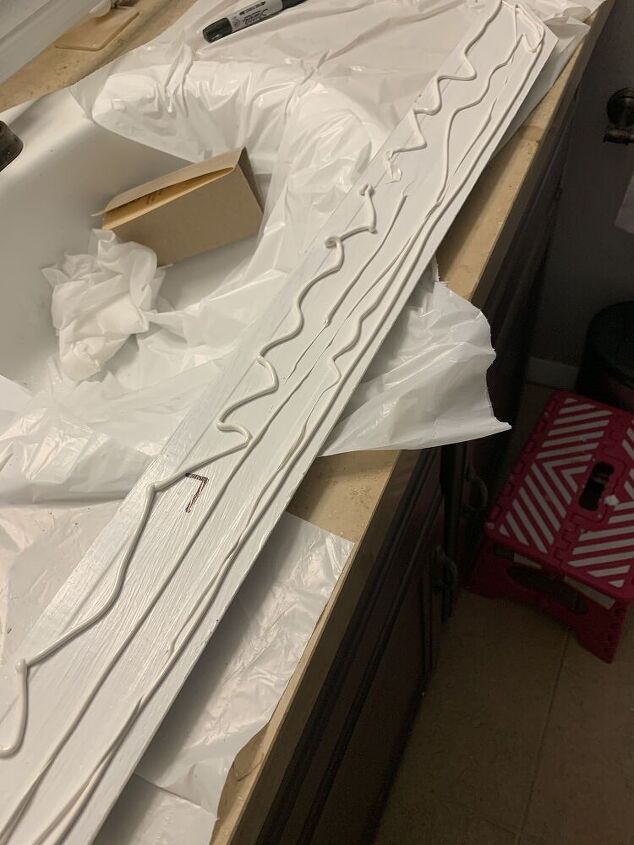
Liquid Nails!
I used only one tube for the entire four sides of the mirror.
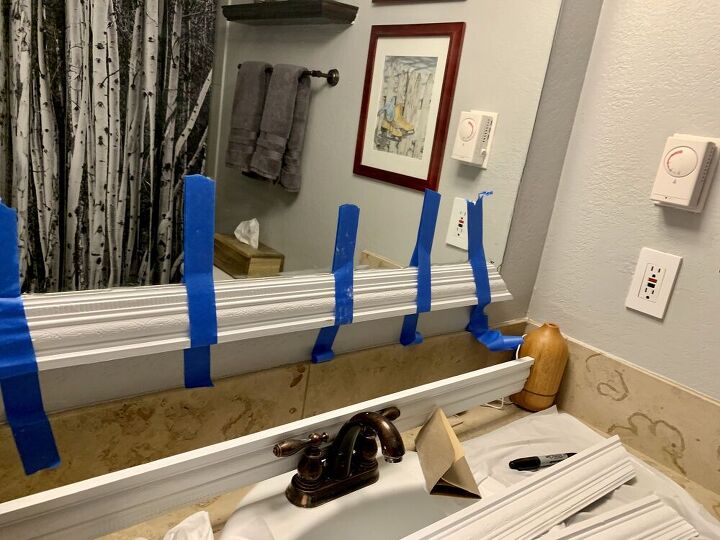
Tape!
The Liquid Nails needed to dry for 4-6 hours. I used blue tape to secure to mirror.
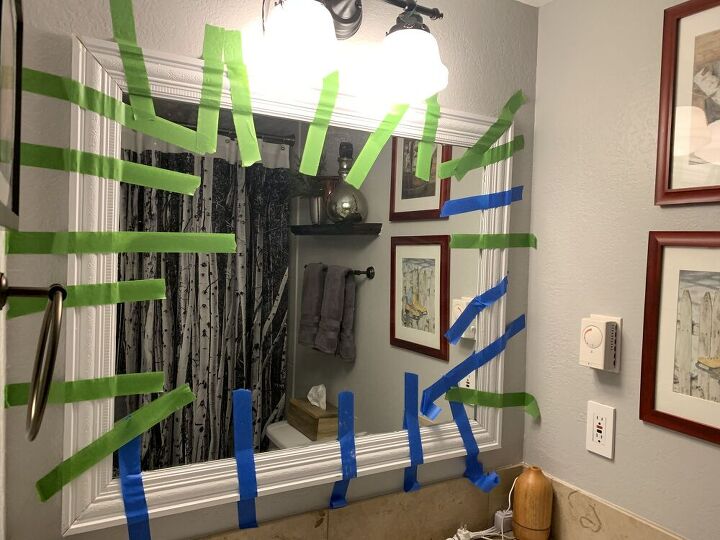
All Four Sides!
(then I went to bed)
...green tape too! ;-)
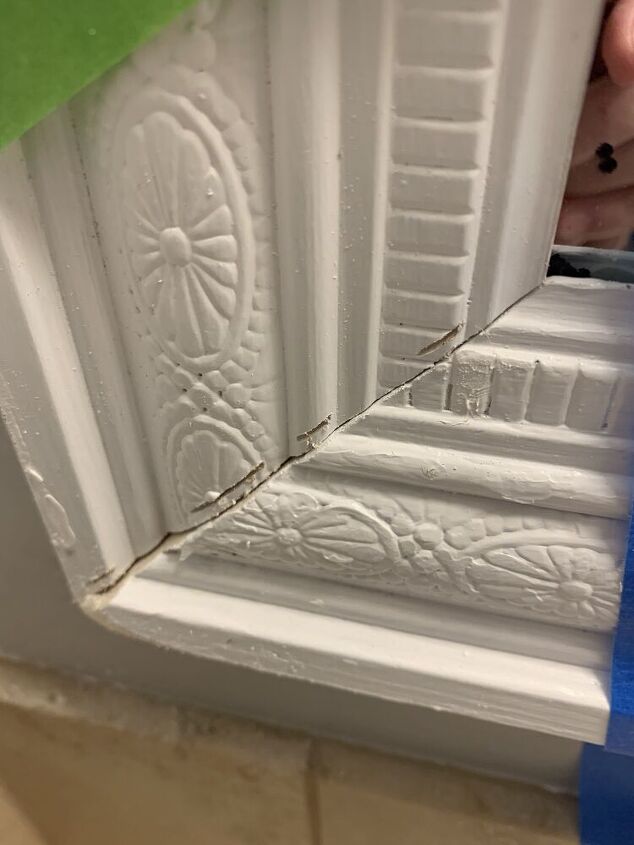
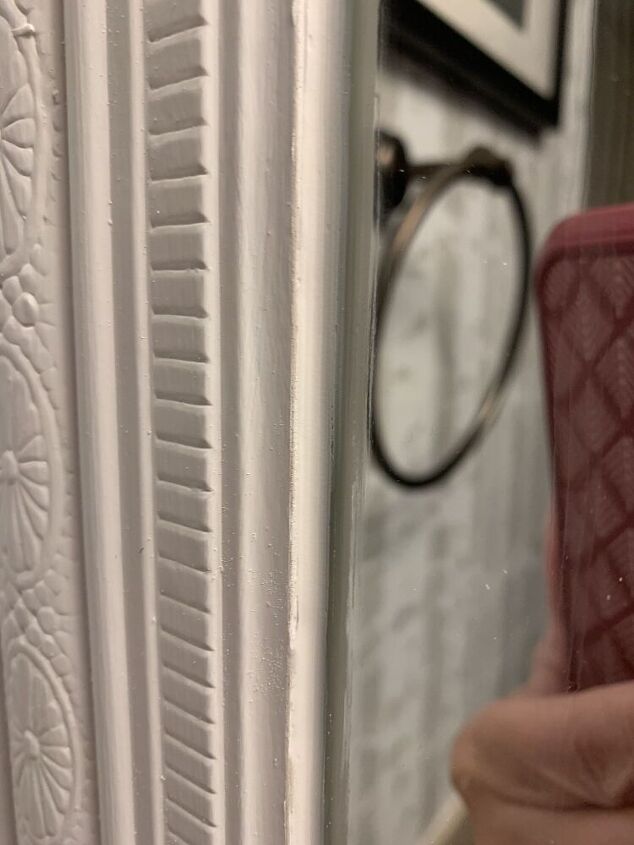
Imperfect Miter
OK... I am not hiding anything! My miter was not perfect. ...and I needed to sand down a glop of paint on edge... then fill the seam with some caulk (or wood filler.) Repaint area if necessary. (It was!) 
Caulk
I also caulked between the inside frame edge and mirror... just to smooth things out. ...then, once dry, I (later) used a razor blade to give a clean line of caulk.
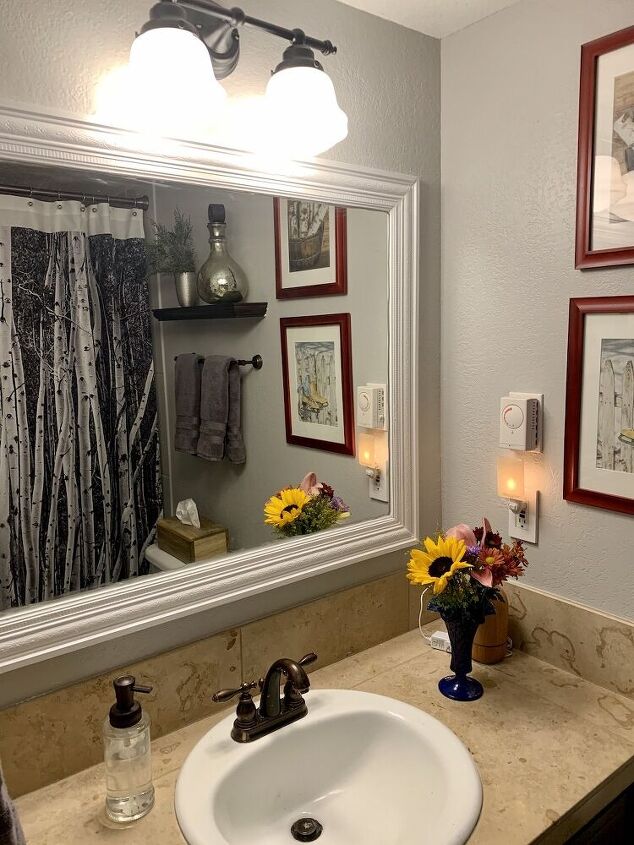
YIPPEE!
Mission accomplished!
Link to the rest of the bathroom re-do:
www.hometalk.com/diy/bathroom/inexpensive-bathroom-re-do-in-the-colorado-mountains-44341071?cid=8491359%3Fcid%3D8491359
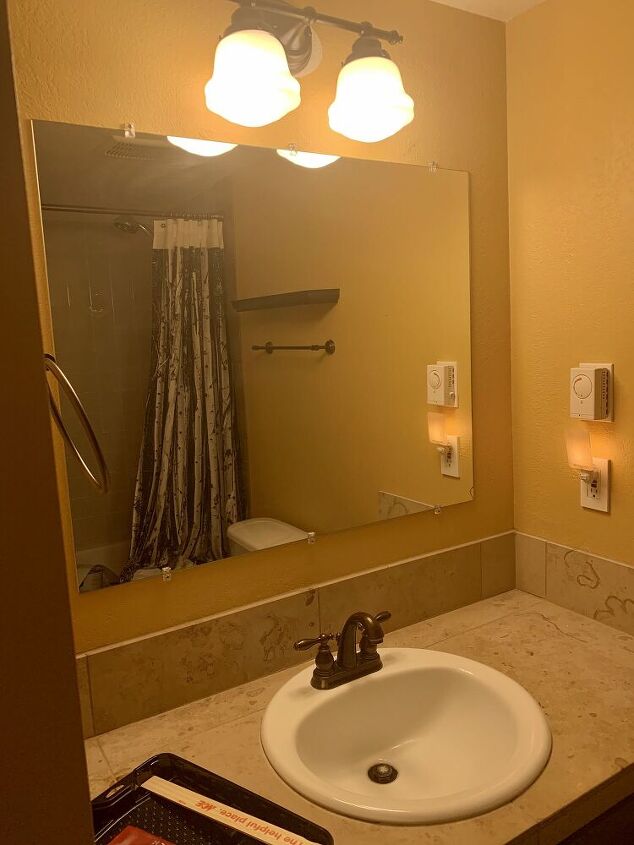
"Before"
O.M.G.  (see my project on the completion of this bathroom!) "Inexpensive Bathroom Re-Do"


Comments
Join the conversation
-
Looks so much better, miter corners confuse me, always have, lol!
-
Go to www.mirrormate.com
Same thing without all the work.
They have different frames and colors.


Frequently asked questions
Have a question about this project?
Very attractive look. Thanks for putting the before and after pictures next to each other. Imperfect miter cuts? Caulking to the rescue. It turns things from so-so diy-looking attempts into pro-looking final results. You did a great job and very much improved the look of the bathroom.
What is hammer for?
I love the shower curtain, where is it from?