


DIY Mirror Frame | Quick and Easy Idea
Mirrors are a quick and easy way to update your home decor. Not only do they reflect light, making rooms brighter, but they can also add a touch of glam to any space. However, often store-bought mirrors can nearly break-the-bank!
No need to worry, today we have an idea for a DIY mirror frame than not only looks gorgeous, but it is also quick, easy and inexpensive to make.
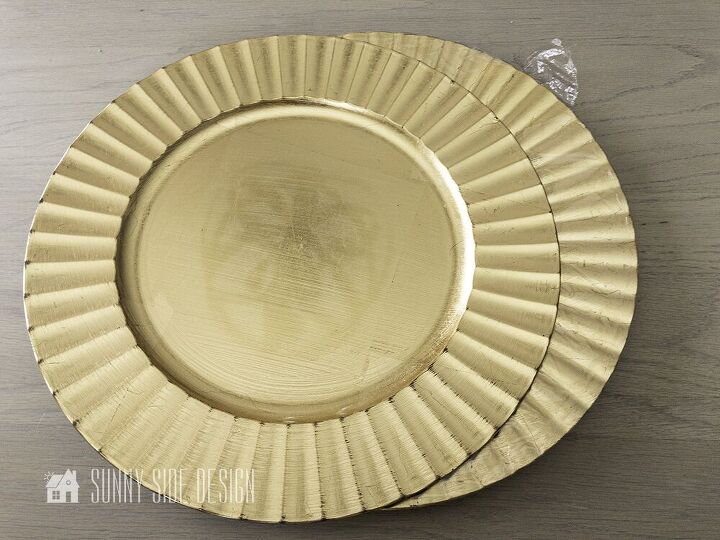
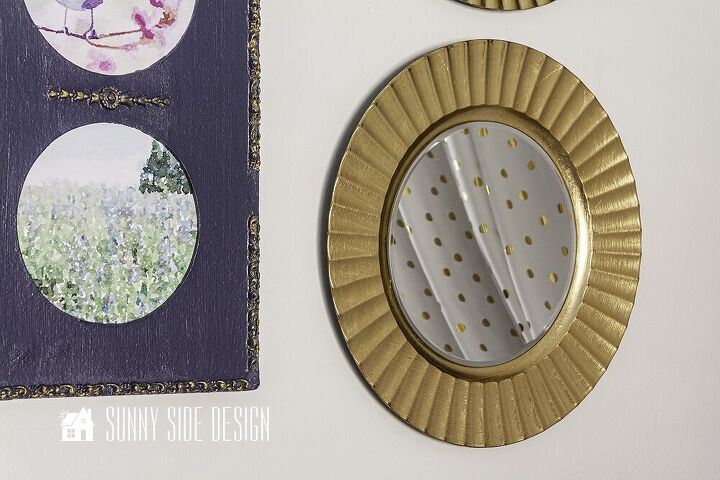
While we were shopping for the finishing touches for Ellies bedroom, we came across these fluted chargers. We immediately thought they would be beautiful mirrors in Ellies bedroom.
We purchased the 3 gold chargers from At Home, for $2.99 each. I have also seen beautiful chargers even at Dollar Tree. Shop around there are many great choices.
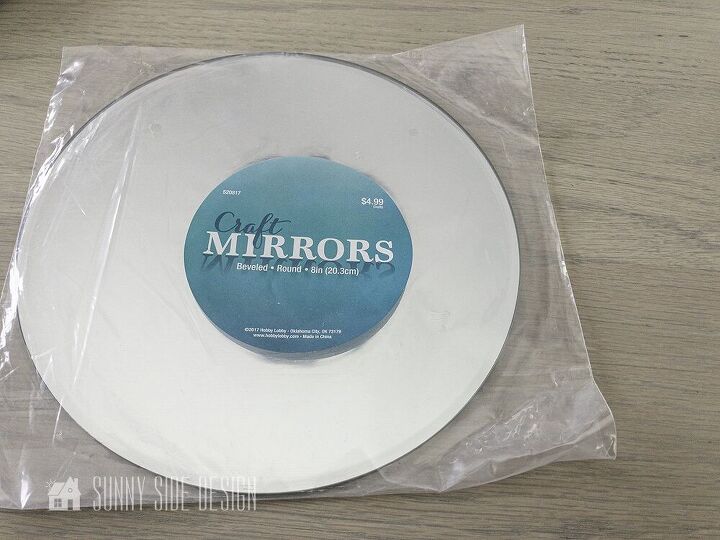
Beveled mirrors to fit our chargers were purchased at Hobby Lobby. Craft mirrors are readily available at most craft stores.

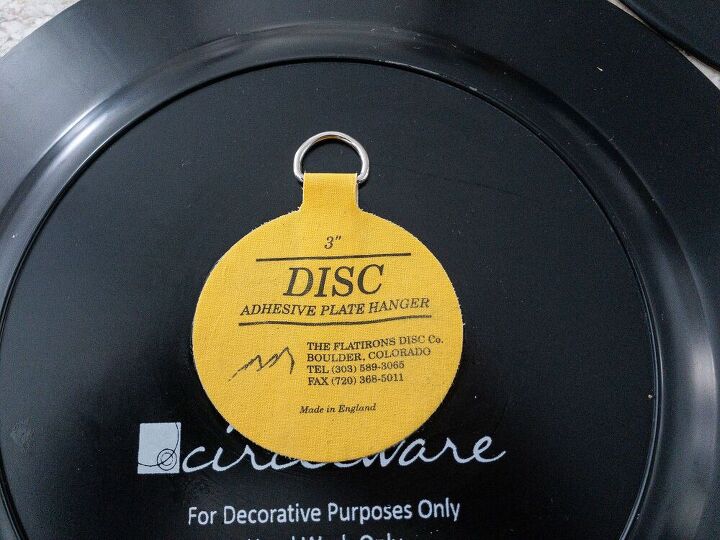
These adhesive plate hangers were purchased at Hobby Lobby to provide a way to hang our chargers. They are also available on Amazon.
You will also need an adhesive that is for mirrors. Not just any adhesive will work, some adhesives can damage the reflective coating on the mirror. Be sure to read the label before purchasing. We used Gorilla Glue Construction Adhesive.
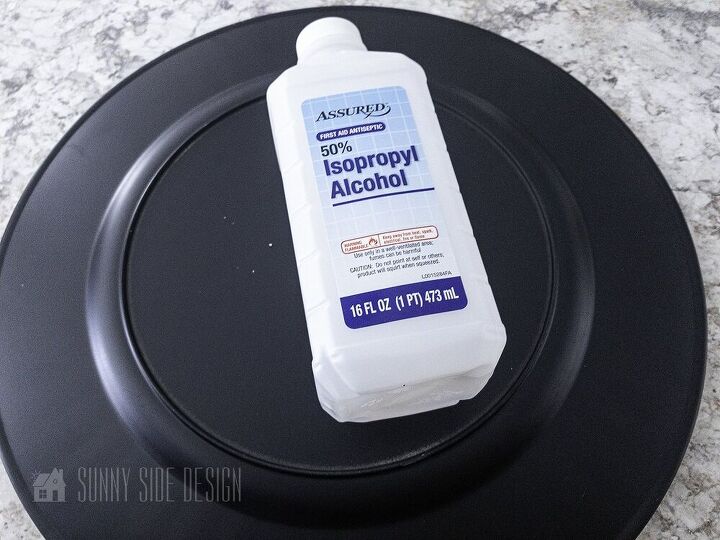
To prep the surface for the adhesive plate hanger, we wiped the back of the charger plate with isopropyl alcohol.
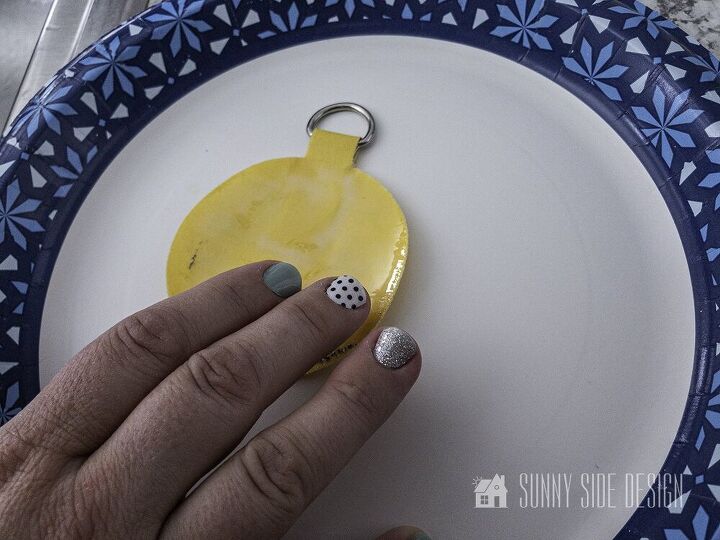
To activate the adhesive disk, wet fingers and mix a little water on the backside of the disk. This will activate the glue. Let sit for 3 minutes and repeat by wetting fingers and rub the adhesive again. Let sit for 3 minutes and then position onto the charger. Make sure it is centered on the charger.
Note: I have used these adhesive plate hangers before for a large plate wall. They worked like a charm!
I’m not sure if it was because the surface was plastic, but when we went to hang it, the hanger pulled off the charger.
We still used them however, we just used some Gorilla Glue Construction Adhesive to adhere them.
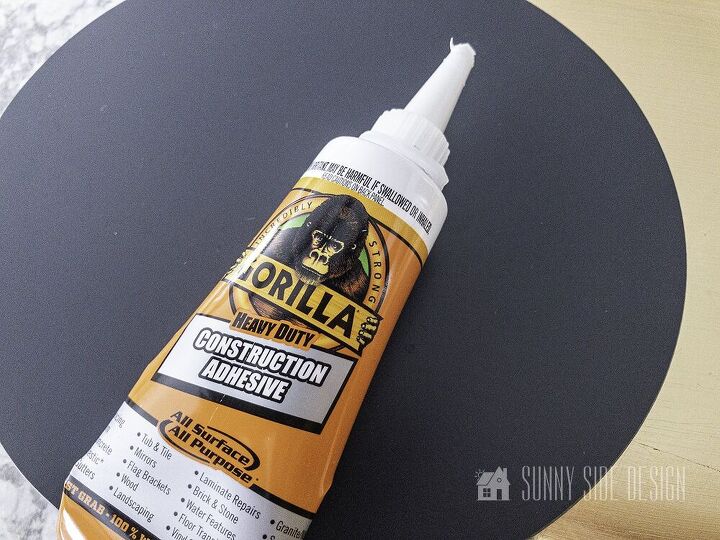
As we stated before, be sure to use an adhesive that is appropriate for mirrors. Check the label first!

Liberally apply adhesive to the back of the DIY mirror.
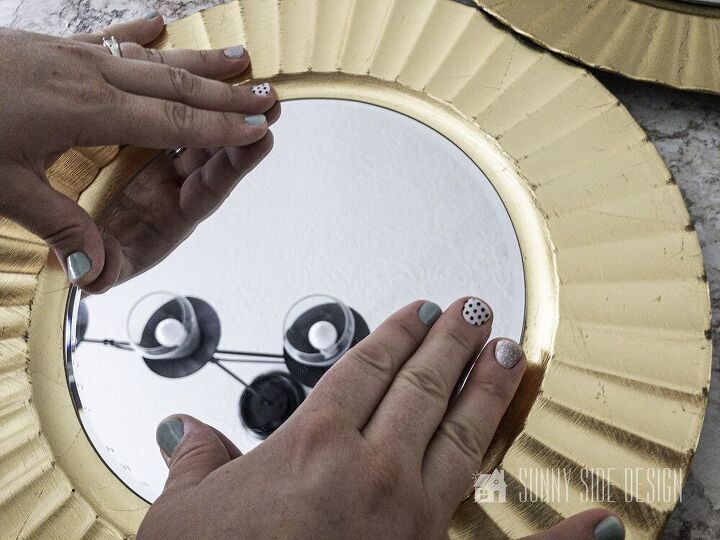
Center and press mirror firmly onto charger plate. Let sit for 24 hours to fully cure.
That’s it! This is a quick and easy way to DIY a mirror, that not only looks gorgeous, but it’s inexpensive too. Can’t beat that!
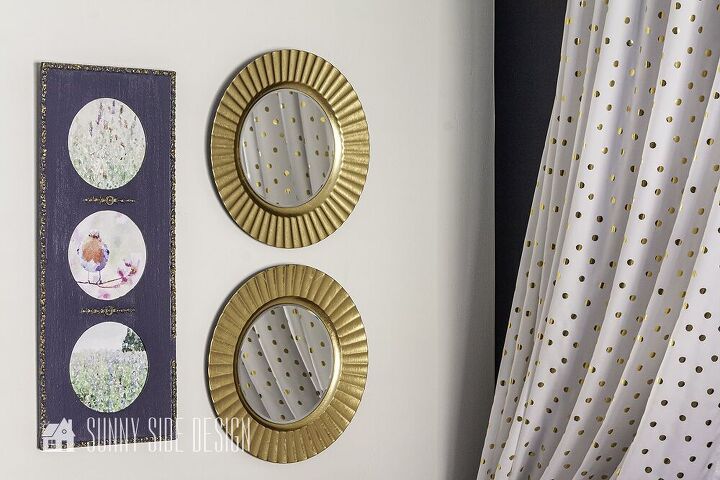
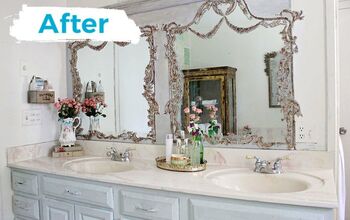
We made 3 of these DIY mirror for Ellies bedroom, two were hung over her beautiful French daybed and one we placed on a shelf in her Upcycled Built In Shelves.
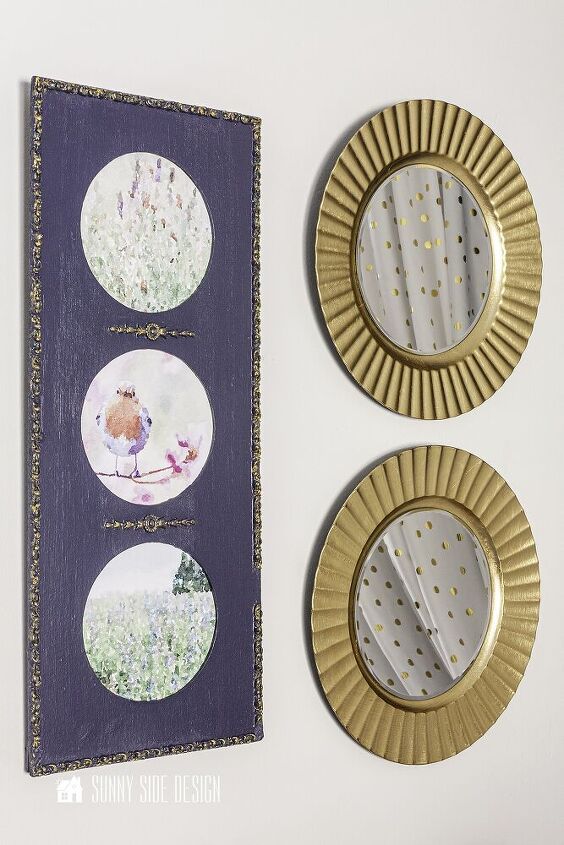
The beautiful watercolor prints that we have used in Ellies room are now available on our website.
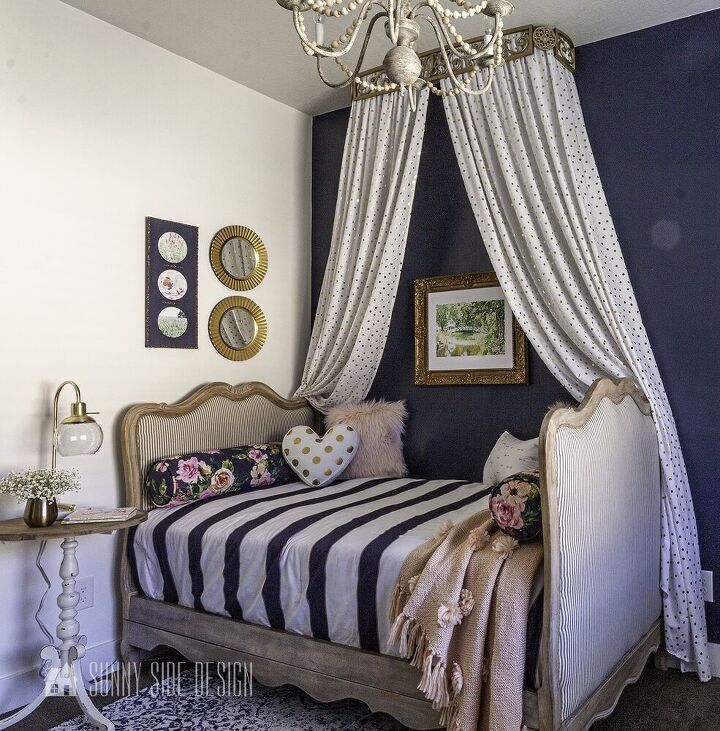
We love the glimmer of the gold as well as the reflective quality of the mirrors in her room. On the shelves it adds a little shimmer and shine.
Is this a project you would like to try? Do you like this idea? We’d love to hear from you! We love your thoughts and input.
Thanks for spending some time with us today!
Resources for this project:
See all materials


Comments
Join the conversation
-
So did evething only cost $10. They are beautiful but it seems more expensive. I’m going to dollar tree today to look for these. Thank you
-
Where on earth did you get those gorgeous gold polka dot curtains? And the heart cushion?


Frequently asked questions
Have a question about this project?
what size are the digital prints on your website? Peg at pegquilter8@aol.com
Great room!
Thank you for your quick reply. Target sheets? Did you buy them like that with the golden dots on them, or did you get white sheets and apply dots? I've never seen such sheets or else I would have gotten some.