


Custom Shower Curtain (No Sewing Involved)

If you’re on the hunt for a custom shower curtain, be ready to dish out some serious moola!
After seeing the price of fabric these days, I understand why. Plus, not everyone owns or enjoys sewing.
However all of us can paint, especially if we are given a stencil, which will produce a professional and flawless result. Besides, acrylic fabric paint comes in a rainbow of colors, so the sky is your limit.
Also, you could reuse the stencil over and over again. Think of the possibilities...custom towels, bathmats. I know, I know...it’s all very exciting!
So, let’s jump right in, shall we?
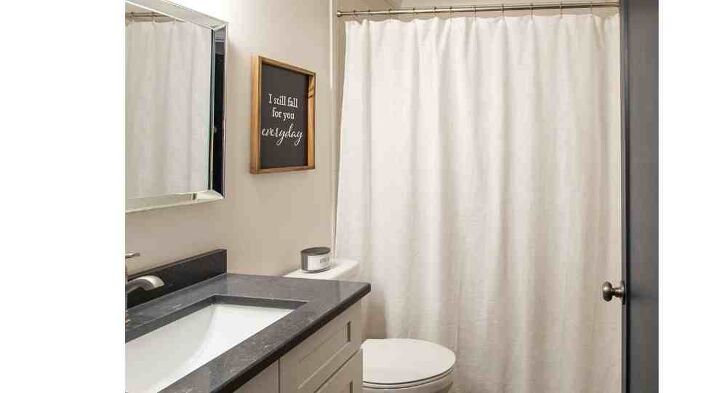
My Plain Jane Shower Curtain Is About To Get A Makeover
It’s best to use natural fibers like linen or cotton. Be mindful that the tighter the weave of the fabric, the easier it will be to paint.
However, I enjoy a very organic look, so I didn't mind using this loose weave fabric shower curtain which I had purchased at my local Target.
Supplies:
See the supplies you will need HERE.
DO NOT RUSH THE PAINTING PROCESS
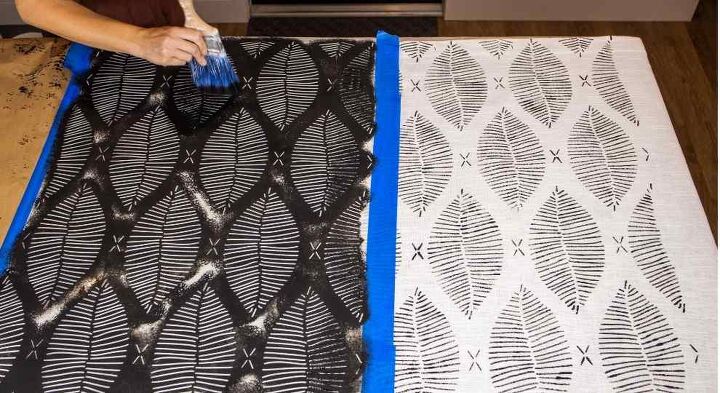
Begin by placing the shower curtain on a flat and hard surface.
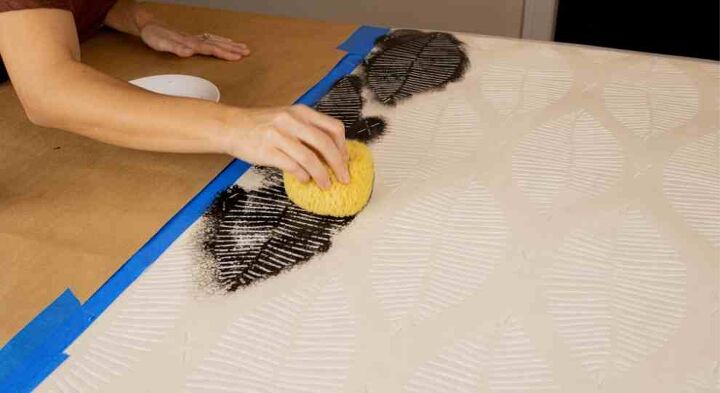
Use a drop cloth or contractor’s paper to protect your surface. To ensure the best design I recommend placing the stencil in the center of your shower curtain and secure it with painter’s tape.
The fabric will soak up paint, so plan on working in layers. If you add too much paint for your first layer, it will bleed into the fabric.
PRO TIP: The key is to apply a light first coat and allow a few minutes for the paint to dry. This will seal the paint and give your custom shower curtain a professional appearance.
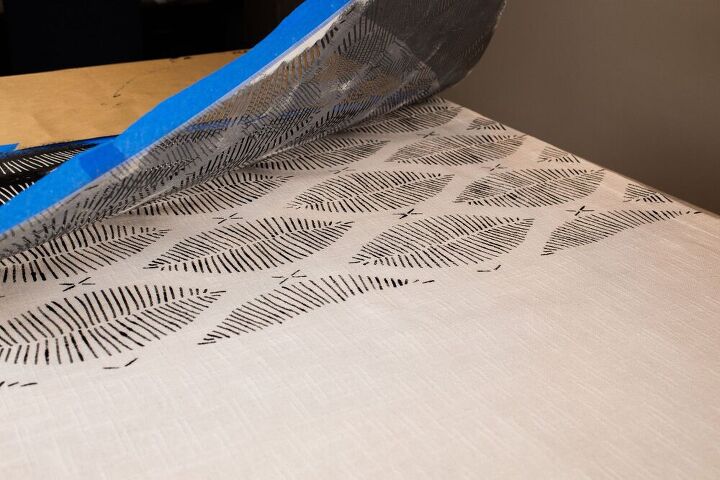
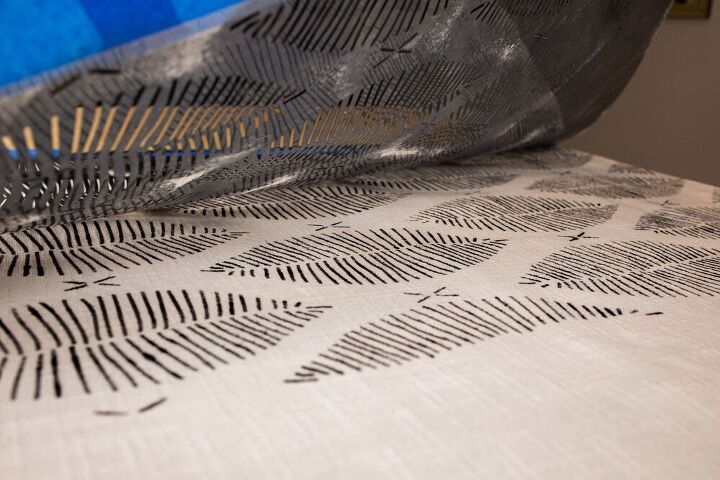
How To Remove Your Stencil
Carefully peel back the stencil onto the protective contractor’s paper and make sure the stencil is completely dry before relocating it to a different area of the fabric.
Tips & Tricks For A Crisp Design
Incase you are seeking a crisp design here are my recommendations.
First, since loose weave fabrics can be tricky to work with, try ironing on freezer paper to give it stability. The freezer paper can be easily removed from the material without leaving any signs of residue.
Also, use spray adhesive on the back of your stencil, which you will be able to reposition throughout your project.
Remember, if you get paint on an area of the fabric, the design could be ruined.
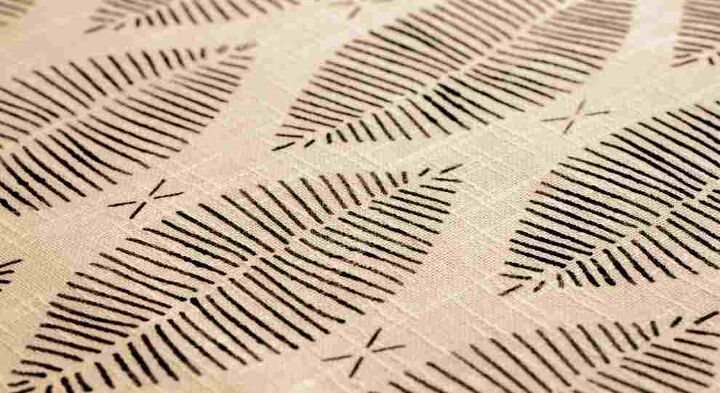
Close-up Photo
As I continued the project, I found an old paint brush was my favorite tool of choice. However, I still used a sponge near the edges of the stencil.
Since I used a loose weave fabric, it was pretty uneven in a few areas. Therefore, when the stencil could not line up, I used a small artist brush and just drew in the lines.
The above photo is a close up of an area that I drew in a few lines.
 You can’t even tell!
The more I work with this design, the more I fell in love with it.
Final Step
My final step was to iron my shower curtain on a high setting for 3-4 minutes per area. I used parchment paper in between.
This helps melt the acrylic paint into the fabric for permanent results, as we don’t want our design to get ruined when it becomes wet.
Side note: Before ironing, I was able to feel the paint on the surface of the fabric when running my hand over the design. Once the iron heated the paint, it was smooth to the touch.
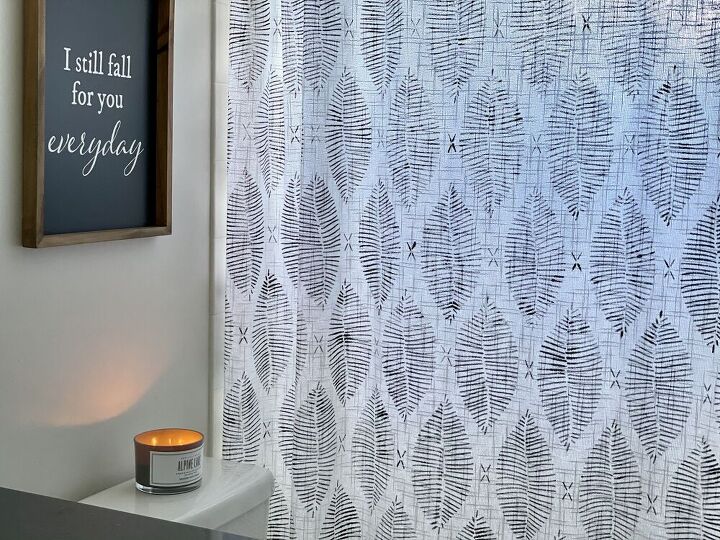
I think it came out dreamy  and it was a great way to get a luxury feel at a discounted price!
Resources for this project:
See all materials


Comments
Join the conversation
-
Beautiful Job!
-
You are much better at stenciling then I am and I have only worked on plaster! WOW! I can’t imagine doing this on a fabric.


Frequently asked questions
Have a question about this project?
Doesn’t the price of materials add up?
What about a sheet with as much cotton in it as possible?
Rebecca, any guest that has the time to look for tiny flaws in your custom-made shower curtain, needs to take a laxative and a chill pill, not necessarily in that order! LOL
That's the beauty of hand-made! Anyone else remember that song from the 60s about ticky-tacky houses that all look the same?
I also love the idea of a framed white leaf from the stencil, on a black background, Rebecca, if you could find the space and time. Could/would you put it on the wall outside the guest bath?
Great project!! Thanks for sharing. 😃