


"Cupcake" Toppers - Two Ways!
Here is a fun way to create customized Valentine's Day (or any holiday really!) gifts for your loved ones. Add a fun little removable cupcake topper to a jar/cup and fill it with special treats!
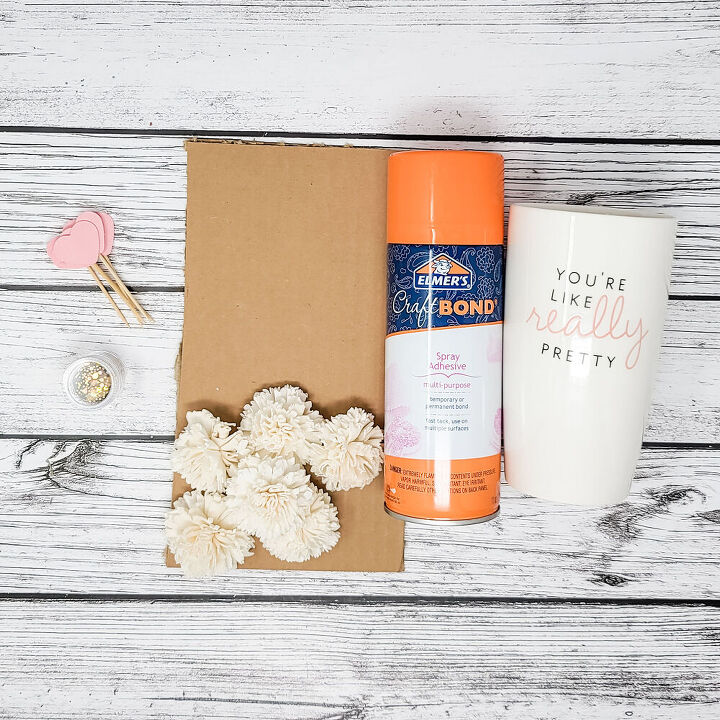
Here is what I used for the first version of our cupcake topper:
- Ceramic tumbler (this one is from the Target dollar spot but you can use any tumbler, mug, glass, jar!)
- Cardboard (a piece large enough that would cover the hole in the cup)
- Seven 2.5" carnation wood flowers from Oh You're Lovely
- Elmer's Craft bond spray glue (any spray adhesive will work!)
- Chunky gold glitter
- Pink heart cupcake toppers
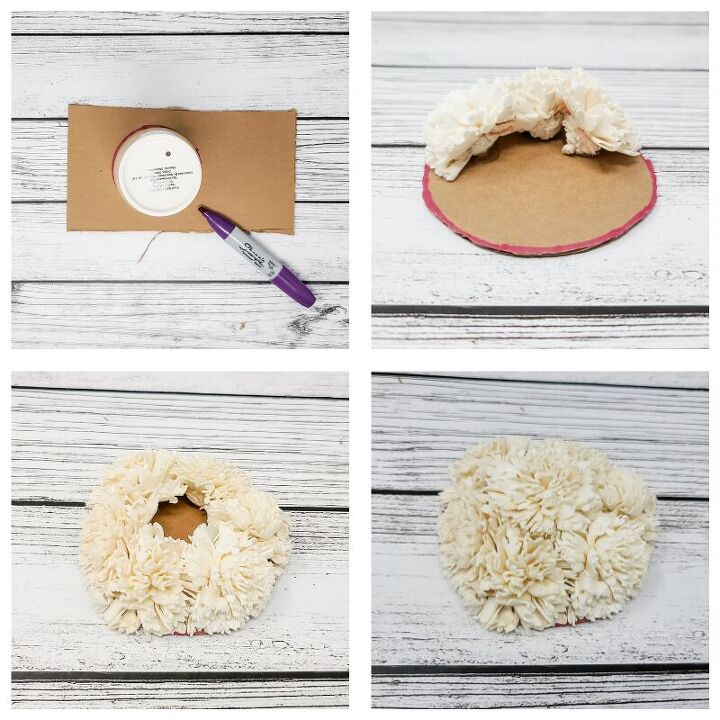
For cupcake topper number 1, first place your cup upside down on the cardboard (with the opening touching the cardboard). Trace an outline with a marker or pen. You want to be sure the topper will be able to rest on the cup itself so when you cut the circle out, no need to be perfectly precise!
Next, hot glue a ring of wood flower carnations along the edge of your cardboard. You want them to be angled at almost a 45 degree angle to create a gentle slope that is cupcake-like! When adding each flower, don't be afraid to snuggle them right up against one another 
The last flower to add is a carnation right on top! Glue around the bottom petals of the flower so the glue catches and holds to the ring you have created.
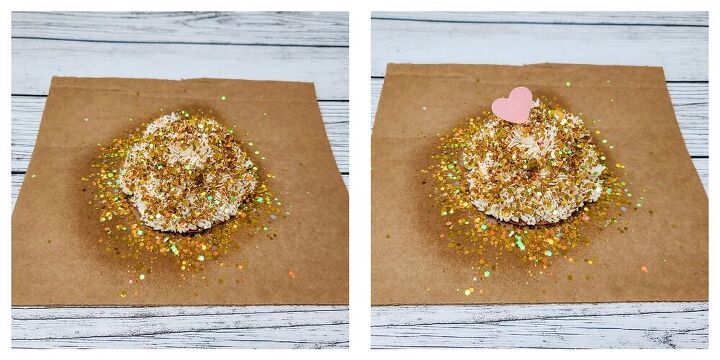
Time for the fun stuff!
Place your topper base onto a piece of cardboard or a paper plate (something you don't mind getting spray adhesive and glitter all over!). Give the whole thing a good spray of adhesive and then start pouring your chunky glitter* on top. Let that dry for a few minutes and then you can shake off the excess glitter.
Final step - cut down the toothpick attached to your pink heart cupcake topper and glue it into place!
*You can use any type of glitter you want for this part. I prefer the chunky/larger glitter because it stands out more.
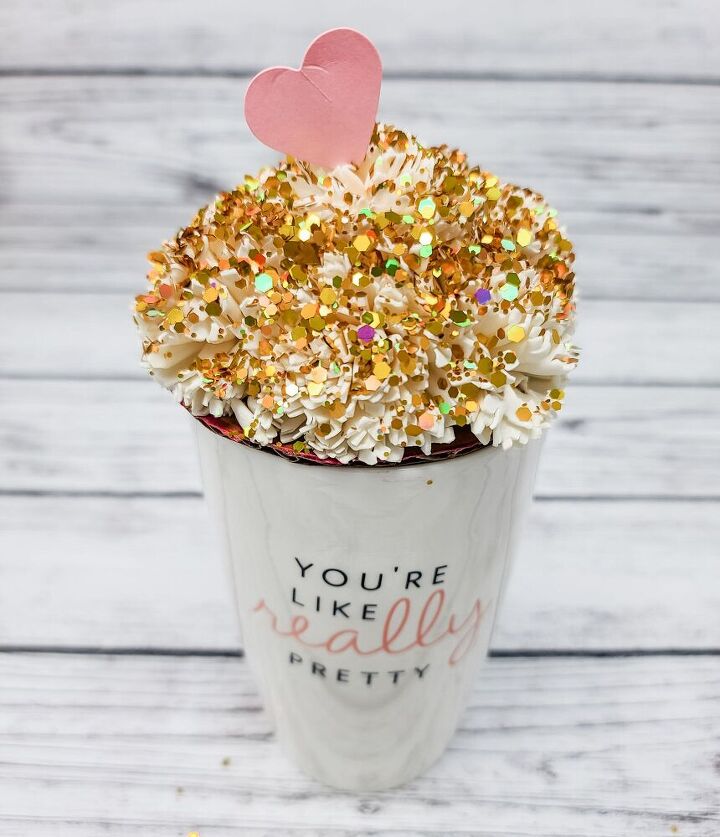
Now the cupcake topper is ready to put on your cup! Since it rests on top of the cup, you are still able to fill the cup with any special treats you would like.
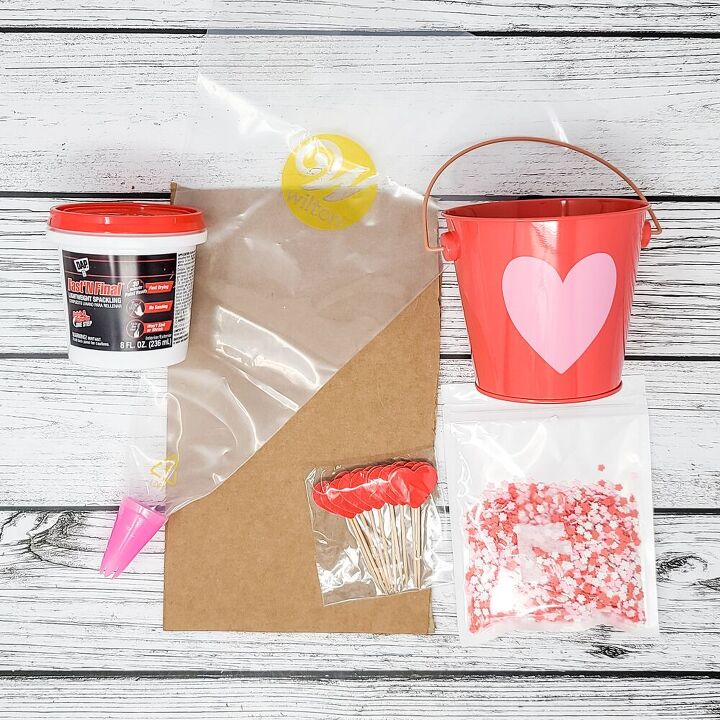
Here is what I used for the second version of my cupcake toppers:
- Metal bucket (this one was also from Target but you can use any little metal bucket)
- Lightweight spackle
- Piping bag with tip
- Cardboard (a piece large enough that would cover the hole in the cup)
- Resin fake sprinkles
- Red heart cupcake toppers
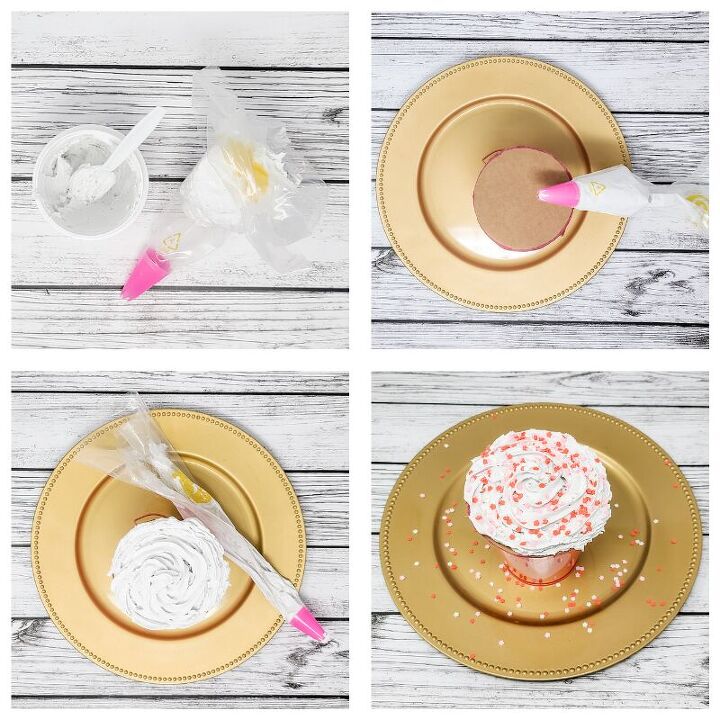
For cupcake topper number 2, let me start by saying I am not a cake or cookie decorator! That is a special talent and I commend those of you who get all sorts of fancy with a piping bag.
The first thing I did was trace the opening of the metal bucket onto cardboard and cut out the circle (same method as from topper
Next, prep the spackle "frosting"! I found it really helpful to fold over the edge of the piping bag so you can add the spackle in much closer to the tip. Pop open the lightweight spackle container and use a plastic or disposable spoon to add the spackle into the bag. The metal bucket I used as a base for this project had a much wider opening than the ceramic tumbler or a normal-sized mug so I did add and use the full half-pint of spackle for one cupcake topper.
Once your spackle is in the bag, pull the edges of the piping bag back up and start gently squeezing the spackle down towards the piping tip. Now you are ready to frost your cardboard circle cut out.
I highly advise doing the next few steps over a plate, cardboard, newspaper...anything to help catch any potential spills between the spackle and sprinkles!
Start piping the "frosting" by gently squeezing the spackle from the bag onto the cardboard circle cut out in a spiral motion - first around the edges of the cardboard and then start to move towards the middle. I wanted a little more height to the center area so I remade my spiral a few extra times in the middle of the cardboard.
Probably my favorite part comes next - add sprinkles!! Add as many or as few as you would like. They will stick to the spackle as it dries (which takes around 24 hours) but once it is fully cured, shake the excess off.
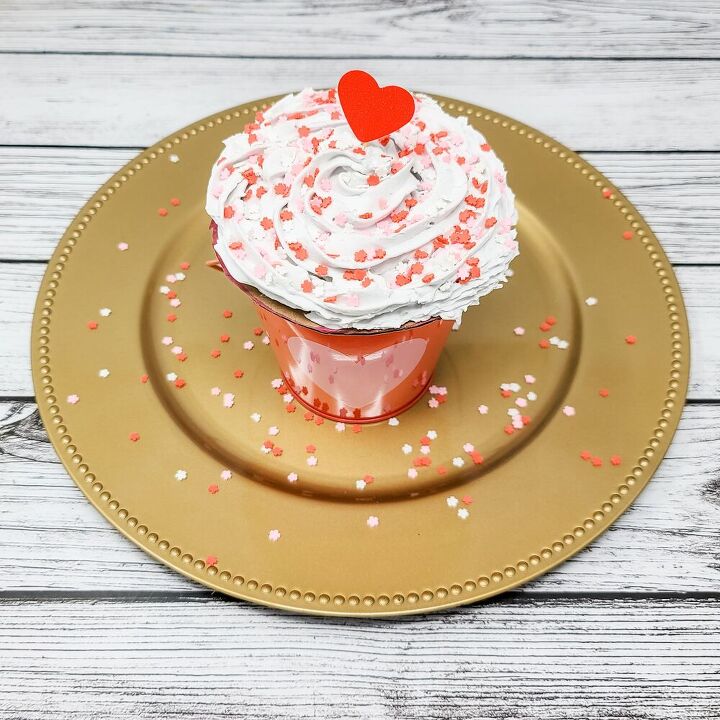
The final step for cupcake topper is to add in our red heart toothpick! I did this while the spackle was still wet.
In this metal bucket, I plan on adding in sweet notes to my kiddos that they can pull as sort of a Valentine's Day advent calendar but you can pop in anything you want and gift it to a special someone.
And there you have it! Two super cute cupcake topper ideas. Let me know if you think you'll give this idea a try!

Comments
Join the conversation
-
This is very clever. I love it. Easy to do, with a beautiful result. Thank you for sharing.
-
Those are adorable and you could hide goodies in the containers 😻😻😻


Frequently asked questions
Have a question about this project?