


Diy Embroidery Coaster

Hi Friends. I love embroidery. I made an embroidery coaster.
.
.
.
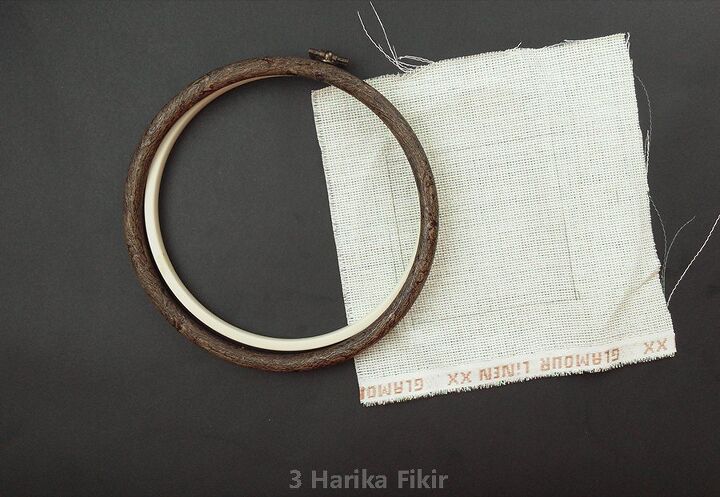
Attach the cross stitch fabric with the hoop.
.
.
.
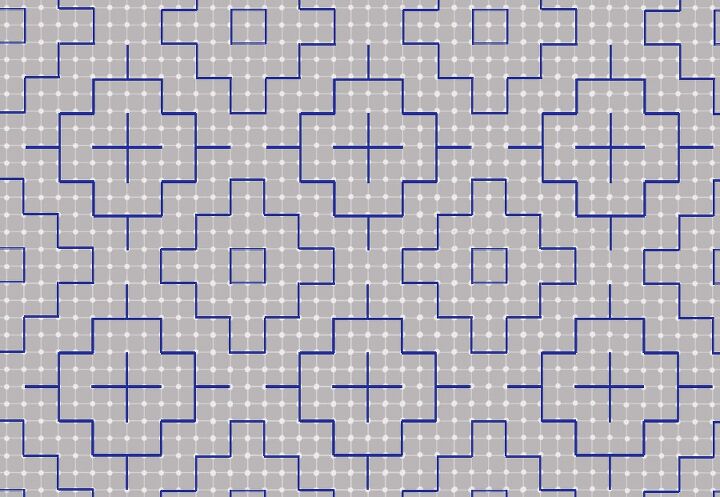
You can embroider to the extent you want by looking at the pattern.
.
.
.
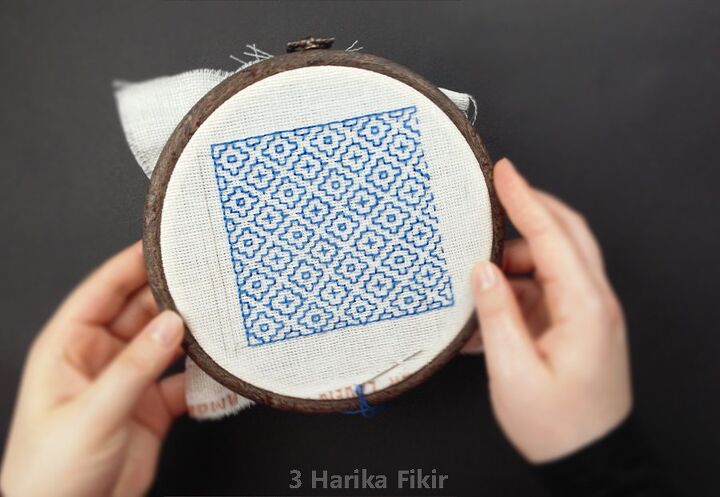
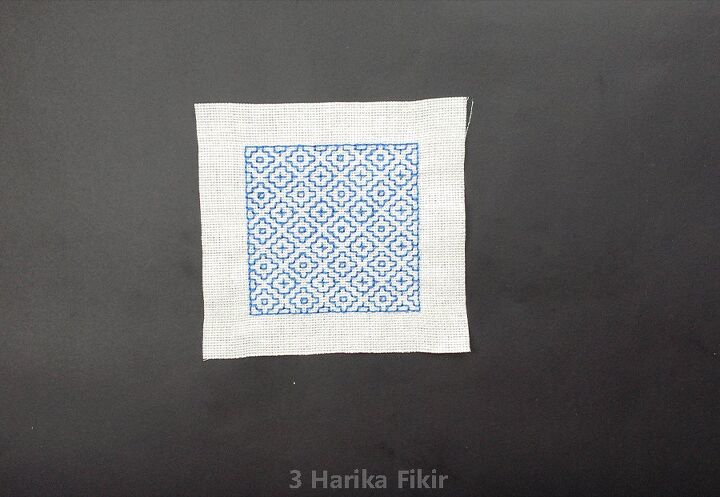
I embroidered the pattern on a square area.
.
.
.
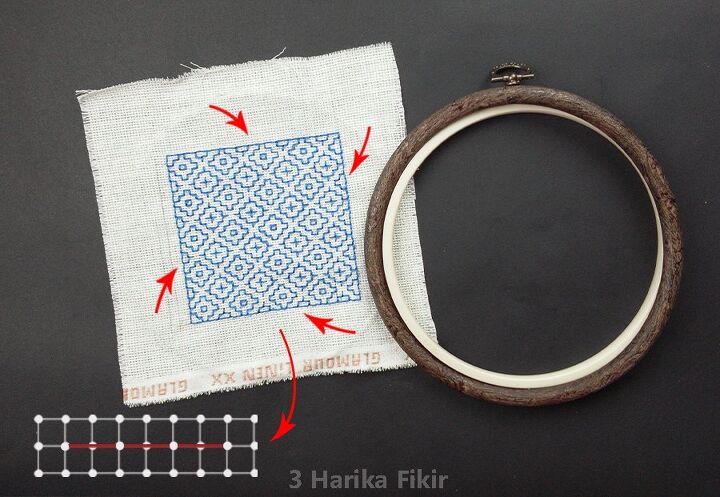
After embroidering the pattern, I embroidered the edges like a square frame. You can see the pattern I use for the border lines in the lower corner of the photo.
.
.
.
After removing the fabric from the hoop, I cut off the excess fabric leaving an area of 2.5 cm from the edge of the area where I embroidered the pattern. To make a stronger coaster, you can turn the back of the pattern at this stage and apply a thin layer of glue on the ropes.
.
.
.
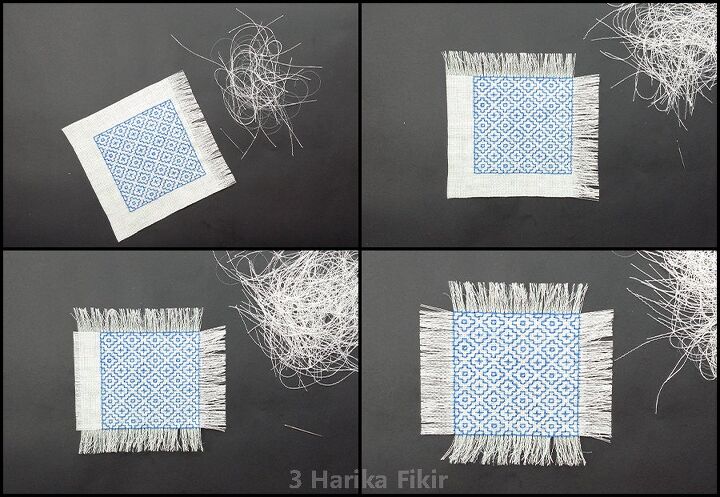
I gently pulled the threads of the fabric that I left 2.5 cm blank by holding the edges. You can use a pair of tweezers or do it with your hand. You have to separate the ropes one by one. I did the same on all 4 sides of the fabric.
.
.
.

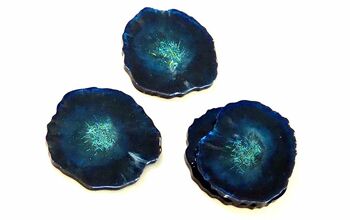
My embroidered coaster is ready. You can make a variety of coasters using different colors and patterns.
.
.
.
My Video about this project. You can also see all details in my video.
.
.
.
Resources for this project:
See all materials


Comments
Join the conversation
-
Thanks! You gave me inspiration to finish the potholders I’m repairing. I was procrastinating the job because it was just boring plain scrap material to work with. Now I’m looking forward to it!
-
I really like the look of your coasters with the fringed ends.


Frequently asked questions
Have a question about this project?
What a beautiful idea. Reminds me of the little towels we did in school. Blue is my favorite color so these are extra special to me. Did you make up this pattern or did you see it elsewhere.