


You Won't Believe This Tip to Create a Distressed Layered Paint Look
Do you ever wonder how to achieve the look of multiple layers of paint, with colors peeking thru the top layer?
You won't believe how easy it is to get that look
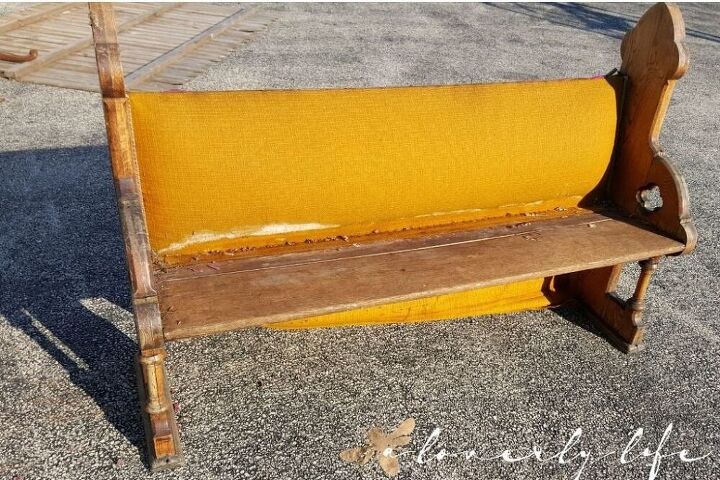
I acquired this ugly church pew thru divine intervention.
You can read all about how this church pew ended up in my hands 40 years after it was purchased from my gifted grandfather over here.
First things first.
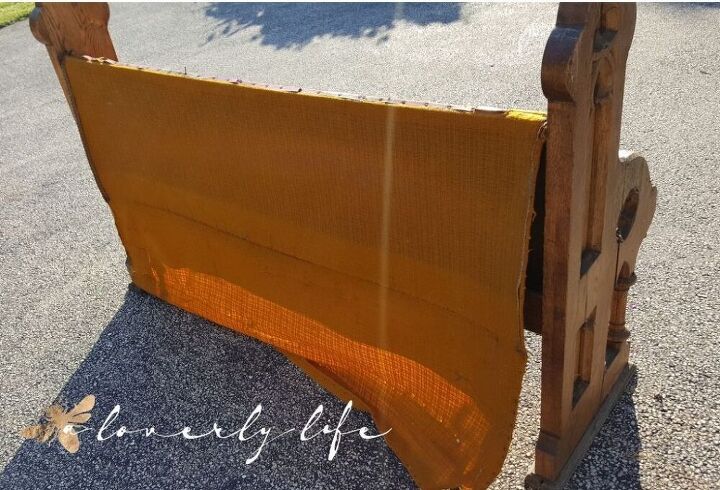
I needed a clean slate to transform this beauty, so I painstakingly removed all the nails and ugly orange fabric.
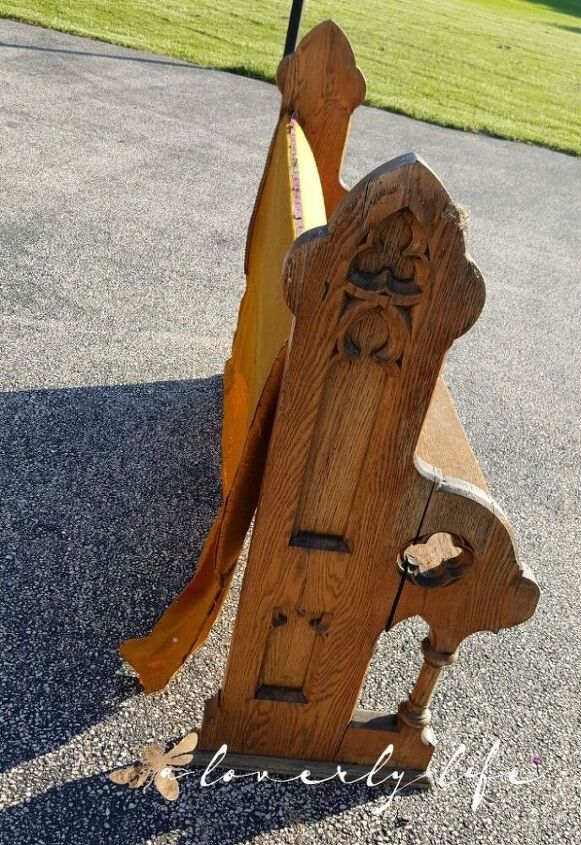
There were SO many rusty nails to remove to get the fabric off.
The finish was so damaged due to neglect over the years, from the marred finish to the cracked wood. My church pew needed some serious love.
Once the fabric was removed, I filled in the cracks with bondo and gave it 2 coats of primer.
I can hear some people asking WHY DID YOU PAINT IT?
There were SO many holes from the nails.
So many cracks that were filled in and smoothed, staining would have been patchy and ugly.
Forgive me, it has been years since I started this project, I seem to have misplaced those photos, but if I find them I will update the post!
Besides, it is my pew. If I want to paint it, then I will paint it.
That is the beauty of working on your projects. You get to chose how you want them to look.
Now I did not want a smooth white finish.
My decor style is French Country Cottage, and I wanted this piece to look like it was plucked from my dreamy chapel in the woods.
Sure, I could just distress it, but I wanted depth and character.
I am going to show you how you that character that makes freshly painted pieces look like layers of paint have been worn away with a something you probably already have laying around the house.
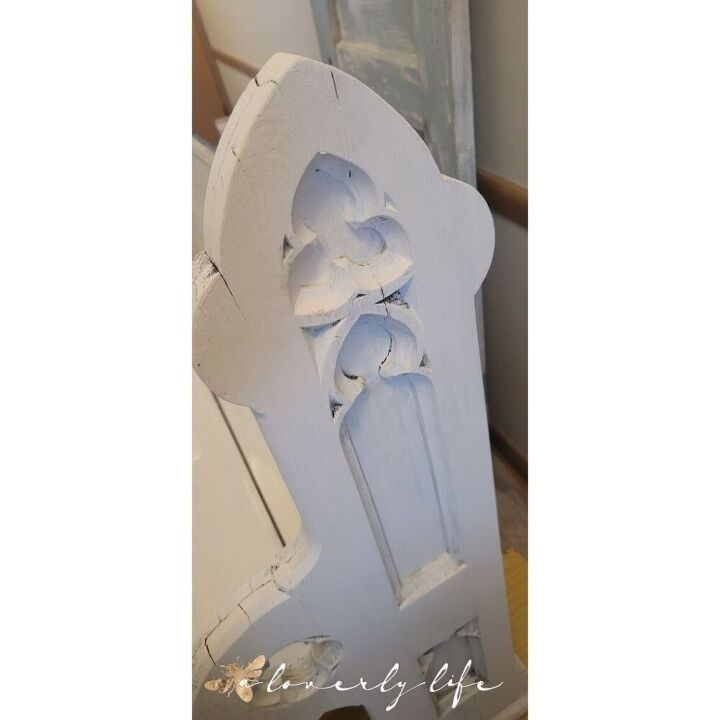
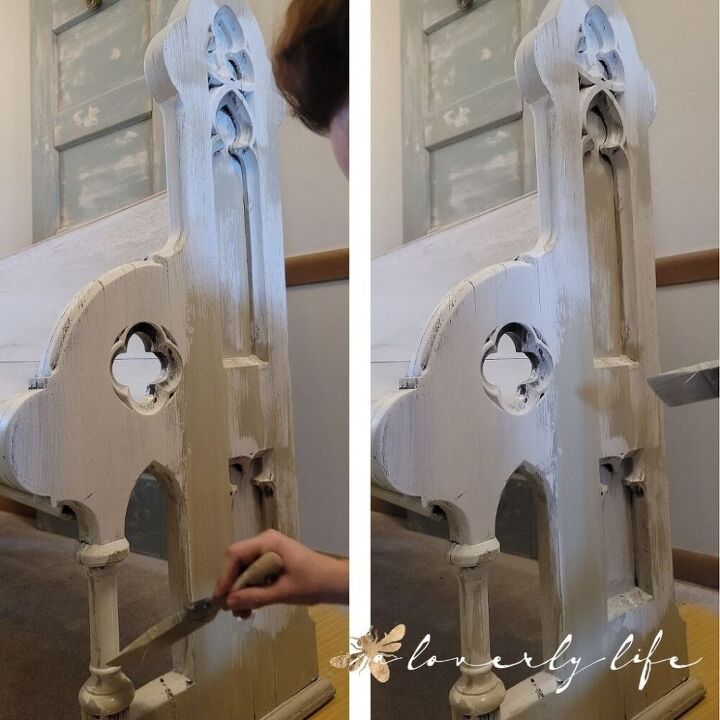
After the coat of primer was dried, I added a greige color in random places all over the church pew.
The gothic accents on this church pew required a detail brush to get paint in all the little nooks and corners.
If you notice, I did leave some of the wood exposed. My goal is to be able to see layers of paint and wood by creating a resist before adding the final coats.
Now, you may be asking “What is a resist?”
A resist is a painting technique in which you apply something that will cause the next layer of paint to RESIST sticking to the prior layers.
I have used Vaseline or hemp oil, but in this instance I will be using a simple bar of soap.
To review what I did up to this point, the ugly orange fabric was removed.
I patched the holes and painted with primer.
Then I painted a greige color paint in random areas because only bits of it will be peeking thru the final coat of paint
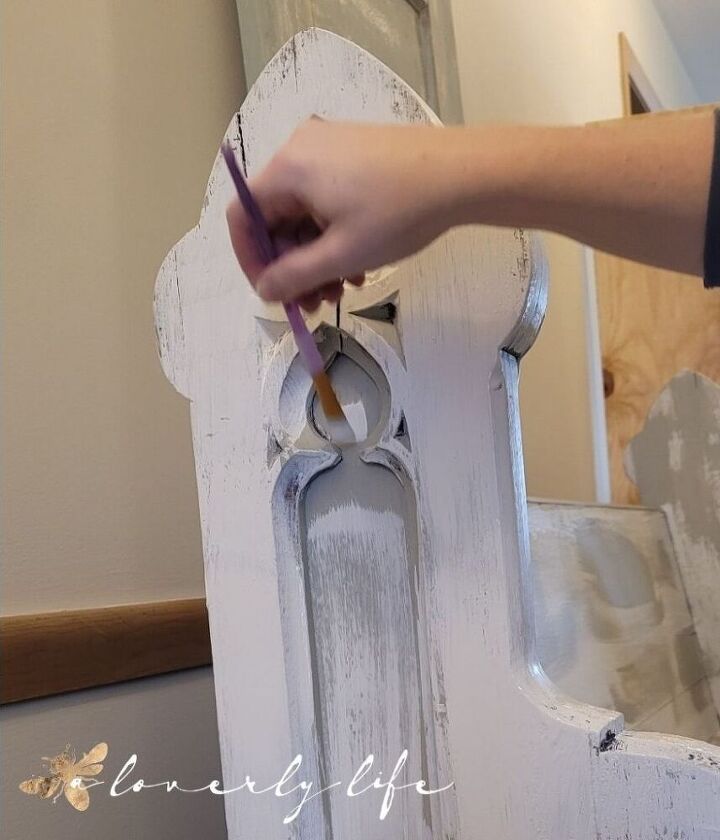
After your accent paint color has dried, I took an old bar of soap and rubbed it over areas of the greige that I wanted to poke thru.
The heavier handed you are, the more of a resist you will achieve.
Once you have rubbed the bar of soap, paint the top color right over the soap.
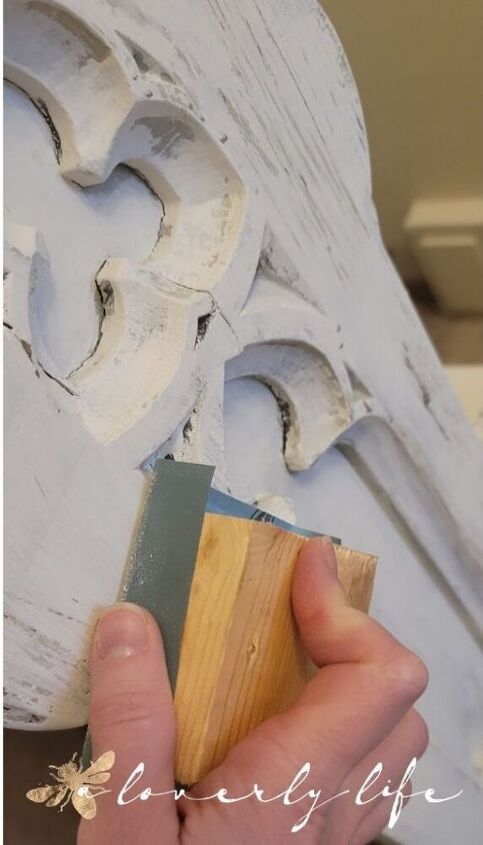
Once the top layer of paint is dried, use a sanding block or 120 grit sandpaper and gently sand the areas where the soap was applied to remove the top layer of paint and expose the color beneath.
You can see just a hint of the griege peeking thru.
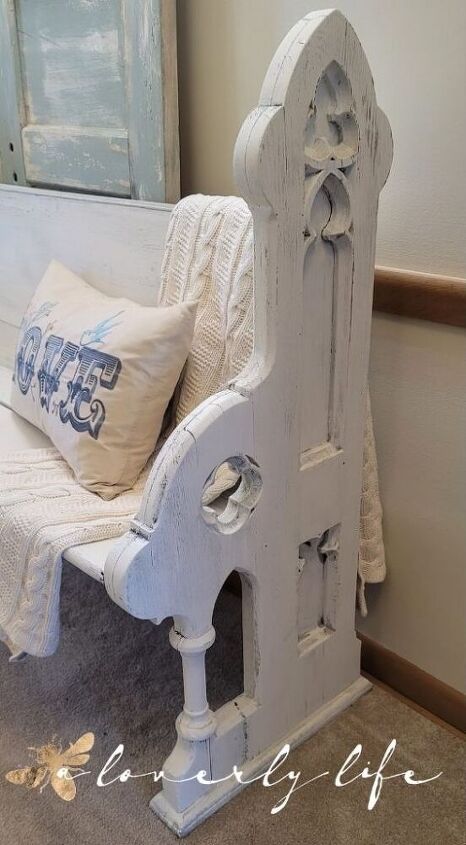
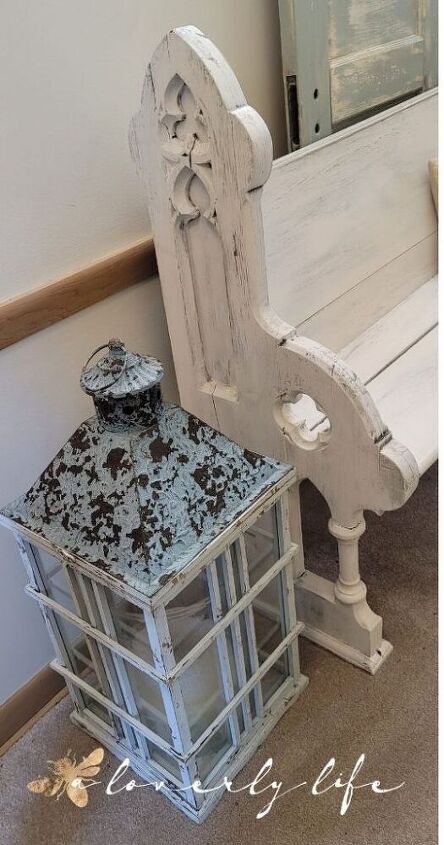
The Abbey church pew is about 5 feet long, so it is hard to show the details and depth of color in a wide shot.
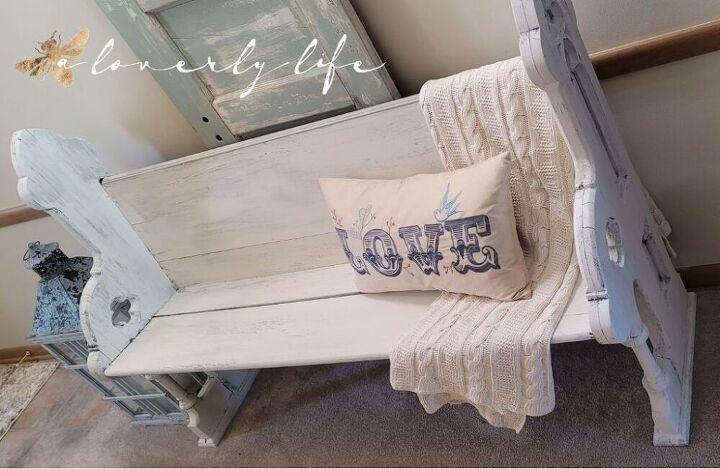
Here she is in all her glory, gracing the foyer as you enter my home.
The layering technique was so simple, too!
For more furniture makeover and DIY's head over to my blog


Comments
Join the conversation
-
Fabulous piece!

-
You are so fortunate to have had the chance to rescue that beautiful antique and made it 100% prettier! (The yellow was gross but the wood!❤️)
you restored its bones and brought it beauty. Kudos for a job well done!


Frequently asked questions
Have a question about this project?
You have done a lovely job with refinishing your pew!!! It is so unique, I was wondering if you know how old it is??? That would be interesting!!!