


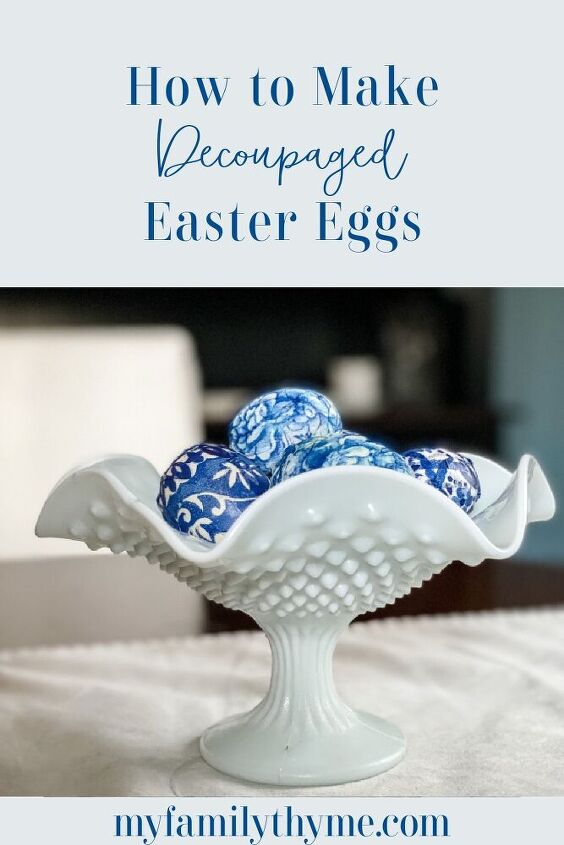
How to Make Decoupaged Easter Eggs
Use decorative napkins and Modge Podge to create these beautiful decoupaged Easter eggs!
This post may contain affiliate links. There is no additional cost to you if you purchase a product using a link. Thank you!
Hi Everyone! I am so excited to join a talented group of bloggers for this monthly craft blog hop. If you’re here from Design Morsels, welcome! Thank you to Andrea of Design Morsels and Chloe from Celebrate and Decorate for organizing this fun event! So, grab yourself a cup of coffee or tea and take some time to enjoy all of the beautiful and creative ideas here!
Do you realize that spring is just a few short weeks away? I am so ready for this new season! Have you begun decorating your home for spring? I have started to add little touches around my home…lighter fabrics, more greenery, and fresh flowers. Throughout this year, I have been adding more and more blue and white to my home decor. I thought I might add these classic, timeless colors into my spring decor too by making my own decoupaged Easter eggs. They were very easy and inexpensive to make, yet add a touch of elegance.
Have you ever decoupaged anything before? It is really easy and so much fun to do. My students at school love it too! One of my favorite decoupage projects were these decorative DIY file folder organizers. They’re so cute! Check them out and let me know what you think!
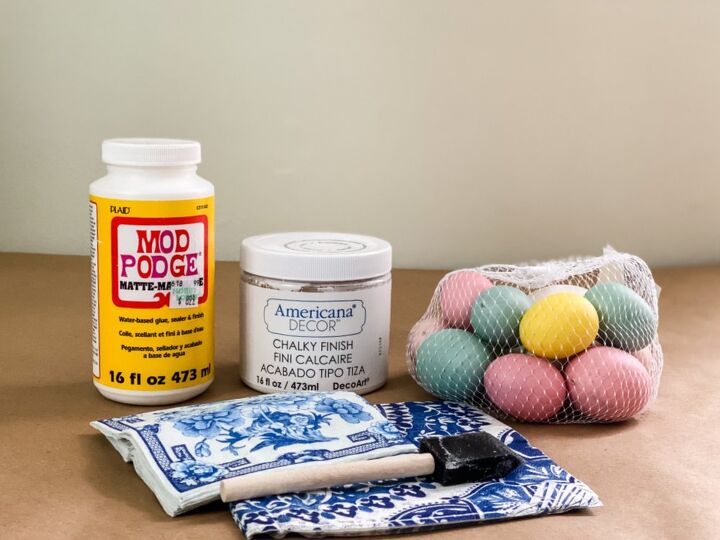
Supplies:
- artificial Easter eggs (I purchased mine at Michael’s Crafts Store)
- white chalk paint
- paint brush
- decorative napkins (I had picked mine up at Marshall’s.)
- scissors
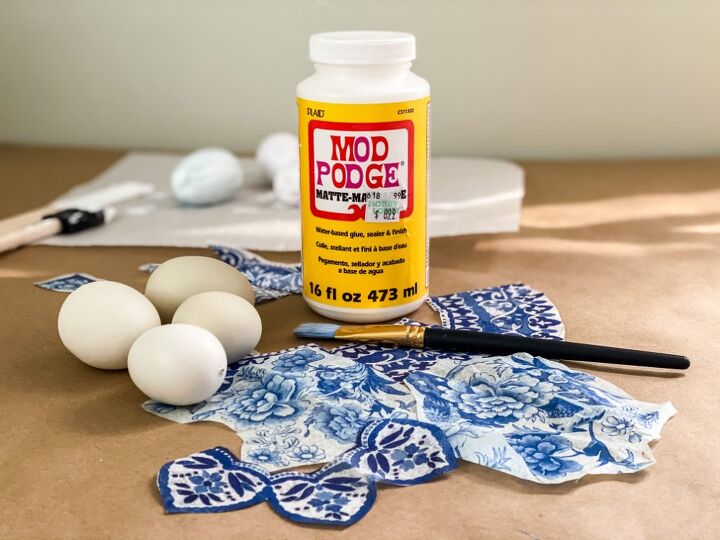
- Modge Podge
- parchment paper sheets
Directions:
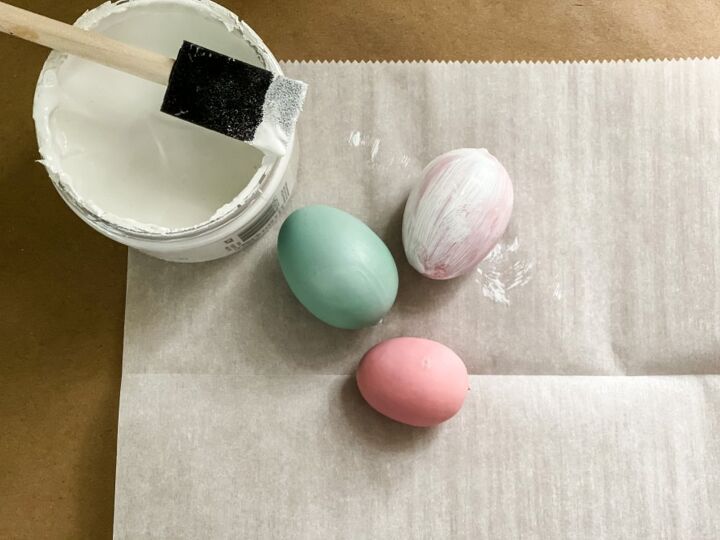
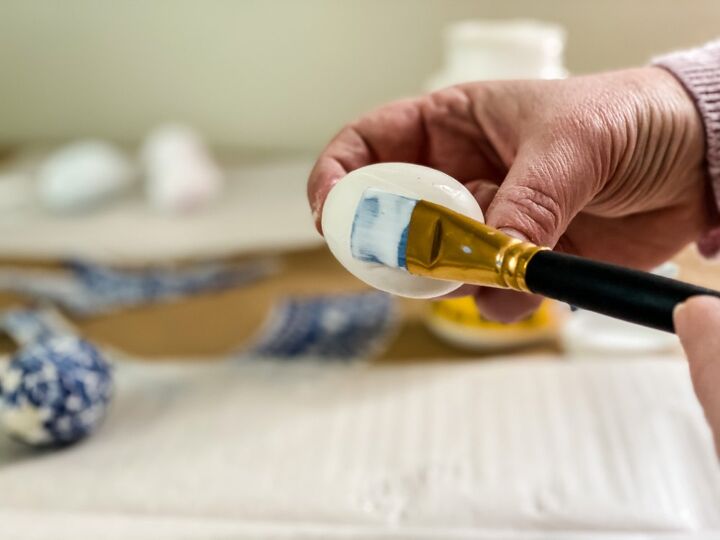
- If you’re using colored artificial Easter eggs, paint them first with white chalk paint. I like to have them dry on parchment paper.
- Take your napkins and separate the layers. You only want to use the very top layer.
- Cut out some of the designs from your napkins that you would like to use on your eggs.
- Paint on a thin layer of Modge Podge on your egg. Then set a piece of the napkin on it. Paint another thin layer of Modge Podge on top of the napkin. Repeat this process until the egg is decorated to your liking.
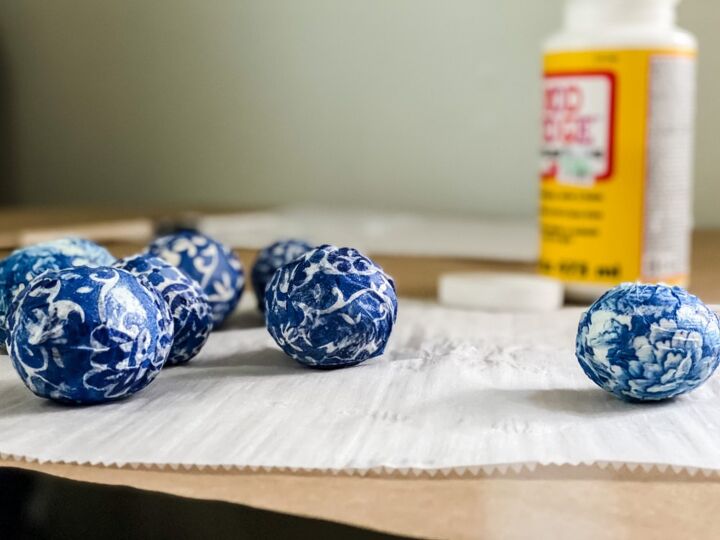
- Again, you can have these eggs dry on parchment paper so they won’t stick.
- Display and enjoy!
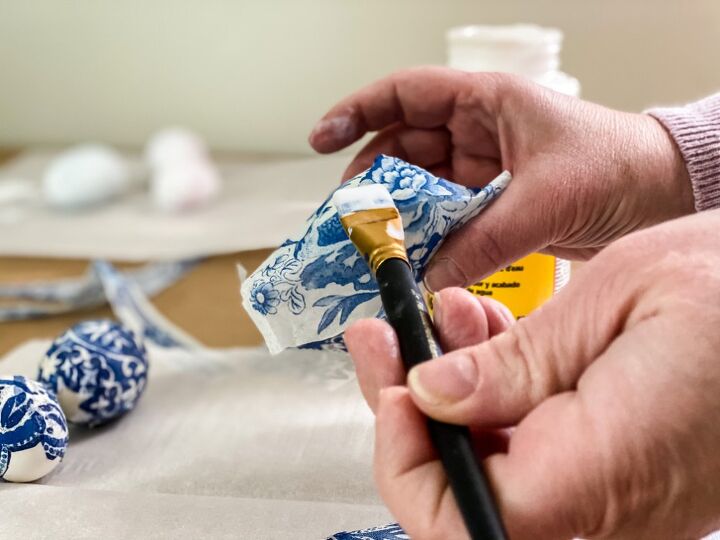
It’s ok if they’re not perfectly smooth. I try to resist the urge to keep trying to smooth them, but found that using small napkin pieces seem to work best.
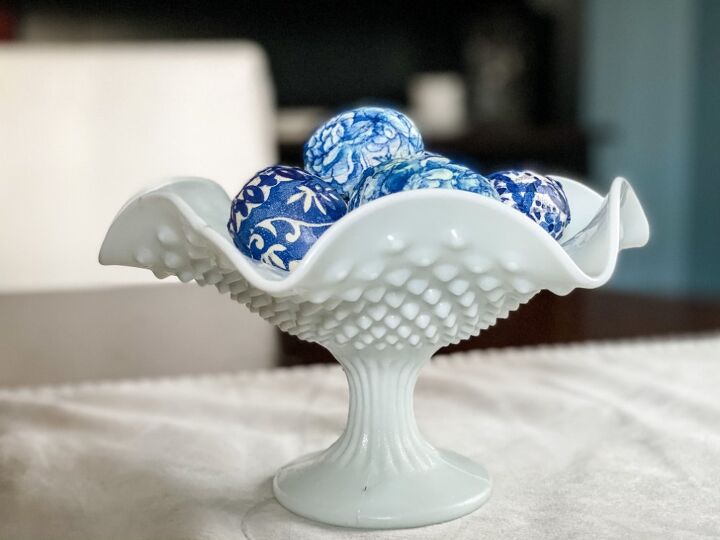
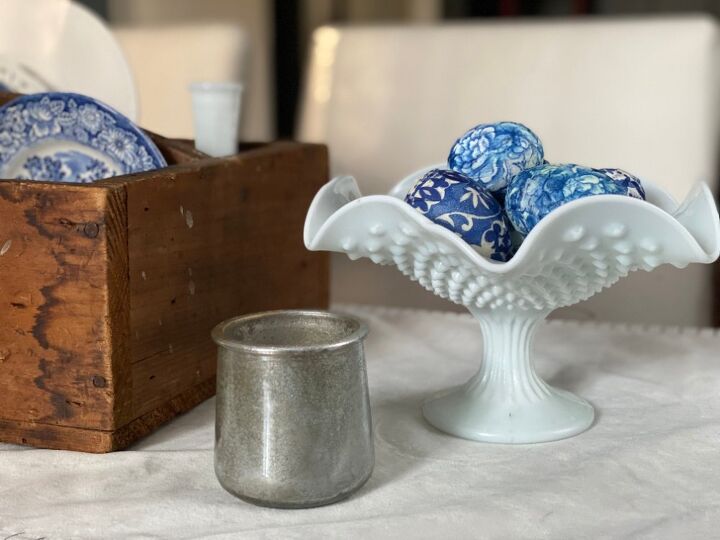
Once they’re dry, display and enjoy! I love the pop of color that these decoupage Easter eggs add to this piece of milkglass! I also added my great grandfather’s vintage toolbox, filled with blue and white dishes, along with my DIY Faux Mercury Glass Votive Holders.
I hope that you give this spring craft project a try! For more spring craft ideas, please check out all of the ideas from my blogging friends!
Thank you so much for visiting today! I would love to connect with you on Facebook, Instagram, Pinterest, or here on the blog!

Birdz of a Feather
The Painted Apron
Chas Crazy Creations
My Hubbard Home
My Thrift Store Addiction
Debbees Buzz
Decorate and More with Tip
Bluesky at Home
Purple Hues and Me
Home is Where the Boat Is
Celebrate And Decorate
B4andAfters
Design Morsels
My Family Thyme
Zucchini Sisters
Resources for this project:
See all materials


Comments
Join the conversation
-
Wrapping paper or tissue-type paper would work, also decorative lining (very thin) or anything in this realm
-
I think some different washi tape would look very good on these eggs and be easy to app as it sticks to the surface.


Frequently asked questions
Have a question about this project?
How do you match the patterns of the pieces of napkin that you use? Yours look like they all match up.