


A Diy Mid-century Wood Accent Wall

I have a quick and easy DIY for you today. I am laughing as I write this as I am kind of known for my accent walls (I have promised no more on a few occasions), and well, here I go again. ;) Today, I am sharing my version of a Mid-Century Modern Wood Accent Wall.

Hometalk Recommends!
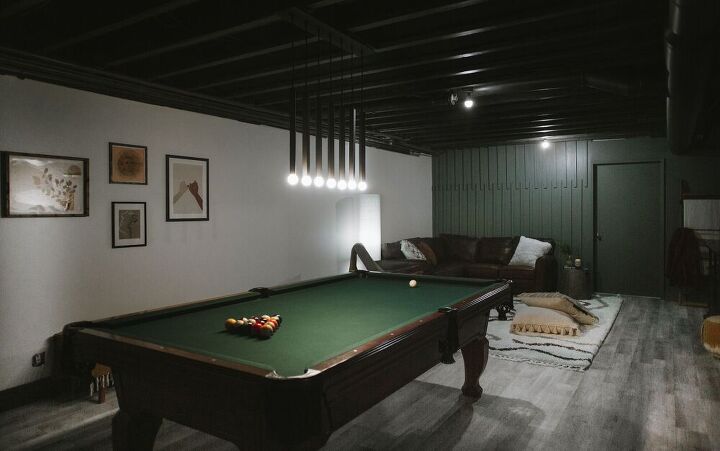
We recently renovated our basement into a game room of sorts. I planned a wallpaper mural on one wall that was a very, very bold choice for me, so I felt there would be plenty of visual interest. But as so often happens in design, once we started on the actual space, I kept feeling as if the wall at the very back of the room needed something to draw your eye back through the room.
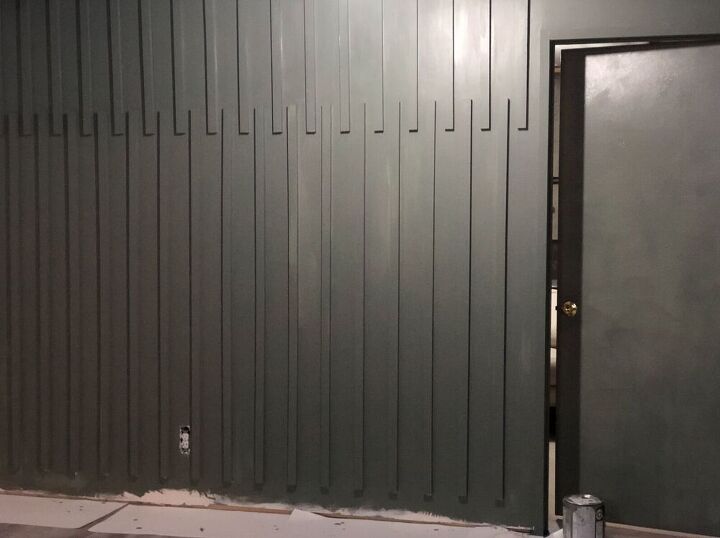
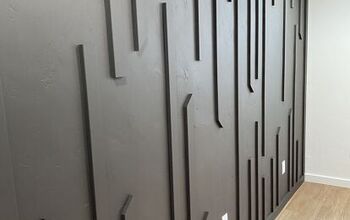
This is truly easy DIY and took me less than a weekend to finish. First up was a trip to my local Home Depot. I bought twenty- 1 x 2 x 10 boards to cover the wall over as far as the door. I used a saw to cut the boards so that they overlap in the upper third of the wall by four inches. I used the width of a board between each piece as a guide (because it was easy) and I liked the spacing.
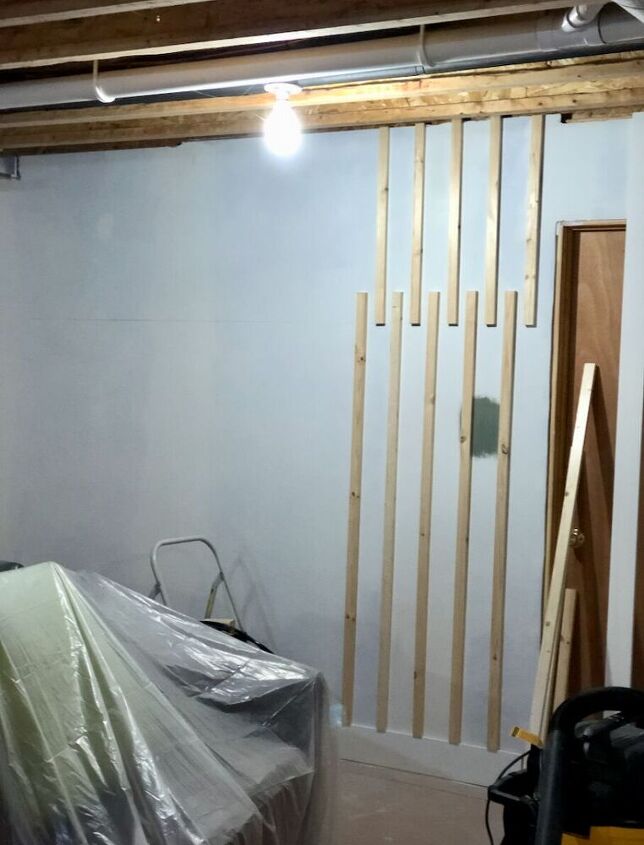
I attached the wood with a bit of wood glue and a pneumatic nail gun. I own a pneumatic nail gun, but they are usually available to rent from your local home improvement store.
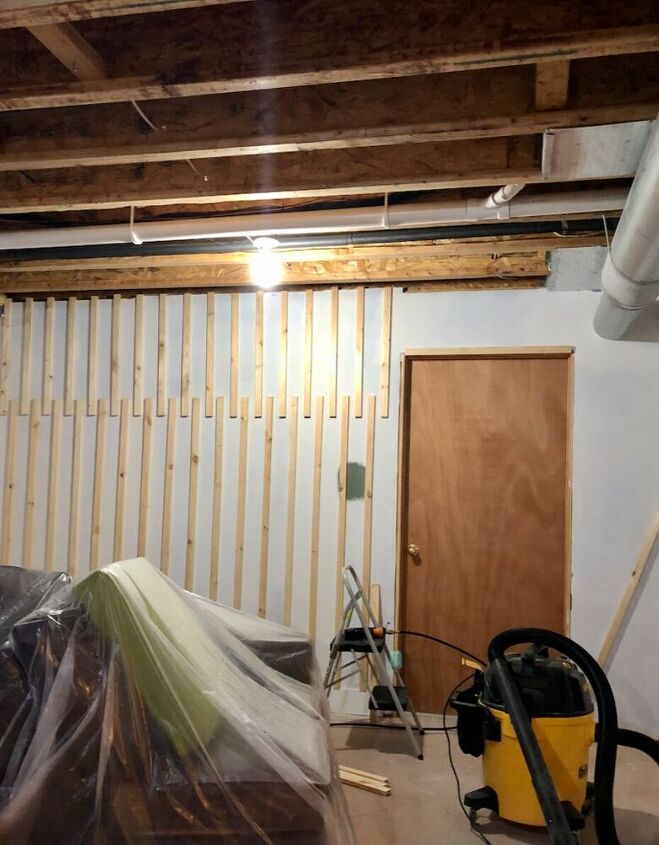
I continued to attach the boards to the end of the wall. This goes quickly. Because I wanted to keep this accent wall as clean and modern as possible, I also framed the door in the same wood instead of using the moulding that was used in the rest of the space.
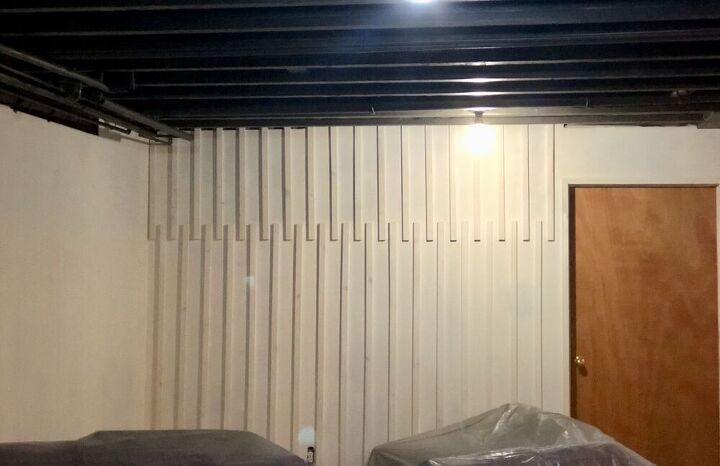
Next up was caulking the wood wherever it didn’t lie flat to the wall. I forgot to photograph this step, but it gives a more finished feel and eliminates gaps once it’s painted. I used regular caulk and smoothed it with my fingertips.
I choose to leave the right side of the wall alone as I didn’t want to work around the pipes. I also wanted to keep the lines simple.
Next up:
I prime everything.
It took two coats of primer- I also primed the door. I am a huge fan of Sherwin-Williams paint. Here I am using SW 6207 Retreat. It was a wonderful compliment to the SW 7008 Alabaster on the walls and the SW 7048 Urbane Bronze on the ceiling. Keeping the pattern and door the solid green- and not breaking it up with any contrast with door moulding, makes it feel a bit Mid-Century Modern.
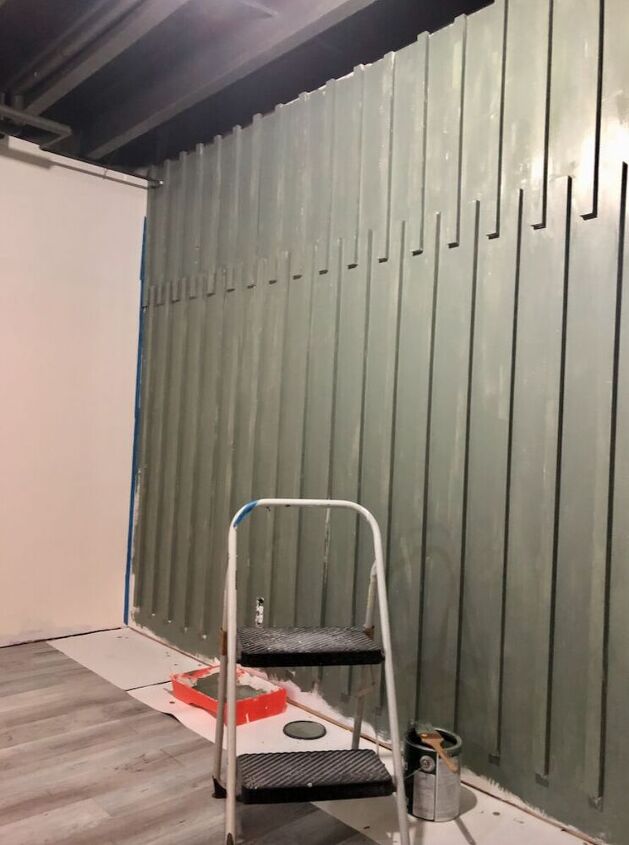
We were able to spray the primer but I used a roller and brush for the paint. Spraying would have made quick work but I was too lazy to tape everything off again!
The final steps were to add a five-inch moulding along the bottom which I painted the same green. Total time was about 30 hours, but that was because of all the waiting for the paint and primer to dry.
Resources for this project:
See all materials


Comments
Join the conversation
-
Love it... now that's an asymmetry visual interest... awesome...
-
I like shiplap in 100 year old farmhouses. I do not like in common tract houses (which we all have). Looks out of place. Worse yet, sharpie lines. Ugh. This is fantastic. Looks at home in 60 year old or new build home. Contemporary or classic or country style depending on paint. Thanks for sharing


Frequently asked questions
Have a question about this project?
That looks great!! Why did you not go all the way to the other end of the wall above and past the door?