


DIY Raised Flower Beds

They previous owners of our home had planted really pretty perennial flowers on the lawn, I believe they’re called bloodroots. And when I say “on the lawn” I mean they were not in a flower bed and just grew up through the grass and weeds. It made it very difficult to mow the grass without killing the flowers, so I built new flower beds and transplanted the flowers into it.
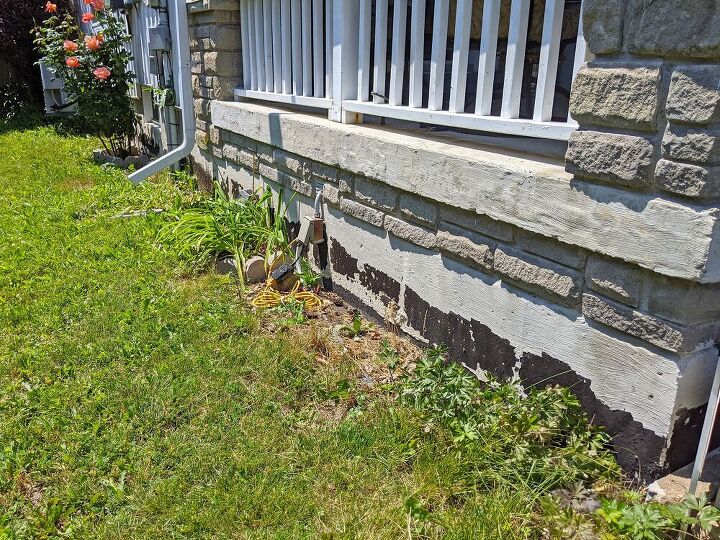
Beside our front porch was a a bit of an eyesore. I planted tiger lilies last summer, but I didn’t give it much space inside the cement edging and it was kind of neglected, so I determined this would be a good spot for new flower beds.
This spot also grows what I think are called bluebells, in the very early spring.
*Update: these have been identified by fellow Hometalkers as grape hyacinth - not bluebells. :)

My original plan was to build one bed along the side, but once I had my supplies picked up it occurred to me that the electrical outlet would be right behind the bed. Clearly that would not be ideal as it would eventually be covered in foliage and also wasn’t safe to water the flowers directly in front of the outlet. So I revised my plan and decided to build two smaller beds on either side. Before getting started I pressure washed the concrete on the foundation of the house and re-painted it.
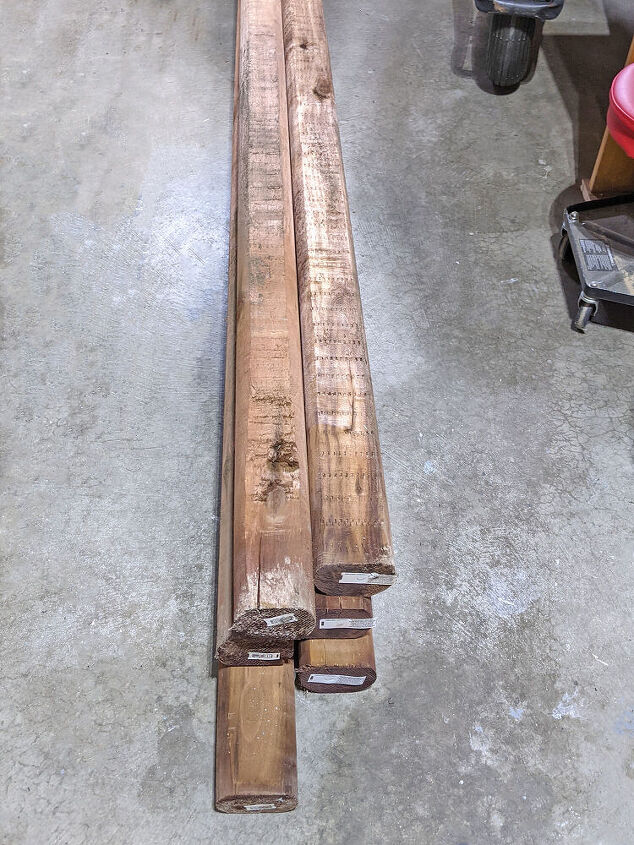
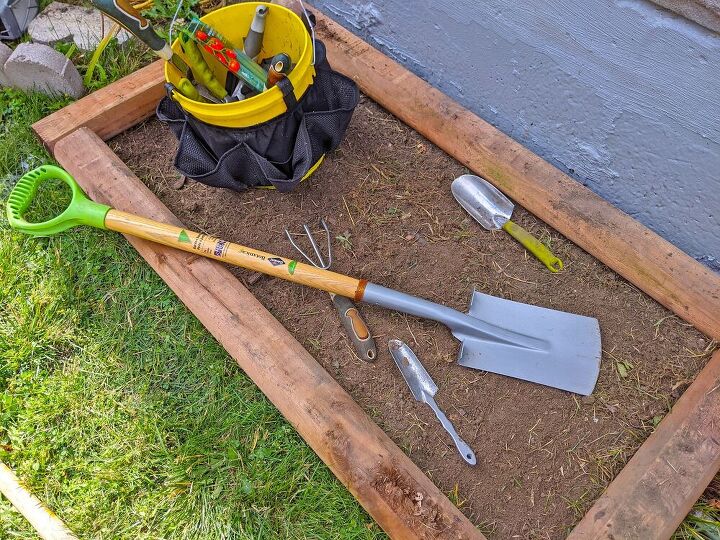
I had picked up six landscape railroad ties, so I did some calculations and decided two beds at 4 x 2 feet would work perfectly. I cut four ties in half and two ties in quarters.
Note: I wore a dustproof face cover while cutting the ties as I’ve heard it’s not healthy on your lungs to cut pressure treated wood without protective equipment. It’s actually a great addition to my workshop, I use it for spray painting and sanding too. There’s absolutely no smell getting through. I wish I had one of these years ago!
Because the ground is uneven, I screwed my ties together on the porch, using 5” deck screws. I did two screws on each end. I was doing two layers, so I staggered the boards so it would be the same concept as a log cabin.
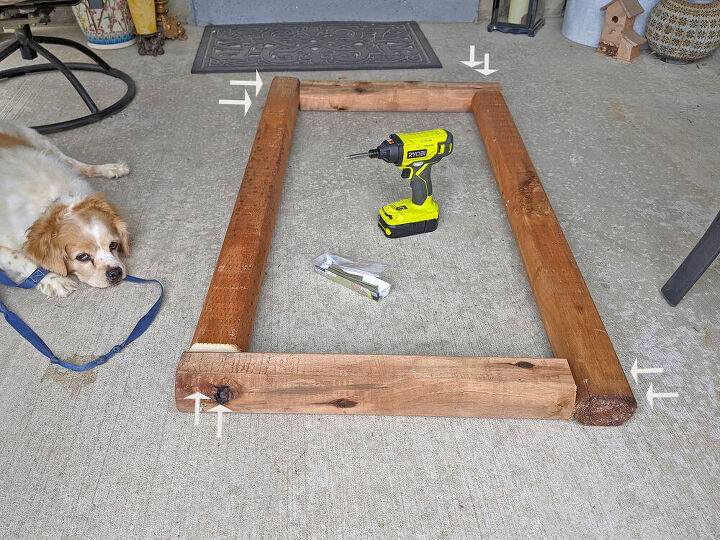
I stacked one layer on top of the other. The weight of the ties alone was probably enough to keep them in place, but I added one deck screw to the front and one to the back to keep it from shifting. Then repeated the process on the second bed.

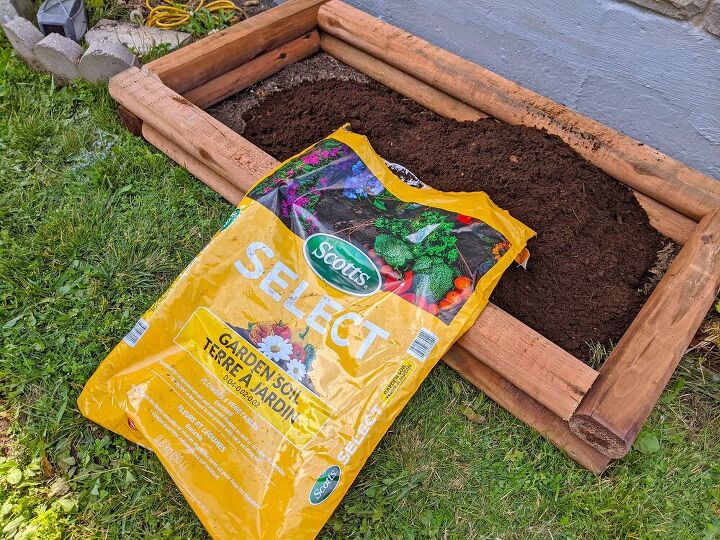
I removed the bluebell bulbs and bloodroots from the beds, as well as the tiger lilies, and put them aside. Then I pulled out all the weeds and grass and leveled the beds.
I added two bags of garden soil to each bed. Then I added a bag of composted sheep manure on top.
I placed the tiger lilies along the back row. Then I spread the bluebell bulbs along the front and pushed them under the soil.
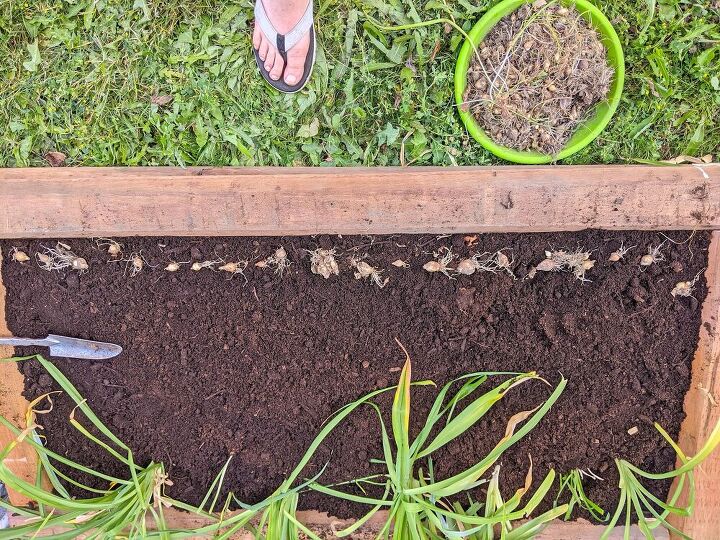
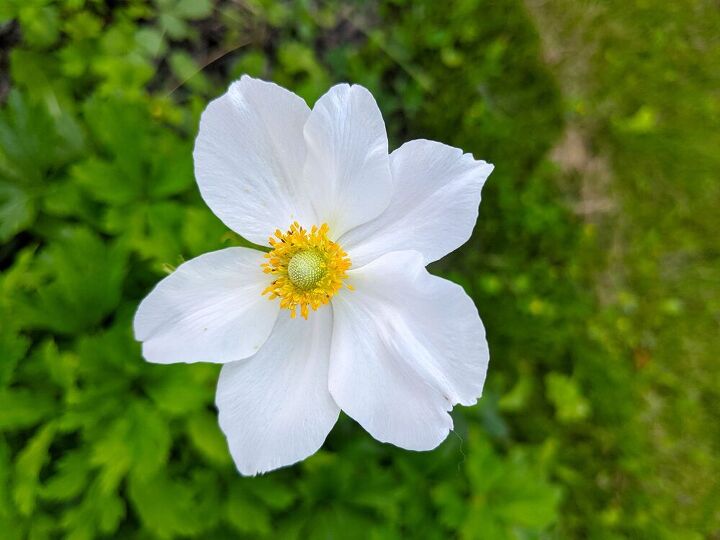
Then I transplanted the bloodroot into the center. I also dug up the rest of those that were growing along our walkway and placed them in the bed. They bloom right after the bluebells are done. This is how they look in bloom.
I filled the bare spots where I dug them up from the grass with soil and grass seeds.
I picked up some mid-season and late blooming perennials and added those as well. Because it was looking a little sad (as new beds usually do) I also added a few annual plants to jazz it up for the rest of this season. The lady who I bought the new perennials from advised me to remove the tiger lilies because she said they will take over my beds. So I dug them back out and transplanted them to my backyard.
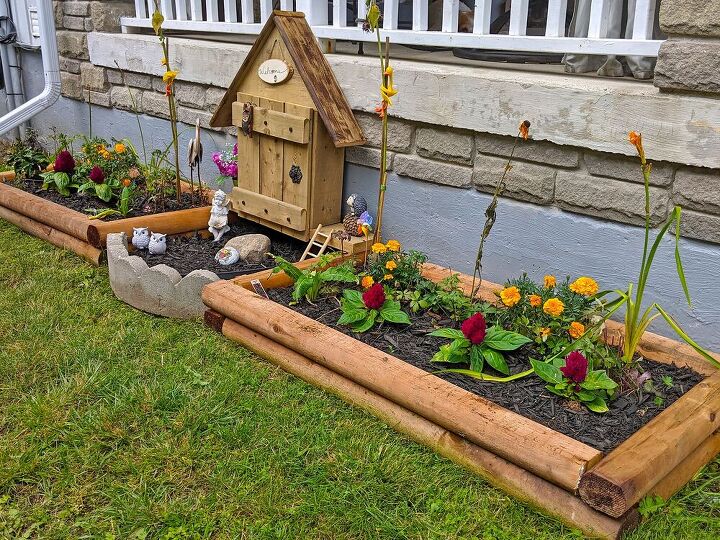
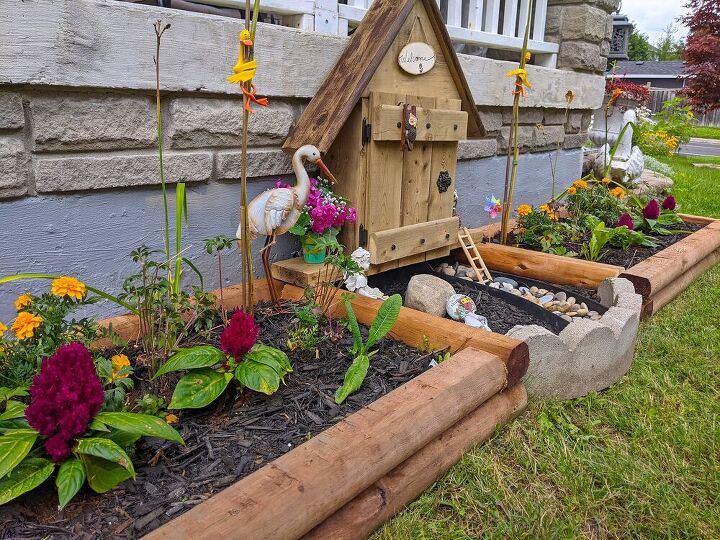
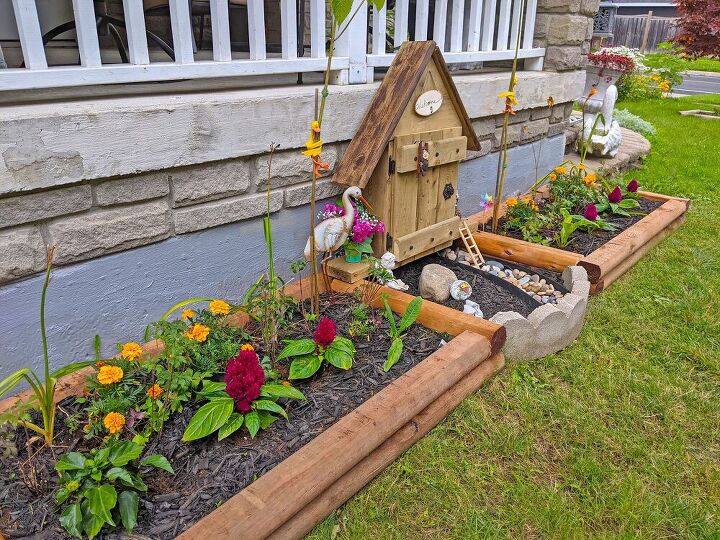
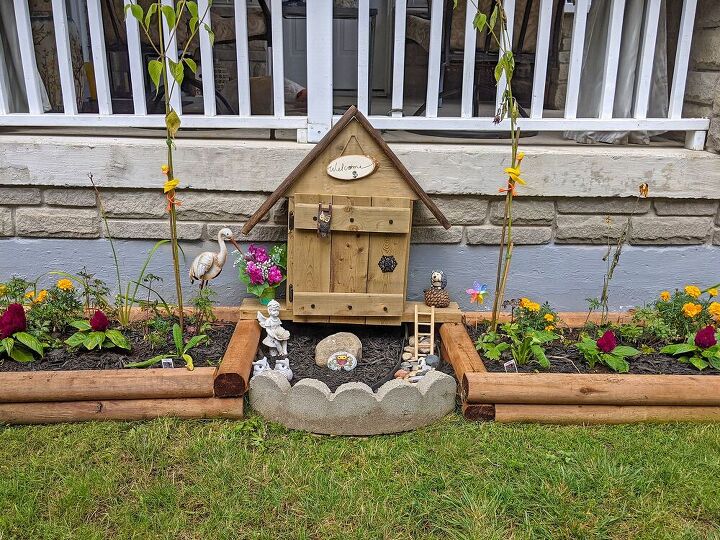
And here’s the new beds.

I’m hopeful that next year I should have things blooming from early spring until fall. I know the flowers will take a year or two to really fill in and get that wow factor, but I can’t wait to see how it all sprouts up next year.
This was a very easy project and will save me a lot of aggravation while mowing and edging the grass. And best of all, I was able to save the beautiful flowers.
After the beds were done I constructed a cover for the electrical outlet to help protect it from snow and rain, using scrap wood I found underneath my back deck. Then my daughter and a created a little fairy garden to cute it up. If you’re interested in finding out how I did that for $5, check here. 😊

Resources for this project:
See all materials


Comments
Join the conversation
-
Looks like you used landscape timbers not railroad ties. Big difference.
Looks great though. Nice idea forsure.. ENJOY!!
-
Awesome job!!!!


Frequently asked questions
Have a question about this project?
Did you lay any type of weed barrier down first?
Those are "railroad ties? All I've seen of railroad ties is very large (and used) rough hewn wood. Don't know what the wood you used is called. Cute project though.