


A Christmas PInecone Wreath for Less Than $10
My girls and I created this pinecone wreath last week. It was super easy and less than $10 in materials. A great Christmas craft to do with your kids!

To get started you will need pinecones, a flat foam wreath shape, glue gun, spray paint, spray snow flocking and ribbon. We walked up to our local school that is lined with pine trees and gathered our pinecones. I then baked the cones in the oven on a foil lined baking sheet at 350° for about five minutes to kill any creepy crawlies. It also melts off the sap so definitely use foil under the cones to prevent sticky sap on your sheet!
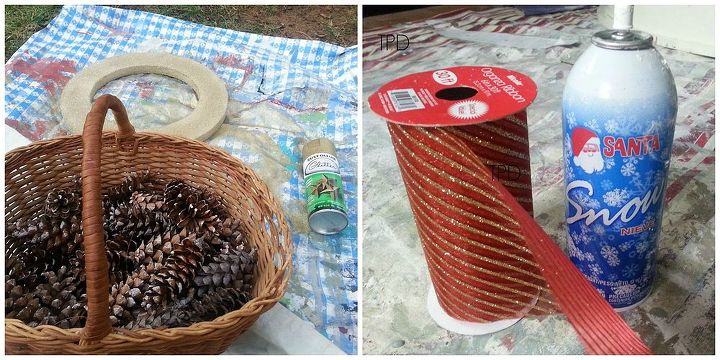
Take your flat, foam wreath and spray paint it gold, green or any color to your liking. You could also take ribbon and wrap it around the wreath and adhere the ribbon with glue. This step is just so you won’t see the white foam peeking through the pinecones when you’re done.
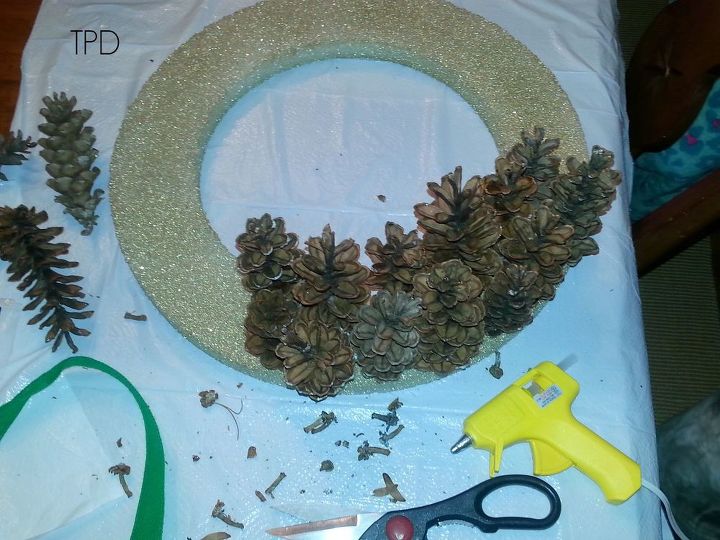
Next, take your pinecones and snap off the little ends. Using a glue gun, apply the glue to the base of each cone and glue onto the foam wreath. Just keep doing this until your wreath is full. The girls each applied the cones and did a very random, higgledy piggledy arrangement and it looks great. You can be a little more precise and place the smaller ones inside and larger outside, etc.

Once dry, I took the spray snow and lightly sprayed the cones to give them a snow dipped look. I then took Christmas ribbon and wrapped it around the outside of the wreath and made a bow on top. We hung it on my vintage door in our living room and it looks very festive!

Want more details about this and other DIY projects? Check out my blog post!
Comments
Join the conversation
1 comment
-
So sweet! I love that bow on it too.


Frequently asked questions
Have a question about this project?